Undo "Move to Trash" and Recover Lost Mac Files
![]() Updated by Justin Kenny on 2016-10-10
Updated by Justin Kenny on 2016-10-10
Easily Undo Move to Trash before Emptying Trash Bin
Move to Trash is one of the most common operations when we are using a Mac. Most of Mac users move files/folders/applications to trash every day. If you regret moving your files to trash, don’t feel so remorseful. You easily undo “Move to Trash” and put back your files before you emptying the trash bin or deleting files immediately.

The steps are very easy. Just open your Mac trash bin, find the file you have deleted. Then right click the file, you will see a menu, just click “Put Back”. Your files will be restored to the original place on your Mac. This the easiest way to undo “Move to Trash” and put back Mac files. But the premise is that you have not emptied the trash bin or deleted the files immediately.
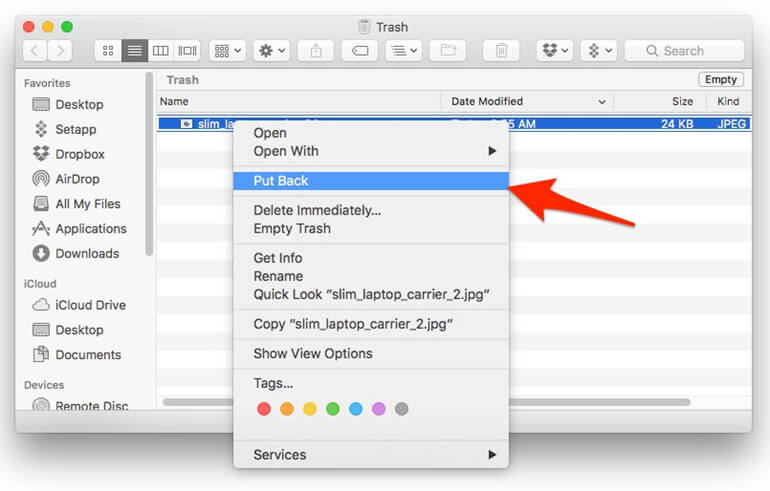
Undo Move to Trash and Recover Lost Mac Files
However, if you have emptied the trash bin or just deleted the files immediately in trash bin like this:

Your files are lost. You can’t undo “Move to Trash” using “Put Back” option. Don’t worry. There is another way to undo “Move to Trash” and recover lost files after emptying trash bin or deleting files immediately on your Mac. The “another way” is Mac data recovery software. It can scan your Mac hard drive and find your deleted files even you have removed them from Mac trash bin. Here free download DoYourData Mac deleted file recovery software to undo “Move to Trash” and recover lost files immediately.
After downloading DoYourData Mac deleted file recovery software on your Mac, just install it (drag the icon to application box). Then run it to undo “Move to Trash” and recover your lost Mac files. It is very simple to use. You can follow these steps below to get your files back.
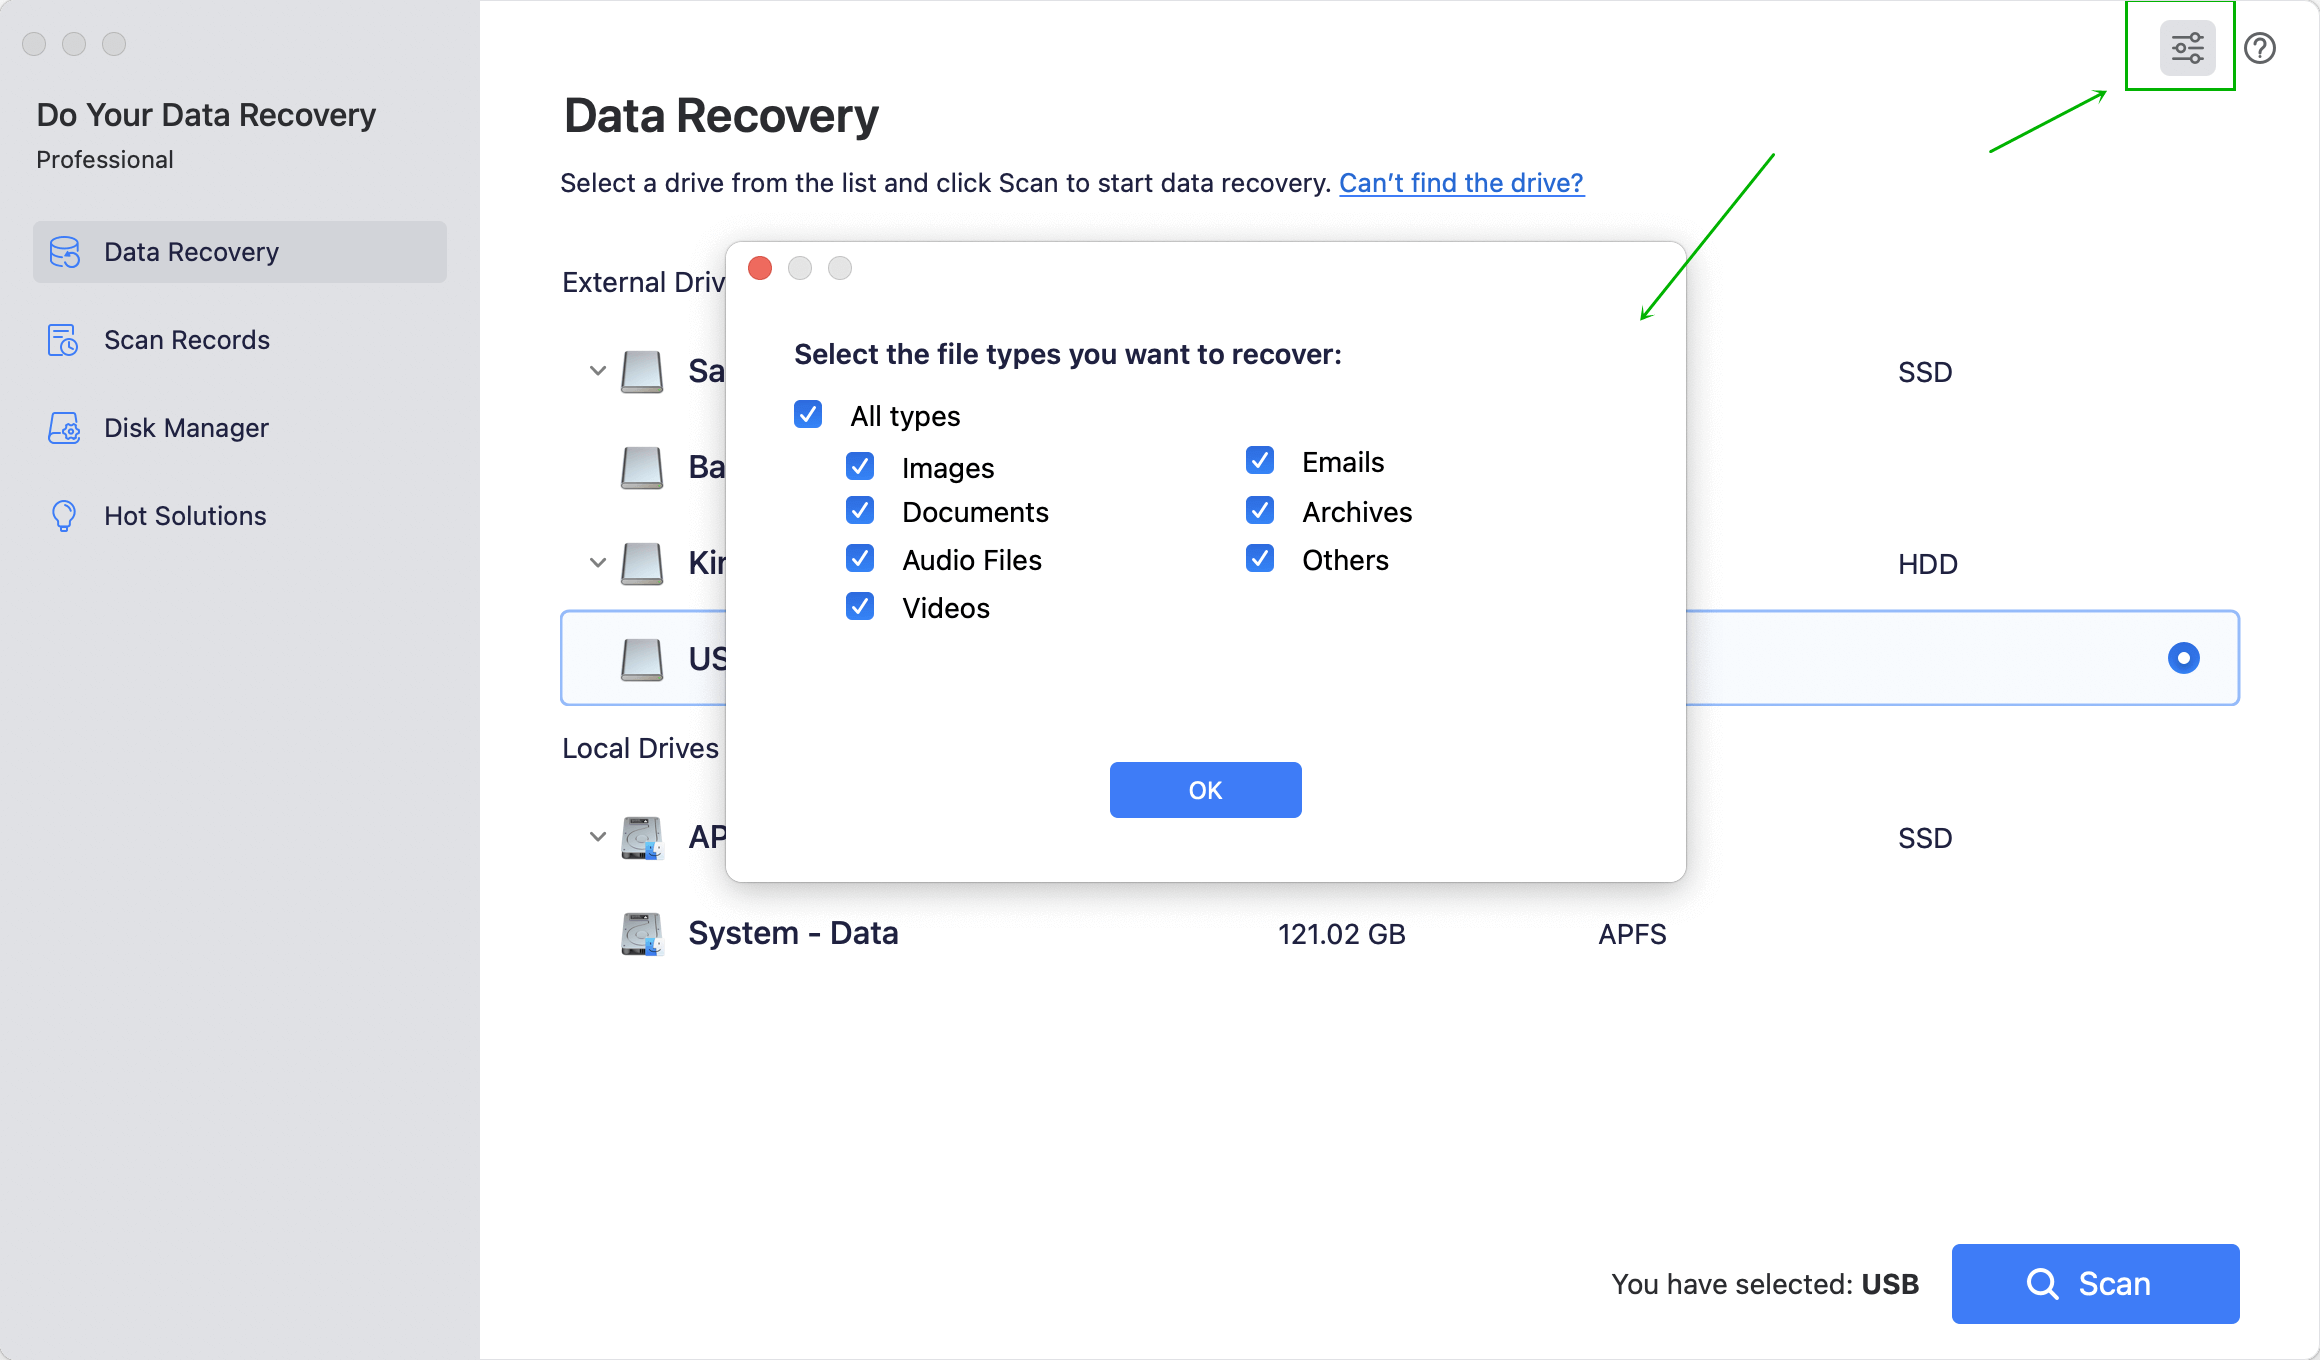
Step 1: Select file types you want to recover.
If you don’t want to recover all kinds of lost files, just select the file types you want to recover at this step. Then move to the next step.
Step 2: Select the hard drive to scan.
Where you move your files to trash, the Mac HD or external hard disk, just select the right hard drive Then click on Scan button to scan the selected hard drive to find your files.

Step 3: Preview and recover lost files.
After scanning, you can preview the recoverable files, and save them back to your Mac.

Please note that if you have not found all your lost files after quick scan, just click “Advanced Recovery” to scan your hard drive deeply to find much more lost files.
The two solutions above can help you undo “Move to Trash” and recover lost Mac files. Just choose one of them depending on your situation. In some cases, you files are deleted immediately and you can’t find them into your trash. Just download and try DoYourData software, it can help you scan the Mac hard drive to find your deleted files.
Written & Updated by Justin Kenny
Justin Kenny is a writer & editor of DoYourData. He joined DoYourData in 2016 and focuses on writing articles about Windows data recovery, Mac data recovery, external device data recovery, hard drive clone, data erasure, Mac cleanup, computer issue fixes, etc. He is a super fan of Apple devices and is big on testing new digital device and system utility software.