How to Format or Wipe Memory Card on Mac?
Disk Utility is a disk management tool in macOS and it can help you easily format a memory card on Mac - check how to use Disk Utility to format the memory card. If you will sell, donate or dispose of an old memory card, just use a data erasure tool - such as DoYourData Super Eraser for Mac to wipe the memory card and permanently erase data from it.
![]() Updated by Shirly Chen on April 12, 2024
Updated by Shirly Chen on April 12, 2024
Quick Navigation:
- Why Format Memory Card on Mac?
- How to Format A Memory Card on A Mac?
- Tips to Format A Memory Card on A Mac
- How to Recover Lost Data after Formatting the Memory Card on Mac?
- How to Wipe Memory Card on Mac? [Files Unrecoverable]
- Conclusion
- FAQs About Formatting or Wiping Memory Card on Mac
Memory cards are essential for keeping and accessing your digital assets, whether you're a photographer capturing special events, a filmmaker making masterpieces, or a professional manager of important files. On the other hand, the ease of saving huge amounts of data comes with good management and upkeep.
If you have a Mac, you must prepare your memory cards correctly to ensure they work with your computer and Mac. This guide will review the most important steps and best ways to format memory cards on a Mac.
Filing a memory card is important for managing your data and ensuring your devices can read and write. It includes choosing the right format type, keeping your data safe, and maximizing your storage space. Get the most out of your memory cards and confidently improve your digital work!

Why Format Memory Card on Mac?
Formatting a memory card is important in handling your digital storage devices because it does many useful things. Formatting ensures that your Mac and other devices can work together, making accessing and sharing data easier.
Choosing the right file system type, like ExFAT, FAT32 (MS-DOS (FAT)) or APFS, Mac OS Extended (Journaled), can make the memory card work better with Windows and other operating systems. Formatting eliminates unnecessary files and boosts speed by erasing all the memory card data.
You can return the memory card to a clean state by formatting it. It will make it work better and be more reliable for future use. In addition, formatting lets you change the file settings to suit your needs. Formatting lets you change the storage setup to fit your needs, whether you need to assign specific partitions, change the size of the allocation units, or label the memory card so it's easy to find.
Note: If you have files stored on the memory card, make a backup before you format the memory card.
How to Format A Memory Card on A Mac?
On a Mac, formatting a memory card is easy and can be done with tools that come with the computer. Here are the steps you need to take to format your memory card:
Step 1. Insert the Memory Card.
First, put the memory card in the right place on your Mac or connect it to your computer with another card reader. Ensure the card is firmly in place to avoid any problems with connection.
Step 2. Start up Disk Utility.
To get to the "Utilities" folder on your Mac, go to the "Applications" folder and plug in the memory card. It is where you'll find an app called "Disk Utility." To open it, double-click it.
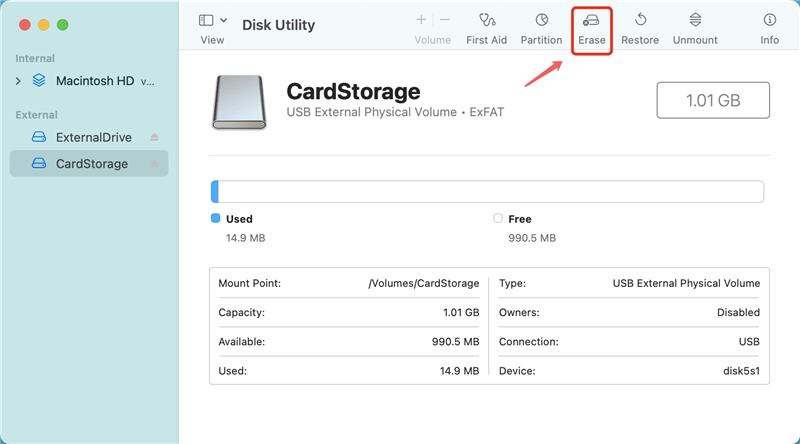
Step 3. Choose the Memory Card.
The left side of the Disk Utility window shows a list of all linked drives and devices. From the list, find and choose your memory card. To prevent your data from getting lost by mistake, do not choose your computer's internal or any other important drives.
Step 4. Choose the "Erase" Option.
Select the card and press the "Erase" button in the Disk Utility window. It will open a new window where you can change the formatting choices.
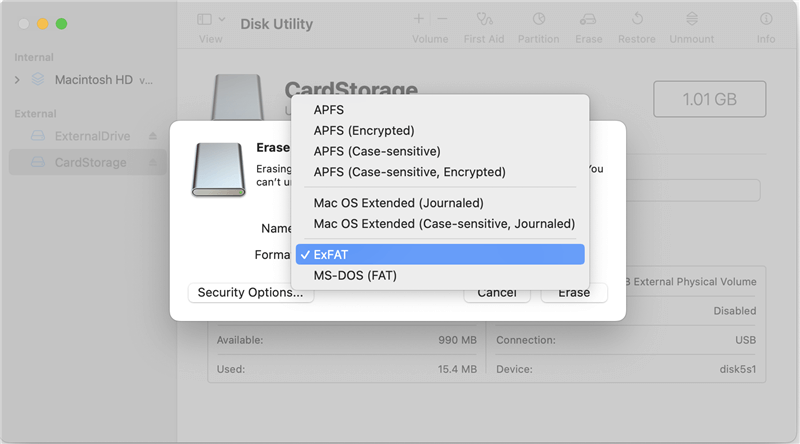
Step 5. Set Up the Formatting Options.
It would help if you chose the format type and other choices in the Erase window. First, pick a file that works with your memory card. It is best to use the MS-DOS (FAT) or ExFAT file system so that it works with a lot of different devices. You could choose the APFS or Mac OS Extended (Journaled) version instead, though, if you only use Macs.
Step 6. Name the Memory Card.
Next, in the "Name" field, give your memory card a name. Pick a name that tells you something about the card and makes it easy to find.
Note: If you want to perform a full format, click Security Options and select the erasure level depending on your needs.
Step 7. Start the Formatting Process.
After setting up the formatting options and giving the memory card a name, make sure everything is correct by checking it again. After that, click the "Erase" button to start the processing.

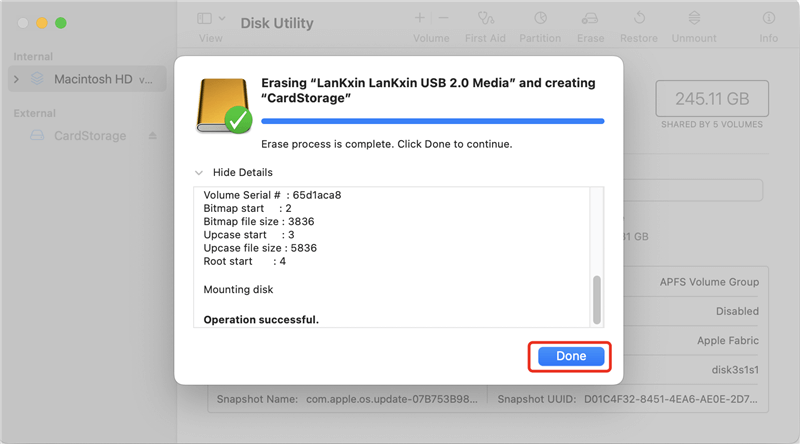
Step 8. Wait for the Formatting to Finish.
Formatting your memory card could take a short time, based on how big and fast it is. A progress bar will let you know how the work is going. A message will let you know when the process is complete.
Step 9. Eject the Memory Card.
Once the cleaning is done, you can safely remove the memory card from your Mac. Select "Eject" or "Right-click" the memory card icon on the screen and drag the icon to the trash to get rid of it.
Tips to Format A Memory Card on A Mac
- Backup Important Data: Always make a copy of any important files or data on a memory card before you empty it. Since formatting will eliminate all the info already there, having a backup is important.
- Choose the Right File System: Choose a file that works with all your devices and meets your needs. For flexibility with multiple platforms, you might want to use the "ExFAT" format. Users with only a Mac might like "APFS or Mac OS Extended (Journaled)" better.
- Check the Format Settings: Before editing, check the settings twice to ensure they are correct. Ensure you chose the right file system and gave the memory card the right name.
- Safely Remove the Memory Card: After cleaning, you should always safely remove the memory card from your Mac so that the data doesn't get lost or the card doesn't get damaged. Please don’t take out the card while your machine still uses it.
How to Recover Lost Data after Formatting the Memory Card on Mac?
If you lose important files due to formatting the memory card on your Mac and you don’t have a backup, you can use Mac data recovery software to get the formatted or lost files back!
Step 1. Download and install the best Mac data recovery software - Do Your Data Recovery for Mac and connect the memory card to this Mac.
Step 2. Open Do Your Data Recovery for Mac, then select the formatted memory card to start data recovery.

Step 3. Click on Scan button to deeply scan the formatted memory card.
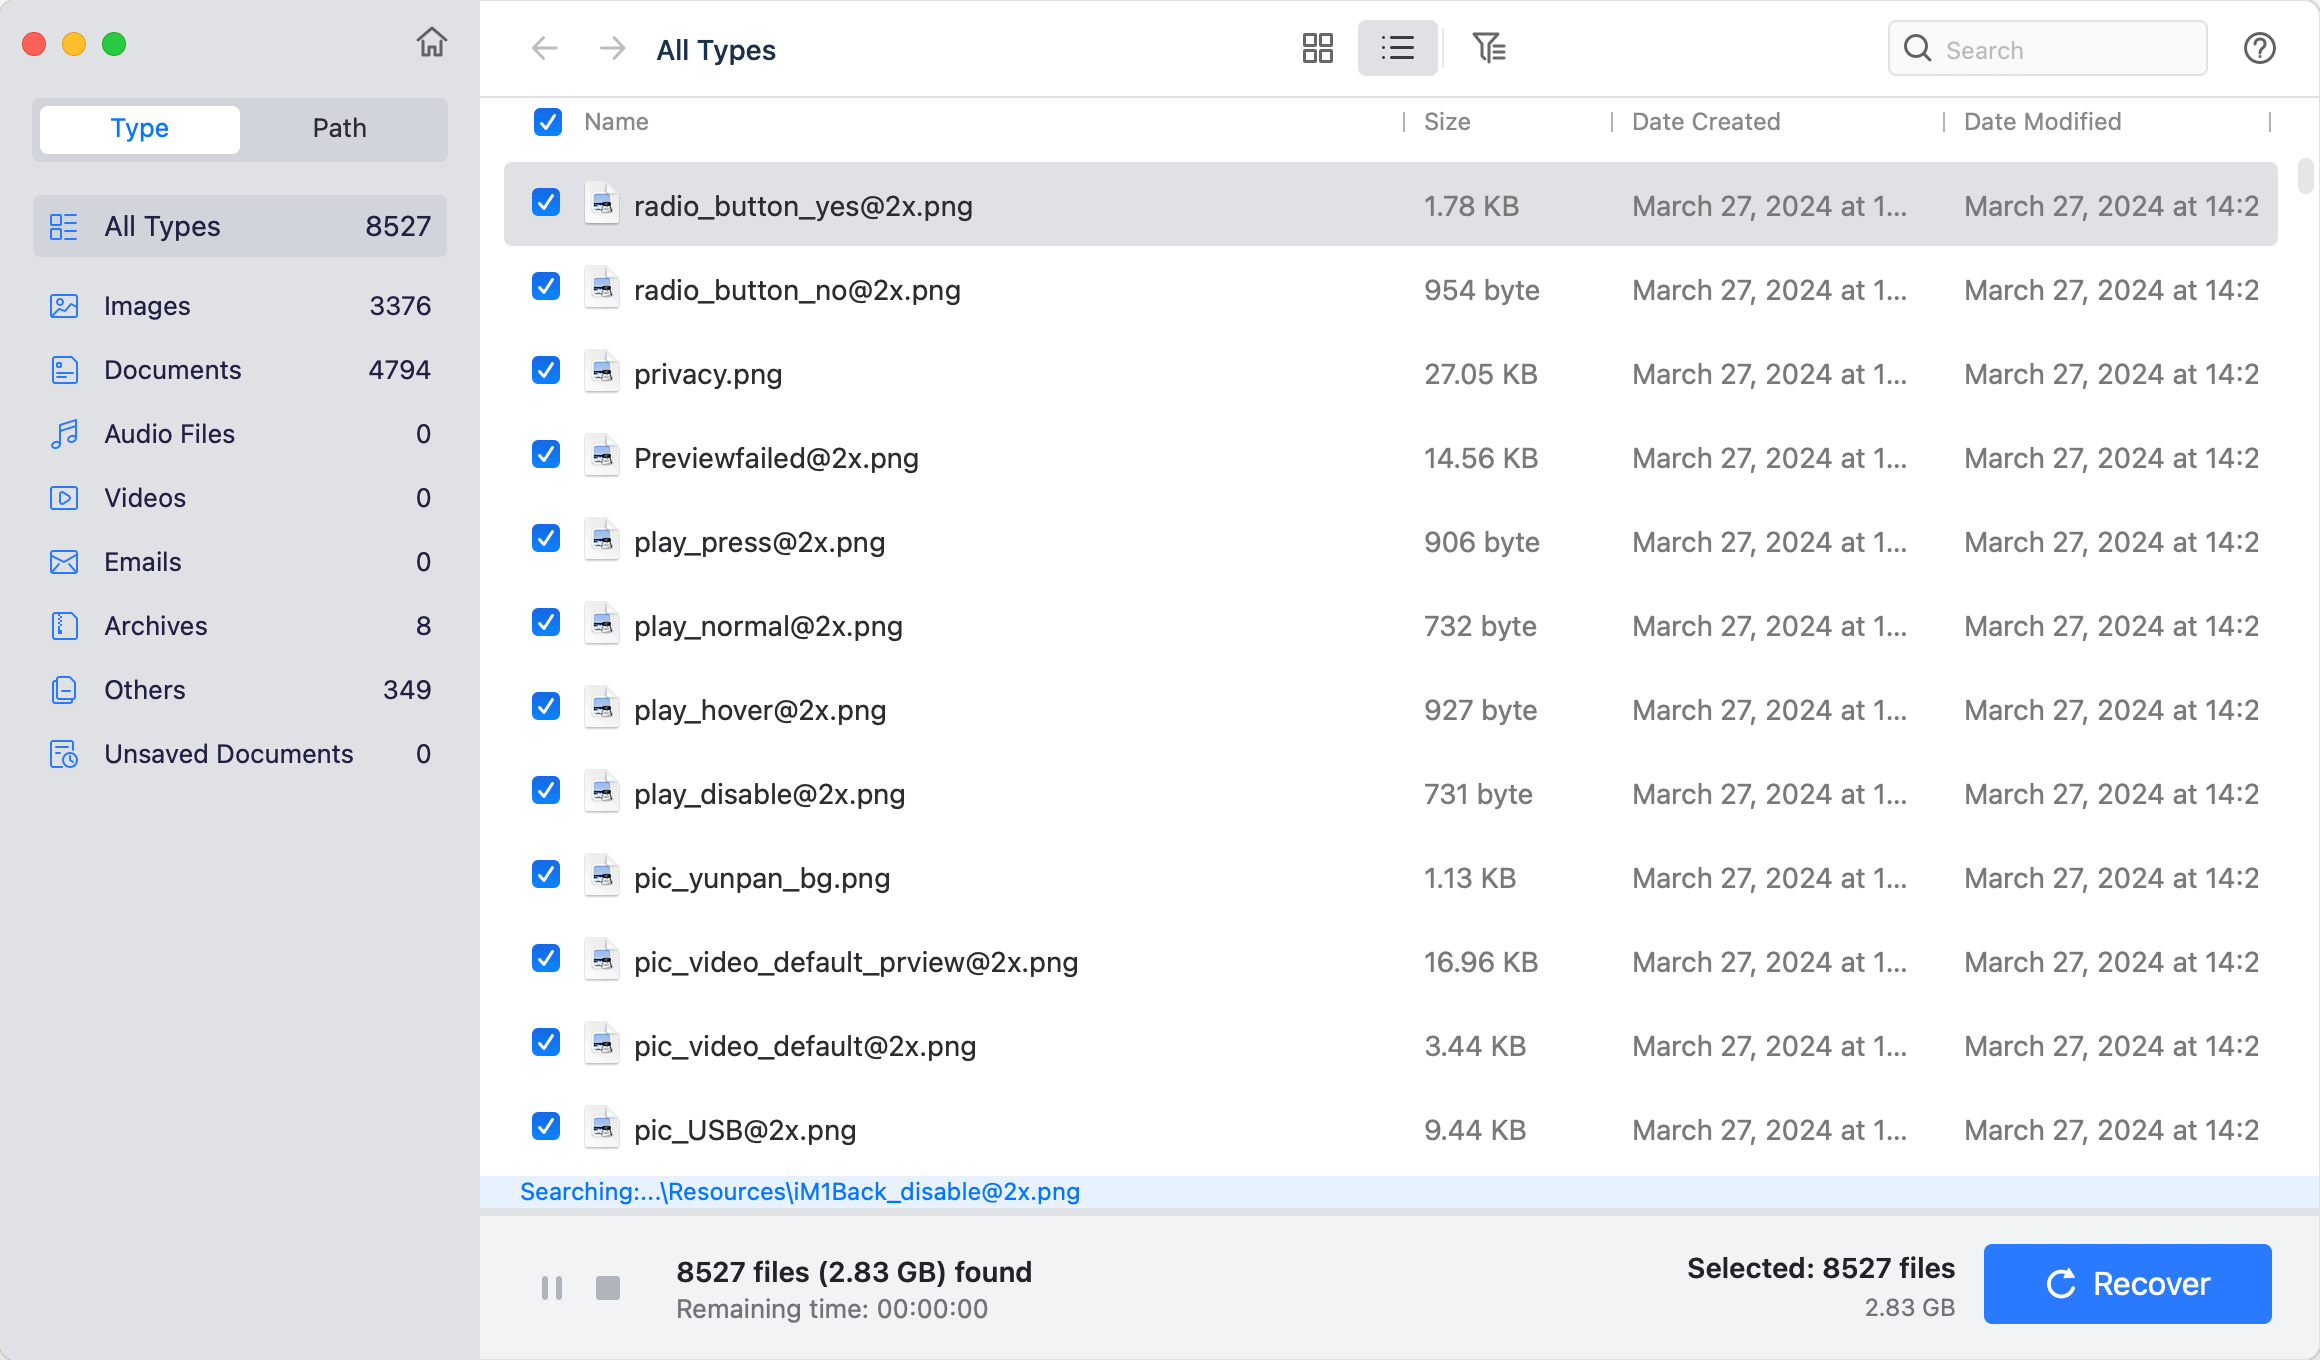
Step 4. Once the scan is completed, select the wanted files and click on Recover button to save them.

How to Wipe Memory Card on Mac? [Files Unrecoverable]
To permanently erase all data from the memory card, you should try data erasure tool - such as DoYourData Super Eraser for Mac. It can help in securely wiping the memory card and permanently erasing all data from it.
DoYourData Super Eraser for Mac
- Permanently erase data from memory card on Mac.
- Wipe, format, mount, repair, eject memory card on Mac.
- 100% safe and easy-to-use data erasure app for Mac.
Please note that once the memory card is wiped by DoYourData Super Eraser for Mac, all the data (existing data, deleted/lost data included) is lost for good, cannot be recovered by any data recovery method. So before you wipe your memory card on Mac with DoYourData Super Eraser for Mac, you should copy your important files from the memory card to other storage device.
Follow the steps below to help you wipe the memory card on Mac before you sell, donate or dispose of it:
Step 1. Open DoYourData Super Eraser for Mac, choose Wipe Hard Drive mode.
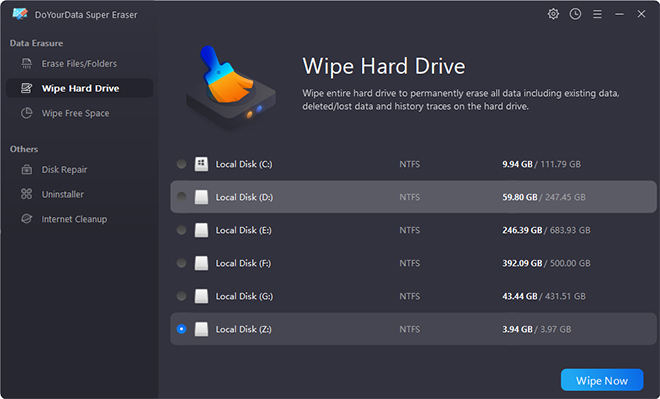
Step 2. Select the memory card, then click on Wipe Now button.

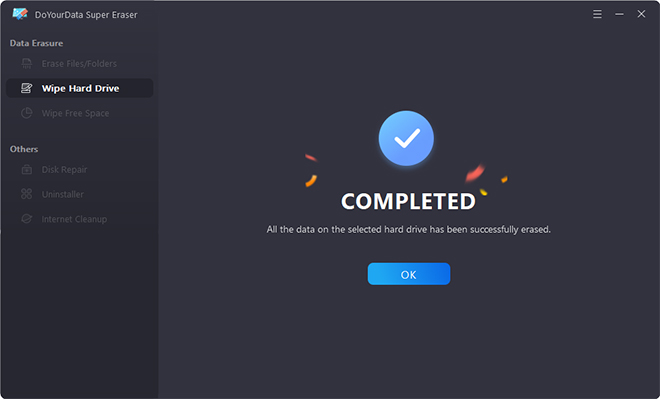
Step 3. Format and wipe the memory card, permanently erase all data from it.
Conclusion:
In conclusion, learning how to format memory cards on a Mac is important for keeping devices running smoothly and compatible. If users follow this step-by-step guide, they will have no trouble managing their digital storage. Formatting ensures that data management and gadget functionality go smoothly.
It does everything from choosing the right format system to keeping data safe and making the most of storage space. With these skills, you can get the most out of your memory cards, making your digital work easier and ensuring your data is safe for all your projects.
FAQs About Formatting or Wiping Memory Card on Mac
1. How to format memory card on Mac?
Here is how to Use Disk Utility on a Mac to format a memory card:
- To open Disk Utility, go to "Applications" > "Utilities" and double-click on "Disk Utility."
- In the Disk Utility window, click on the "Erase" tab.
- You can select the SD card's format (like ExFAT or MS-DOS)
- You can give the SD card a name in the "Name" box if you want to.
- To delete everything on the SD card, click the "Erase" button.
- Once the process gets finished, click on Done button.
2. What is the best memory card formatting tool?
Here is the list of top 5 memory card formatting tool:
- Disk Utility
- DoYourData Super Eraser for Mac
- MacClean360
- Terminal
- AweEraser for Mac
3. How to wipe memory card on Mac?
If you don't want other people to have the chance to recover the data from the memory card, you can try data erasure tool to wipe the memory card:
- Download and install DoYourData Super Eraser for Mac.
- Open this data erasure tool on Mac.
- Choose Wipe Hard Drive mode.
- Select the memory card, click on Wipe Now button.
- Permanently erase all data from the memory card.
Written & Updated by Shirly Chen
Shirly Chen has been writing data recovery, data erasure articles for DoYourData over 4 years. She has been working as a professional website content writer & editor for quite a long time. She also writes articles about disk clone, Mac optimization, disk backup, etc.