Run First Aid in Disk Utility to Fix Disks on Mac
You can fix external disks and startup disk of your Mac by running First Aid. It gives a safe way to fix crashed startup disk on Mac.
Here are some solutions to help you securely empty trash on Mac. And if you want to permanently erase all already deleted/lost files from your Mac, just run a data erasure app - DoYourData Super Eraser to securely wipe the Mac trash bin and permanently erase all deleted/lost files, making data recovery be impossible.
![]() Updated by Shirly Chen on March 15, 2024
Updated by Shirly Chen on March 15, 2024
Quick Navigation:
Welcome to the world of Mac magic! Think of your Mac as a helpful companion whenever you need it. Now, consider the Trash on your Mac as a spot where things you don't need anymore go. It's like a virtual bin! But, much like in your room, picking up the Trash is vital, too. Rest assured, as we learn to wipe Mac Trash, we will use simple steps to make this guide easy to understand and follow.
It's about as pleasant as giving your Mac a quick cleaning; it'll be cheerful and ready for anything you throw at it. Let's take a leisurely walk through the processes to rid ourselves of digital clutter and keep our Macs happy!

The Mac's Dock always has the Trash sign at the very end, on the far right. When you click this icon, the Trash window shows you what you've removed.
Before deleting everything from the Trash, it's a good idea to look through what's inside. This step prevents you from accidentally deleting critical files. Take a moment to review the Trash and ensure you want to delete these things.
After clicking the Trash box, right-click and select "Empty Trash." This action removes everything in the Trash, making room on the hard drive.

Press Command + Shift + Delete to empty the Trash while it is open. This works the same as right-clicking and choosing "Empty Trash."
Understanding Locked Files
Sometimes, you may find locked files in the Trash that you can't delete right away. These files can't be deleted because other programs or systems often use them.
Unlocking and Deleting
Right-click on the file or folder you want to work with and select "Get Info." In the Info window, Uncheck the "Locked" box. Once you've unlocked the item, you can empty the Trash as usual.

Secure Empty Trash
The "Secure Empty Trash" option in old macOS is for people worried about privacy and data security. This feature replaces removed files with random data, making it hard for data recovery tools to regain private data.

Terminal Commands
Advanced users can use Terminal commands to control the Trash, such as sudo rm—rf ~/.If you are an administrator, you can use Trash/* to empty the Trash. But you should be careful when using Terminal orders because if you do them wrong, they can have effects that can't be undone.
Note: The files which have been emptied from Trash are not lost for good. Data recovery software can help you easily and quickly recover the deleted files from emptied Trash bin. To make data recovery be impossible, you need one more step - wipe the Mac trash using data erasure software.
After emptying the Trash, just use a data erasure application to help you wipe the Trash to permanently erase all deleted/lost files on your Mac. DoYourData Super Eraser for Mac has a Wipe Free Space tool that can help you wipe the Trash bin on Mac.
This software offers high-level data erasure standards such as HMG Infosec Standard 5, Peter Gutmann's algorithm, U.S. Army AR380-19, DoD 5220.22-M ECE to help you wipe Trash bin on Mac, ensures erasing every deleted file permanently. Follow the steps below to wipe Trash bin on Mac:
Step 1. Download and install DoYourData Super Eraser for Mac, then open it from Launchpad pad. It offers three data erasure modes: Erase Files/Folders, Wipe Hard Drive, Wipe Free Space. To wipe Trash bin on Mac, just choose Wipe Free Space mode.
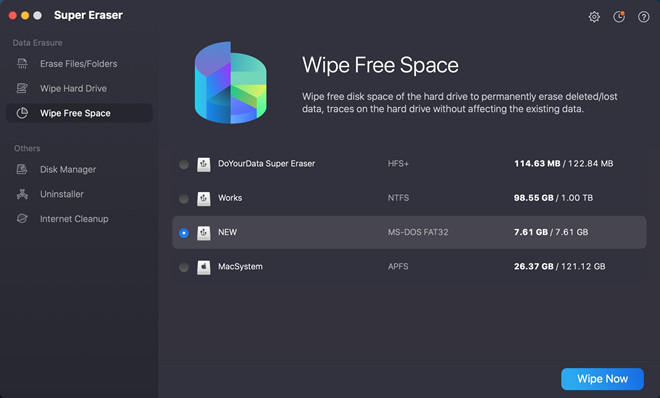
Step 2. Select the Mac startup disk, such as Macintosh HD, Apple SSD, etc. Then click on Wipe Now button to wipe free disk space of the Mac and permanently erase all deleted/erased/lost files from your Mac, making data recovery be impossible.

Inability to Empty Trash
If you have trouble clearing the Trash, it could be because of files used by other programs. Close all of your open programs and try emptying the Trash again. If the problem keeps happening, restarting your Mac will usually fix it.
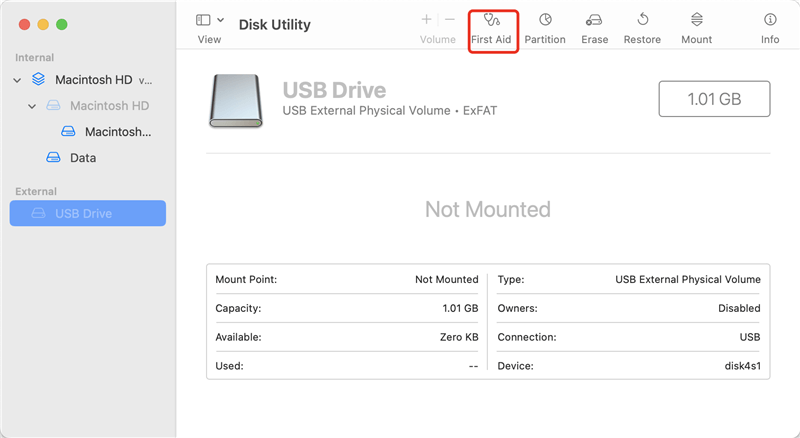
Disk Utility for Disk Repair
If you have trouble deleting the Trash, your disk may be affected. Disk Utility is a built-in tool for macOS that can be used to fix disk mistakes and fix possible file system errors.
Run First Aid in Disk Utility to Fix Disks on Mac
You can fix external disks and startup disk of your Mac by running First Aid. It gives a safe way to fix crashed startup disk on Mac.
Ejecting External Drives
It is essential to empty the Trash on an external drive before removing it from your Mac. Not doing this could lead to incomplete deletions and data corruption on the external device.
Time Machine Considerations
People who use Time Machine to back up their data should be careful when deleting Trash on external drives. When you delete essential files from Time Machine backups, the changes can't be undone. Before emptying the Trash on an external drive, you should always check what's in it.
Regular Trash Maintenance
Make regular Trash maintenance a part of your routine to keep your system clean and well-organized. Set aside time to review and empty the Trash, preventing unnecessary accumulation of deleted items.
Storage Management Tools
Take advantage of macOS's built-in storage management tools. These tools give you information about how your storage is being used and suggest places to clean up and improve. Follow the tips, like emptying the Trash, to get back valuable disk space.
A tidy and content Mac that is all! Thanks to the deletion of the Trash, your digital environment is now tidy. Keeping your Mac neat is like putting it back together after a playdate; it will run more smoothly. Remember that this straightforward method makes more room for exciting new experiences. These steps make it easy to say goodbye to digital clutter, regardless of your computer expertise. You have finally perfected the art of keeping your digital playground spotless, and your Mac is prepared for additional fun. Great job! I hope you enjoy your Mac free of clutter!
If you want to permanently wipe Trash bin data on Mac, just use a data erasure tool, such as DoYourData Super Eraser for Mac to help you wipe free disk space of the Mac. All deleted/lost files will be permanently erased from your Mac, can’t be recovered by any method.
1. How to erase trash bin on Mac?
2. I empty the Trash, the deleted files are gone forever?
No, the deleted files are still there, stored on the free disk space. Before they are completely overwritten by new files, they can be recovered by Mac data recovery software.
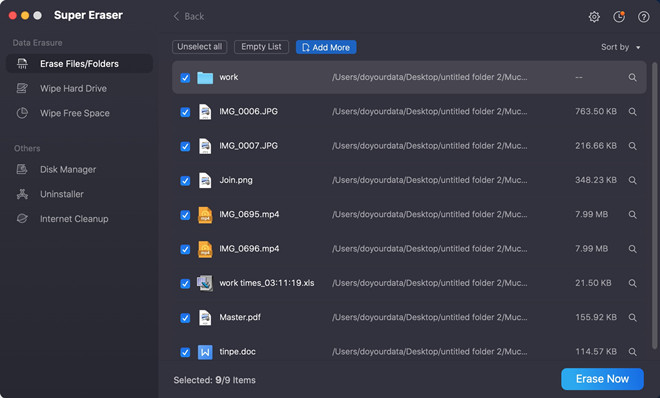
3. How to permanently delete files on Mac?
You can use data erasure app to help you permanently delete files and folders on Mac:
Once the files or folders are erased by DoYourData Super Eraser for Mac, the files are lost for good, can't be recovered by any method.
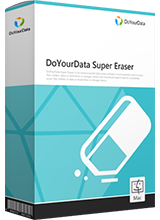
DoYourData Super Eraser for Mac
DoYourData Super Eraser for Mac is a 100% safe, powerful and easy-to-use data erasure program. It offers certified data erasure standards including Peter Gutmann, U.S. Army AR380-19, DoD 5220.22-M ECE to permanently erase data from Macs and external devices, making data recovery be impossible.
Written & Updated by Shirly Chen
Shirly Chen has been writing data recovery, data erasure articles for DoYourData over 4 years. She has been working as a professional website content writer & editor for quite a long time. She also writes articles about disk clone, Mac optimization, disk backup, etc.