Quick Navigation:
- 1. How to Access the BIOS Windows 11 Settings?
- 2. Change the Boot Order in Windows 11
- 3. Change Boot Order Using One-Time Boot Menu
- 4. How to create a boot drive for Windows 11?
Boot Order describes the sequence of hardware components a computer looks for upon powering on. If you haven't changed the default boot order, Windows will always be the first operating system to launch when you turn on your computer.
However, there are scenarios in which you'd want to switch things up and alter the boot order. The boot order, boot priority, or boot sequence describes the order in which the computer's BIOS receives data from the various storage devices that make up the hardware.
Changing the boot order of your Windows installation is necessary if you want to start your computer from a different operating system on your hard drive, boot stuff from your USB stick, or boot items from a DVD. If you're using Windows 11 and want to modify the boot order, this guide will help.

How to Access the BIOS Windows 11 Settings?
Basic Input/Output System is the acronym for the system. It's the basic software that runs a Power On Self Test at boot time to ensure the integrity of your computer's hardware. After that, it checks for problems and loads Windows if none are found. However, the BIOS can be told to find bootable media in a different location, such as a disc or a removable USB drive.
To alter the boot sequence, press the BIOS Setup key during startup to access the BIOS user interface. What you must do to access BIOS will change depending on which motherboard manufacturer you bought from.
To access the BIOS settings:
- At startup, a splash screen will instruct you to press a special key to enter BIOS Setup.
- Try tapping the most often used keys like F2, F9, F10, F11, and DEL to see what happens.
- If you need help with your computer, check the handbook or go online for further instructions.
- The option to Begin Setup can be found in the One-Time Boot Menu.
Change the Boot Order in Windows 11
Once the BIOS configuration utility has loaded, the boot order can be modified by navigating to the list of bootable devices. Although each motherboard manufacturer has a unique procedure, these steps will give you a good idea of what must be done.
Step 1. Click the tab or section that shows the boot devices or the boot order for your computer.

Step 2. Choose all the storage media you want to rearrange and click the Rearrange button. Choose a device from the drop-down menu after selecting each boot option the BIOS presents.
Step 3. Save your modifications and exit the BIOS.
Step 4. The only way to navigate the BIOS is with a keyboard. At the screen's bottom and right, you'll see a list of keys and the functions they perform.
Change Boot Order Using One-Time Boot Menu
Utilizing the One-Time Boot Menu on your personal computer is the most effective method for temporarily altering the boot order in Windows. Performing this action entails pressing a particular key at the beginning of the startup boot sequence. Examples of such keys include Esc and F12.
While starting your computer, you might see a listing for the Boot Menu key on the splash screen. If not, consult the user manual for your motherboard or the internet documentation to find the appropriate key. After loading the One-Time Boot Menu, choose which boot device to use by pressing the Up and Down arrow keys, and then press the Enter key to confirm your selection.
However, if you must repeatedly boot from the same device or set your computer to favor external media, you must alter its boot order. If that's the case, you should permanently adjust the boot order in the BIOS. You can do this by selecting the device you want to boot and then selecting it multiple times.
How to create a boot drive for Windows 11?
You can clone the entire system disk from a PC to an external hard drive and make it be bootable. Then you can connect the clone backup disk to the Windows 11 PC, and set it as the boot drive.
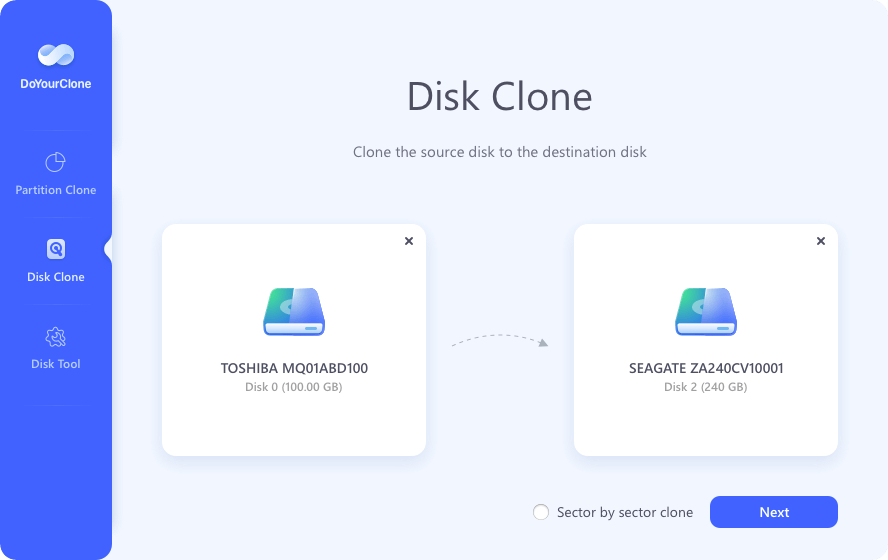
Step 1. Download and install DoYourClone for Windows - a reliable disk cloning program on your computer. Then connect an external hard drive to your computer.
Step 2. Open DoYourClone, choose Disk Clone mode. Then select the computer’s disk as the source disk and select the external hard drive as the destination drive. Click Next.
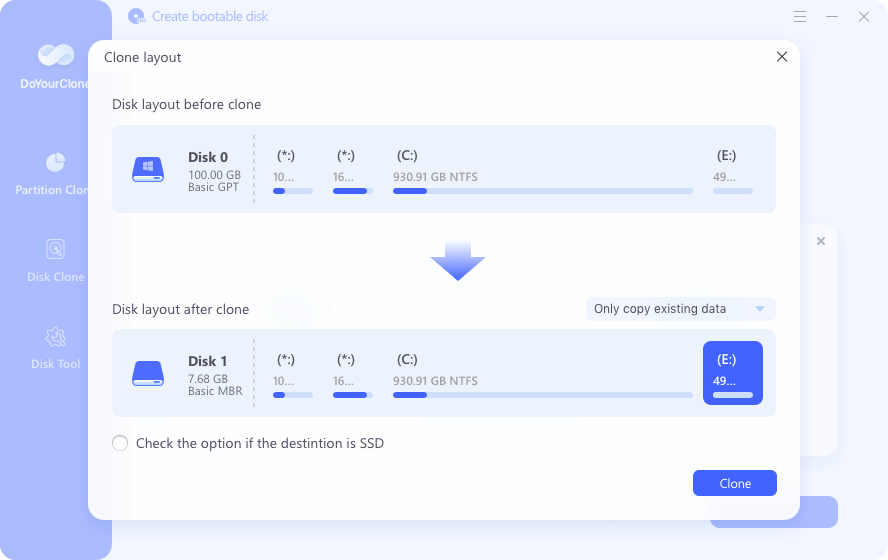
Step 3. Select ‘Check the option if the destination is SSD’ if the external hard drive is a SSD. Then click on Clone button. When it gets finished, just eject the external hard drive from your computer.
Conclusion:
When you turn on your computer, its first order of business is called the boot order. However, users with more than one OS installed on their PC may wish to change the default boot sequence. As such, this tutorial covered various ways a Windows 11 computer's boot order could be modified.
In particular, we covered the One-Time Boot Menu's role in rearranging your PC's boot sequence. It is helpful to have Windows 11 Installation files stored on a DVD drive or another version of Windows set up on a separate hard drive. You can enter the Windows Recovery Environment by performing a hard reset at the Windows logo three times if you cannot boot into the Windows desktop.
Written & Updated by Ricky Lin
Ricky Lin is an senior editor of DoYourData who lives in Adelaide, Australia. He is interested in writing technology articles related with data recovery, computer issue fixes, disk clone, iPhone data recovery, video edit, Mac optimization, etc. He Joined DoYourData in 2019 and have written 500+ articles to help both Windows users and Mac users to solve data or computer problems.
Hot Articles
- Best Free Data Recovery Software Review
- Best Data Erasure Software Review
- Best Disk Cloning Software Review
- Fix External Hard Drive Not Showing Up on Mac
- Fix RAW External Hard Drive
- Reset A M1 Mac to Factory Settings
- How to Back Up Mac Data
- Uninstall Apps on Mac
- Install Windows-style Start Menu on Mac
- Fix iMac Black Screen and Fix iMac Boot Issue