How to Use Migration Assistant on Mac?
Migration Assistant can help you move data from an old Mac to a new Mac and restore your Mac from a time machine backup. Check this guide to learn what Migration Assistant can do and what can it copy. You also can download DoYourClone for Mac to help you make a bootable clone backup for your Mac.
![]() Updated by Anderson on July 1, 2023
Updated by Anderson on July 1, 2023
Quick Navigation:
- 1. How to move files from one Mac to another with the help of Migration Assistant?
- 2. How does Migration organize your file shift?
- 3. Migration Assistant: does it copy everything?
- 4. When using Migration Assistant, what prerequisites are necessary?
- 5. What can't you move with Migration Assistant?
- 6. How to create a bootable clone for your old Mac or new Mac?
- 7. FAQs about Mac data transfer and migration
If you're upgrading to a new Mac directly or restoring from a Time Machine backup, Apple's Migration Assistant is a fantastic tool to make the transition a breeze.
Data can also be transferred between Macs through Wi-Fi, Thunderbolt, FireWire, or Ethernet using Migration Assistant. You can use your shiny new Mac after you've finished the data migration.
![]()
Even though Migration Assistant is intuitive, we'll still walk you through the essential procedures to ensure a smooth transition from your old Mac to your new one.
How to move files from one Mac to another with the help of Migration Assistant?
On the new Mac:
- Migration Assistant can be found under the Utilities subfolder of the Applications menu in Finder.
- A new window will open, asking for your administrator password.
- Click Continue after choosing a source (Mac, Time Machine backup, or startup drive).
On the old Mac:
- Start Migration Assistant, click Continue, then supply the administrator's password.
- Confirm Moving to another Mac > Keeping Going.
Upgrade to the latest Mac:
- In the "Transfer Information to this Mac" window, choose the target Mac and click the Continue button.
Back to the old Mac:
- Verify that the code displayed in the pop-up is the identical one that showed on your brand-new Mac.
- To proceed, please select Continue.
On the new Mac:
- Select the files and folders or the data set you wish to transfer to the new Mac.
- The Transfer can be initiated by clicking Continue in the upper right corner.
Migrating several huge files and directories can take a long time. When it's done, shut down both copies of Migration Assistant and double-check your new Mac's files.

How does Migration organize your file shift?
- Apple's Migration Assistant automatically categorizes the files you select.
- You are a part of the Application Team. Folder organized by User, Miscellaneous data. The configuration of your system and connections.
- Launch Migration Assistant and select the files you wish to migrate by marking them in the software.
- That means your options for what to migrate are somewhat constrained.
- Select anything that applies and begin the migration process.
Migration Assistant: does it copy everything?
Every single file is copied to the destination computer by the migration assistance. Everything from programs to files to pictures to movies. With everything safely stored in your shiny new Mac, you won't have to worry about forgetting anything.
While copying all of your data over is useful, it might be inconvenient if you wish to delete old files. You can thoroughly clean your folders to ensure you don't transfer any files you don't want on your new Mac if you don't want to transfer everything.
When using Migration Assistant, what prerequisites are necessary?
Wi-Fi enables data transfer between Macs. You should be ready if your old Mac and new Mac are linked to the same Wi-Fi network.
But.
The process of effecting such a shift might be lengthy. Your WIFI's speed and reliability will play a role. That's one ancient and sluggish machine you have there. Connecting two Macs through Ethernet is preferable. Using the target disk mode on your source Mac.
Or it's equivalent. Ensure you have a copy of your Mac's data on an external hard disk or solid-state device, in addition to moving data from a Time Machine backup on a Mac.
Your older Mac would benefit greatly from a Time Machine backup, particularly if you're upgrading because of issues with your previous Mac.
A copy was made from the Time Machine backup drive. Your current computer will experience no stress whatsoever during this process.
What can't you move with Migration Assistant?
Mac OS X is not migrated from an older Mac with Apple's Migration Assistant. For the simple reason that your previous Mac's OS probably won't be compatible with your new one's. Also, the new machine can have problems booting up after the transfer.
The Migration Assistant will not copy 32-bit apps from your previous Mac. Even ones that aren't compatible with your shiny new Mac.
Instead, a greyed-out icon with a line across it will appear in the Apps folder of your new Mac.
And when the App is launched, click on it. A message telling you to contact the program's creator because it doesn't work on your new Mac will appear.
Apple's updated apps are not compatible with previous versions of iOS. The Music app, for example, has mostly succeeded iTunes. Photos have taken over for iPhoto. Both iTunes and iPhoto refuse to sync. However, they will still be visible in the Applications folder, albeit in a disabled state.
How to create a bootable clone for your old Mac or new Mac?
If you want to make a bootable clone backup in case of system failure, you can download DoYourClone, a reliable disk cloning application. It can help you copy hard drive on Mac, create bootable clone, make disk image backup, etc.
After downloading this software and installing it on your Mac, just connect an external hard drive to your Mac. Then open DoYourClone for Mac.
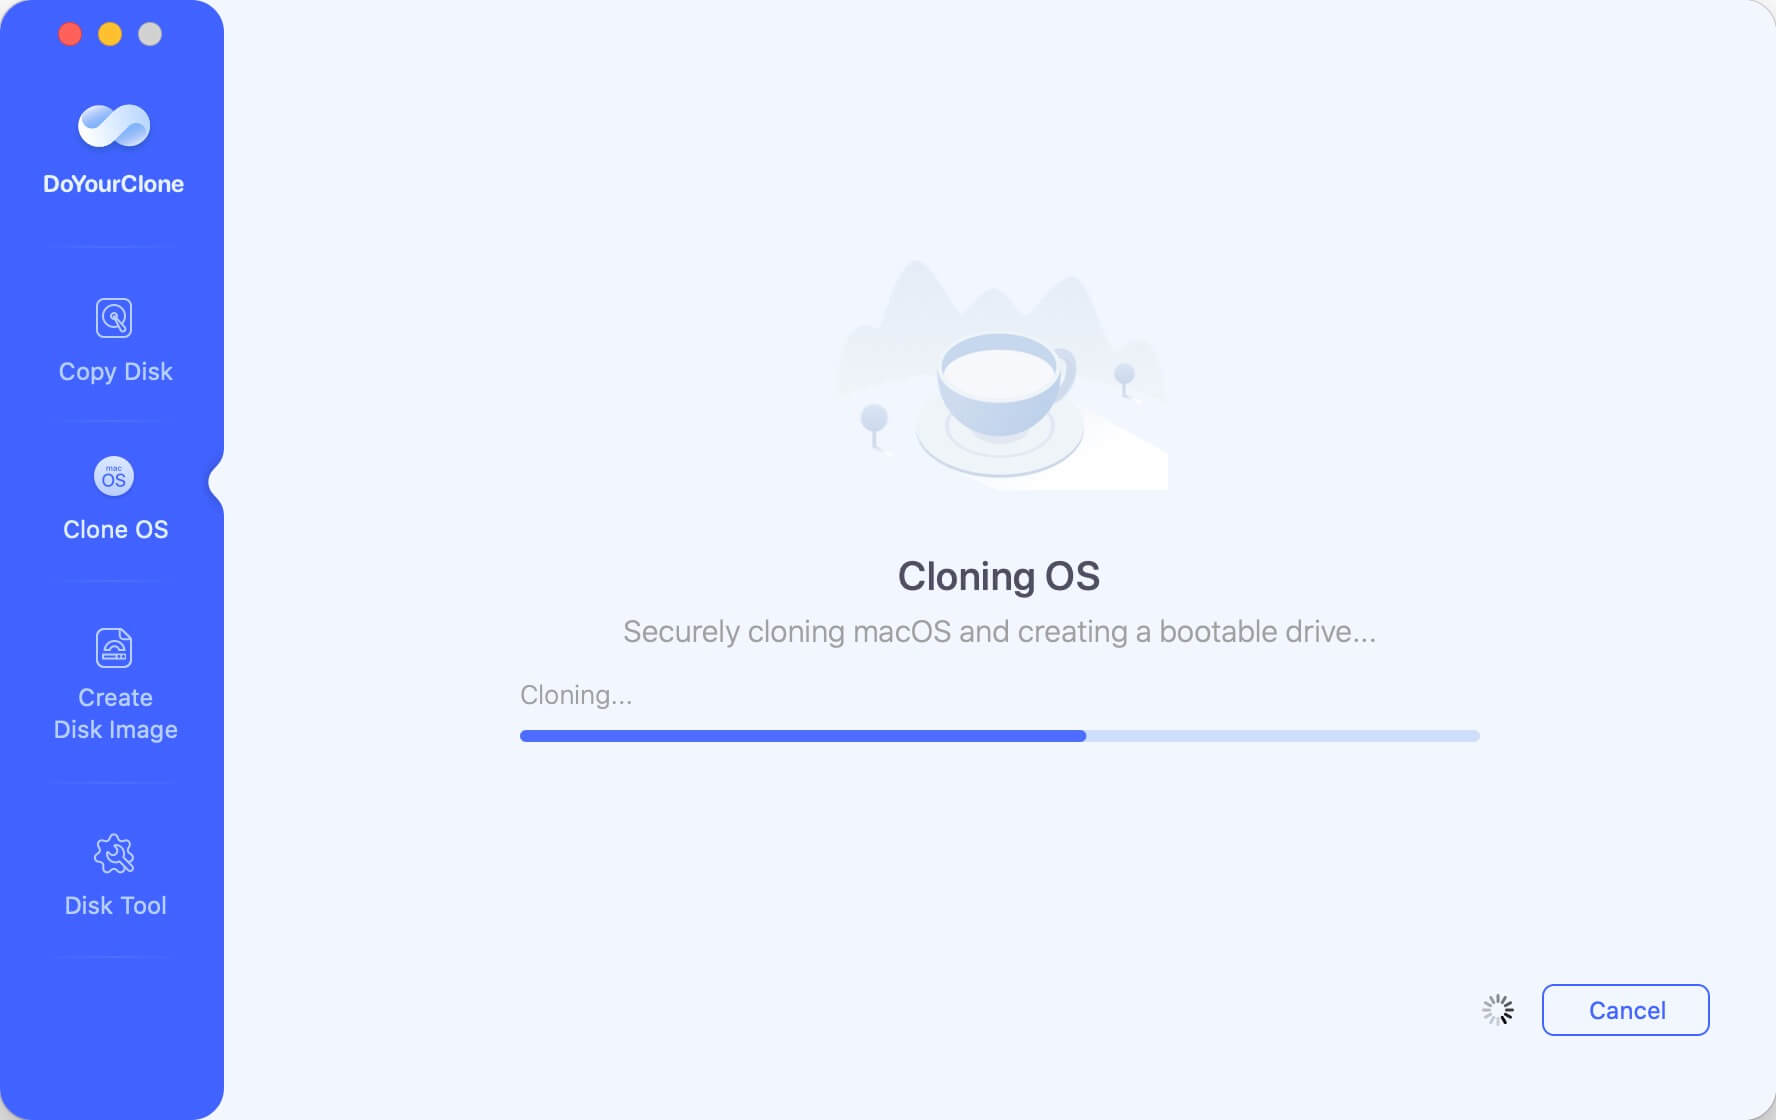
Step 1. Choose Clone OS mode. This mode will clone all data from your Mac startup disk to the external hard drive, creating a bootable clone backup.
Step 2. Select the external hard drive as the destination drive and click on Clone Now button.
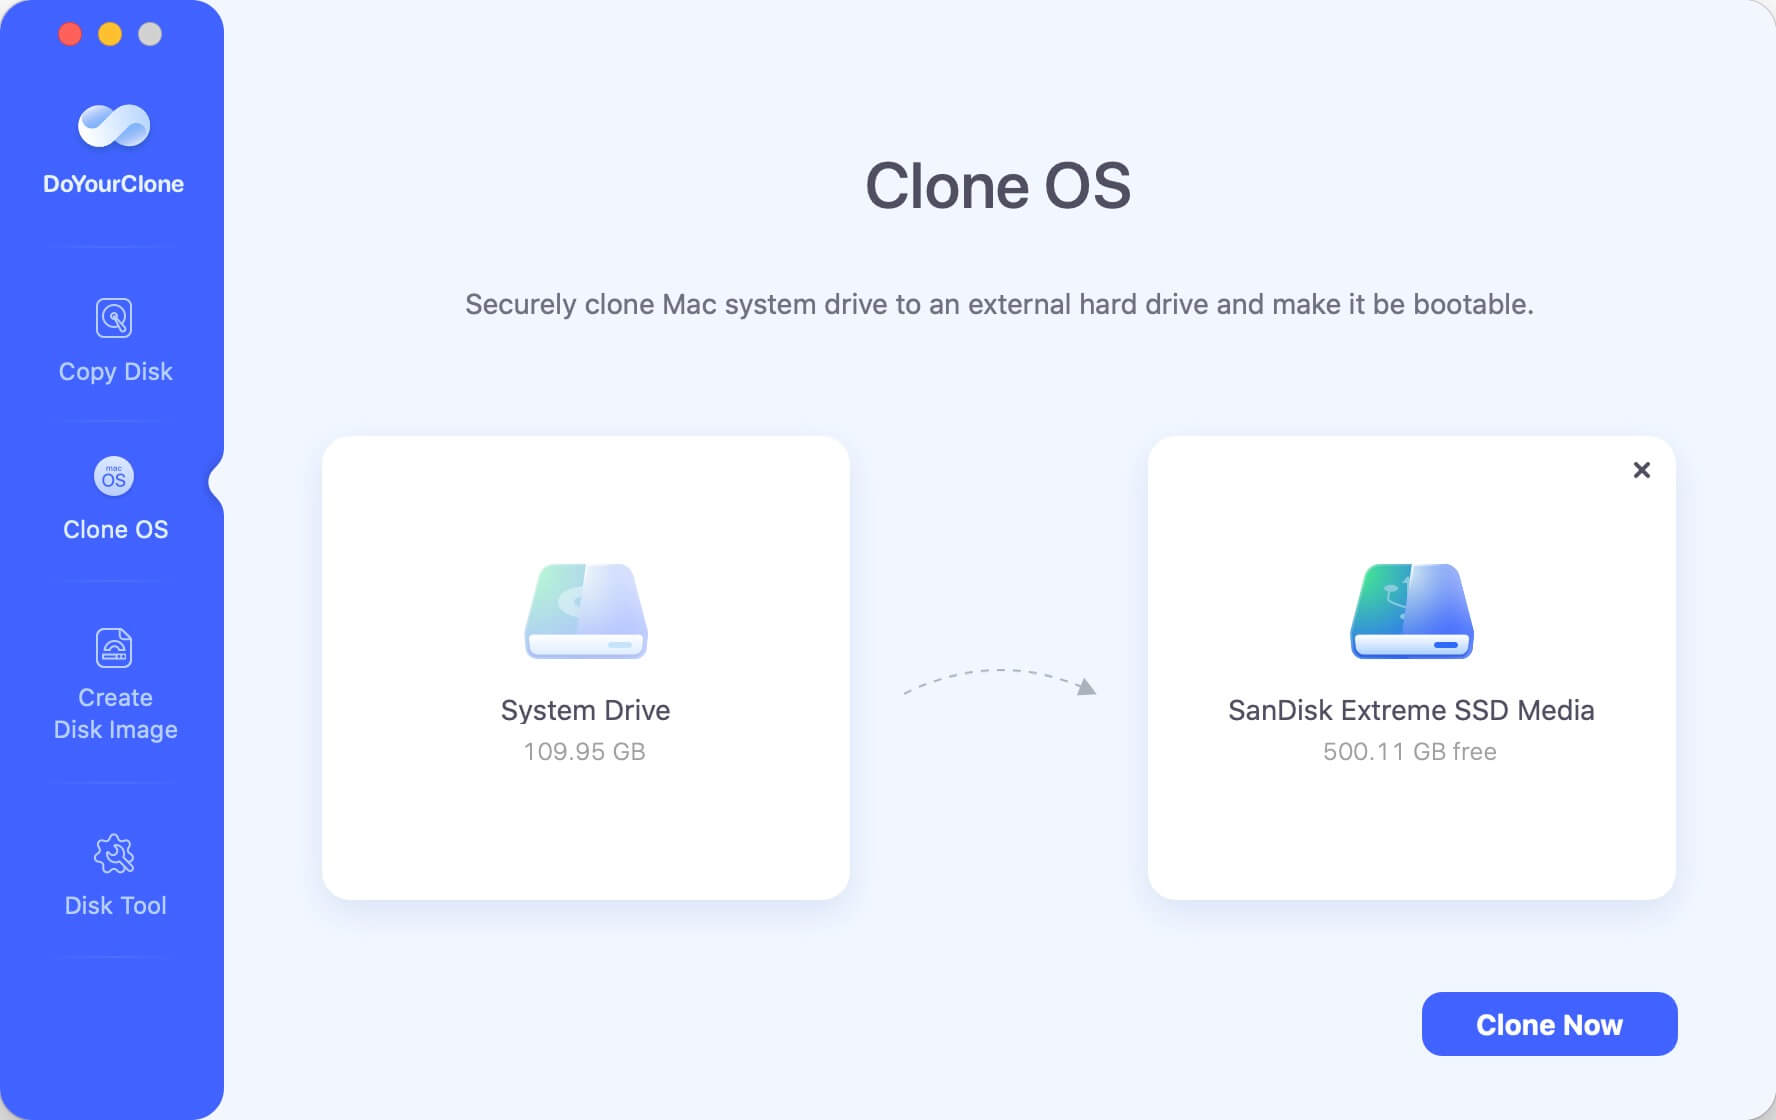
Step 3. Select the destination drive.
Step 3. This software will move all data including macOS, user data, files, apps, settings and more from your Mac to the external hard drive.
FAQs about Mac data transfer and migration:
- Restart your Mac, press and hold Power button, till enter into macOS Recovery mode.
- Select the Options and click on Continue button.
- Choose Disk Utility.
- Select the Mac startup disk.
- Click Restore.
- Select Restore from the clone backup.
Conclusion:
You are aware that the migration assistance will transfer everything from your previous Mac to the new Mac that you have purchased. Your life will be made easier by using Migration Assistant, as it makes moving from one Mac to another as painless as possible. You won't have any trouble moving your settings and data if you choose to.
Written & Updated by Anderson
Anderson is a big fan of computer technology. He joined DoYourData in 2018 and has been writing 200+ articles about disk clone, data recovery, computer technology, data erasure, Mac system optimization, etc. He loves music, movie, and reading. In his spare time, he’s studying music and playing tennis.