Disk Cleanup in Windows: Remove Junk Data or Wipe All Sensitive Data
Here is the solution to easily clean up disk to regain disk space on Windows. Use Windows Disk Cleanup tool, you can easily clean up all junk data from your PC. If you will sell, donate or dispose of an old hard drive and want to clean up all data permanently, you can try data erasure program - such as DoYourData Super Eraser to wipe the hard drive.
![]() Updated by Shirly Chen on March 13, 2025
Updated by Shirly Chen on March 13, 2025
Quick Navigation:
- What Is Disk Cleanup?
- How to Use Disk Cleanup?
- Recover Lost Files after Disk Cleanup
- Wipe A Hard Drive Before Selling or Donating
- Conclusion
Have you ever seen the annoying message "Low Disk Space"? Do not be afraid. We've all been there: our Windows PCs were a mess with too much digital stuff. But before you give up and delete those important videos, let's look at Disk Cleanup, a secret gem.
You can use this built-in tool like a life jacket when your hard drive is full, helping you get back important storage space. In this guide, we'll go deep into Disk Cleanup, showing you all its tricks and giving you the tools you need to solve your storage problems.
What Is Disk Cleanup?
Windows has a Disk Cleanup tool that can help you reclaim storage space by finding and removing useless files. Some examples of these files are temporary internet files, downloaded program files, images, and files left over from installing Windows earlier. Removing these files will free up room on your hard drive and make your system run faster.
Benefits of Using Disk Cleanup:
Disk Cleanup has several advantages, such as:
- Frees Up Disk Space: One of the main goals of Disk Cleanup is to free up space on your drive. This can be beneficial if you need to install new programs, download files, or store more data but don't have enough space.
- Improves System Performance: When the drive is full, the machine can sometimes slow down. Disk Cleanup can improve your system's performance by getting rid of temporary files and unnecessary data.
- Safe and Easy to Use: Disk Cleanup is a safe and accessible tool. It tells you which files are usually safe to delete and gives you complete information about each type.
Features of Disk Cleanup:
Disk Cleanup has many tools to help you handle the room on your Windows computer's hard drive. Some of the most important traits are:
Temporary file removal:
Disk Cleanup looks through your computer for temporary files from different programs and system processes. Most of the time, it's safe to delete these files. They can be temporary internet files, system temporary files, or temporary program download files.
Windows Update Cleanup:
Temporary files and backups are often created when Windows updates are installed to facilitate the process. Disk Cleanup can find and eliminate these files, freeing up space on your hard drive.
Removal of system files:
Disk Cleanup can find and remove useless system files and temporary files. These include old Windows installation files, system errors, memory dump files, and system log files.
Thumbnail Cache Cleanup:
Windows makes thumbnails of files and folders so that File Explorer can show you what they look like. These thumbnail cache files can build up disk space over time. To make room, you can eliminate these thumbnail cache files you don't need with Disk Cleanup.
How to Use Disk Cleanup?
The process of using Disk Cleanup in Windows is easy. Here is a step-by-step plan to help you begin:
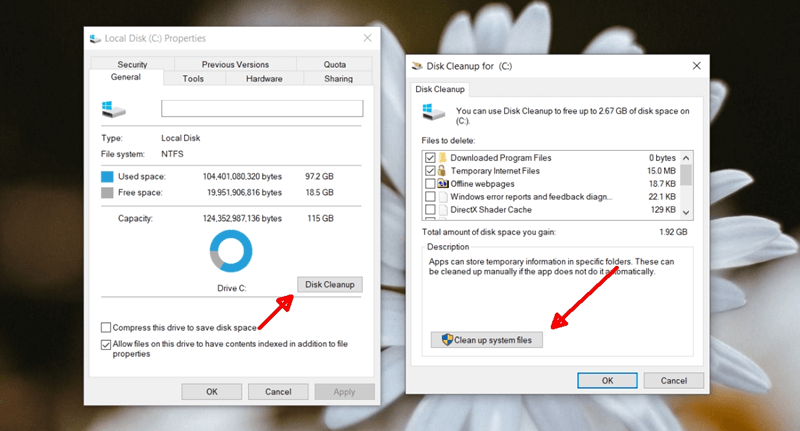
1. Open Disk Cleanup:
To open Disk Cleanup, type "Disk Cleanup" into the Windows search bar and pick the app from the list.
2. Select the drive to clean:
You'll be asked to pick which drive you want to clean up by Disk Cleanup. Most of the time, you should choose the drive where your Windows operating system is installed, usually the C: drive.
3. Scan for unnecessary files:
After you choose the drive, Disk Cleanup will look for files you don't need. Depending on the number of files and your disk size, this process could take a while.
4. Review and select file categories:
After the scan is done, Disk Cleanup shows the list of files that can be deleted. These may include temporary files, system files, Windows Update cleanup, and others. Review the list and check the boxes next to the areas you want to clean up.
5. Start the cleanup process:
Once you've chosen the file categories, click the "OK" button to start the cleanup process. Disk Cleanup will begin removing the selected files from your hard disk. This process may take some time, so be patient and allow Disk Cleanup to complete the operation.
6. Confirm deletion:
Before Disk Cleanup deletes the selected files, you will be asked to confirm the action. Review the list of files and click the "Delete Files" button to continue.
7. Completion and disk space reclamation:
Once the cleanup process is complete, Disk Cleanup will show a summary of the disk space reclaimed. You can now close the Disk Cleanup window and enjoy the benefits of a cleaner, more optimized machine.
Note: If you are a Mac user, you can use Mac cleaning software such as MacClean360 to clean up all junk data on the Mac.
Recover Lost Files after Disk Cleanup
If Disk Cleanup delete important files from your computer, don’t panic, you can use data recovery software to scan the hard drive and get the deleted files back.
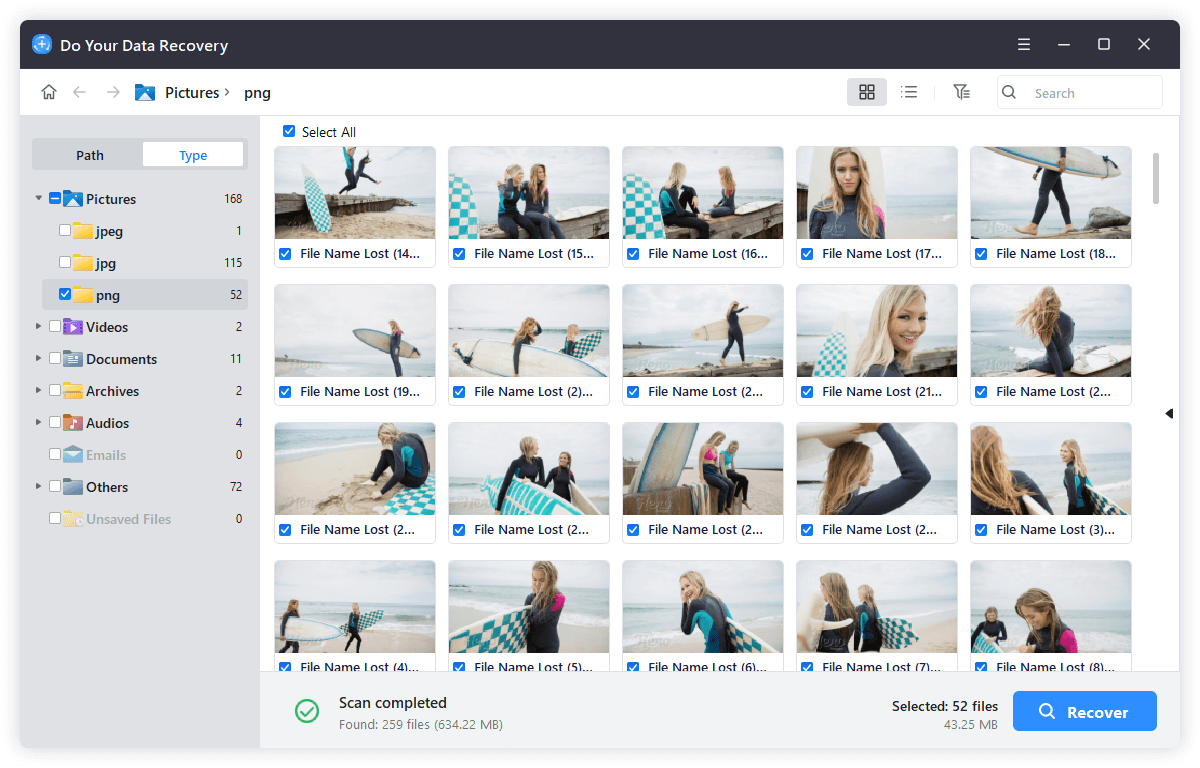
Step 1. Download and install the powerful data recovery program - Do Your Data Recovery on your computer.
Step 2. Open Do Your Data Recovery, select the hard drive such as C drive to start data recovery.
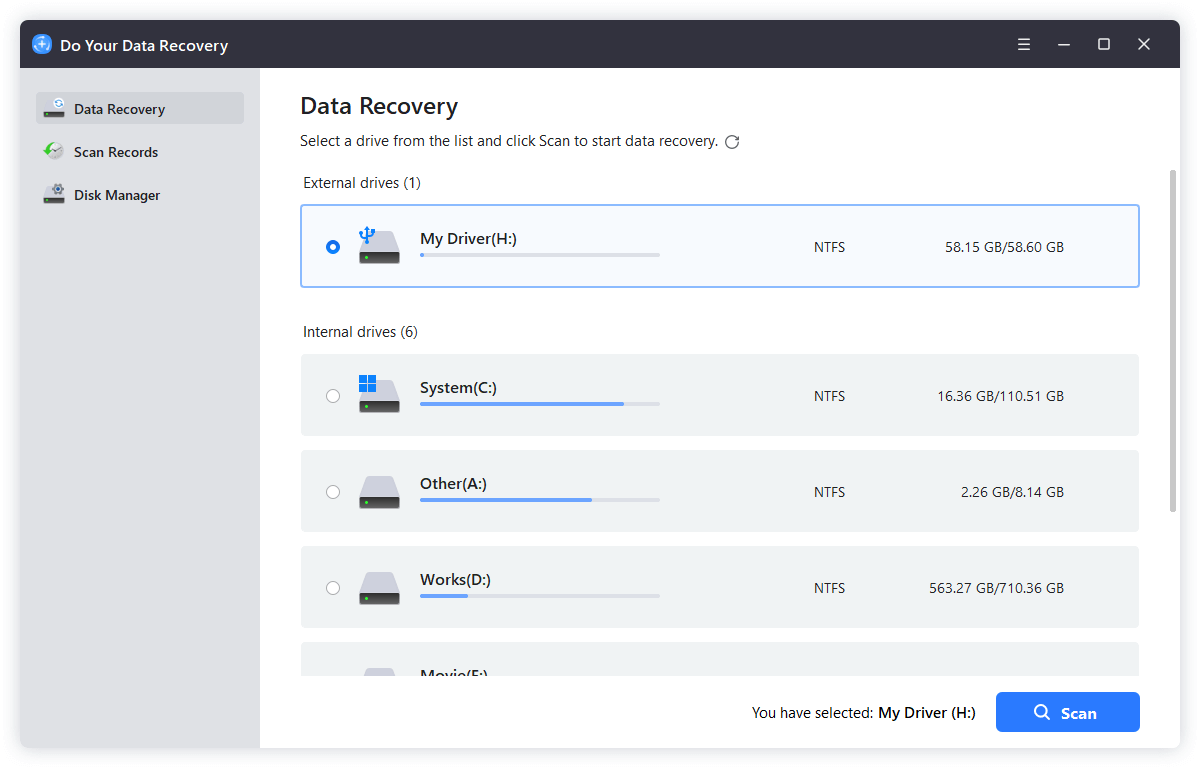
Step 3. Click on Scan button to deeply scan the drive and find all recoverable files.
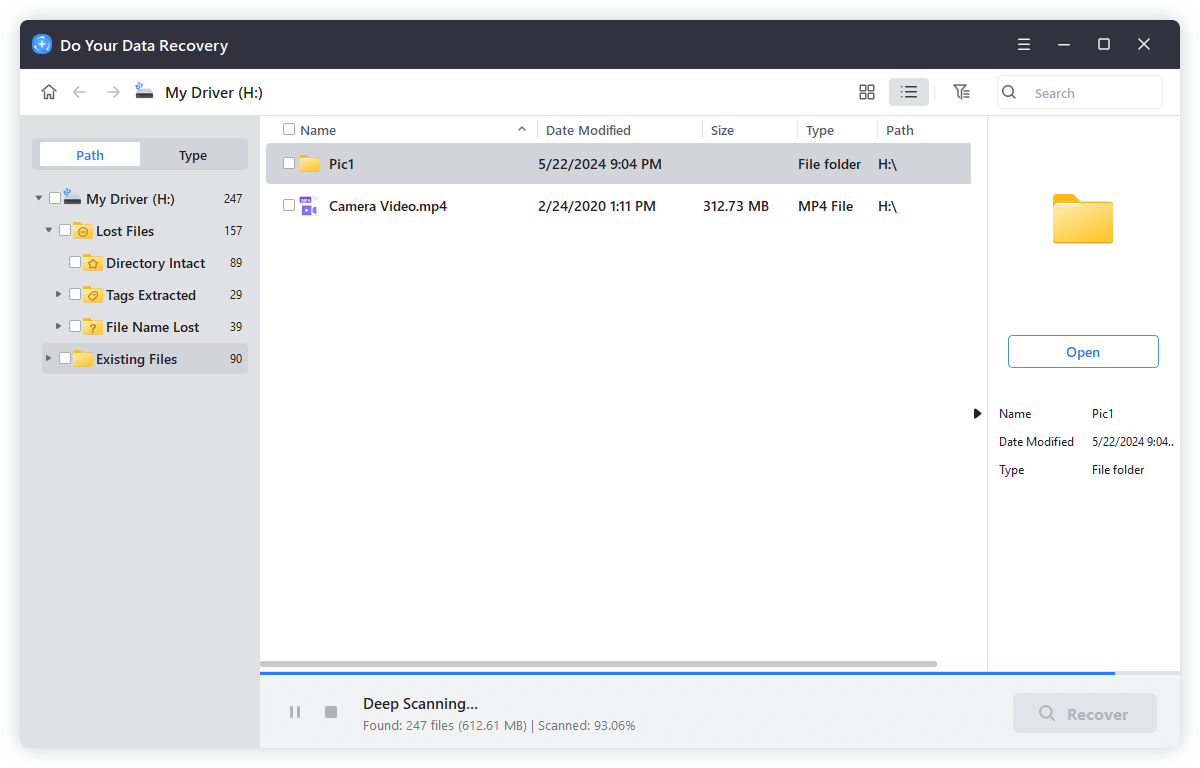
Step 4. Once the scan is completed, you can preview the recoverable files. Then select the desirable files, click on Recover button. Choose a location to save the recovered files.
Wipe A Hard Drive Before Selling or Donating
Before you sell or donate your hard drive, you need to clean up all data from the drive. Disk formatting can delete all data from the hard drive, but the formatted data is not lost forever, and it can be recovered by data recovery software.
To permanently erase all data from the hard drive, you can try data erasure program - such as DoYourData Super Eraser. It offers certified data erasure standards to permanently erase all data from the drive, making data recovery be impossible.
DoYourData Super Eraser
- Permanently erase data from HDD/SSD, memory card, USB flash drive, digital camera, etc.
- Powerful data erasure standards including Peter Gutmann, U.S. Army AR380-19, DoD 5220.22-M ECE, etc.
- 100% safe data erasure program.
Step 1. Download and install DoYourData Super Eraser on your computer, then open it, choose Wipe Hard Drive mode.
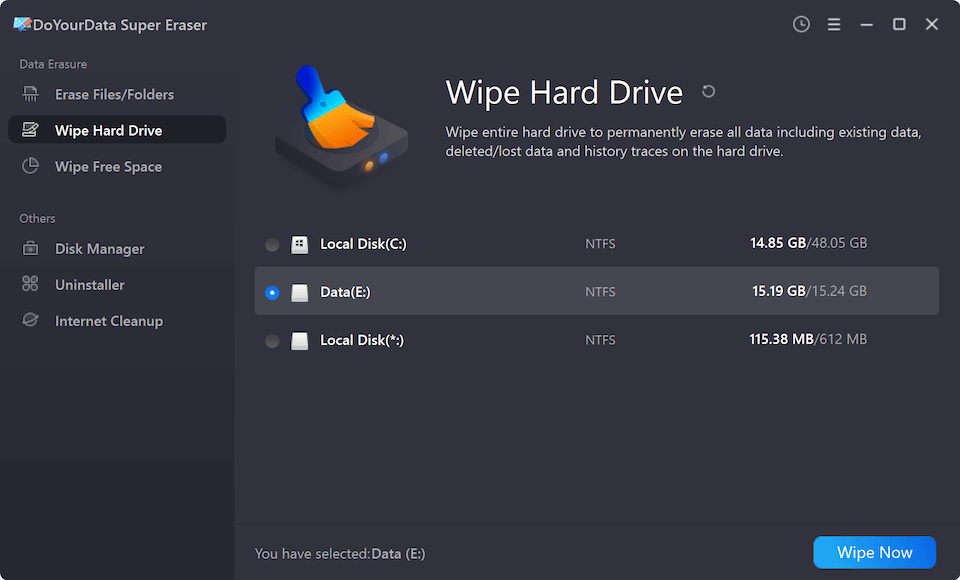
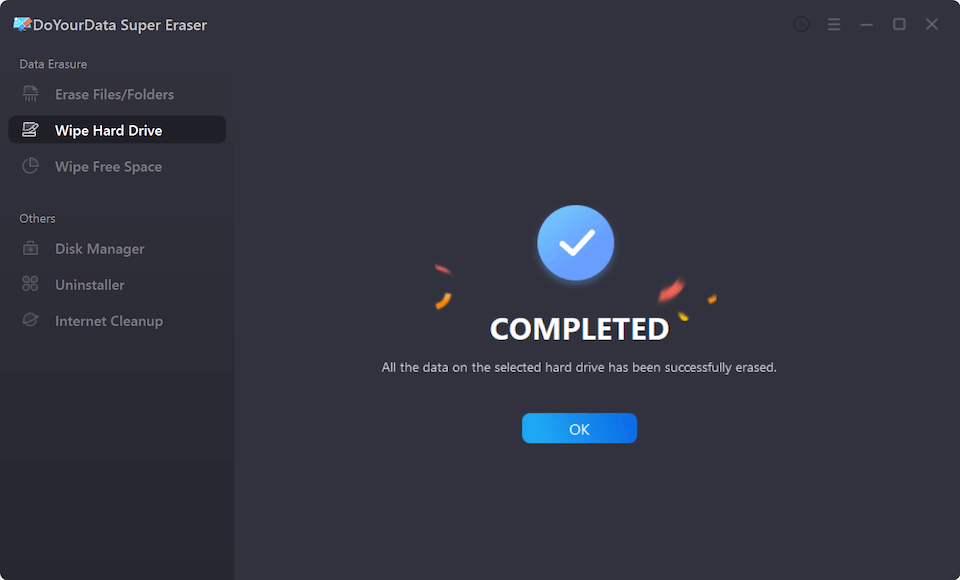
Step 2. Select the target drive, then click on Wipe Now button to securely and permanently erase all data from the selected drive. (All existing data, deleted/lost data, hidden data will be permanently erased from the drive)
Conclusion:
Disk Cleanup is a valid Windows tool for controlling disk space and making the system run faster. Regularly deleting files you don't need from your hard drive can free up room and ensure your computer runs more smoothly. Because it is easy to use and has many valuable features, Disk Cleanup makes it simple to keep your system clean and running at its best. Run Disk Cleanup to improve your Windows experience as part of your regular maintenance.
If you will sell or donate your hard drive, just use a data erasure program - such as DoYourData Super Eraser to wipe the hard drive. It will permanently erase all data from the hard drive.
DoYourData Super Eraser
DoYourData Super Eraser, the award-winning data erasure software, offers certified data erasure standards including U.S. Army AR380-19, DoD 5220.22-M ECE to help you securely and permanently erase data from PC, Mac, HDD, SSD, USB drive, memory card or other device, make data be lost forever, unrecoverable!
Written & Updated by Shirly Chen
Shirly Chen has been writing data recovery, data erasure articles for DoYourData over 4 years. She has been working as a professional website content writer & editor for quite a long time. She also writes articles about disk clone, Mac optimization, disk backup, etc.