Home > Hard Drive Solutions for Mac
Unable to Write Data to USB Flash Drive on Mac, How to Fix It?
How to fix USB flash drive read-only issue on Mac? Download DoYourData NTFS for mac and install it on your Mac, then run it to mount USB flash drive on Mac and grant full read-write access to the NTFS USB flash drive on Mac.
![]() Updated by Justin Kenny on July 24, 2023
Updated by Justin Kenny on July 24, 2023
Quick Navigation:
- 1. Why does my Mac make my USB disk read-only?
- 2. How to write data to a USB flash drive on Mac?
- USB drive contains unknown errors
- Check if the USB is write-protected
- Check the USB Stick for Viruses
- Check the Drive's Formatting
- 3. How to recover lost data from USB flash drive on Mac?
- 4. How to enable NTFS read-write support for USB flash drives on Mac?
You've completed all of your tasks for the day. The last step is to copy the data onto an USB device. Then the following message appears: "The drive is write-protected. You can either turn off the write protection or swap out the disk. Instantly, you begin tearing your hair out. This USB drive is yours, so feel free to read, write, and otherwise manipulate the data.
No need to rip out your hair over this one. You maintained a serene demeanor. But your USB drive requires immediate attention. Fortunately, removing write protection from a USB device only requires a few easy actions. Tech is just tech. It's not hopeless, though.

Why does my Mac make my USB disk read-only?
Before we jump into fixing the USB drive is read-only on Mac issue, it's important to understand what causes your USB drive to become read-only. The following are some of the most common causes of this issue:
- The incorrect link between gadgets.
- The USB disk is broken or has flaws that cannot be detected now.
- The read-only attribute is set on the USB disk.
- The NTFS file system has been applied to the USB disk.
- Malware or viruses.
Remember that the USB drive on your Mac may be read-only for various reasons; we've only highlighted a few of them here. You have identified a potential source of the issue, so let's work together to resolve it.
How to write data to a USB flash drive on Mac?
USB drive contains unknown errors:
When a USB drive has internal issues that the Mac can't detect, it may appear read-only and prohibit you from changing its contents. In this scenario, you can try running Disk Utility First Aid to see whether that eliminates the USB read-only issue brought on by internal faults.
Some small issues on the read-only drive can be fixed with the help of First Aid. Follow these steps to fix a read-only USB device on a Mac with Disk Utility:
Connect the read-only flash drive to your Mac.
To launch Disk Utility, go to the Mac Launchpad and Others.
Select the defective USB device in the left pane of the Disk Utility window.
To begin, select the First Aid option from the main menu's tabs, then click Run in the dialogue box.

Check if the USB is write-protected:
Do you need instructions for using a flash drive with a toggle? If you turn off a write-protect switch, you won't be able to use it. So, the solution to this problem is as simple as flipping a switch. For reference, please see the image below. It is recommended that the user never turn off the switch if unsure of its use, which could occur if the user is not tech aware.
Check the USB Stick for Viruses:
If you have ever used an USB drive on a computer that is not your own or a public computer, you should always run a virus scan as soon as you plug it into your computer.
Having your USB drive react with the Write Protected error is a common symptom of a virus infection.
Depending on your antivirus program, it's possible to set it up to automatically check any USB drives plugged in for the first time. If it doesn't work, you can manually initiate an antivirus scan by right-clicking the USB drive in Windows Explorer.
Check the Drive's Formatting:
Launch Disk Utility by navigating to the /Applications/Utilities directory. Select the drive from the list of available drives on the window's left side. Then look for "Partition Map Scheme" in the window's footer. Disks partitioned in the Windows-standard NTFS format cannot be written to on Mac OS X. It is simpler to copy all files off the NTFS-formatted disk, reformat it for Macintosh use, and then copy the files back than to use one of the many methods that either cost money or involve technical expertise to enable this feature.
How to recover lost data from USB flash drive on Mac?
Erase or First Aid of Disk Utility will reformat the USB flash drive. If you don’t back up the files before repairing or erasing the USB flash drive, you will lost all of the files. Data recovery software can help you unformat USB flash drive on Mac.
Do Your Data Recovery for Mac
- Recover permanently files from Mac hard drive or external device.
- Unformat USB flash drive on Mac.
- Recover all erased or inaccessible data on Mac.
Step 1. Connect the USB flash drive to your Mac and open Do Your Data Recovery for Mac.

Step 2. Select the USB flash drive and click on Scan button.
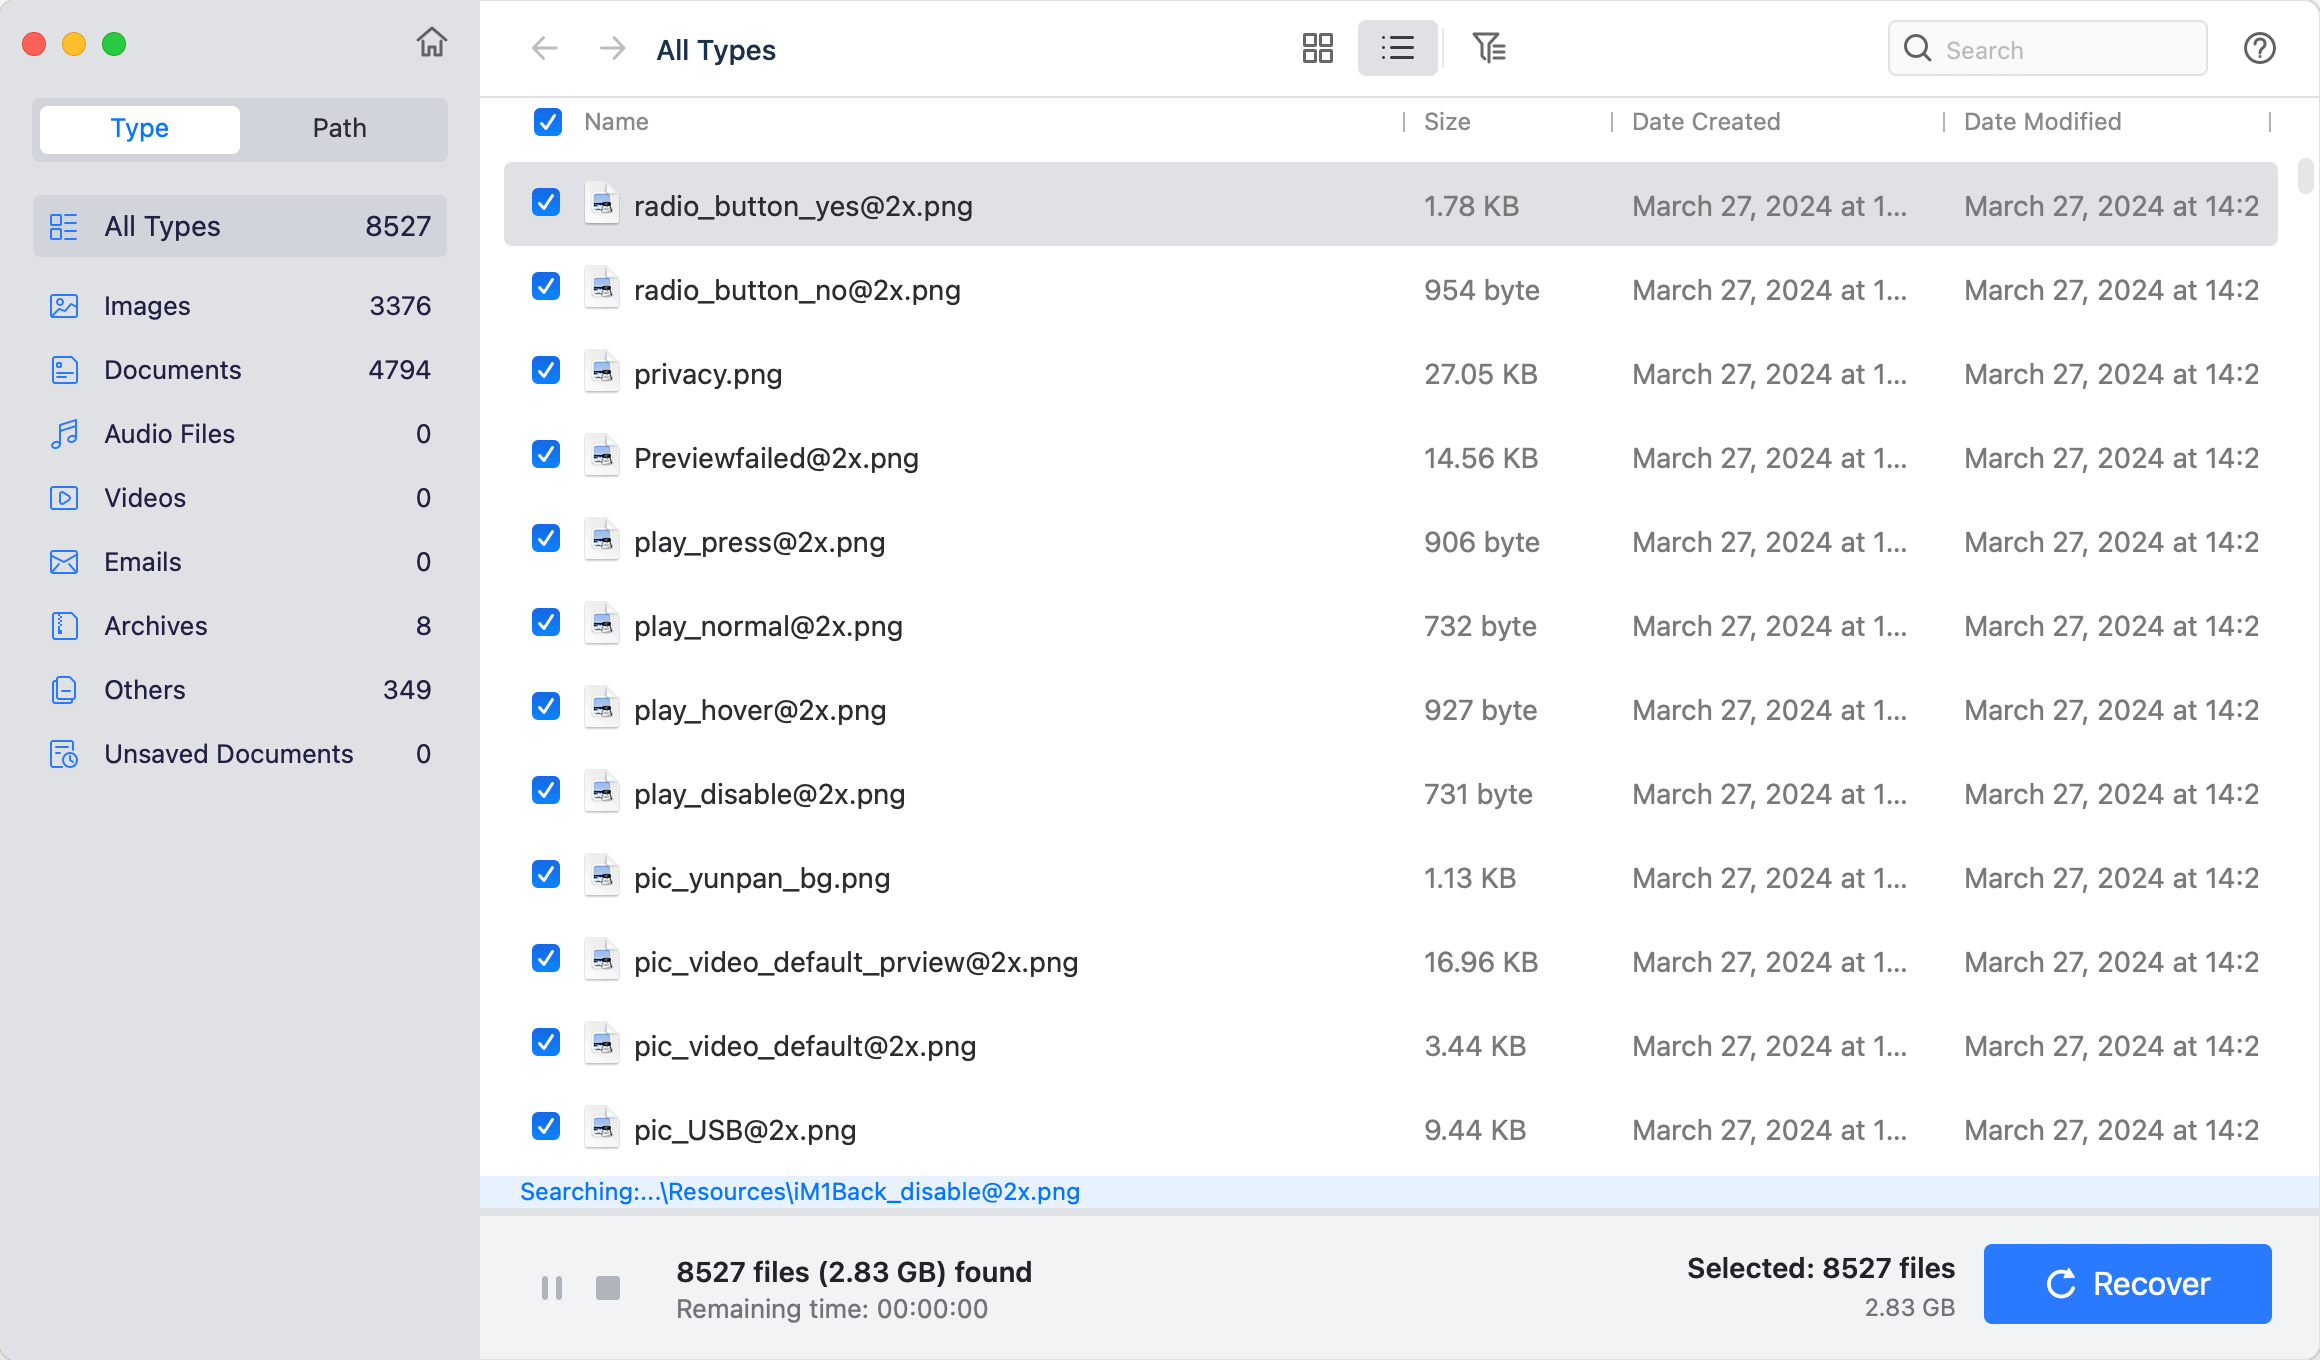
Step 3. Once the scan is completed, you can preview all recoverable files. Then select the wanted files and save them.

How to enable NTFS read-write support for USB flash drives on Mac?
If you don’t want to format the NTFS USB flash drive to ExFAT or FAT32, you can download a DoYourData NTFS for Mac software to help you enable NTFS read-write support on Mac. Follow the steps below:
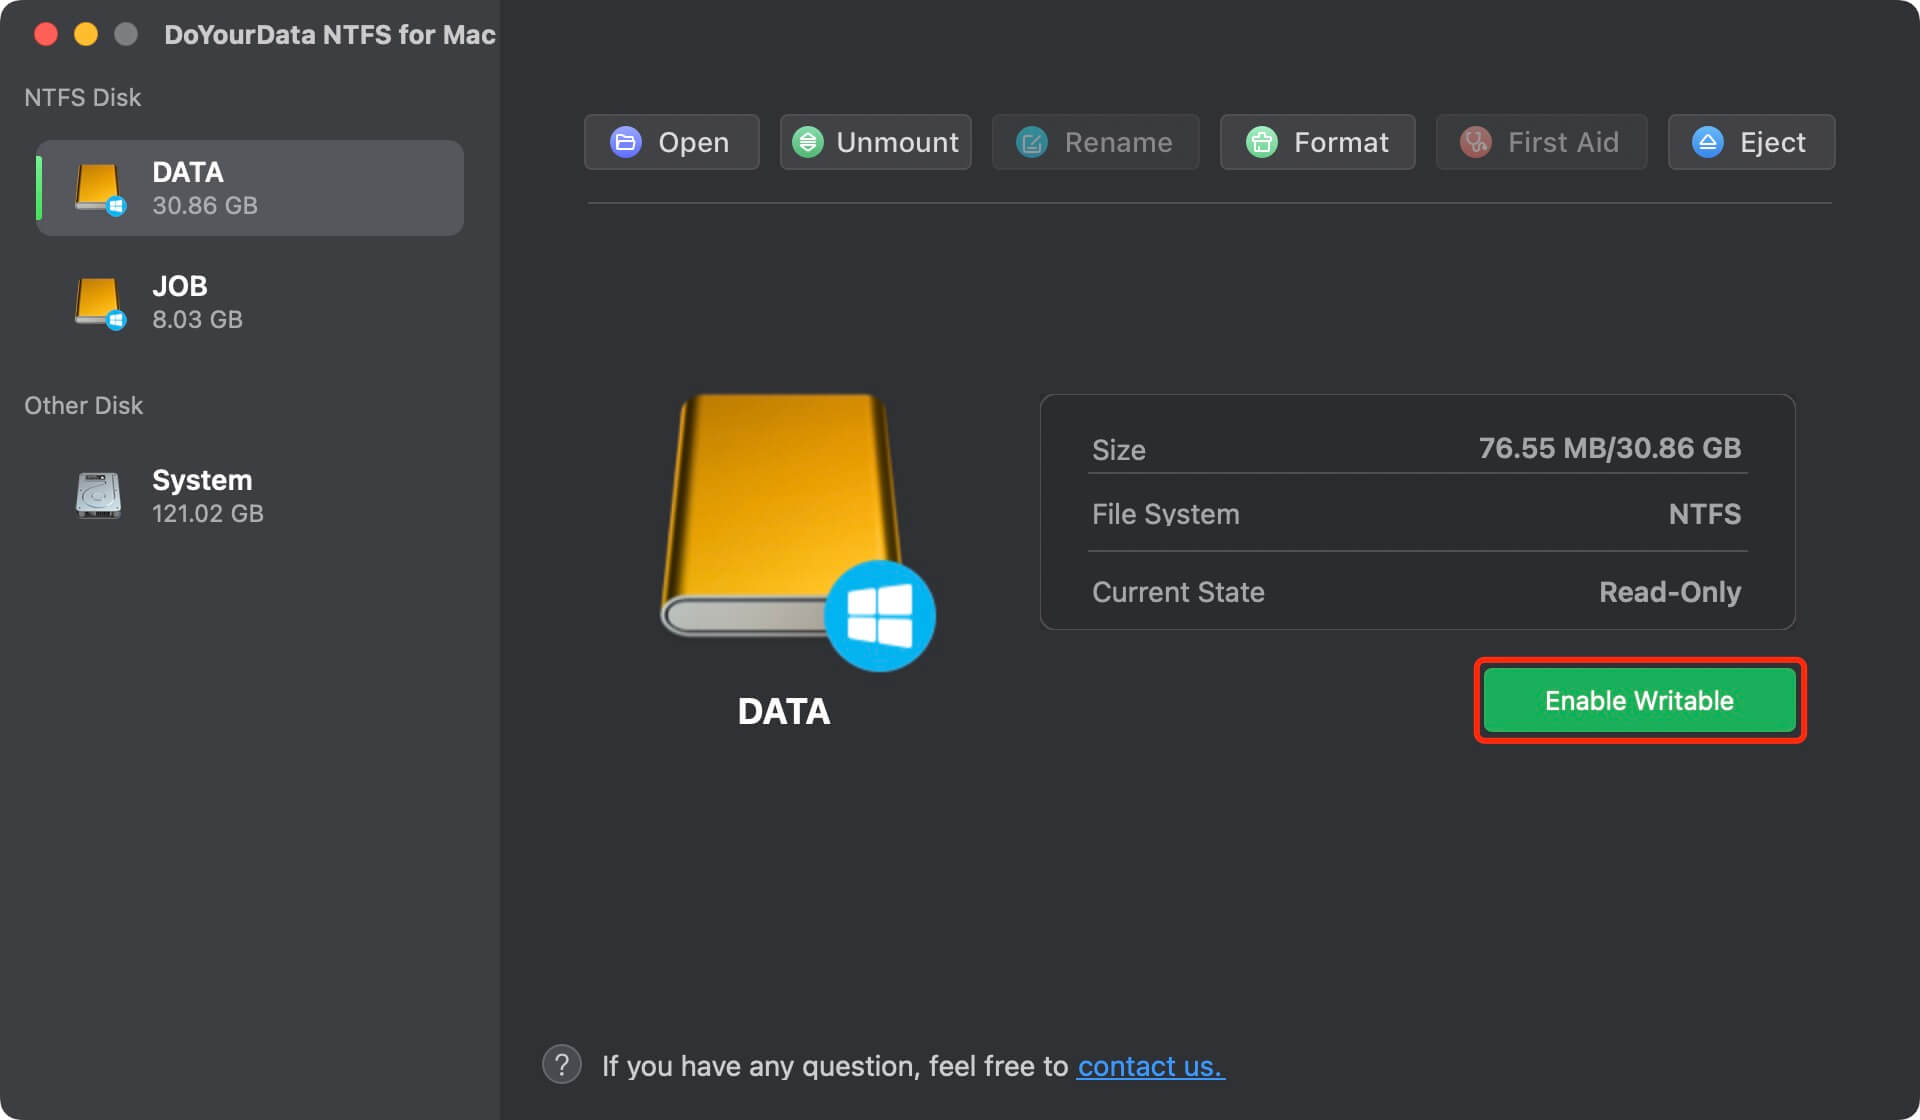
Step 1. Download and install DoYourData NTFS for Mac on your Mac and connect the NTFS USB flash drive to your Mac.
Step 2. Select the USB flash drive and click on Enable Writable button. Then you can read and write the NTFS USB flash drive without any limitation.
Conclusion:
NTFS file system is a Windows-based file system and it is not compatible with macOS. If you find your USB flash drive is formatted to NTFS and it is read-only on your Mac, just download a reliable NTFS for Mac tool, such as DoYourData NTFS for Mac. This software can quickly enable NTFS support for all external drives and USB flash drives on Mac. This is the easiest method to fix USB flash drive read-only issue on Mac.
Written & Updated by Justin Kenny
Justin Kenny is a writer & editor of DoYourData. He joined DoYourData in 2016 and focuses on writing articles about Windows data recovery, Mac data recovery, external device data recovery, hard drive clone, data erasure, Mac cleanup, computer issue fixes, etc. He is a super fan of Apple devices and is big on testing new digital device and system utility software.