Home > Hard Drive Solutions for Mac
Format and Unformat WD Elements External Hard Drive on Mac
WD Elements external hard drive may be not compatible with macOS. You can use Disk Utility to format the WD Elements external hard drive to Mac-compatible file system. And if you want to recover lost data from erased/formatted WD Elements external hard drive, just try data recovery application - Do Your Data Recovery for Mac.
![]() Updated by Justin Kenny on August 15, 2023
Updated by Justin Kenny on August 15, 2023
Quick Navigation:
- 1. Before Formatting WD Elements External Hard Drive on Mac
- 2. Format WD Elements External Hard Drive on Mac
- 3. How to Unformat WD Elements External Hard Drive on Mac?
- 4. Format and Unformat WD Elements External Hard Drive on Mac FAQs
The Western Digital Elements hard drive is a popular portable storage option. They have been around since 1994, but unfortunately, only PCs running Microsoft Windows can play them. However, because of their appealing features and widespread applicability in the computer industry, WD Elements have steadily increased demand and popularity among macOS users, prompting a format switch.
This article will discuss the most effective ways to format or reformat a WD Elements drive on a Mac or other device. After accidentally formatting a WD Elements hard disk in a Mac-compatible format, you'll discover what to watch out for and how to get your data back.

Before Formatting WD Elements External Hard Drive on Mac
You should prepare a few things before attempting to format a WD Elements external hard drive for a Mac. Do this only after you have decided to wipe the drive. Here are the steps you need to do to get ready.
- Create backups: It should be no surprise that formatting a hard drive would permanently delete all stored data. You should back up your data to a safe location before formatting your hard disk to restore your files easily.
- Inspect the connections: The WD Elements drive can connect to a 2.0 or 3.0 USB connection. By visiting apple.com and entering your device's Serial Number, you may discover what kind of port your Mac has. An adapter can be used if the ports on your Mac are incompatible with the WD Elements drive.
- Ensure there's enough power: Inadequate power can cause format failures, ruining your file system. Verify that your WD Elements drive has enough power to finish formatting.
Format WD Elements External Hard Drive on Mac?
First, link your Mac to the WD Elemental hard drive:
Wait for some time after plugging in your hard drive for the computer to recognize and "mount" the drive, making it accessible for use. When the disk is finally recognized, a hard disk icon appears on the desktop.
Second, select the disk utility menu item:
Launch Finder by selecting it in the Mac OS dock. When it opens, choose "Go" from the top menu, then "Utilities." Things like applications, utilities, etc., are now visible. Select the disk utility program from the utility menu.
Third, select the hard drive that will be formatted:
Now that you've opened the Disk utility choose the external disk you plugged into your device.
Fourth, choose a presentation type:
Select the Erase option in the disk utility file menu to permanently remove data. A new window with a dialogue prompt has opened. You can now choose the specific format you want to use to format the hard drive. You can rename the hard drive to whatever you like.
Fifth, format the WD Elements external hard drive:
When you've finished making your selections, click the Erase button, and your hard drive will be formatted in seconds.

Tips for Mac WD Elements Changes:
Here are a few things to remember while adjusting WD Elements on a Mac.
- Choosing the correct format will ensure a wide variety of devices can read-write the drive. ExFAT and FAT32 are two examples of such file systems.
- Ensure your computer has enough power to prevent interruptions while formatting the hard drive.
- Do not use unofficial software to format your hard drive; doing so could be disastrous.
How to Unformat WD Elements External Hard Drive on Mac?
If you have not backed up the WD Elements external hard drive before erasing or formatting it, you’ll lose all of the files. Data recovery software can help you unformat WD Elements external hard drive on Mac.
Do Your Data Recovery for Mac
- Recover permanently deleted or erased files from WD Elements external hard drive.
- Unformat WD Elements external hard drive on Mac.
- Recover lost data from inaccessible or crashed WD Elements external hard drive.
Step 1. Download and install Do Your Data Recovery for Mac and then open it. Select the formatted WD Elements external hard drive to start data recovery.

Step 2. Click on Scan button. This Mac data recovery software will deeply scan the formatted WD Elements external hard drive and find all recoverable files.
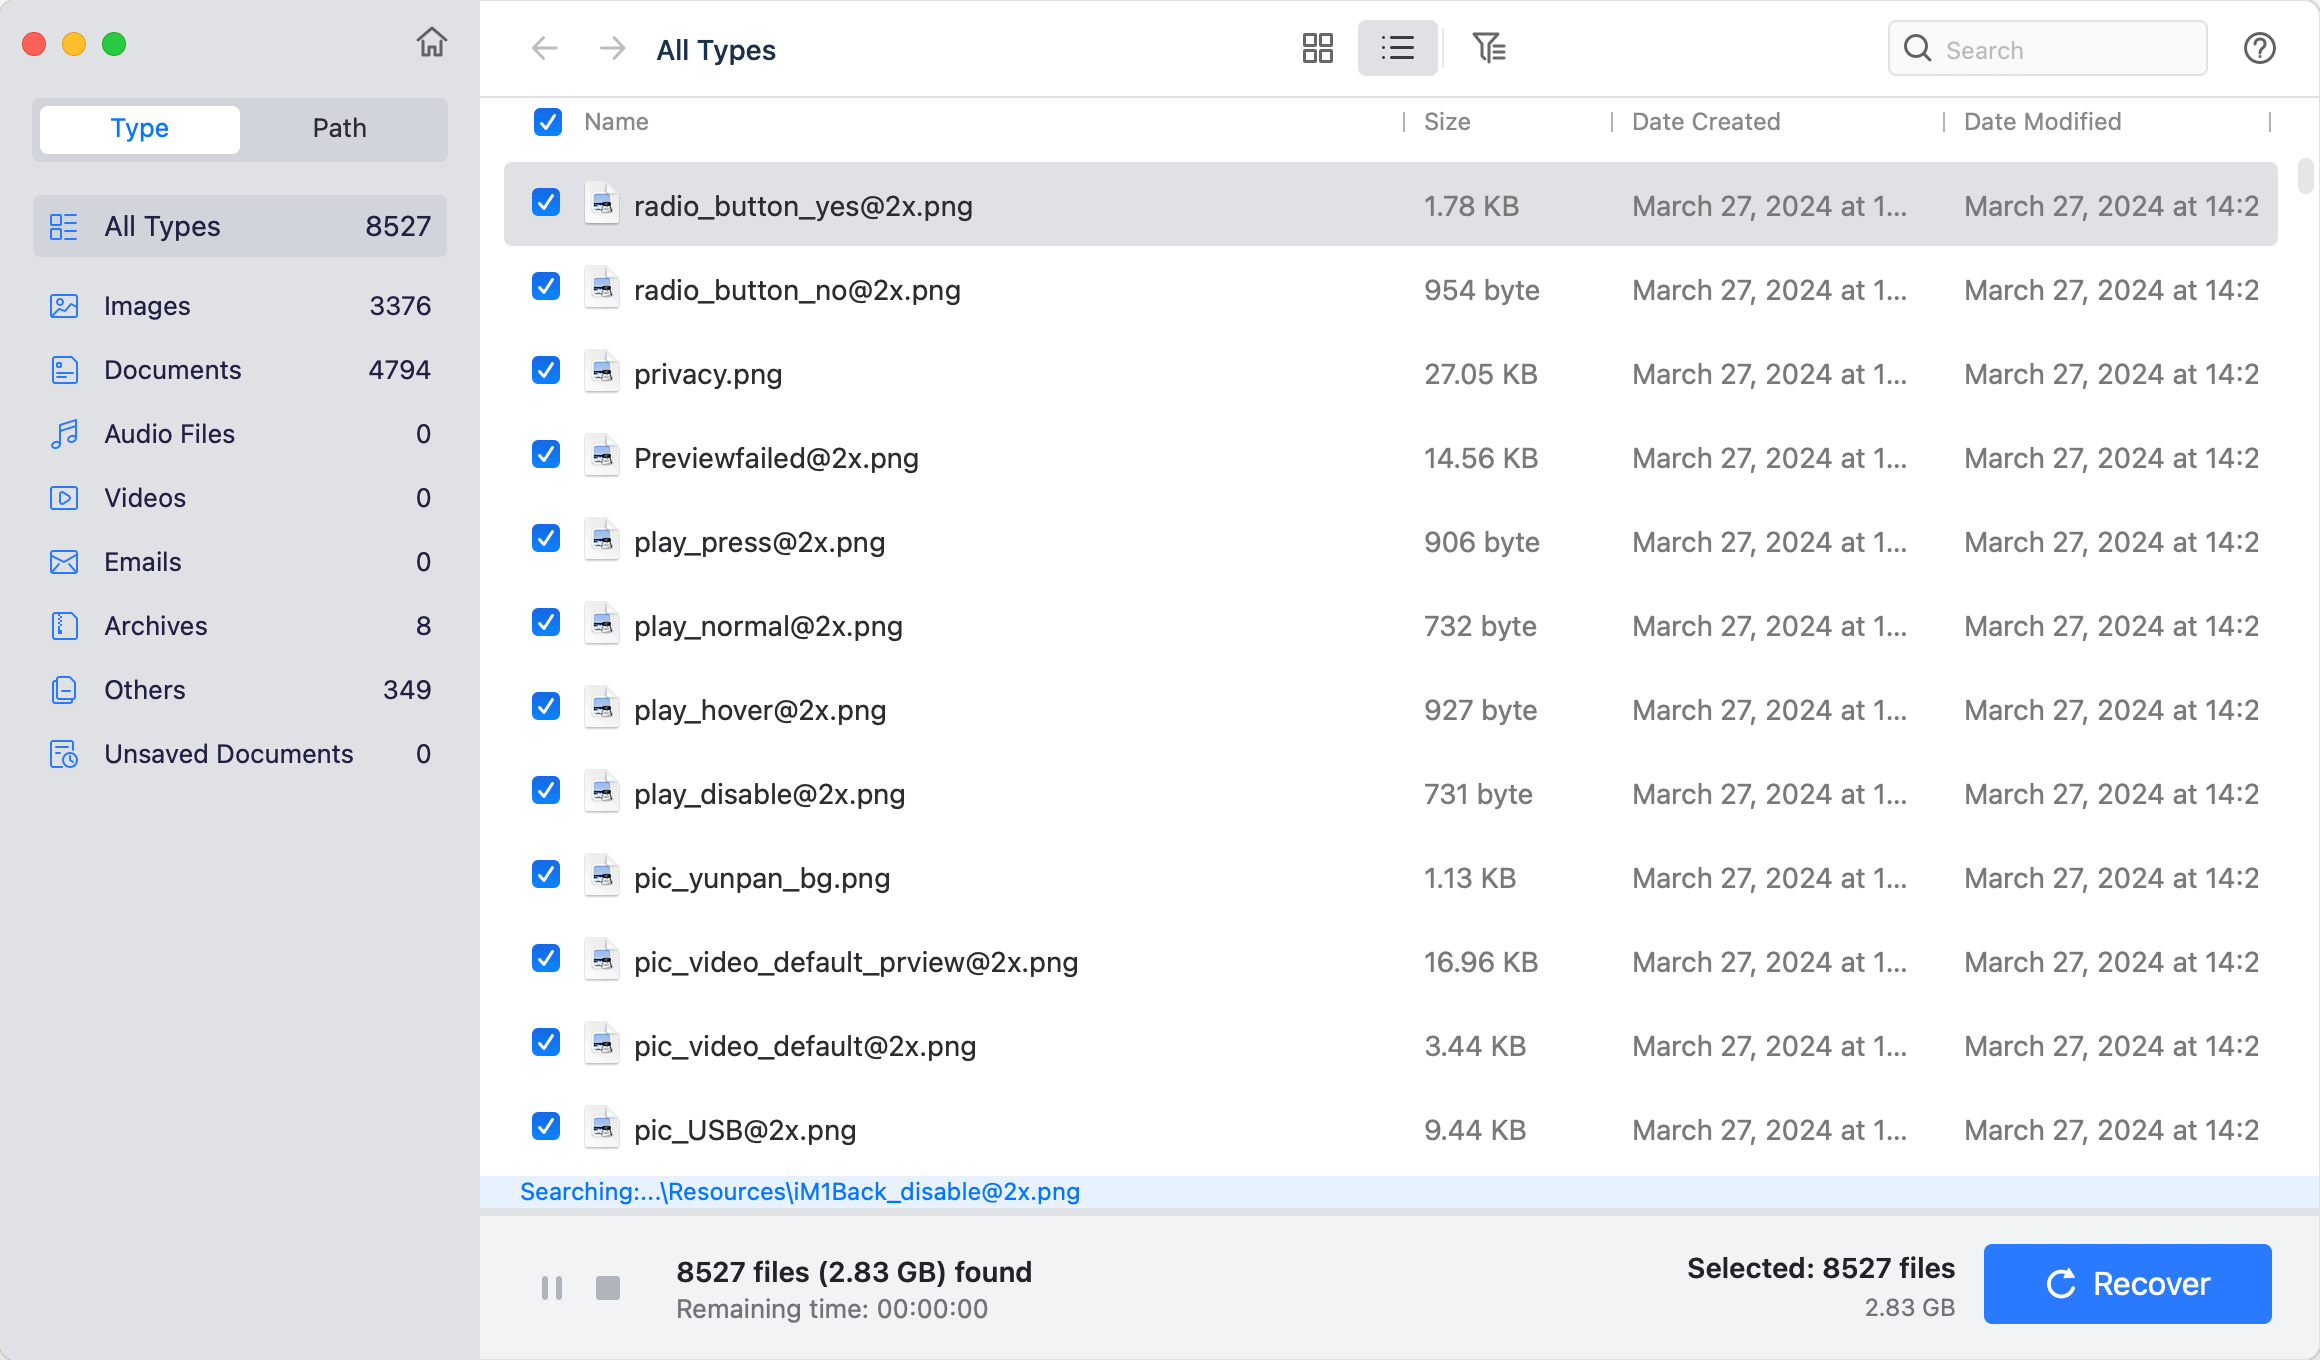
Step 3. Once the scan is completed, you can preview all recoverable files. Then select the wanted files and save them.

Format and Unformat WD Elements External Hard Drive on Mac FAQs
1. How to format WD Elements external hard drive on Mac?
Here are the steps you need to do to utilize your Mac's Disk Utility to format your WD Elements drive.
- Connect the WD Elements external hard drive to your Mac. Once the drive has been detected and mounted, a hard disk icon will show on your desktop and Finder.
- Second, go to Launchpad and find Disk Utility, open it.
- Select the WD Elements external hard drive, click Erase.
- Then select a file system and give it a new name.
- Click Erase again.
- Once the process gets finished, click on Done button.
2. How to unformat WD Elements external hard drive on Mac?
If you want to recover lost data from a formatted WD Elements external hard drive, just try Mac data recovery software. It will scan the formatted WD Elements external hard drive and find all recoverable files.
3. How to use NTFS WD Elements external hard drive on Mac without formatting?
NTFS file system is read-only on Mac. If you want to use NTFS WD Elements external hard drive on Mac and you don’t want to format it, you can install a third-party NTFS driver on Mac.
- Download and install the WD NTFS driver on Mac.
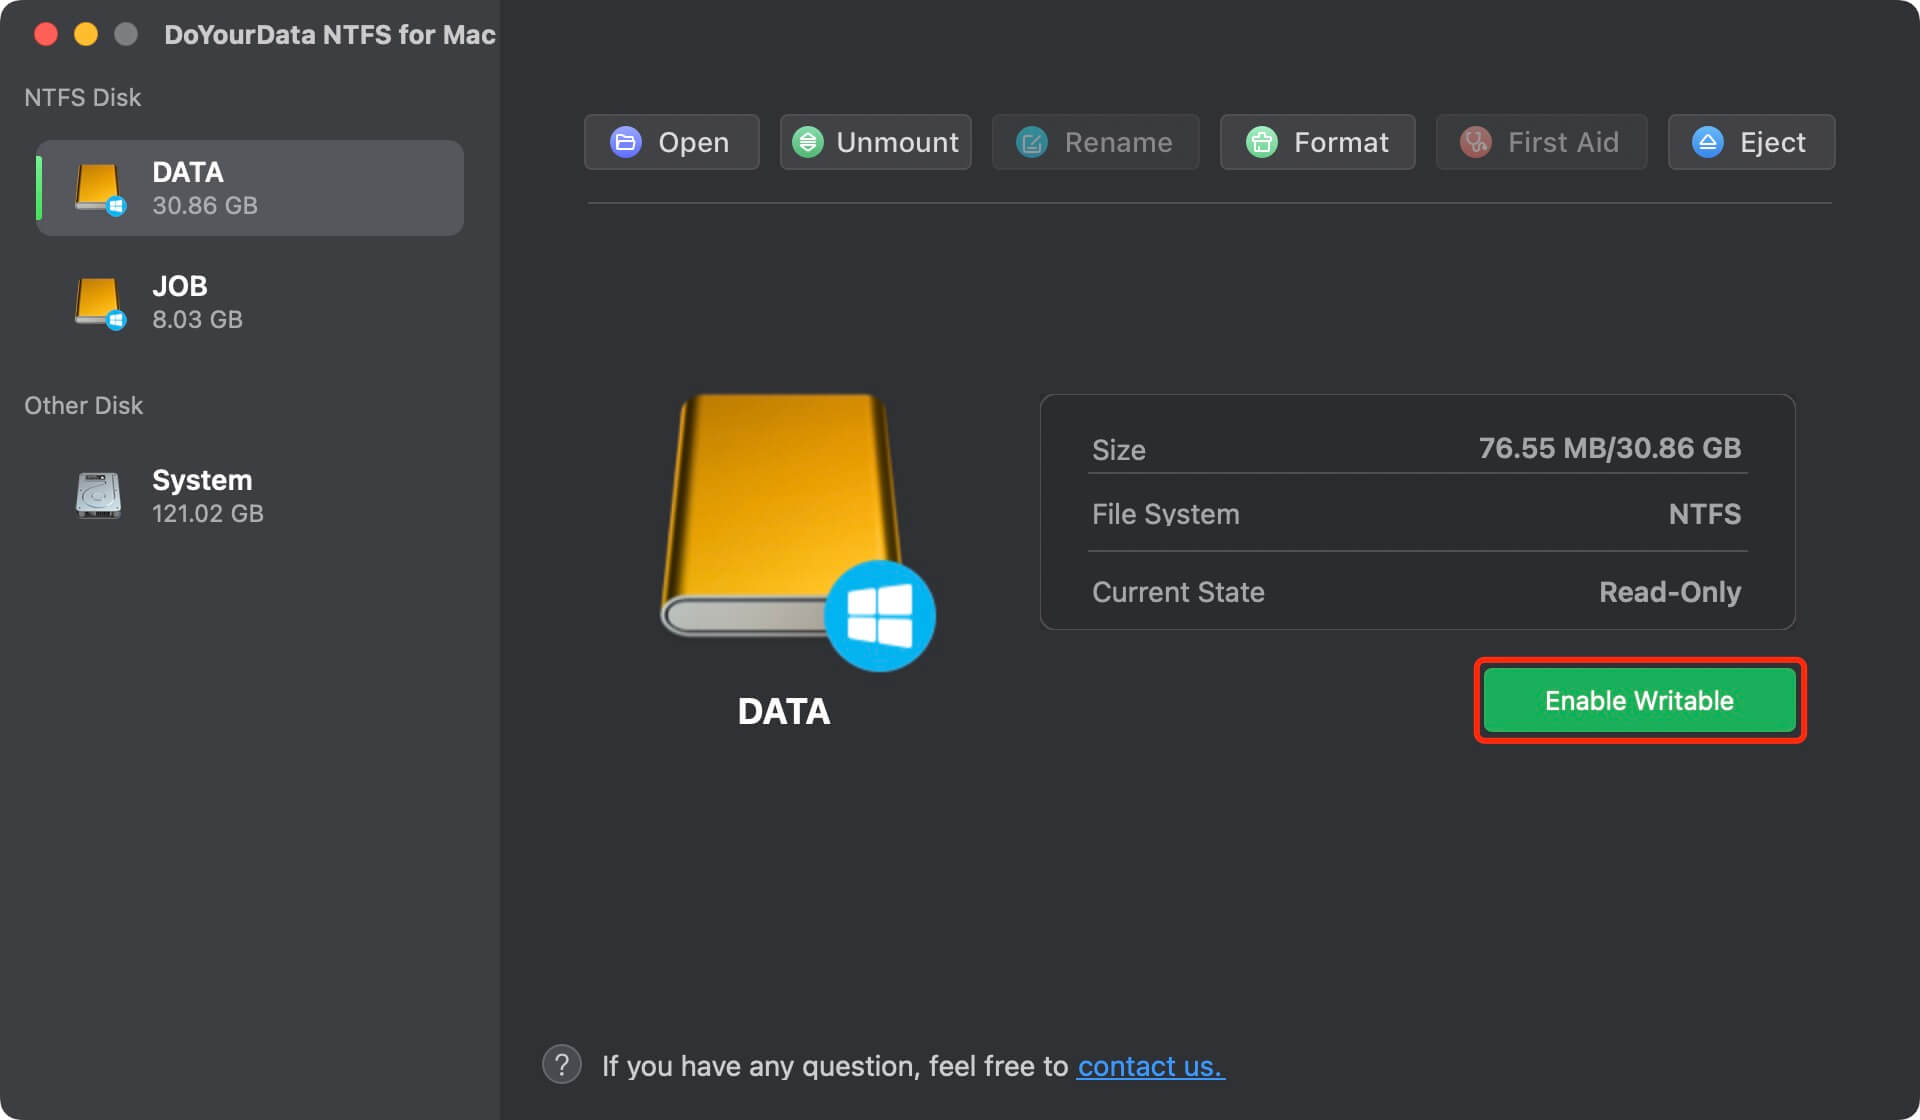
- Open the NTFS driver and select the WD Elements external hard drive.
- Click Enable Writable to grant full read-write access to NTFS drives on Mac.
4. How to wipe WD Elements external hard drive before selling or donating?
Even you have erased the WD Elements external hard drive using Disk Utility, the lost data still can be recovered by data recovery software. If you will sell or donate your WD Elements external hard drive, you’d better permanently destroy all sensitive data stored on it.
Mac data eraser offers certified data erasure method to help Mac users securely and permanently erase data.
- Download and install DoYourData Super Eraser for Mac.
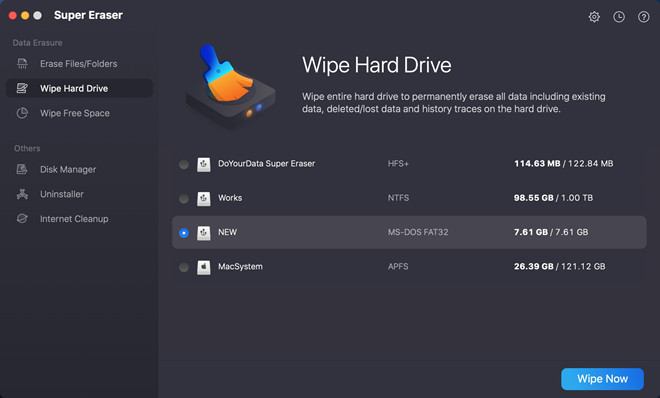
- Open DoYourData Super Eraser for Mac, select data erasure mode - Wipe Hard Drive.
- Select the WD Elements external hard drive and click Wipe Now button.
- Permanently wipe all data from the WD Elements external hard drive.
Conclusion:
Even though WD Elements hard drives are widely used, the NTFS format employed by default is not compatible with Mac systems. That renders the drives completely useless to Mac users. Converting WD Elements hard drives to a macOS-compatible format is necessary before they can be used on a Mac. This guide discusses formatting a WD Elements drive on a Mac. If you haven't backed up your WD hard drive before formatting it, don't worry; you can easily retrieve the data with Mac unformat software.
Written & Updated by Justin Kenny
Justin Kenny is a writer & editor of DoYourData. He joined DoYourData in 2016 and focuses on writing articles about Windows data recovery, Mac data recovery, external device data recovery, hard drive clone, data erasure, Mac cleanup, computer issue fixes, etc. He is a super fan of Apple devices and is big on testing new digital device and system utility software.