Installation and Activation
Download DoYourData NTFS for Mac from our website, then check the .dmg file in Download folder. Double-click the .dmg file to start installation.

Drag the icon of DoYourData NTFS for Mac to Applications folder.

Go to Launchpad, find DoYourData NTFS for Mac and open it. Then click on the Activation button, it will pop up a activation window. Enter your license code and click on Activation button to activate this software to full version.
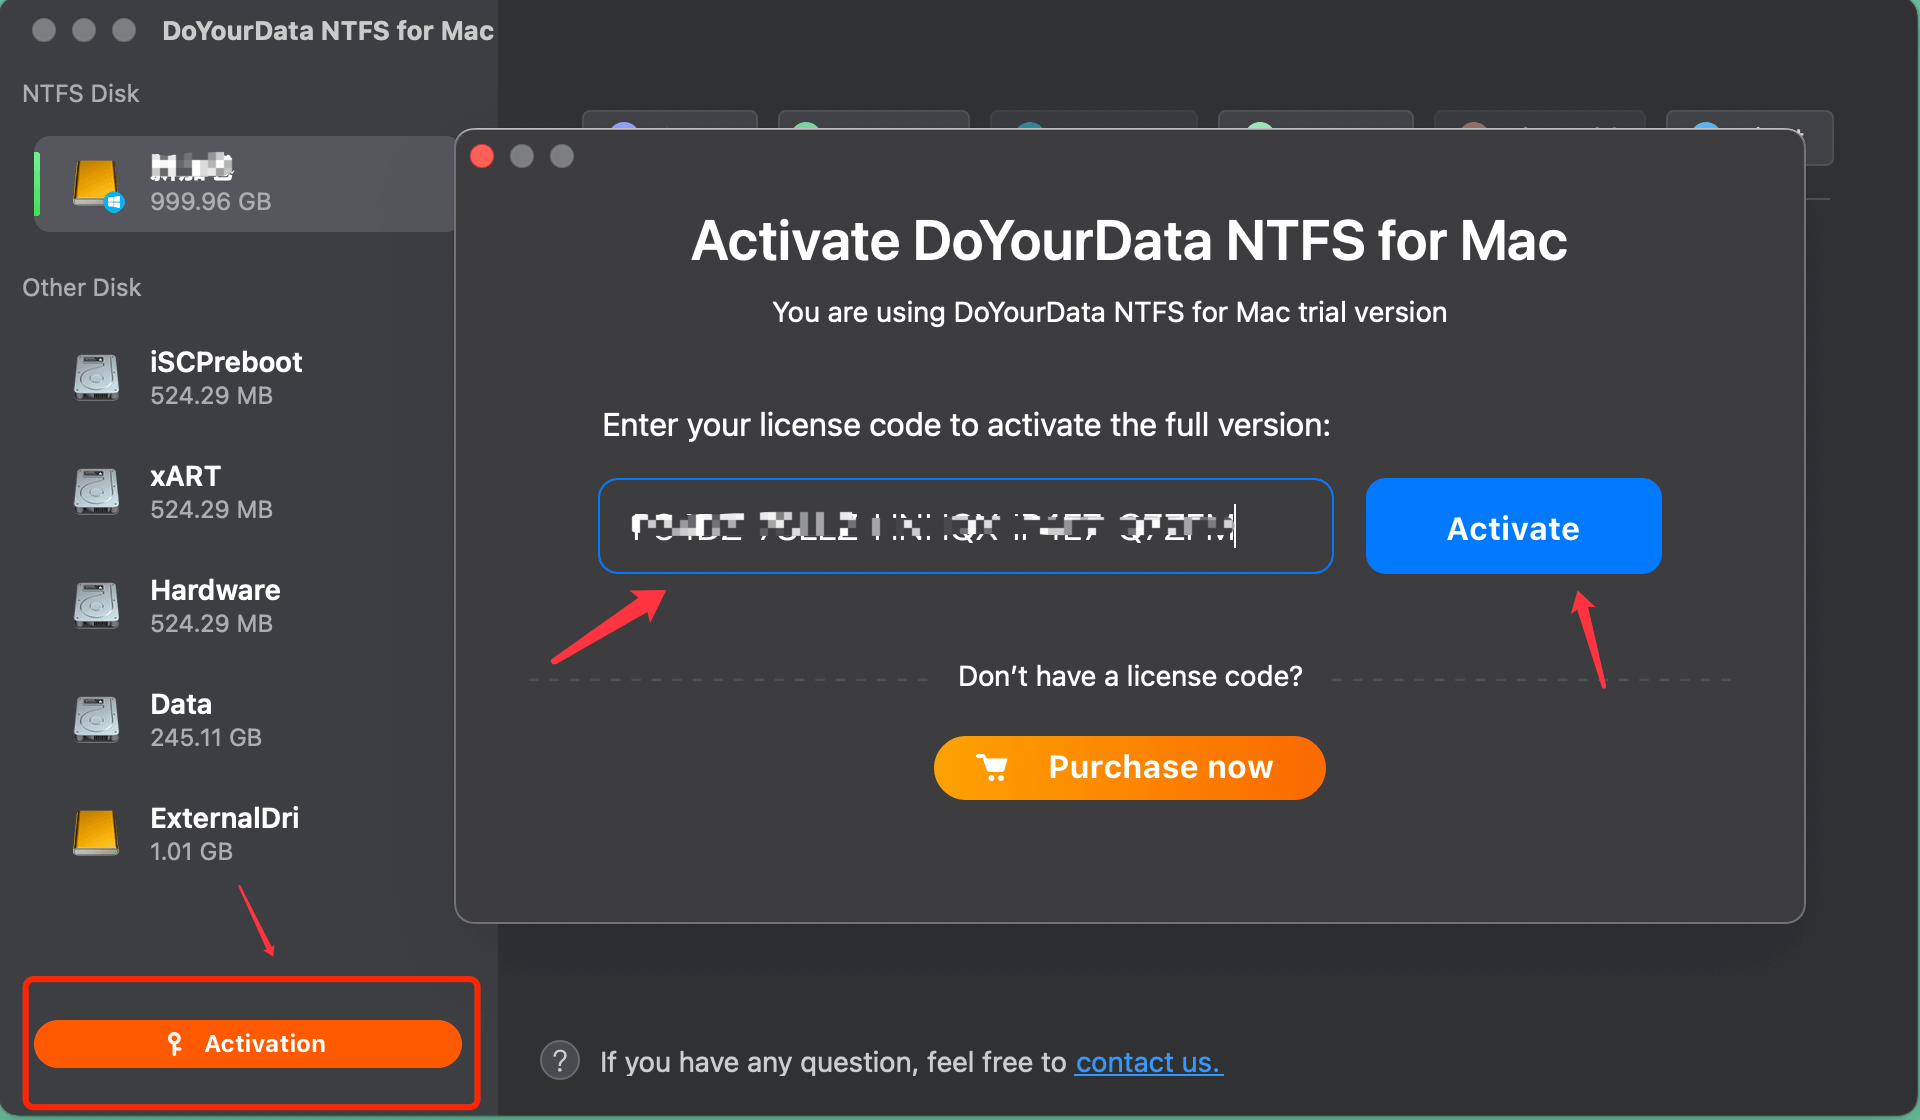
Note: the activation requires network connection. And if you are using VPN, just turn it off when you are activating this software.
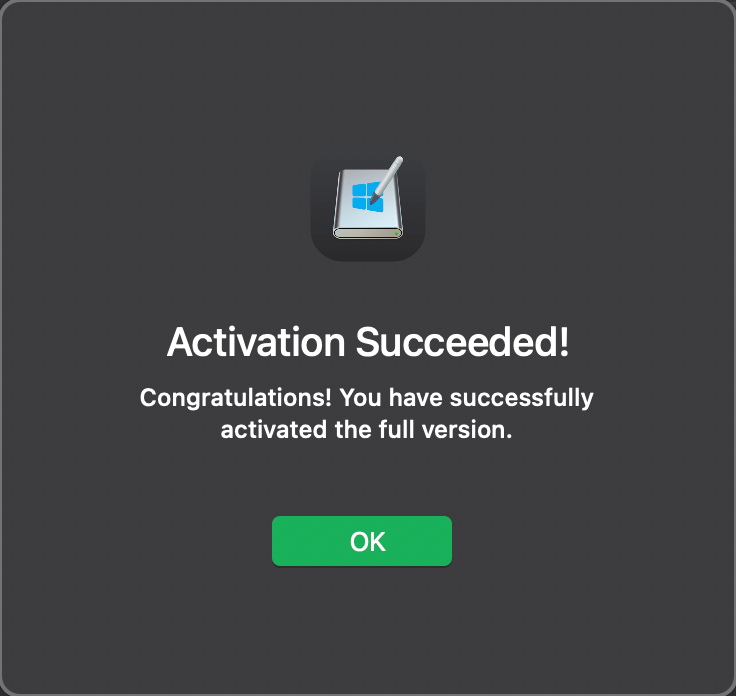
Now, the software is activated successfully. You can use it to manage NTFS drives and other drives on your Mac.
Allow DoYourData NTFS for Mac on Your Mac
Just download and install DoYourData NTFS for Mac on your Mac, then it will list all NTFS drives and other disk drives on your Mac. When you use it for the first time, you should get the NTFS for Mac permission from your Mac so that it can grant full read-write access to NTFS drives on Mac.
For Intel-based or Apple T2 Security Macs:
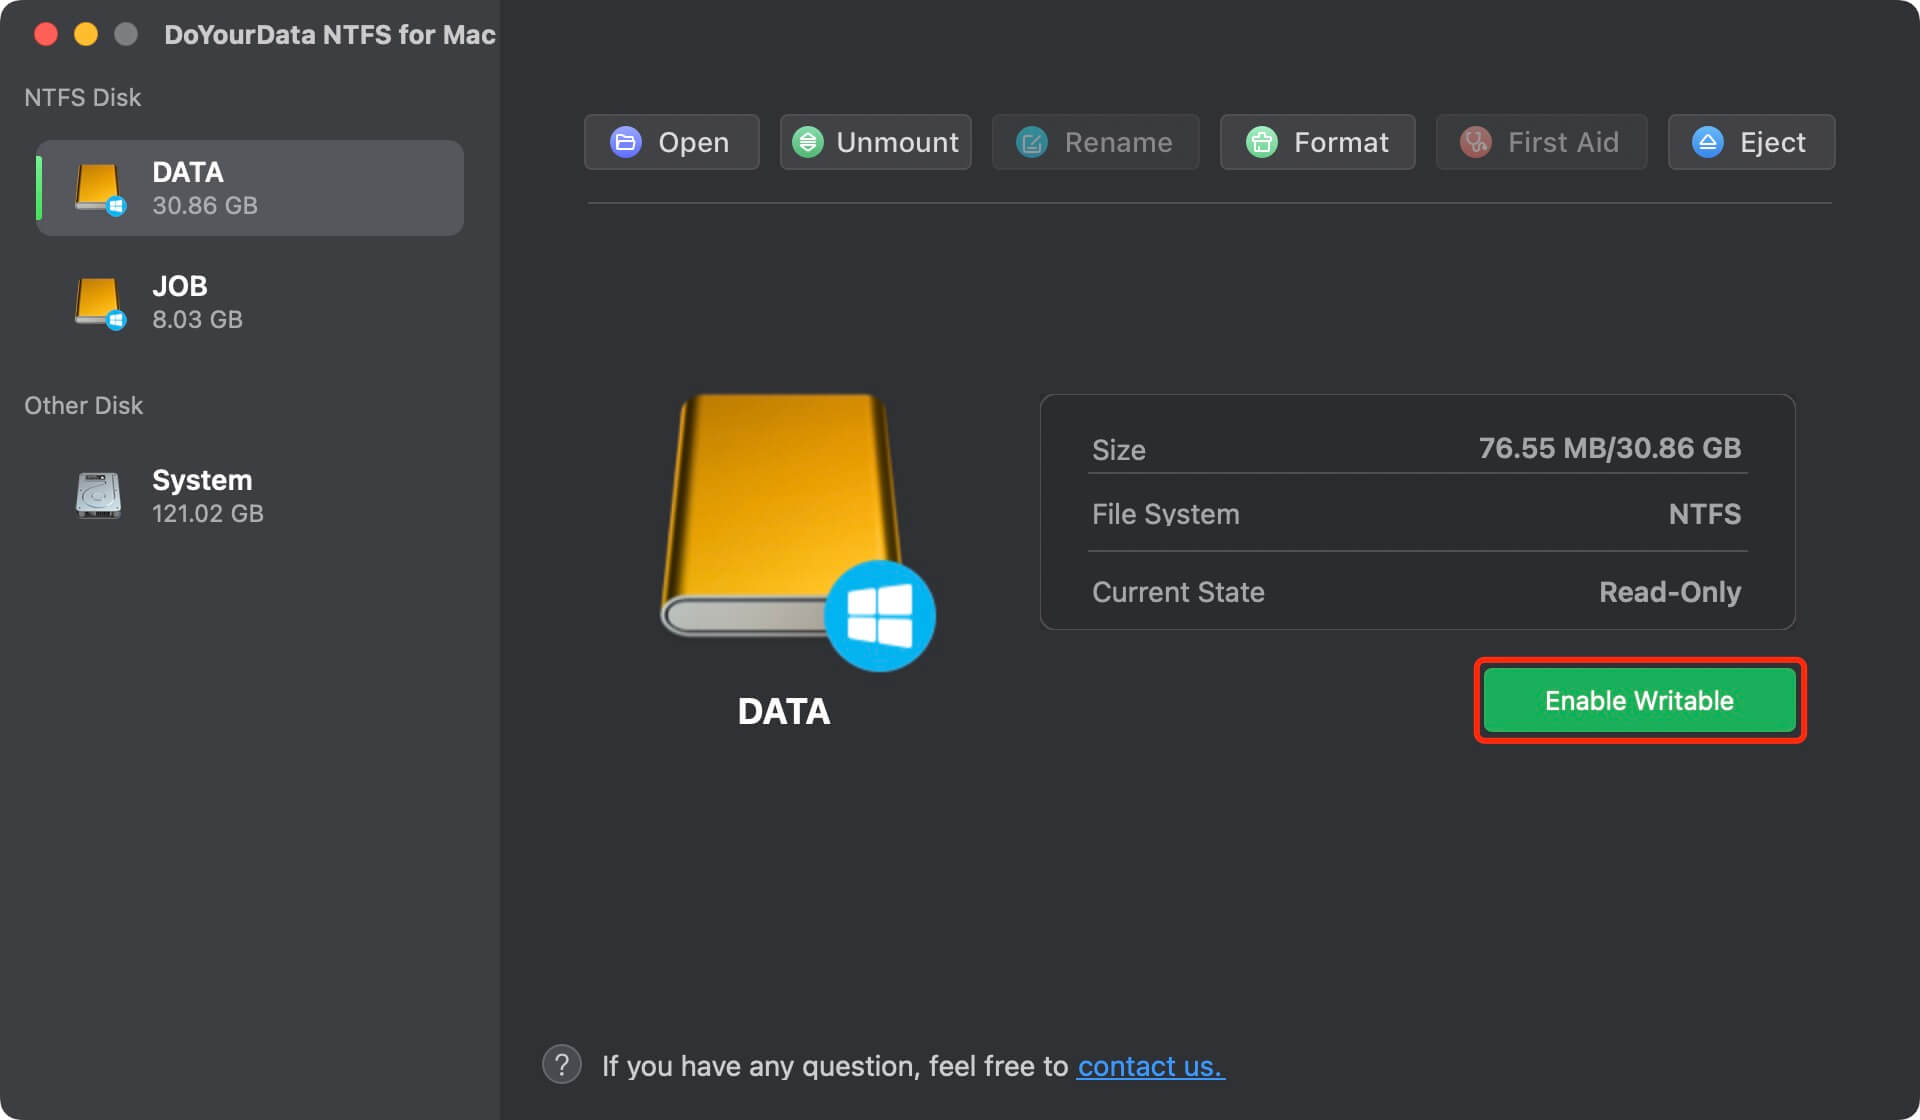
Step 1. Open DoYourData NTFS for Mac from Launchpad, under NTFS disk, you will see the connected NTFS drive and select it. You will see it is a Read-only drive, click "Enable Writable".
Step 2. Then open System Preferences > Security & Privacy > General. Click on Allow button.

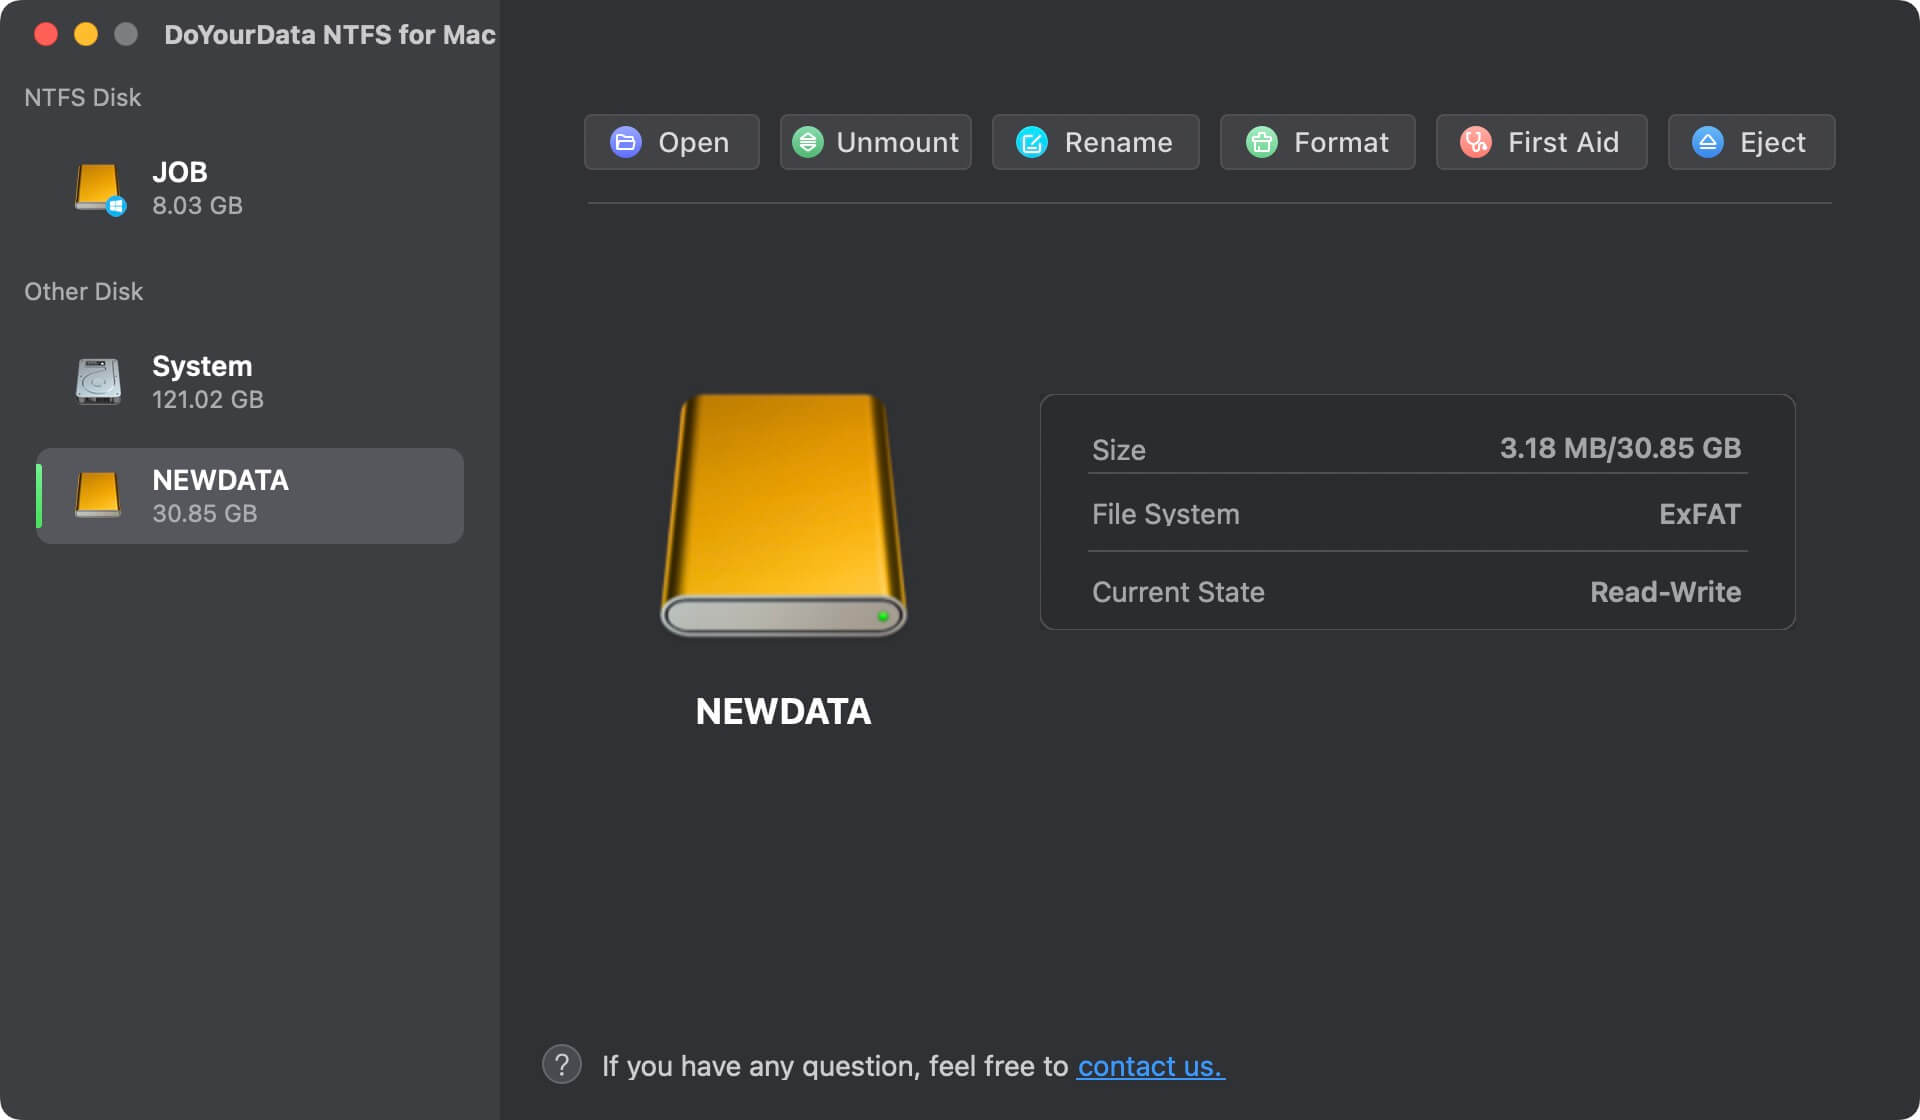
Step 3. Restart your Mac, open DoYourData NTFS for Mac again, click "Enable Writable" for NTFS drive. Now, you can use any NTFS drive on your Mac without any limitation.
For Apple silicon Macs:
Step 1. Open DoYourData NTFS for Mac from Launchpad, under NTFS Disk, find the NTFS drive and select it. Click “Enable Writable”.
Step 2. Restart your Mac, hold on Power button to enter into macOS Recovery mode. Select Options, and click on Continue button.

Step 3. Under Utilities, select “Startup Security Utility”.

Step 4. Select the startup disk, click “Security Policy...”

Step 5. Select “Reduced Security” and “Allow user management of kernel extensions from identified developers” then click on OK button to save the settings.

Step 6. Restart your Mac, then open Donemax NTFS for Mac again. Select the NTFS drive, click “Enable Writable” again.
Step 7. Open System Settings.

Go to Privacy & Security > Security, click on Allow button.

Step 8. Restart your Mac, open DoYourData NTFS for Mac, find and select the NTFS drive, click "Enable Writable", then you can use NTFS drives on your Mac without any limitation.
Manage NTFS Drives on Mac
When you connect an external hard drive to your Mac, you can check if it is an NTFS dive. If it is an NTFS drive, open DoYourData NTFS for Mac, find it and click “Enable Writable”, then you can write data to the NTFS drive and edit, move, delete or add new data to the NTFS drive without any limitation.
DoYourData NTFS for Mac also allows you to open, rename, mount/unmount, format, First Aid or eject the NTFS drive.

Manage Other Drives on Mac
Under Other Disk, you can check all non-NTFS drives on your Mac, you can open, rename, format, first aid, mount/unmount, eject the drives.
Please feel free to contact us by sending an email to support@doyourdata.com if you have any question.