Quick Navigation:
- What Is Full Disk Access on Mac?
- When to Give An App Full Disk Access on Mac?
- Steps to Get Full Disk Access
- Unlock NTFS Access on Mac
- Conclusion
To get the most out of your Mac, you must learn how to use its security tools. Full Disk Access is one of the most important ones. Think of your Mac as a stronghold that keeps unwanted people from getting into your info. As the castle's guardian, Full Disk Access ensures that only trusted programs can move easily through its halls.
Your Mac protects the security of your personal information, but sometimes you need to give certain apps VIP access. This guide is like a treasure map; it will show you how to give someone Full Disk Access. You don't have to be a tech whiz to do these easy things. They will make your favorite apps work better and your Mac experience smoother.
What Is Full Disk Access on Mac?
The security feature known as Full Disk Access was added to macOS Mojave (10.14) and subsequent versions. It safeguards against harmful software and other potential dangers and stops unauthorized users from accessing sensitive system regions. Only mandatory system processes are granted Full Disk Access by default.
Full Disk Access isn't always necessary for some valid programs or processes. Backup utilities, disk management tools, antivirus software, and similar programs may require this permission to function properly.
When to Give An App Full Disk Access on Mac?
To ensure that software may access certain regions of your disk for its intended purpose, you should grant it Full Disk Access on your Mac. Full Disk Access should be considered in the following situations:
- Backup and Restore: To make full backups and recover your system, backup applications such as Time Machine frequently need Full Disk Access.
- Disk Management: Many utilities may require Full Disk Access to format, partition, and repair disks.
- Security Software: To check your system for hazards, antivirus and anti-malware solutions may demand Full Disk Access.
- Third-Party Apps: Some third-party apps may request Full Disk Access to provide expanded features, particularly those dealing with file management or organization.
Steps to Get Full Disk Access
A critical step in granting specific apps the authority to access sensitive regions of your disk on a Mac is to grant Full Disk Access. To help you through this process, I have included a full guide:
Access System Settings:
Pick up where you left off by clicking on the Apple logo in the upper left corner of your screen. After you see the menu bar, choose "System Settings." Your Mac's configuration options will pop up in a new window.

Navigate to Security & Privacy:
Locate the "Security & Privacy" icon inside the System Settings or Preferences window and click on it. In this area, you can adjust your Mac's security settings.

Locate Full Disk Access:
Go to the "Full Disk Access" option in the Security & Privacy window once you've unlocked the settings. You may access the options that pertain to your privacy in the menu on the left. Keep scrolling until you reach "Full Disk Access." Selecting it will show you which apps have access to this feature.
Enable Changes:
You must unlock changes explicitly for Full Disk Access before you may add or uninstall programs. After you've entered your administrator password twice, click the padlock icon again, then click the "Unlock" button. Make sure you have the right permissions to change the Full Disk Access settings by following this step.

Add Applications:
Click the plus sign (+) underneath the application list to assign Full Disk Access to that app. A file dialog box will open to access the program needing Full Disk Access. To add the program to the list, click "Open" after you've made your selection.
Restart Applications:
Once you've added a program to the Full Disk Access list, it's recommended to exit and then restart the app. That way, the modifications will be applied instantly, and the app can access the required parts of your disk without any problems.
Unlock NTFS Access on Mac
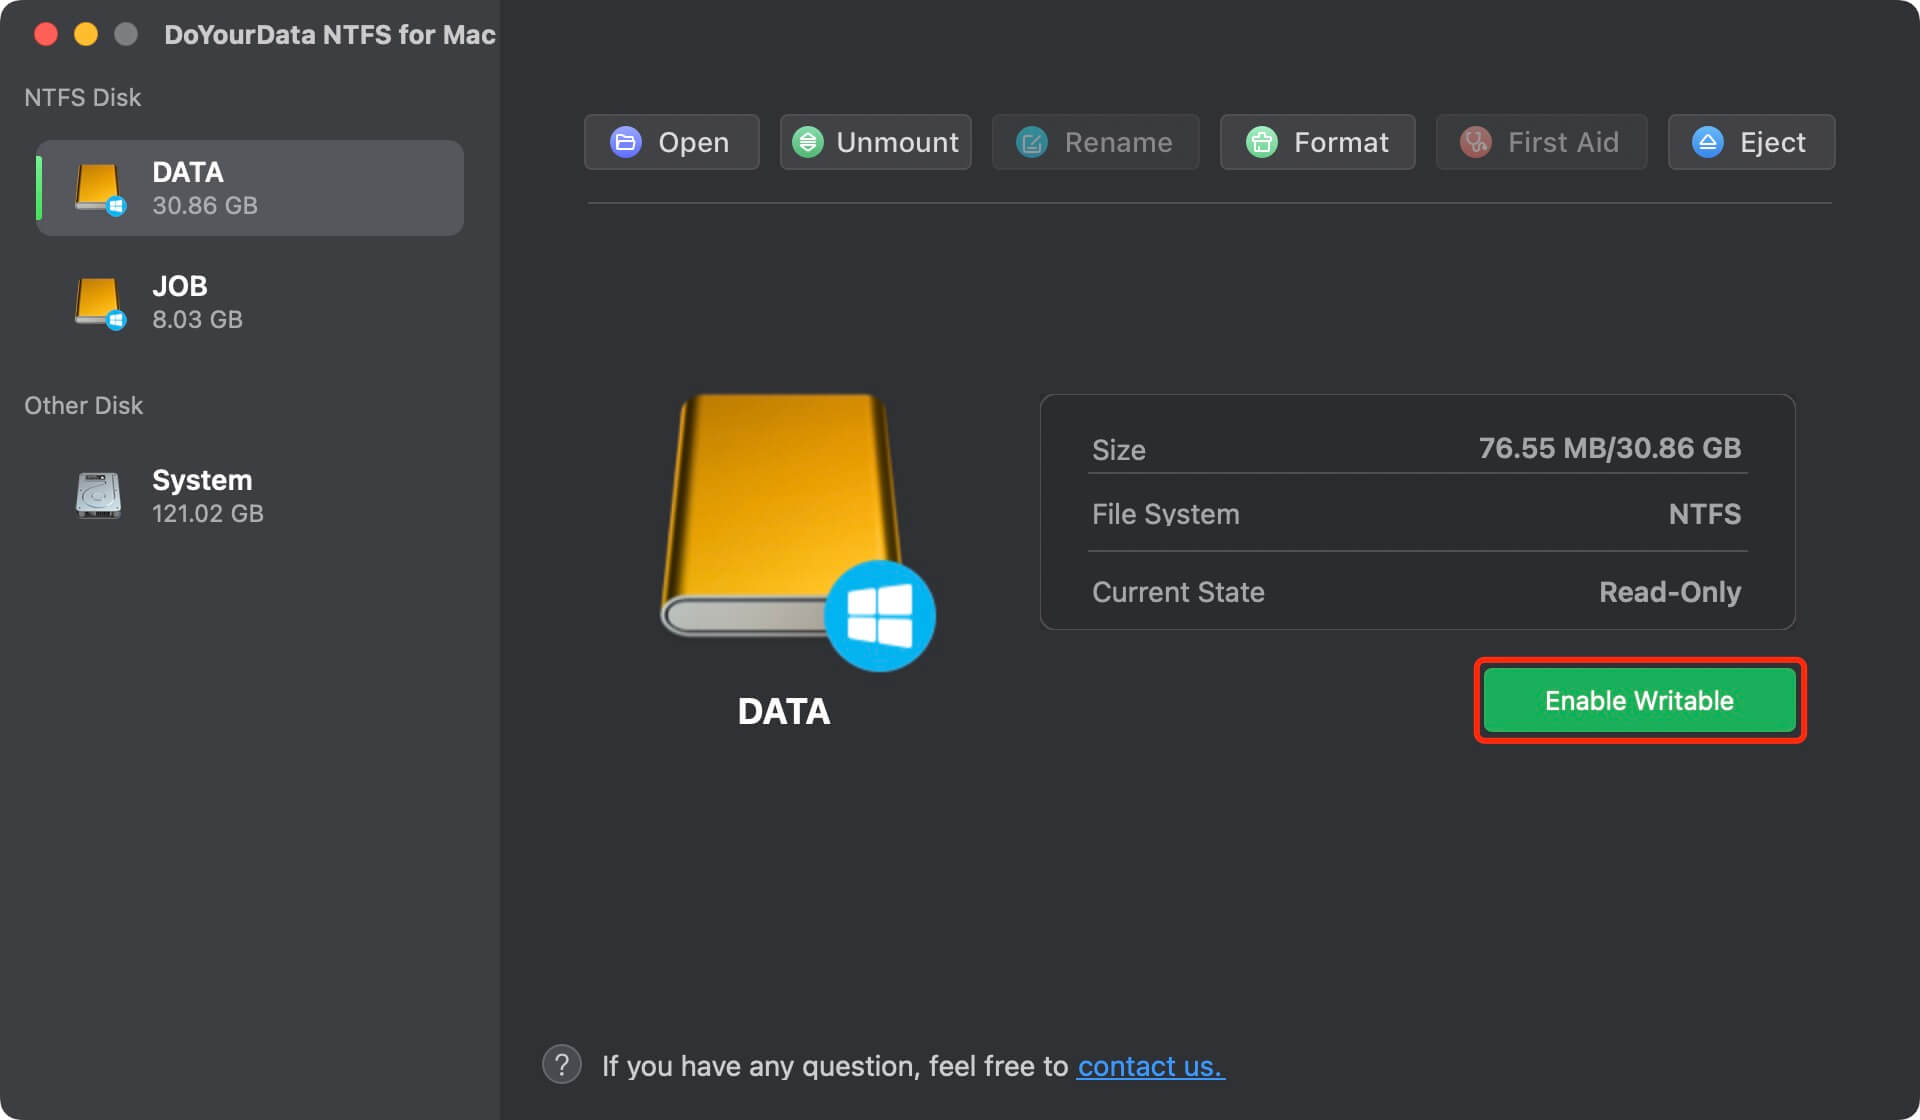
If an external hard drive or USB flash drive has been formatted to NTFS, you can only read the drive, but can’t write data to it. To get the full disk access to the NTFS drive on Mac, you can download and install a third-party NTFS for Mac software tool, and run it to enable full read-write access to the NTFS drive on Mac.
Step 1. Download and install DoYourData NTFS for Mac tool on your Mac.
Step 2. Open this tool, then select the NTFS drive, click on Enable Writable for the drive.
Conclusion:
Full Disk Access is an important security feature on macOS, and you need to know how to give it to certain apps for the system to work properly. You can ensure your Mac is safe and works well by following the steps in this guide and knowing what to do if something goes wrong. When giving Full Disk Access, you should always be careful and only do so to applications from a known source to protect your data and keep your system running smoothly.
If you want to get full read-write access to a NTFS drive on your Mac, just try NTFS for Mac tool. This tool can enable full read-write access to any external drive which has been formatted to NTFS. It also can help to mount NTFS drive on Mac or repair a crashed SSD, etc.
Written & Updated by Ricky Lin
Ricky Lin is an senior editor of DoYourData who lives in Adelaide, Australia. He is interested in writing technology articles related with data recovery, computer issue fixes, disk clone, iPhone data recovery, video edit, Mac optimization, etc. He Joined DoYourData in 2019 and have written 500+ articles to help both Windows users and Mac users to solve data or computer problems.