How to Permanently Erase Videos from a Canon Digital Camcorder?
Before you sell, donate or dispose of your Canon digital camcorder, you should permanently erase all videos (including existing videos and deleted videos) to prevent potential data recovery. Data erasure program - DoYourData Super Eraser can help you securely and permanently erase videos or other data from your Canon digital camcorder, beyond the scope of data recovery.
![]() Updated by Shirly Chen on September 6, 2024
Updated by Shirly Chen on September 6, 2024
Quick Navigation:
- Understanding Video Storage in Canon Digital Camcorders
- Standard Deletion vs. Permanent Erasure
- Methods to Permanently Erase Videos from Canon Digital Camcorder
- Best Practices for Data Security
- Conclusion
In the digital age, managing and securing personal media files has become increasingly important. Whether you're a professional videographer or a casual user, the videos stored on your Canon digital camcorder might contain sensitive or private moments that you don't want to be recovered by others. Simply deleting files isn't enough to ensure they are gone for good; data can often be recovered with the right tools. This article dives into the importance of permanently erasing videos from your Canon digital camcorder, outlining various methods to ensure that your data is securely and irretrievably erased.
Understanding Video Storage in Canon Digital Camcorders
Canon digital camcorders typically store videos on two types of media: SD cards and internal memory. Understanding where your videos are stored is the first step in securely erasing them.
- SD Cards: Most Canon camcorders use SD cards for video storage. These cards are portable, allowing easy transfer of files to other devices, but also pose a risk if not properly managed. Simply removing the SD card and deleting files from a computer might not be enough to prevent data recovery.
- Internal Memory: Some Canon camcorders come with built-in internal memory. This storage type is less accessible, meaning you must connect the camcorder to a computer or use its interface to manage files. Again, simply deleting files doesn't guarantee they are permanently erased.
Knowing where your videos are stored is crucial because the method you choose to erase them will depend on the type of storage.
Standard Deletion vs. Permanent Erasure
Many people mistakenly believe that deleting a file from a digital device, whether through the device's interface or by formatting the storage, is enough to make the file disappear. However, standard deletion often only removes the file's entry in the file system, making it invisible to the user but not actually erasing the data from the storage media. This leftover data can often be recovered using specialized data recovery software.
- Standard Deletion: When you delete a file using the camcorder's delete function or by dragging it to the trash bin on your computer, the file remains on the storage device until new data overwrites it. Until then, it's vulnerable to recovery by anyone with access to the storage media.
- Permanent Erasure: Permanent erasure, on the other hand, involves overwriting the existing data with random data, ensuring that the original file can no longer be recovered. This process is crucial if you're looking to securely erase sensitive videos.
Understanding the difference between these two methods is vital for ensuring that your videos are truly gone when you no longer need them.
Methods to Permanently Erase Videos from Canon Digital Camcorder
Permanently erasing videos from your Canon digital camcorder can be done in several ways, depending on the type of storage and the tools at your disposal. Below are the most effective methods:
Method 1. Use Canon Camcorder's Built-in Features
Many Canon digital camcorders are equipped with built-in features that allow you to format or securely erase data stored in the internal memory or on an SD card. This method is convenient and doesn't require additional software, making it an excellent option for users who want to quickly and easily erase their videos. Here's a step-by-step guide on how to use your camcorder's settings to permanently erase data:
Step 1. Power On the Camcorder.
Begin by turning on your Canon camcorder. Make sure it has sufficient battery power, or connect it to a power source to avoid interruptions during the process.
Step 2. Access the Camcorder's Menu
Once the camcorder is powered on, navigate to the main menu. This can usually be done by pressing the "Menu" button on the side or back of the camcorder. The location of the button may vary depending on the model, so refer to your user manual if needed.
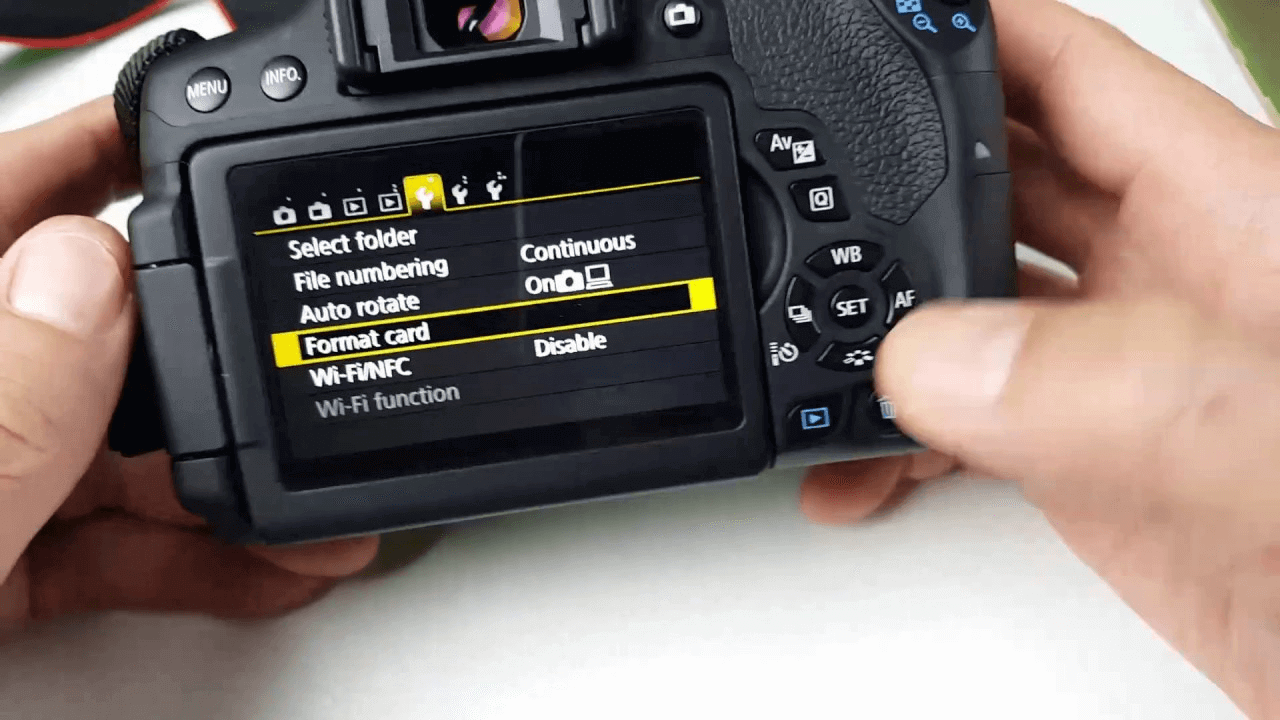
Step 3.a Locate the Format or Erase Option
Within the menu, look for an option related to managing storage. This is often labeled as "Format xxx," "Erase All," "Initialize," or something similar. This option is typically found under the "Settings," "Tools," or "System" sections of the menu.
- Format: This option will reformat the selected storage media, effectively erasing all data on it.
- Erase All: This may be presented as an alternative to formatting, allowing you to delete all files without reformatting the storage.
Step 4. Select the Storage Media.
If your camcorder uses both internal memory and an SD card, you will be prompted to choose which storage location you want to format or erase. Select the appropriate option based on where your videos are stored.
- Internal Memory: Choose this if your videos are saved directly on the camcorder's built-in memory.
- SD Card: Select this option if your videos are stored on an SD card inserted in the camcorder.
Step 5. Confirm the Action.
After selecting the storage media, the camcorder will likely ask you to confirm your choice. A warning message will appear, indicating that all data will be lost and asking if you want to proceed. This is an important step to prevent accidental deletion.
- Double-Check: Make sure you've backed up any videos you want to keep before proceeding.
- Confirm: Once you're certain, confirm the action to start the formatting or erasure process.
Step 6. Wait for the Process to Complete.
The camcorder will take a few moments to complete the process, depending on the amount of data and the type of storage being erased. During this time, it's crucial not to turn off the camcorder or remove the SD card, as doing so could interrupt the process and potentially damage the storage media.
Step 7. Verify the Erasure.
After the process is complete, you can verify that the videos have been successfully erased by attempting to access them through the camcorder’s playback mode. If the format or erase process was successful, the storage should be empty, with no files available for playback.
Step 8. Optional - Perform a Secure Format (If Available).
Some Canon camcorders may offer a "Secure Format" or similar option, which goes a step further by overwriting the storage with random data to prevent recovery. If your camcorder has this feature and you're concerned about data security, it's worth using.
Note: The deleted videos are not lost for good and can be recovered by data recovery software. If you want to permanently erase all videos from your Canon digital camcorder, try data erasure software.
Method 2. Use Third-Party Data Erasure Software
For a more secure erasure, especially if you're dealing with particularly sensitive videos, third-party data erasure software is the best option. This software can overwrite the storage media with random data, making recovery nearly impossible.
Step 1. Download and Install Software.
Choose a reputable data erasure software compatible with your operating system.
DoYourData Super Eraser is one of the best data erasure programs. It is 100% safe and easy-to-use. With this software you can securely and permanently erase videos or other files from your Canon digital camcorder, ensure no data is recoverable.
DoYourData Super Eraser
- Selectively shred videos/files from Canon digital camcorder.
- Wipe all data from Canon digital camcorder.
- Wipe deleted/lost videos from Canon digital camcorder.
Step 2. Connect the Camcorder to the Computer.
Use a USB cable to connect your Canon camcorder to your computer. Ensure the computer recognizes the device and the storage media appears as an external drive.
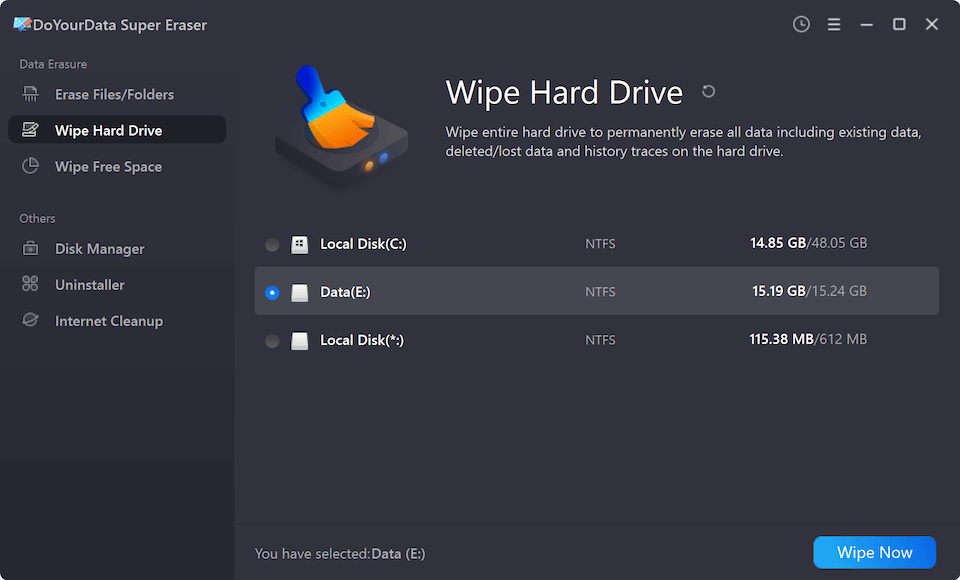
Step 3. Select the Storage Media.
Open the data erasure software, choose Wipe Hard Drive mode and select the storage media associated with your camcorder. This could be the internal memory or an SD card. Then click on Wipe Now button.
Step 4. Choose the Erasure Method.
DoYourData Super Eraser offers several data erasure standards such as HMG Infosec, NIST 800-88, Peter Gutmann's algorithm, DoD 5220.22-M, U.S. Army AR380-19. Just select a data erasure standard.

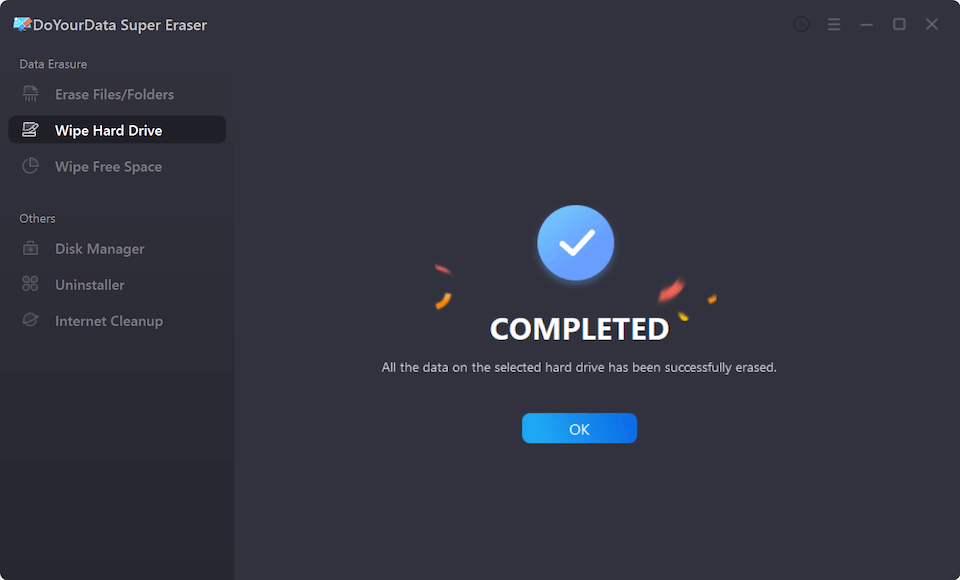
Step 5. Execute the Erasure.
Confirm your choices and start the erasure process by clicking on Continue button. This can take anywhere from a few minutes to several hours, depending on the size of the storage and the erasure method chosen.
Method 3. Physically Destroy the Storage Media [Not Recommended]
If you want to ensure that your videos are permanently erased beyond any possible recovery, physically destroying the storage media is the ultimate method. This should be a last resort, used only when the storage media is no longer needed for any other purpose.
Step 1. Remove the SD Card.
If your videos are stored on an SD card, remove it from the camcorder. If they're on internal memory, this method may not be applicable unless you're prepared to destroy the entire camcorder.
Step 2. Destroy the SD Card.
There are several ways to physically destroy an SD card, such as cutting it into pieces, using a hammer to crush it, or burning it (in a safe and controlled environment). The goal is to make the card unreadable.
Step 3. Dispose of the Remains Safely.
Once the card is destroyed, dispose of the remains in a way that ensures they can't be reassembled or recovered. If you’re unsure how to do this safely, consult a professional service.
While extreme, this method guarantees that no one will be able to recover your videos.
Best Practices for Data Security
In addition to securely erasing videos, there are several best practices you should follow to ensure your data remains secure.
- Regular Backups: Before erasing videos from your Canon digital camcorder, make sure you have backed up any that you may need in the future. Use encrypted storage solutions to keep your backups secure.
- Erase All Copies: Be sure to erase all copies of the videos, not just those on your camcorder. This includes any backups on computers, external hard drives, or cloud storage.
- Use Trusted Software: When using third-party software, always choose reputable and well-reviewed options. Untrusted software could introduce vulnerabilities or fail to fully erase your data.
- Update Firmware: Keep your Canon camcorder's firmware up to date to ensure you have access to the latest security features and improvements.
Conclusion
Permanently erasing videos from your Canon digital camcorder is essential if you want to protect your privacy and sensitive information. Whether you use the camcorder's built-in features, third-party data erasure software, or physical destruction, understanding the methods and best practices is crucial. By following the steps outlined in this article, you can ensure that your videos are securely erased and beyond recovery, giving you peace of mind.
DoYourData Super Eraser
DoYourData Super Eraser, the award-winning data erasure software, offers certified data erasure standards including U.S. Army AR380-19, DoD 5220.22-M ECE to help you securely and permanently erase data from PC, Mac, HDD, SSD, USB drive, memory card or other device, make data be lost forever, unrecoverable!
Written & Updated by Shirly Chen
Shirly Chen has been writing data recovery, data erasure articles for DoYourData over 4 years. She has been working as a professional website content writer & editor for quite a long time. She also writes articles about disk clone, Mac optimization, disk backup, etc.