Put Back Files in Mac Trash Bin Whether You Have Emptied the Files or Not
![]() Updated by Justin Kenny on 2023-01-07
Updated by Justin Kenny on 2023-01-07
Quick Navigation:
- 1. Put Back Files on Mac from Trash
- 2. Fix Put Back Not Working on Mac Trash
- Fix Mac Trash Don't Have A "Put Back" Button
- Fix Can’t Put Back Files in Mac Trash
- Try Picking Just One Item from the Trash and Put Back
- 3. Put Back Files from Emptied Trash Bin
Put Back Files on Mac from Trash
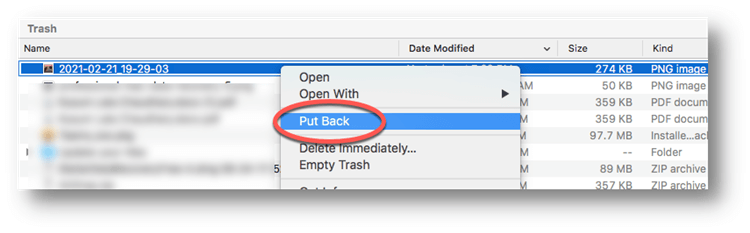
On a Mac, when you delete a file, the file will be moved to the Mac Trash. You can easily put back the deleted file from Trash till you emptied it. For example, open Trash > find and select the deleted file you want to recover > right-click the file icon > select Put Back option, then the deleted file will be put back to the location where you delete it.
However, the "put back" option was missing from the contextual menu when we attempted to restore many files and directories. Have you ever deleted millions of files by mistake and found that even if they were in the trash, you couldn't get them back since the Mac OS lacked a Put Back option? Well, that's to be expected and does occur.
When you remove many files or folders from separate places and attempt to restore them simultaneously, the Put Back option may be disabled. If you're having trouble with Trash Put Back, follow the guide below to fix it.
Fix Put Back Not Working on Mac Trash
Fix Mac Trash Don't Have A "Put Back" Button
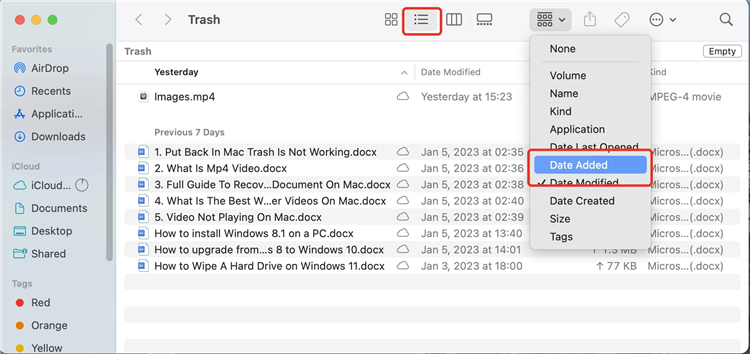
When the folder view is changed from list view to any other, and the files are not sorted by the date they were added or changed, the Put Back option is unavailable or grayed out. Here's what we do to get the Put Back option in the trash on a Mac.
Select "List View" from the main menu's top toolbar.
To sort items in chronological order, either right-click the blank area and pick "Organize by > Date Added," or use the arrange icon in the main toolbar and choose "Arrange by > Date Added or Date Modified."
If you delete a file and then right-click or Ctrl-click on it, you'll get an option to "Put Back" the file.
Selecting many files at once may cause the methods mentioned above to fail. When restoring several files, the undo button vanishes.
If the original folder from which the files were removed does not exist or has been removed from the trash, the files will be permanently lost. It's possible that restoring the parent folder will be necessary before you can successfully restore the subfolder and its contents.
Fix Can’t Put Back Files in Mac Trash
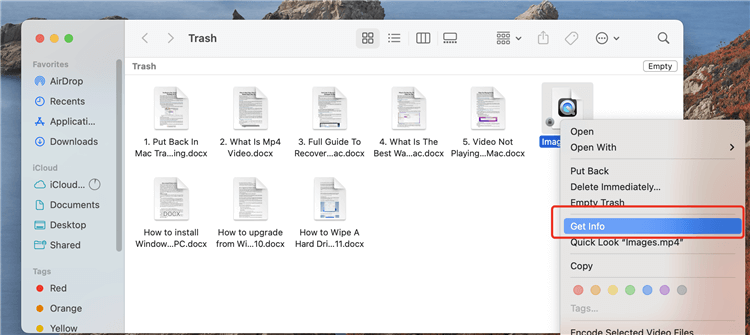
If you delete a locked file and then attempt to restore it from Trash, you may get an error or see the option to do so disabled. A notification stating, "File could not be put back. File does not exist anymore," appears when an attempt to proceed with the action fails. Simply confirm the current action by clicking OK.

Before re-assembly, you'll need to unlock the file. To do this, right-click the file you want information on and choose "Get Info."
You will need to remove the tick from the Locked box in the following.
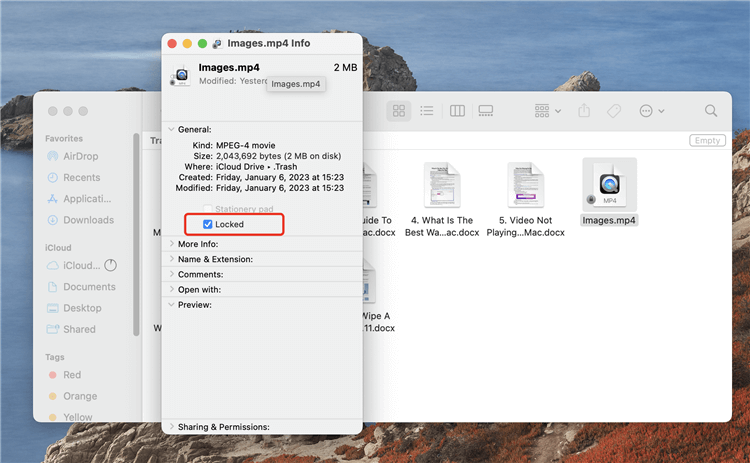
Once the file has been unlocked, you may use Put Back normally. Once you choose this option, the file will be returned to its previous place.
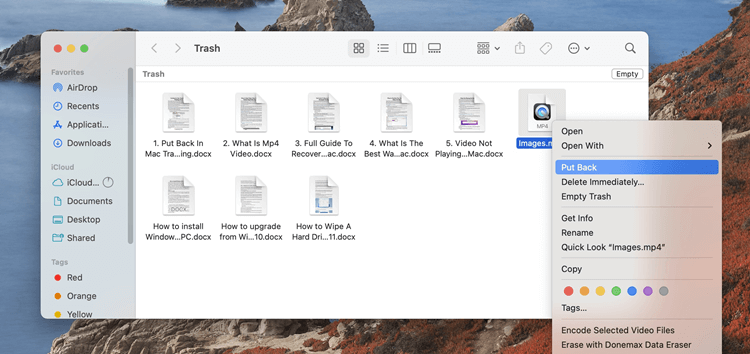
Try Picking Just One Item from the Trash and Put Back
You may not see Put Back as an option if you select numerous items in the Trash and right-click to bring up the context menu. So, choose just one trashed object, right-click, and maybe the Put Back option will appear. If you choose this option, the object will return to its previous place.
If, however, the Put Back option remains greyed out even when choosing a single file, this might be because the folder from which the item was removed does not exist at the specified disk location. To restore the child file, first, restore the parent folder.
Alternatively, move the trashed object directly to the desktop by dragging and dropping it there. The next step is to copy the data to the new location on your Mac's hard disk.
Recover Lost Files from Emptied Mac Trash with Data Recovery Software
Mac data recovery software is the best tool to help you put back files from emptied trash bin. But there are thousands of Mac data recovery applications and the quality of these applications vary greatly.
Don’t worry! We have found the perfect one for you. Do Your Data Recovery for Mac is very powerful and pretty simple to use. It can help you easily and quickly put back files from emptied trash bin. You don’t have to believe in us, you just try. You will find this software is so amazing.
Once you’ve found you delete your files by mistake and empty them from Trash. Stop using your Mac. Just immediately download and install Do Your Data Recovery for Mac, open it to get deleted files back.
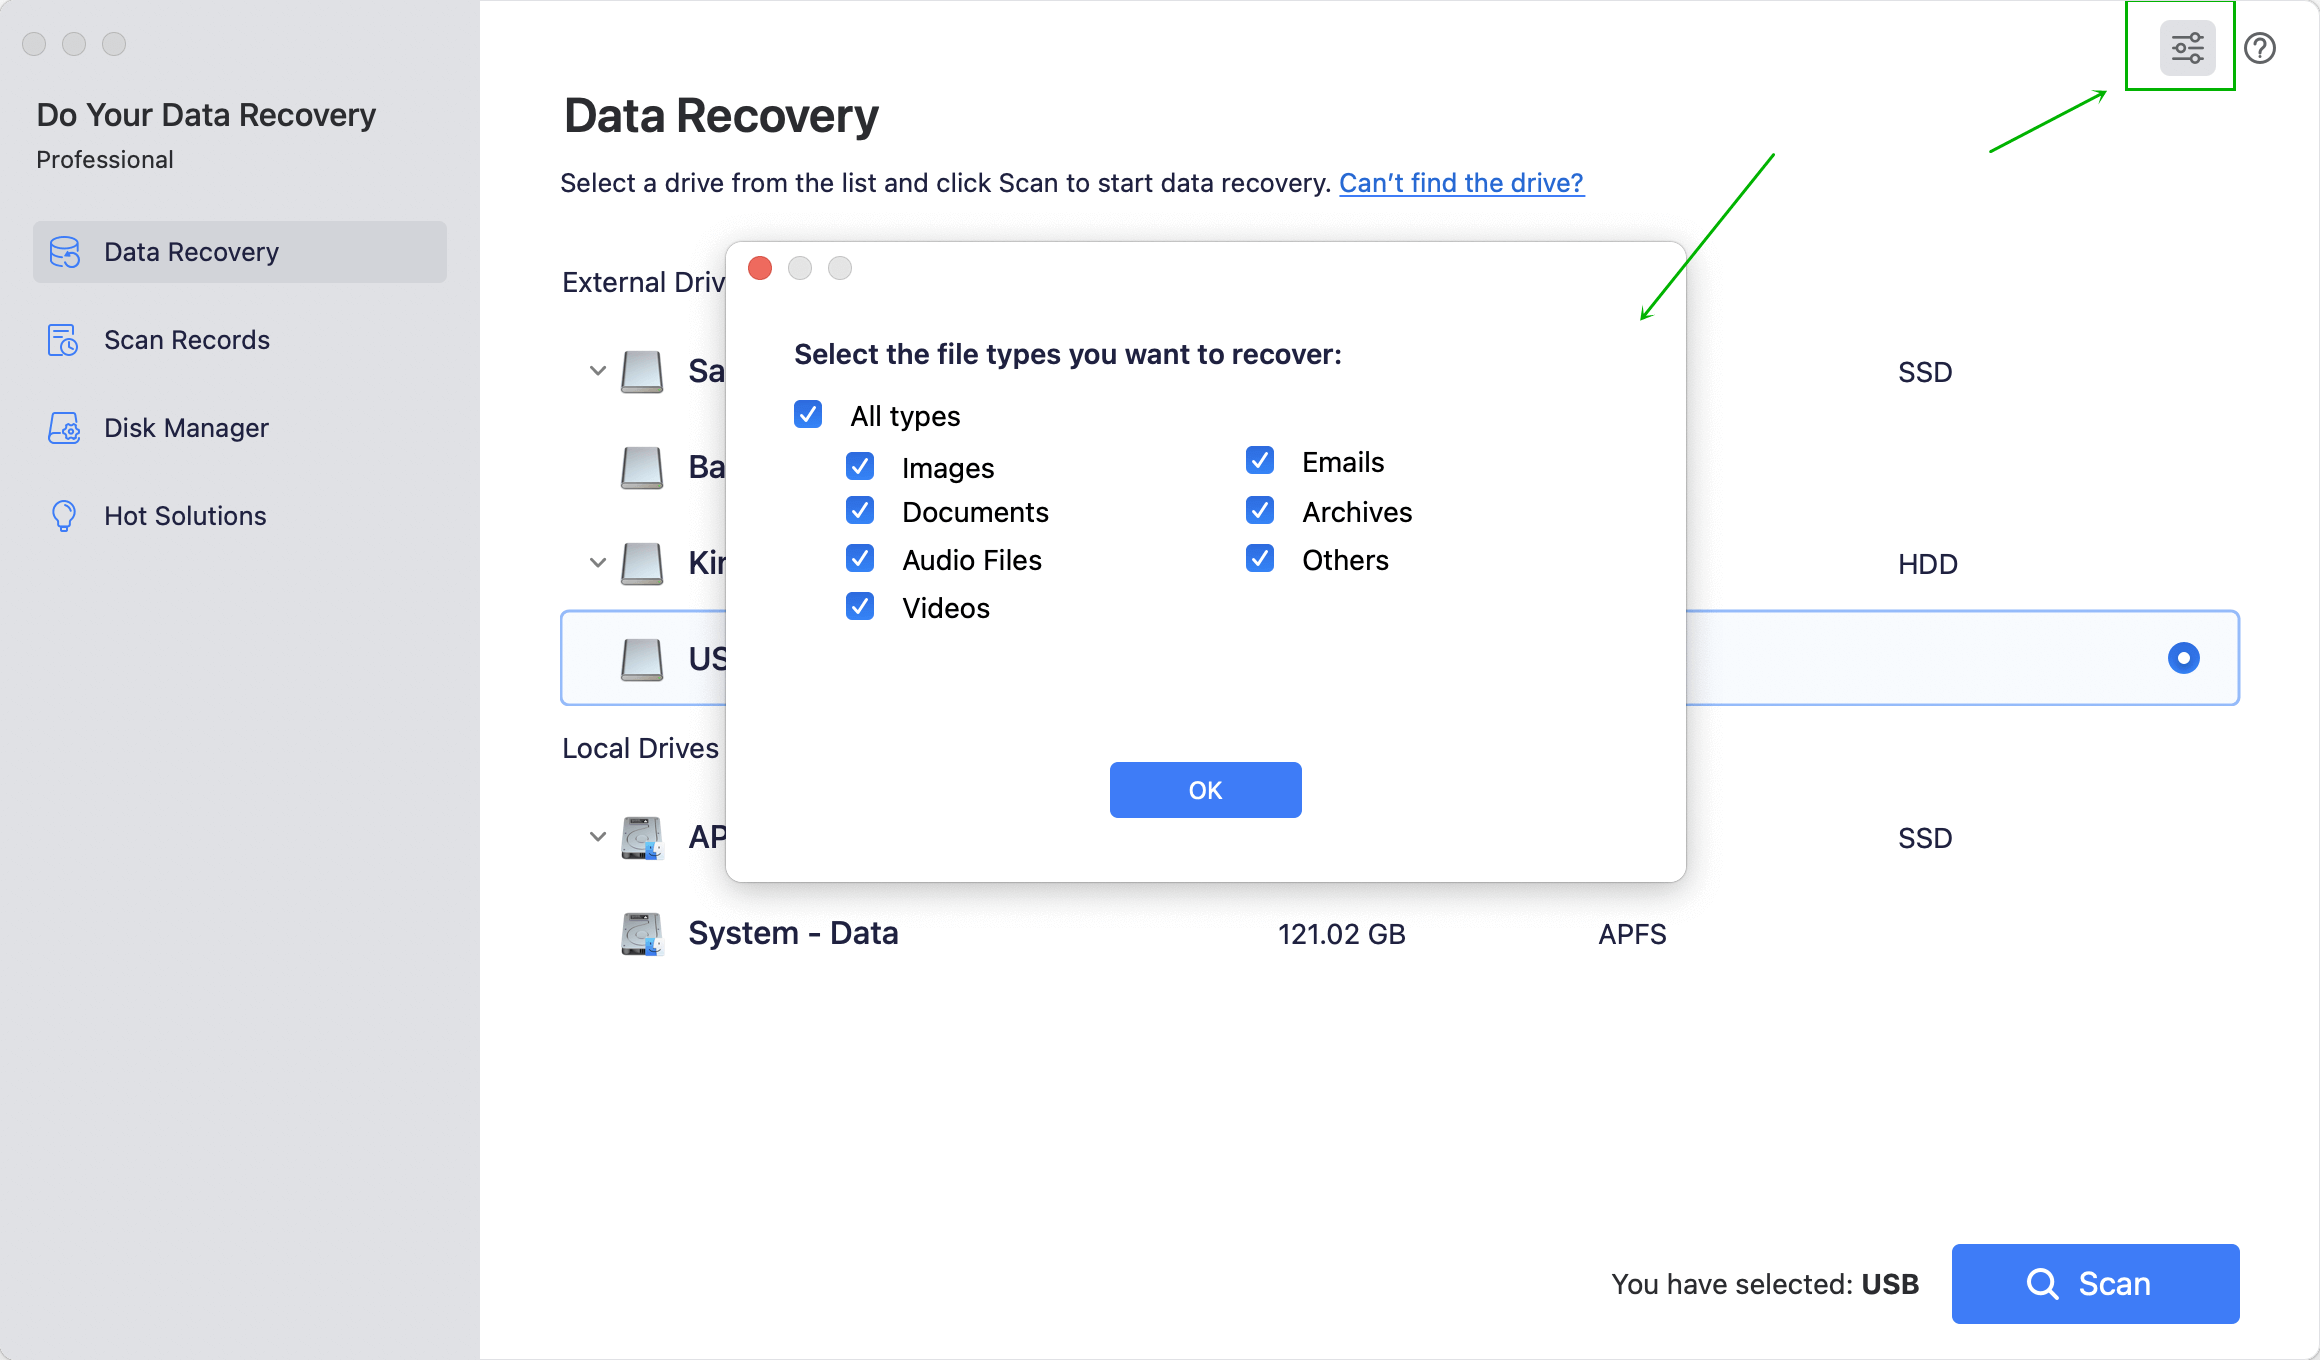
Step 1: Select the files types you want to put back.
Do Your Data Recovery for Mac will scan your Mac hard drive and find all lost files in any format. If you want to recover specific file types, just select them at this step.
Step 2: Choose the hard drive and scan it.
Where you delete your files? Just select the hard drive or device to start scanning. Do Your Data Recovery for Mac will deeply scan the hard drive and find all lost files.

Step 3: Preview and put back your Mac files.
After scanning, you can preview the files and find the files you want to put back. Then select the wanted files and click on “Recover” button to save the files to your Mac.

It is very easy to put back deleted/lost files from emptied trash bin with Do Your Data Recovery for Mac. This software also can recover lost data from other data loss disaster including format, virus attacking, volume loss, Mac OS upgrade, reinstallation, etc. You can easily put back your deleted files such as photos, emails, videos, audio files, documents, archives, etc.
Written & Updated by Justin Kenny
Justin Kenny is a writer & editor of DoYourData. He joined DoYourData in 2016 and focuses on writing articles about Windows data recovery, Mac data recovery, external device data recovery, hard drive clone, data erasure, Mac cleanup, computer issue fixes, etc. He is a super fan of Apple devices and is big on testing new digital device and system utility software.