How to Clone Dynamic Disk to SSD?
The best way to clone a dynamic disk to a new SSD is to use disk cloning program. DoYourClone is the reliable disk cloning program and it can help you quickly & securely clone a dynamic disk to a SSD. Just select the dynamic disk as the source disk and select the SSD as the destination disk, click Clone button.
![]() Updated by Darren on January 4, 2024
Updated by Darren on January 4, 2024
Quick Navigation:
- Why Clone Dynamic Disk to SSD?
- Precautions before Cloning Dynamic Disk to SSD
- Steps to Clone Dynamic Disk to SSD
- Conclusion
Moving from a slow dynamic disk to a fast Solid State Drive (SSD) seems like a technological giant leap in today's performance-driven digital world. Imagine a world where you never again have to wait for a page to load, your computer boots up in a flash, and your interactions with it are lightning-fast.
Clone a dynamic disk to an SSD, and your device's capabilities will be transformed, like a turbo boost for your PC. Data migration and system modifications are difficult processes that require a well-guided journey before you can dive into this exciting update. Join me on an exciting journey as I reveal the mysteries of cloning and show you how to get the most out of your computer!
Why Clone Dynamic Disk to SSD?
Users choose to clone dynamic disks to SSDs for multiple reasons:
- Enhanced Performance: Solid-state drives (SSDs) outperform conventional hard disc drives (HDDs) regarding read/write rates, leading to quicker system responsiveness and less time spent loading data and programs.
- System Responsiveness: Changing to an SSD can significantly improve OS responsiveness, making regular computer activities easier and faster.
- Space Optimization: SSDs usually have lower capacity compared to HDDs. Users may be motivated to streamline their data organization and program removal processes by cloning a dynamic disk to a smaller solid-state drive (SSD).
Precautions before Cloning Dynamic Disk to SSD
Cloning a dynamic disk to an SSD requires sensitive data migration and system changes. Thus, to ensure a smooth and safe process, various steps must be taken:
- Backup Data: Backup all dynamic disk data before cloning. It guarantees a secure backup in case of data corruption or loss during cloning.
- Check Compatibility: Make that the SSD's interface (SATA, NVMe, etc.), form factor, and connectors match your system. Check for specific SSD cloning needs or constraints for dynamic disks.
- Allow Enough Space: Make sure the SSD can hold dynamic disk data. Optimize the dynamic disk's data or upgrade the SSD if needed.
Steps to Clone Dynamic Disk to SSD
Step 1: Choose Reliable Cloning Software
You must use reliable cloning software or tools to copy data from a dynamic drive to an SSD. Some highly regarded choices are DoYourClone, Macrium Reflect, AOMEI Partition Assistant, Clonezilla, etc. Get the software you want to use and install it on your computer. In this article, we will show you how to clone dynamic disk to SSD using this easy-to-use disk cloning program - DoYourClone.
Step 2: Connect the SSD:
Verify that your computer can detect the solid-state drive (SSD) by physically connecting it using the correct interface (SATA, NVMe, etc.). For external SSDs, a SATA-to-USB converter can be used if needed.
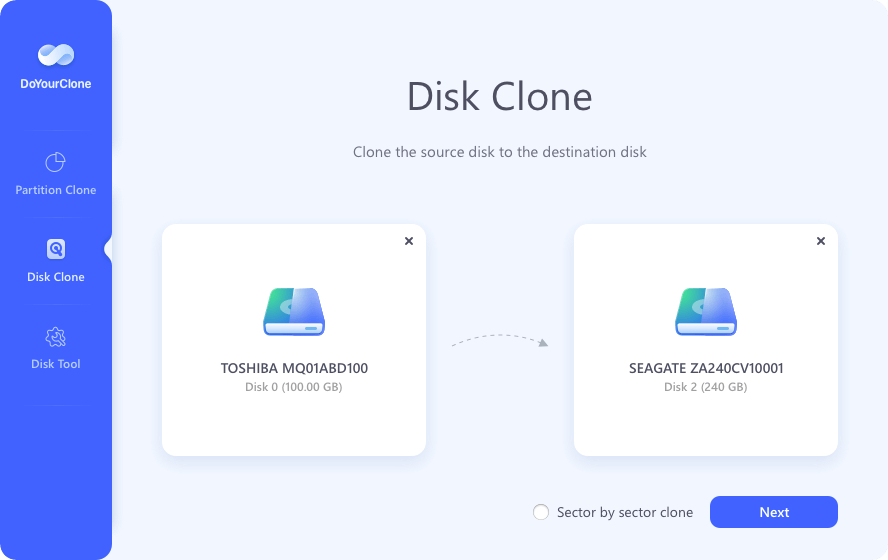
Step 3: Launch Cloning Software:
Launch the cloning program and look for the setting that allows you to copy whole disks. To begin a disk clone, choose the source dynamic disk. Then, choose the target solid-state drive (SSD) to save the copied files.
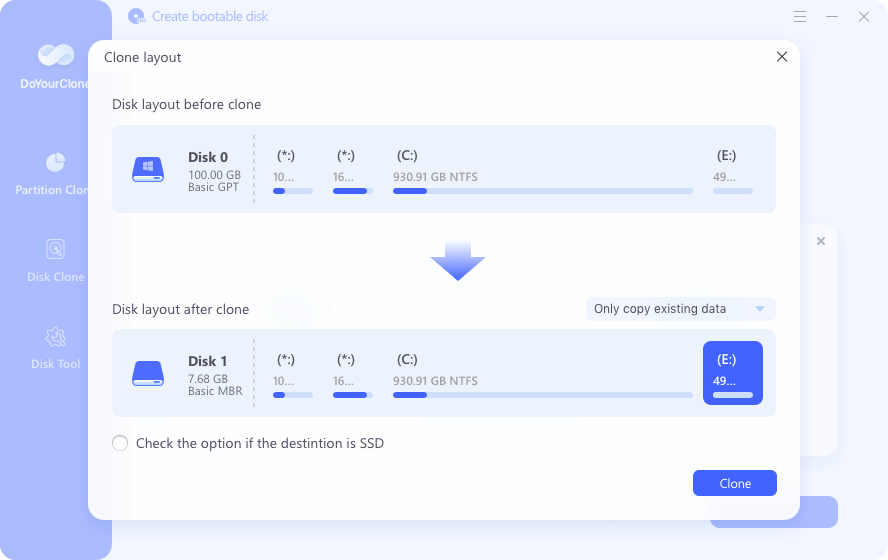
Step 4: Configure Cloning Settings:
Make the necessary adjustments to the cloning parameters. You can tweak the performance of the destination SSD, clone particular partitions, or resize partitions. Make sure everything is set up according to your liking before moving further.
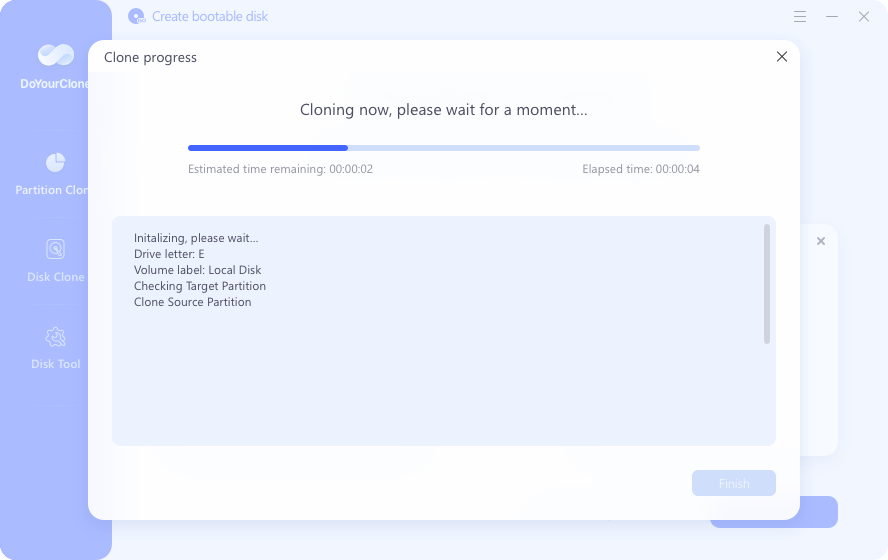
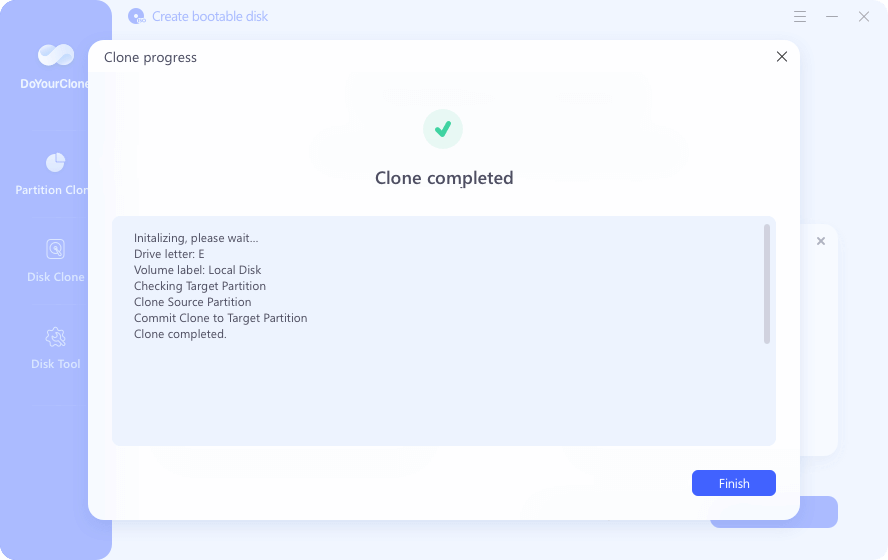
Step 5: Start Cloning Process:
Use the software's interface to start the copying process. After selecting the SSD, the program will move files from the dynamic disk. How long it takes to complete depends on your device's data volume and processing speed.
Step 6: Verify Cloned Data
Ensure the cloned data on the SSD is entire and intact by carefully verifying it after the cloning operation. Make sure the data, partitions, and files have all been moved.
Step 7: Set SSD as Boot Drive:
To make the solid-state drive (SSD) the main boot device, go into your system's BIOS or UEFI settings and do just that. At this point, your machine will be ready to boot from the cloned SSD.
Step 8: Test System Performance:
You may evaluate the SSD's performance once you've set it up as the boot drive and rebooted your system. Verify if the system responds quickly, applications load more quickly, and the boot time is shorter.
Conclusion:
As we near the end of the thrilling process of switching from a dynamic disk to an SSD, consider all the new opportunities that have opened up. Your system is prepared for the future with faster boot speeds, better responsiveness, and a flexible computing experience. To guarantee a smooth move without losing data, be careful, make backups, and be precise during this procedure. As technology changes, keep up with the latest techniques and tools for the best results. Look at this update as a ticket to a better, quicker digital world. In the future, we hope to have computers that can keep up with your speed, respond instantly, and personalize our experience based on your needs.
DoYourClone - Best Disk Clone Software
DoYourClone is a 100% safe, powerful and easy-to-use disk cloning program. It supports to clone any hard drive, clone HDD to SSD, upgrade old drive to new drive, create bootable clone backup for Windows and macOS. With this program, you can easily clone any hard drive. It supports sector by sector clone, SSD upgrade clone, etc.
Written & Updated by Darren
Darren is an senior editor at DoYourData. Since 2021, Darren has written 100+ articles about data recovery, Mac file recovery, disk management, disk clone, computer issue fixes, etc. He helps lost of users to recover important data, get the reliable data backup solution, find optimization for PCs and Macs.