Ultimate Guides: How to Repair Damaged Photos on Any Devices
Photos or images might be damaged somehow on computers, phone, tablet, etc. Here are some solutions available to help you repair damaged photos on both Mac and Windows machines. Sometimes the photos cannot be open because of issues of drive or device, it's able to repair the photos by fixing the device issues. Also, it's able to use data recovery to recover and repair the damaged photos.
![]() Updated by Justin Kenny on September 18, 2024
Updated by Justin Kenny on September 18, 2024

Quick Navigation:
- Reasons That Make Your Damaged Photos?
- Guide 1: Repair Corrupted Images on Windows
- Guide 2: Recover Photos That Have Been Corrupted on A Mac
- Guide 3. Recover and Repair Damaged/Lost Photos with Software
- Conclusion
- FAQs About Repairing Damaged Photos
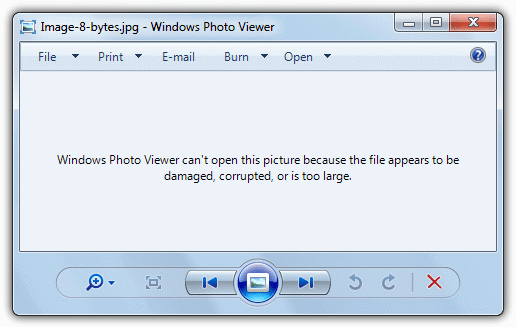
Corrupt photographs can be caused by a variety of circumstances such as a corrupted file system, faulty sectors on storage media, scratches on DVDs, or even data deterioration. However, we live in a technologically advanced society, and many of us may be unaware of the appropriate tools or software to use to easily repair faulty images. In this article, we will show you the best ways to handle these problems, to fix the corrupted images on any device.
Reasons That Make Your Damaged Photos?
There might be a number of reasons why a photo file became corrupted. Before you discover a solution, you may need to figure out what caused the problem and then take steps to avoid it in the future. Here are some of the reasons that make your damaged photos:
- Typically, the photo becomes corrupt during the saving process, when your device abruptly crashes or loses power, resulting in a damaged photo.
- Due to the accumulation of faulty sectors on an optical or magnetic disc, previously inaccessible storage material becomes un-writable.
- The media bits are corrupted by the loss of magnetic orientation of hard drives, resulting in data deterioration.
- During reading/writing operations, data corruption goes undetected.
- A damaged or erased file results from a data transmission interruption.
- Use of an incompatible picture file format.
After knowing the possible reasons for the issue that photos might be damaged, keep reading to see how to repair damaged photos on both Windows and Mac in different cases.
Guide 1: Repair Corrupted Images on Windows
If you need to repair a photo on your Windows 10/11 PC, use this approach. Although corrupted photos may not open immediately on your Windows device, there are several methods for repairing them. Before learning how to do so, attempt to prevent causing further damage to the storage media. You can try to recover your corrupted image in one of three ways:
Solutions 1: Change the photo viewer
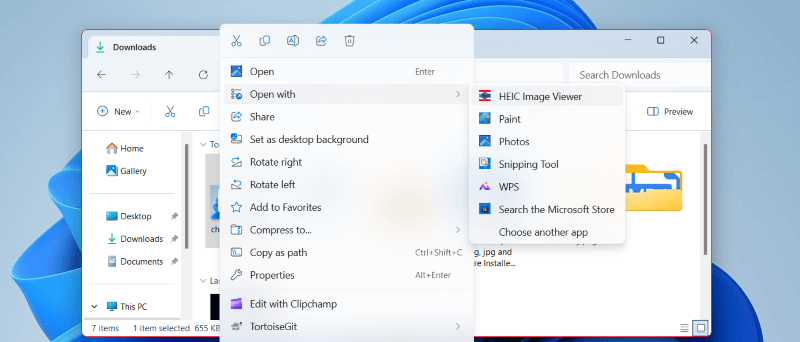
Due to compatible issue with the photo viewer software, some kind of photos cannot be opened and viewed by the default photos viewer. In such a case, it's simple to fix the issue by using another photo viewer or installing extension to support the specified photo format.
For example the .HEIC format of photos cannot be opened directly in Windows. In such a case, you can download and use third-party software HEIC Image Viewer or other photo viewer to open the software.
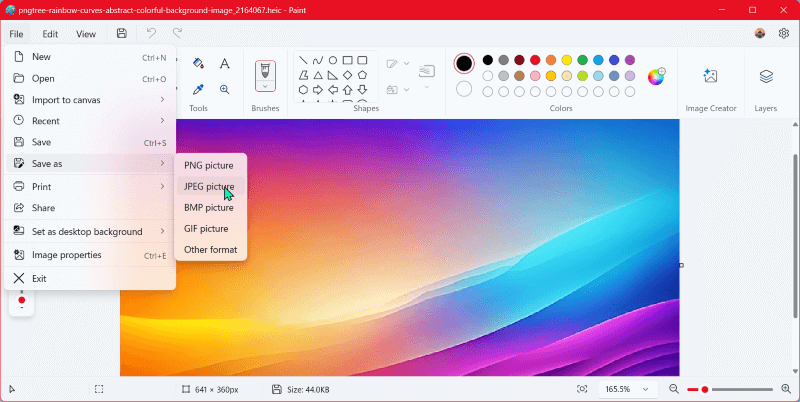
Also, you can convert the format the photo to a compatible format for Windows. You can open a photo with the app Paint, then click File > Save as and export the photo in JPEG, PNG, or other formats. Then you can open it normally with the system default photo viewer.
Besides, you can also download and add extensions to default photo viewer for some special photo formats, then you can open the photos with the default photo viewer application.
Solution 2: Launch a CHKDSK scan
Any file system issues could be fixed with a CHKDSK scan. Before you start this scan, make sure you have a backup of the corrupt data on an external device. To execute a CHKDSK scan, follow these steps:
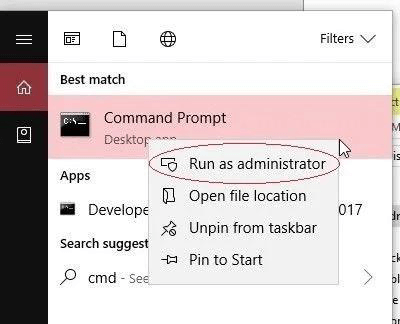
Step 1: Connect the storage device which includes the photo files that have been corrupted. Press the combination Windows+S to quickly open the searching tool and then input "cmd".
Step 2: Right-click on Command Prompt and choose Run as administrator.
Step 3: When the Command Prompt is started, text the line chkdsk X: /r /f, where X is the letter of the linked drive.
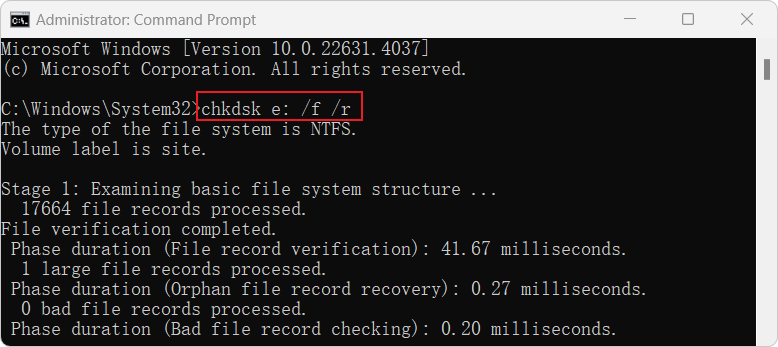
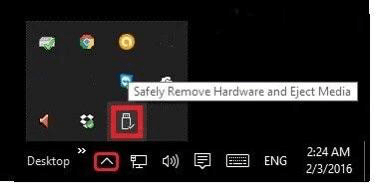
Step 4: Press Enter and wait until the scan process is done. Double-click on the Safely Remove Hardware and Eject Media icon in the Windows System Tray after pressing the up arrow on the taskbar.
Step 5: To access the images, unplug the storage medium or USB device and reconnect it. If the photos corruption was related to the file system, it would fix the issue with this way and make the photos repaired and open normally.
Solution 3: Check for errors with the Error checking tool
The error-checking software is usually included with every Windows PC. The following are the steps to using it:
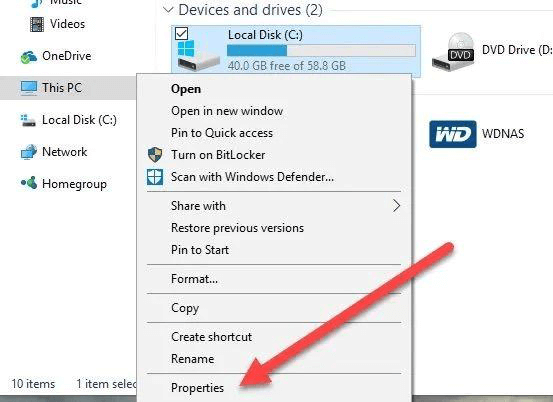
Step 1: Open File Explorer and right-click on the corrupted photographs on the linked media.
Step 2: Right-click the drive that contains the corrupted files and select Properties.
Step 3: Choose from the Tools menu and select the Check option.
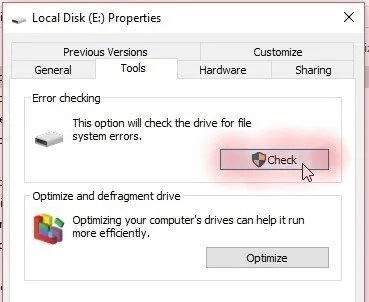
Step 4: Choose Scan drive to begin the scanning procedure.
Step 5: After selecting Scan Drive, wait for the scan to complete.
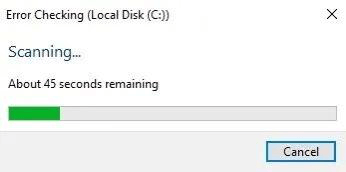
Step 6: After selecting Scan Drive, wait for the scan to complete. If there are any problems, the tool will highlight them for you to address. It will notify you with a notice in a dialogue window if this is normal.
Guide 2: Repair Photos That Have Been Corrupted on A Mac
How to repair corrupted photos on a Mac? Here you can also try the following methods first.
Solution 1. Repair the library "Photos Library".
For photo repair on MAC computers, most people utilize the Photo library repair program. Read the steps below and follow the instructions:
Step 1: While opening photographs on your MAC device, hold and press the Command and Option keys.
Step 2: In the dialog box, click Repair to begin the photo repair procedure.
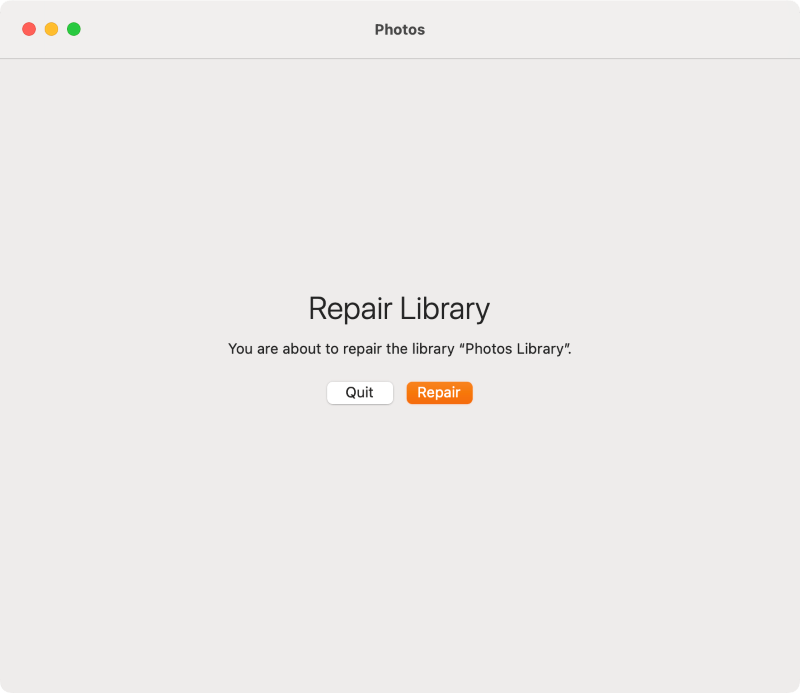
Step 3: Authorize the operation by entering your User account password. After the repair process is finished, you can then check if you can access and open the photos normally in Photos library.
Solutions 2. Change the format of the file
If the format of the file is not compatible with the default photo viewer program Preview, it would be fail to open the photo and users might think the photo is corrupted. You can change the format of the photo on Mac to have a try.
Step 1: Try to open the photo with the default tool Preview. And then click File from the menu bar, and then click the option Export.
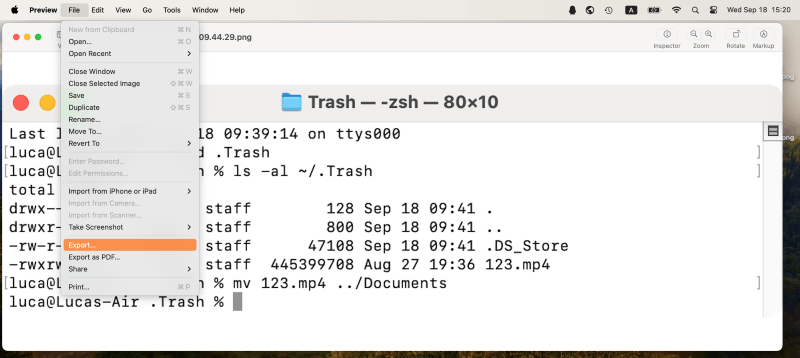
Step 2. It will pop up a small window where you can change the format of the photo, you can change it to a compatible format for the photo Previewer from the drop-down list.

Here are also some other tips to solve the issue. For example, if there are bad sectors on the drive, it might cause the photo be damaged and cannot open. In such a case, you can create a new folder and then copy the photo to the new folder and check if the photos can open normally. Sometimes, if the default photo viewer is outdated or there are issue, you can try to reinstall or update the software and try again. You can also try to rename the damaged photo and change the file extension directly to open it.
Guide 3. Recover and Repair Damaged/Lost Photos with Software
At last, we suggest you a professional photo recovery and repair software for the problem. The software Do Your Data Recovery can recover deleted or lost photos, and also repair the damaged photos during the process. If you cannot repair the corrupted photos with the other methods, you can try this software to recover and repair the photos.
Do Your Data Recovery
- Professional photo recovery and repair software.
- Support both Windows and Mac machines.
- Recover deleted/lost files in any situations.
You an first download and install the software on your computer. Then follow the guide below to recover and repair the damaged photos step by step:
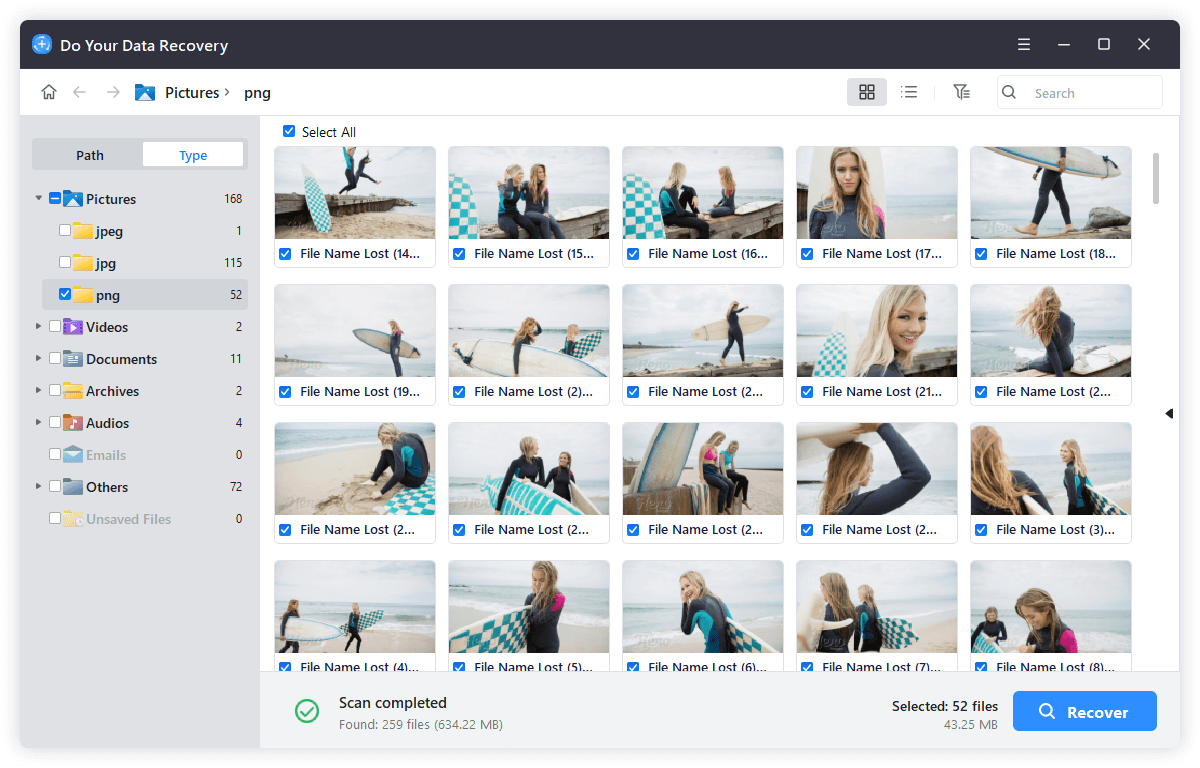
Step 1. Run the software and select the drive where you lost or damaged the photos.
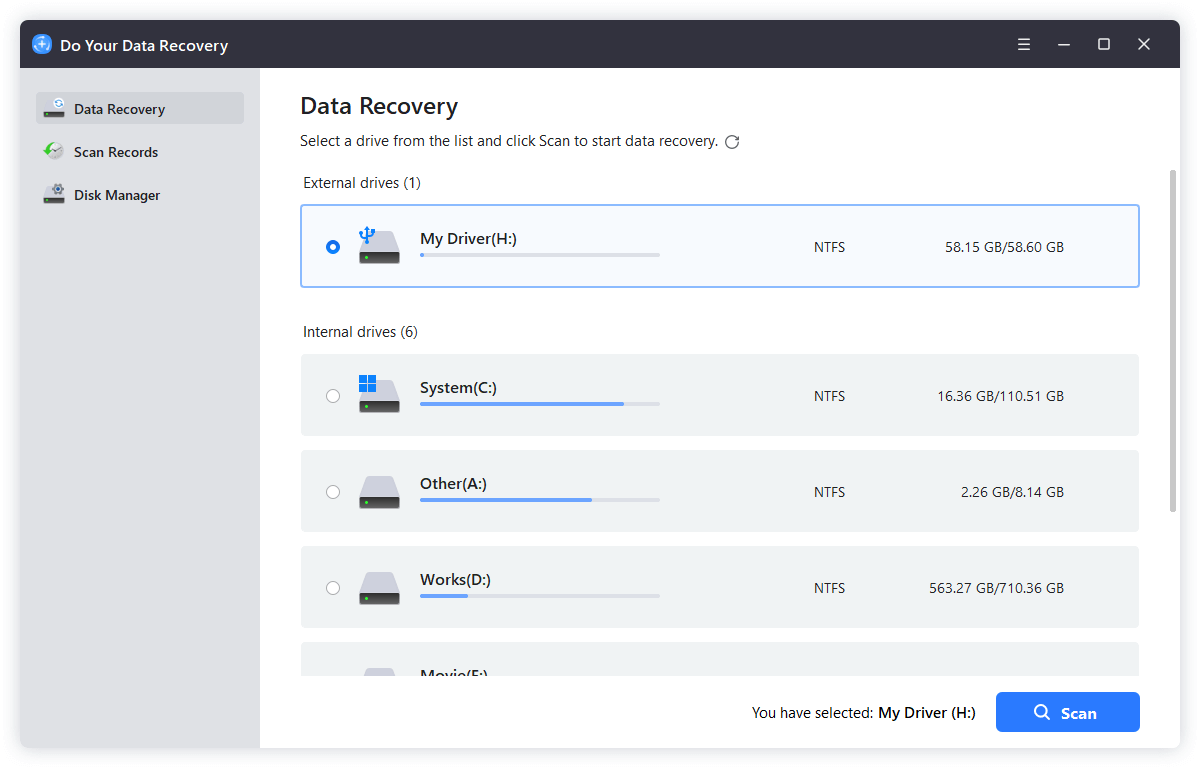
Step 2. Click the Scan button to scan the drive and search for the deleted/lost/damaged photos.
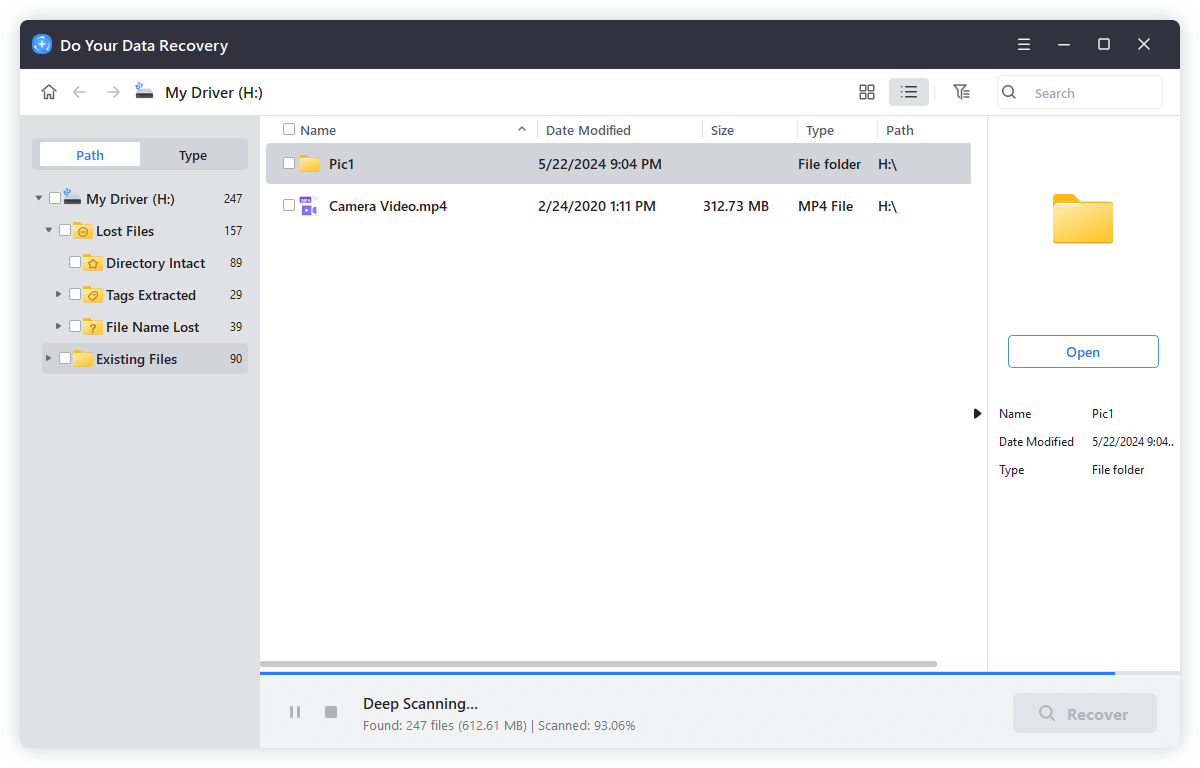
Step 3. After the scan is finished, choose the wanted files to recover and save to another drive. During the process, the damaged photos will be repaired by the software.
Conclusion
Through this article, we hope to have provided you with ways to fix corrupted image files on different devices, like Windows and Mac machines. As long as you are really focused and follow the steps clearly stated above, you will surely succeed.
Also, the software Do Your Data Recovery and not only help users recover deleted/lost photos or other files, it can also try to repair the damaged files, including photos, documents, and other files. Should you suffer data loss or damage, it's highly suggested to download and try with the software.
FAQs About Repairing Damaged Photos
1. Common reasons for photo damage on Windows and Mac.
There are several factors and issues that will cause photo damage or inaccessible.
- Sudden power off or disconnection while transferring photos between devices.
- Bad sectors on hard drive might cause photos damage.
- Issues with file system of a drive will lead to image damage.
- Interruption occur while editing photos with application.
- Virus attack or malware infection will cause damage to photos.
- Use of an incompatible photo format on the device.
2. How to repair corrupted photos on Windows machine?
After finding out a photo cannot open normally on Windows machine, first, please check the format of the photo. If it's not compatible with the default photo viewer application, you need to convert the photo to a compatible format. For example, you can open the file with the Paint app, then save it as a compatible format. Or you can download related extensions or third-party photo viewer which support the photo format.
Sometimes, the issues with hard drive would also cause the photos damaged. You can run CHKDSK X: /f /r (replace X: with the correct drive letter on your computer) command to fix the drive issues. You can also right-click the drive that has the damaged photos, click Properties > Tools > Error checking, and click on Check button to check and fix file system errors. In this way, you would repair the photos in some cases.
3. How to repair damaged photos on Mac?
Mac computer uses Photos app to manage the photos. So if there are issues with Photos Library, it will cause damage to the photos. You can try to repair Photos Library to fix the issue: Press and hold Command and Option keys, then click Photos from the dock, it will pop up the repair option, just click it to continue.
It's able to fix the issue by changing the photo format of an inaccessible photo. First try to open it in Preview app, click File from menu bar, click Export option and then change to another photo format.
4. The best software to recover or repair photos?
There is simple way to recover or repair photos with a data recovery software. It can recover deleted/lost photos and repair the photos with flaw during the process. Here's how:
- Download and install Do Your Data Recovery on your computer.
- Launch and run the software and scan the drive where the photos were lost or damaged.
- After the scan is finished, choose the wanted photos and save to another drive. The software will repair the damaged photos during the process.

Do Your Data Recovery
The safe, powerful and easy-to-use data recovery program to help you recover deleted, formatted or lost data, recover lost data from damaged hard drive, from HDD, SSD, USB flash drive, memory card, digital camera, etc, fix damaged drive and external devices.
Written & Updated by Henry Lee
Henry Lee joined DoYourData in 2022. He is interested in writing articles about fixing PC/Mac’s problems. He often shares tutorials and skills regarding information tech and enjoys helping people solve various data loss problems or hard drive crash problems. He likes reading and cooking very much when he is off work.