Free Up Storage Space After macOS Tahoe Update
When you find there are too much junk data after macOS Tahoe update, you can try to manually release the disk space. However, we suggest freeing up storage space safely and easily with the Mac cleanup and optimization tool DoYourData MacClean360.
![]() Updated by Ricky Lin on February 02, 2026
Updated by Ricky Lin on February 02, 2026
Quick Navigation:
- Why Storage Drops After a macOS Tahoe Update
- Check What Is Actually Using Your Storage
- Steps to Free Up Storage Space After macOS Tahoe Update
- Free Up Storage Space Easily and Safely with MacClean360
- Prevent Storage Issues After Future macOS Updates
- Conclusion
Updating to macOS Tahoe brings performance improvements, security patches, and new system features—but for many users, it also comes with an unpleasant surprise: suddenly reduced free storage space. Even Macs that had plenty of available disk space before the update may now show warnings like "Your disk is almost full" or an unexpectedly large System Data category.

This is a common post-update issue and, importantly, it is usually fixable without deleting personal files or reinstalling macOS. In this guide, you will learn exactly why macOS Tahoe consumes extra storage after an update and how to free up storage space after macOS Tahoe update. By following the guide, you can reclaim several gigabytes of space safely and methodically.
Why Storage Drops After a macOS Tahoe Update
macOS updates are not simple replacements of old files. During and after the update process, macOS Tahoe performs several behind-the-scenes actions that temporarily or permanently increase disk usage:
- Old system components are retained for rollback and compatibility
- Update installers and packages remain stored locally
- System caches, logs, and indexes are rebuilt
- Time Machine local snapshots expand
- App compatibility data and media assets are re-downloaded
Because of these behaviors, storage usage immediately after an update is often misleading. The system needs manual cleanup to return to an optimal state.
Check What Is Actually Using Your Storage
Before deleting anything, you should first understand where your storage is going.
- Open System Settings
- Go to General → Storage
- Wait for macOS Tahoe to fully calculate usage
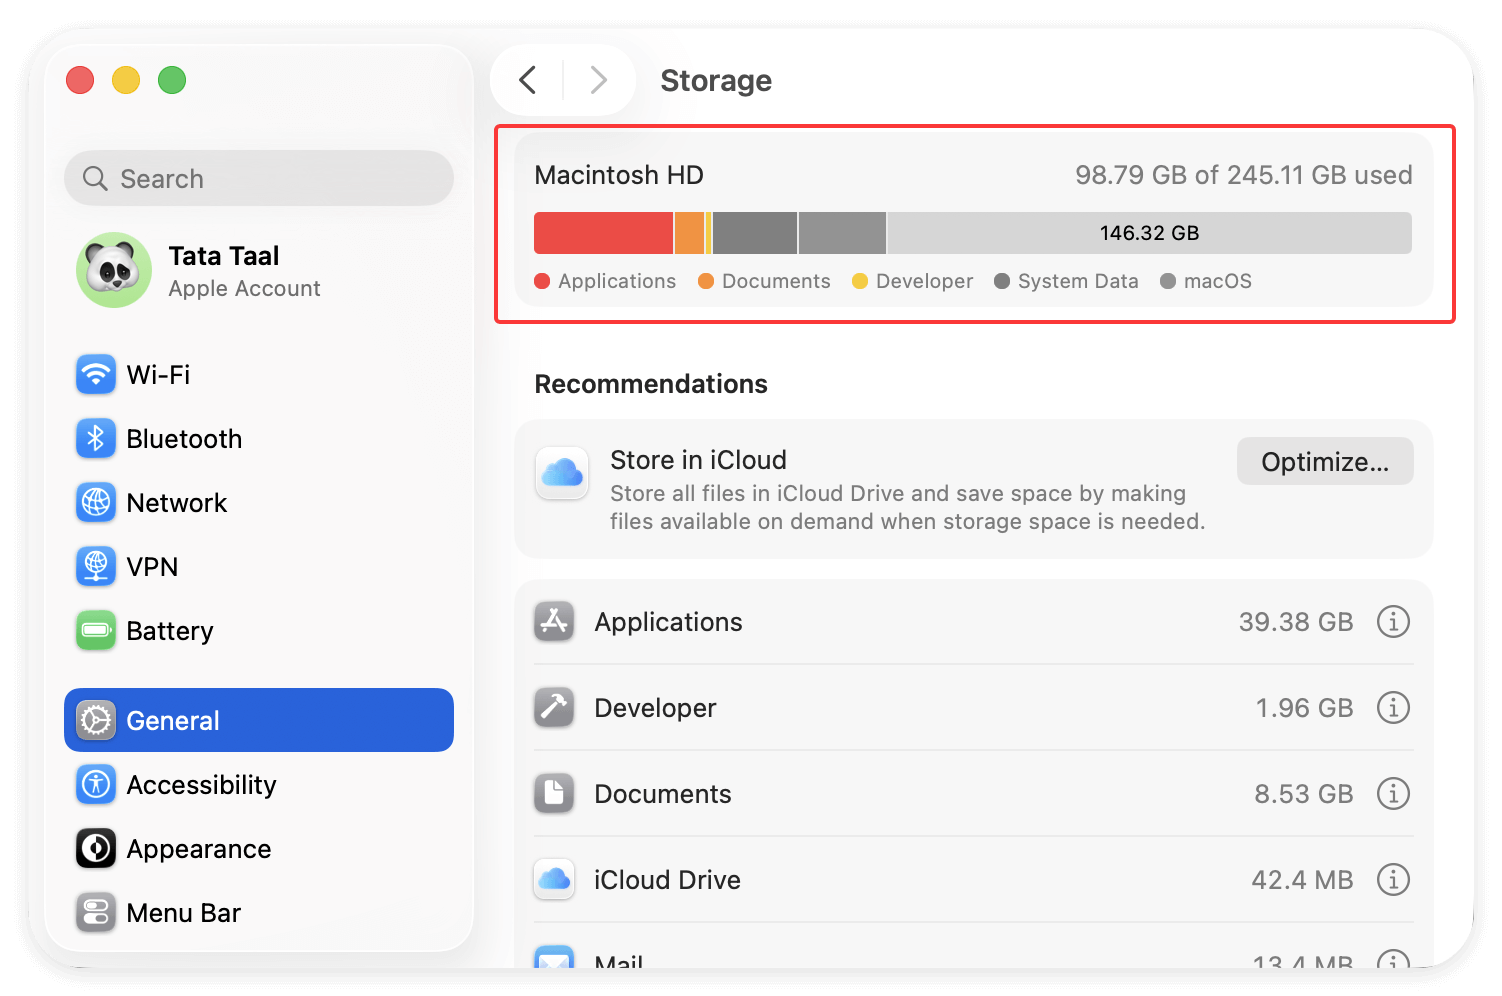
You will see categories such as:
- macOS
- System Data
- Applications
- Documents
- Photos
- Developer Data (if applicable)
Pay close attention to System Data, which is usually the main culprit after an update. Finder may show different numbers than System Settings—this is normal, as System Settings includes hidden and protected system files.
Steps to Free Up Storage Space After macOS Tahoe Update
Step 1: Remove macOS Tahoe Update Residual Files
After upgrading, macOS often keeps old installers and update packages that are no longer needed.
Delete Old macOS Installers
- Open Finder
- Go to Applications
- Look for files named like Install macOS Tahoe.app
- If the update is complete, delete the installer
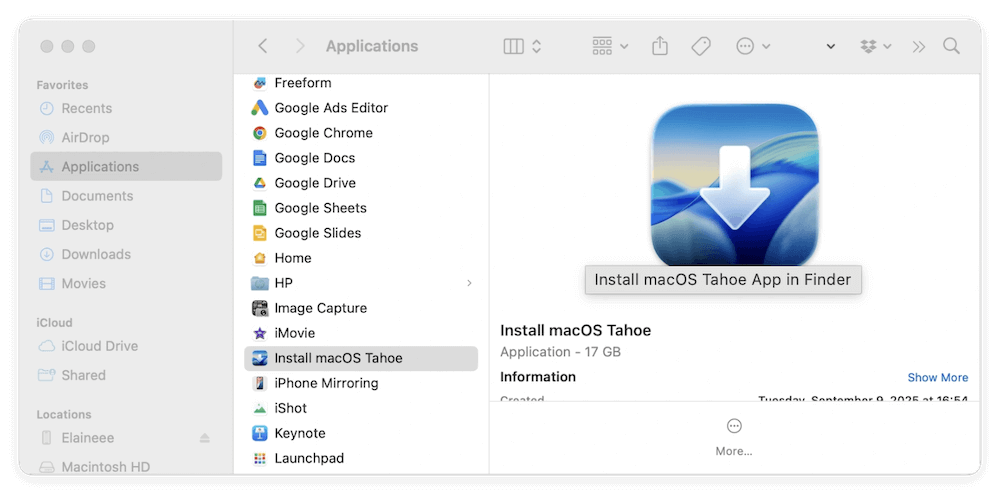
These installers alone can consume 10–20 GB of storage.
Remove Update Packages
Temporary update files are usually stored in system-level directories and removed automatically over time, but they sometimes linger. Restarting the Mac after cleanup steps helps macOS release these files.
Step 2: Clear System Cache and Temporary Files
After a major update, caches are rebuilt and often grow much larger than necessary.
What Caches Do
Caches speed up app launches and system processes, but outdated caches after an OS update are not always purged correctly.
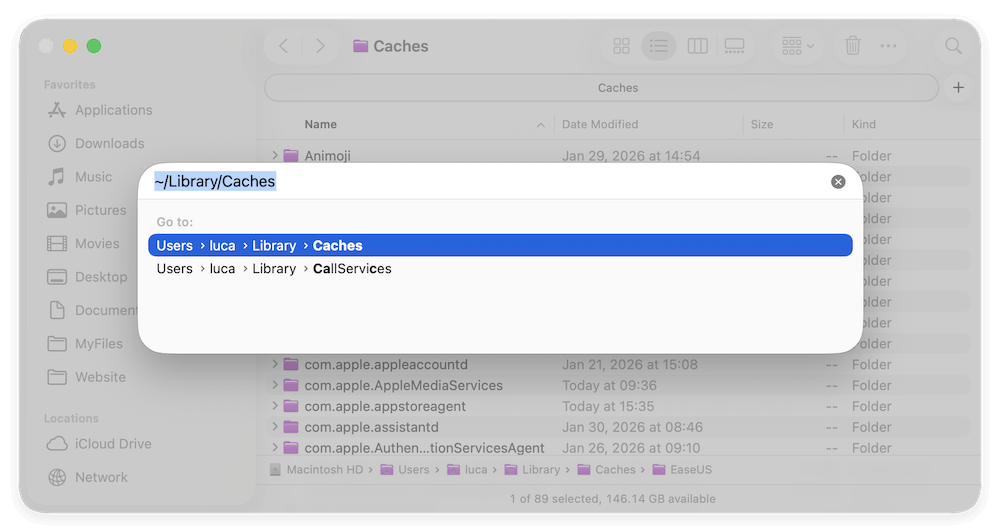
Clear User Cache Safely
- Open Finder
- Press Command + Shift + G
- Enter: ~/Library/Caches
- Delete the contents of folders inside (not the folder itself)
Clear System Cache (Advanced)
System-level caches rebuild automatically but should be handled carefully. Restarting your Mac after clearing user caches often triggers safe system cache optimization without manual deletion.
Step 3: Reduce "System Data" Size in macOS Tahoe
After upgrading to macOS Tahoe, System Data often becomes the largest and most frustrating storage category. Many users see it consuming 30–80 GB, with no obvious explanation or delete button. Understanding what System Data actually contains—and how to safely reduce it—is the key to reclaiming significant disk space.
What Exactly Is "System Data" in macOS Tahoe?
System Data is a broad umbrella category that includes files macOS considers essential or semi-essential for system operation. Unlike Applications or Documents, these files are mostly hidden and managed automatically by the OS.
System Data typically includes:
- Time Machine local snapshots
- System and user logs
- Cache files that survived the update
- Spotlight and Photos indexing data
- Virtual memory (swap files)
- iOS device backups
- Temporary system working files
- App compatibility and migration data from the update
After a major OS upgrade like macOS Tahoe, this category grows rapidly because macOS prioritizes stability and rollback safety over storage efficiency.
Remove Time Machine Local Snapshots
macOS creates local backups when an external drive is not connected.
- Open Terminal
- List snapshots:
tmutil listlocalsnapshots /
- Delete older snapshots:
sudo tmutil deletelocalsnapshots SNAPSHOT_DATE
This alone can free several gigabytes, especially on laptops.
System Logs, Diagnostics, and Analytics Files
macOS Tahoe generates a large number of logs immediately after an upgrade. This happens because:
- Apps are checked for compatibility
- System services are restarted and monitored
- Errors from legacy components are logged
- Indexing processes report progress
Over time, these logs should shrink—but in practice, many remain indefinitely. Most user-accessible logs are stored in: ~/Library/Logs. These include:
- App crash reports
- System diagnostics
- Analytics data
Older logs can usually be deleted without risk. macOS recreates necessary logs automatically.
Spotlight and Search Index Rebuilds
After updating to macOS Tahoe, Spotlight reindexes:
- Files
- Emails
- Photos
- Messages
- System metadata
This process temporarily increases System Data usage.
Why This Matters ? Indexing creates large databases that:
- Appear as System Data
- Grow faster on large drives
- Persist longer on slower or nearly-full SSDs
In most cases, Spotlight indexes stabilize after a few days. Restarting the Mac after cleanup helps macOS compact these indexes more efficiently.
Virtual Memory and Swap Files
macOS dynamically creates swap files when RAM is insufficient. After an OS update:
- Background migration processes consume memory
- Swap usage increases
- Swap files may not shrink immediately
These files:
- Are stored on disk
- Count as System Data
- Shrink only after restarts and normal usage resumes
If System Data remains high immediately after the update, give the system 24–48 hours and one or two restarts before assuming it is permanent.
iOS and iPadOS Backups Hidden in System Data
Local backups of iPhones and iPads can silently consume large amounts of space.
These backups:
- Are stored locally
- Do not appear under Documents
- Are counted as System Data
You can review and delete old backups from:
- Finder → Your device → Manage Backups
- Or System Settings → Storage (if listed)
Removing outdated device backups can instantly free 5–20 GB.
When System Data Shrinks Automatically—and When It Doesn't
macOS Tahoe does clean System Data over time, but only when:
- Disk space becomes critically low
- The Mac is idle and powered on
- Background maintenance tasks are allowed to run
However, if your disk is already nearly full, macOS may fail to complete cleanup tasks—creating a vicious cycle.
This is why manual intervention is often necessary after major updates.
Expected Results After Cleanup
After removing snapshots, logs, caches, and backups, most users can expect:
- 10–30 GB reduction in System Data
- Faster Spotlight indexing
- More accurate storage reporting
- Improved system responsiveness
System Data will never drop to zero—and it shouldn't. The goal is controlled size, not elimination.
Step 4: Find and Delete Large Hidden Files
macOS Tahoe often reveals storage issues caused by forgotten large files.
Use Finder Search
- Open Finder
- Select This Mac
- Click the "+" button
- Filter by File Size → Greater Than → 1 GB
You may find:
- Old DMG files
- ZIP archives
- Duplicate installers
- Exported videos
Deleting these files often produces immediate results.
Step 5: Properly Uninstall Unused Applications
Dragging apps to Trash rarely removes everything. After macOS updates, apps often generate additional support files.
What Gets Left Behind
- Application support files
- Caches
- Preferences
- Logs
Best Practice
- Review unused apps in System Settings → Storage → Applications
- Remove apps you no longer use
- Restart afterward to allow macOS to release locked files
This step is particularly effective for developer tools, design software, and media editors.
Step 6: Clean Up Photos, Videos, and Media Libraries
Media libraries frequently expand after updates due to re-indexing or cloud re-syncing.
Photos App
- Enable Optimize Mac Storage if using iCloud Photos
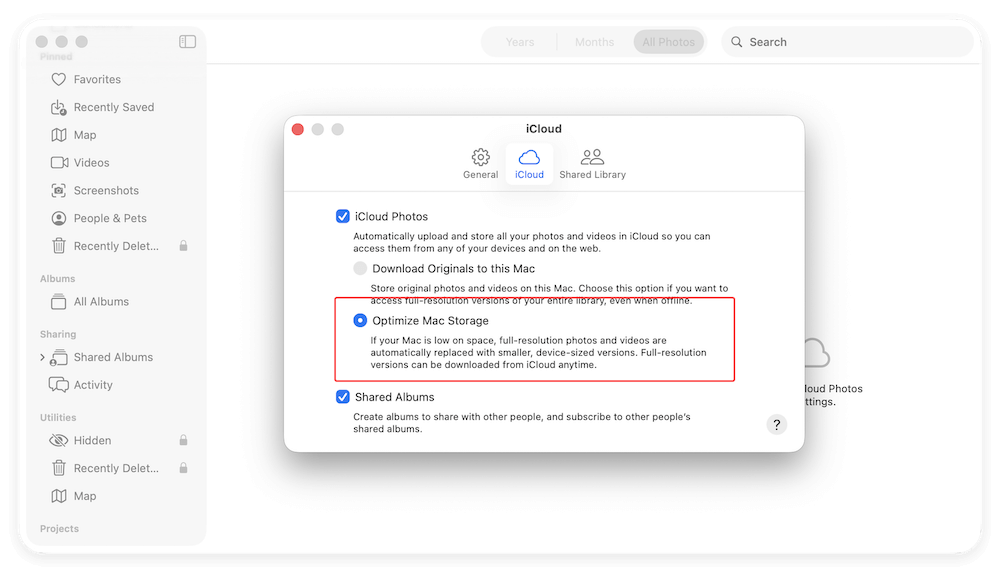
- Remove duplicate or failed imports
- Empty Recently Deleted album
Music and Video Apps
- Delete downloaded content you no longer need
- Check for offline media re-downloaded after the update
Creative Apps
GarageBand, iMovie, and Final Cut often install extra sound libraries and assets during updates. Removing unused assets can free multiple gigabytes.
Step 7: Manage Downloads and Desktop Clutter
macOS Tahoe may surface storage issues that already existed but went unnoticed.
Downloads Folder
- Sort by Size
- Remove old installers, PDFs, and archives
- Delete outdated documents
Desktop Files
Files on the Desktop are constantly indexed and backed up. Clearing clutter here improves both storage and performance.
Step 8: Use Built-In macOS Storage Optimization Tools
macOS Tahoe includes built-in tools that are effective when used correctly.
Optimize Storage
- Automatically removes watched Apple TV content
- Keeps only recent email attachments
Empty Trash Automatically
Enable this option to prevent forgotten files from accumulating.
Store Files in iCloud
Useful for documents, but not ideal for large local workflows. Consider bandwidth and offline access before enabling.
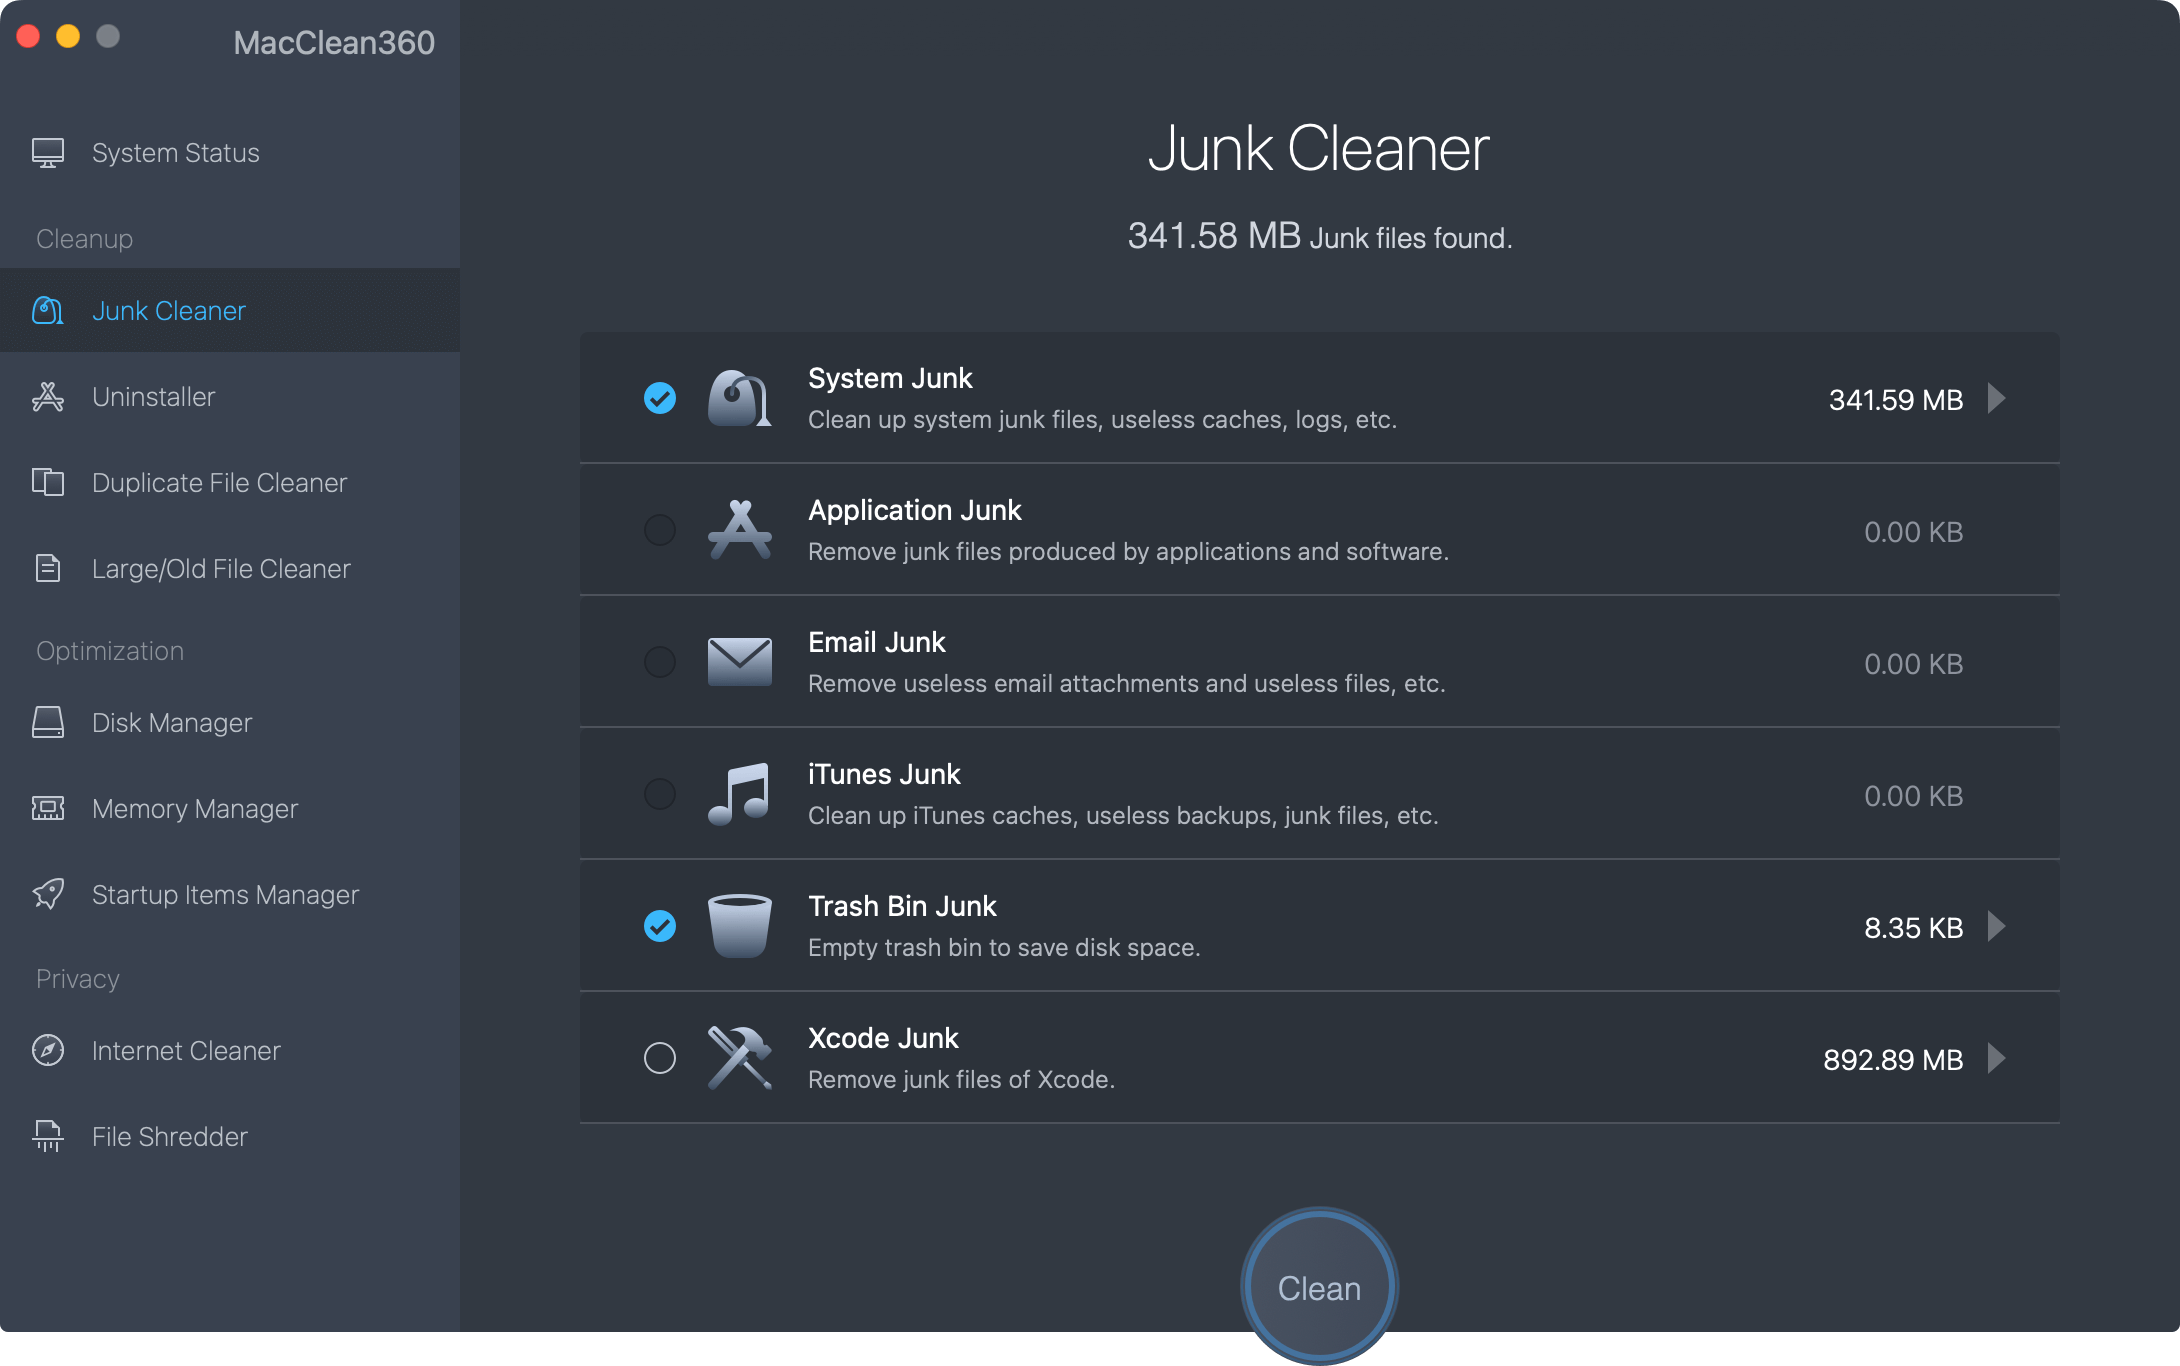
Free Up Storage Space Easily and Safely with MacClean360
When manually free up space on Mac, there are risks removing the wrong files. Especially, the system or apps may not work normally after deleting some crucial files. How to safely free up storage space after macOS Tahoe update? It's recommended to use the professional Mac cleanup tool - DoYourData MacClean360.
MacClean360 - Best Mac Cleaner
- Reliable Mac cleanup and optimization tool.
- Clear junk data on Mac quickly and easily.
- Comprehensive tool to speed up your Mac.
The software can deeply scan your Mac to find possible junk data. It's easy and safe to remove different kinds of junk files from Mac after macOS Tahoe update. The software offers different options to help you remove the junk data and free up space, including:
- Cleaning up system and application junk
- Uninstall apps without leftovers
- Detecting and removing duplicated files
- Finding and deleting large files
- Clearing the browser cache and junk data
Restart, Reindex, and Recheck Storage
After cleanup, restart your Mac. This step is critical. Why?
- Releases locked system files
- Forces storage recalculation
- Triggers Spotlight and cache optimization
After restarting:
- Return to System Settings → Storage
- Wait for recalculation
- Compare before-and-after results
Many users report reclaiming 10–30 GB after following all steps.
Prevent Storage Issues After Future macOS Updates
To avoid repeating this problem:
Before Updating
- Ensure at least 30–40 GB free space
- Delete old installers and large unused files
After Updating
- Restart once or twice
- Check System Data after 24–48 hours
- Remove leftover installers manually
Ongoing Maintenance
- Review storage monthly
- Keep Downloads and Desktop clean
- Monitor Time Machine snapshots
Conclusion
Freeing up storage space after a macOS Tahoe update is not about deleting personal files—it is about removing update residue, system clutter, and accumulated system data that macOS does not always clean automatically.
By:
- Removing leftover installers
- Clearing caches and logs
- Managing System Data and snapshots
- Cleaning media libraries and unused apps
You can restore your Mac's storage to a healthy state and prevent future slowdowns or update failures. With a little post-update maintenance, macOS Tahoe runs smoothly—even on Macs with limited SSD capacity.
MacClean360
All-in-one Mac maintenance tool to clean up all types of junk data by 1 click, remove old/duplicate files, uninstall unwanted apps, clean up browser junk data, manage disk, permanently shred files, speed up slow Mac, manage startup items on Mac.
Written & Updated by Ricky Lin
Ricky Lin is an senior editor of DoYourData who lives in Adelaide, Australia. He is interested in writing technology articles related with data recovery, computer issue fixes, disk clone, iPhone data recovery, video edit, Mac optimization, etc. He Joined DoYourData in 2019 and have written 500+ articles to help both Windows users and Mac users to solve data or computer problems.