How to Recover Deleted Files Using Mac Terminal?
![]() Updated by Justin Kenny on 2022-04-28
Updated by Justin Kenny on 2022-04-28
A fast clean-up of your Mac's document and desktop folders, even the desktop itself, may be essential at times. You can get back any files you accidentally erased after a clean-up, even if they were the ones you wanted to remove.
The Mac Terminal is an excellent option for those who are experienced with command lines since it enables you to make changes on your Mac swiftly and permanently. Here, we'll show you how to use Mac Terminal to restore lost files, one of Terminal's most valuable functions.
How to Run Terminal on a Mac?
Launching the Terminal software on macOS is simple since it's incorporated into the operating system, so you don't need to download anything.
Open Finder and choose Utilities from the menu.
In Utilities, search for the Terminal program and double-click it to start it up.
You'll be presented with a new blank Terminal window, into which you may input Terminal commands.
We'll take a look at some of the methods you may use the Terminal to recover files below.
How to Restore Deleted Files Using The Mac Terminal
One of the greatest ways to get back deleted data fast is to use the Mac Terminal. These methods may assist you in having a positive experience.
Method 1: Use Mac Terminal to Recover Deleted Files from The Trash
Using your Mac's Utilities, open Terminal and enter the following command: cd.Trash and press Return to exit.
To see what's in your Trash folder, use ls -al /.Trash.
Now, enter mv filename../ and press Return again. For this method to function, you must provide the full file name in the command line.
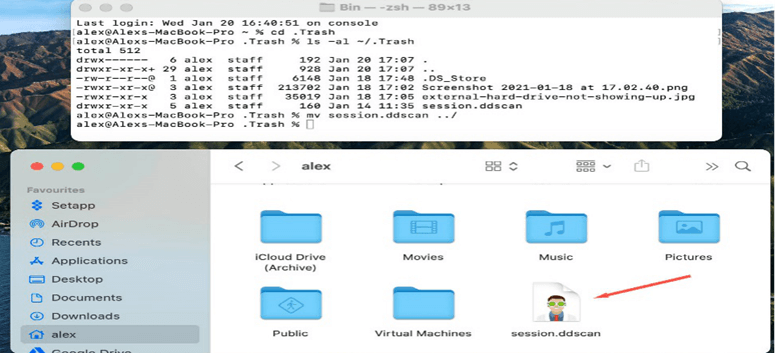
Type "Quit" on the command line. This command ends the session.
The deleted file should be visible in Finder. The search bar may be used to find it if the prompt window doesn't display it.
Method 2: Using The rm Command To Recover Files
Any file may be removed from the Terminal using the rm command. If you use the rm command to remove a file, it will not be able to be recovered using the above-described approach.
PhotoRec, which runs in Terminal and may be installed using Homebrew, is a Mac data recovery program that can help you get them back.
Paste the following command into Terminal to get Homebrew up and running:
/bin/bash-c"$(curl-fsSL https://raw.githubusercontent.com/Homebrew/install/master/install.sh)"
Enter the command brew install testdisk and press Enter (PhotoRec is included in the TestDisk package).
Launch PhotoRec by entering the command sudo photorec and pressing Enter.
Choose your hard drive. Go ahead and choose a hard drive.
Select a partition in the next step. Choose the "No partitions" option to scan the whole hard disk.
Press Enter to choose the correct file system. PhotoRec will make recommendations based on what it thinks is the best course of action.
Hit C on your keyboard to save the retrieved data when you're done.
Method 3: Running The Time Machine Through The Terminal
You can save your Mac's data to an external hard disk using Time Machine as a built-in tool. For the most part, you can restore deleted data without using the Terminal by using the Time Machine interface instead.
If you're seeking to operate Macs that are distant or execute scripts on them, the Terminal-based technique is a good option. In addition to learning how to utilize Time Machine without the graphical user interface, you can also use this recovery technique to restore your system.
Time Machine instructions with the following in their name are common:
tmutil
Activate the Terminal. It's important to ensure that the Terminal has complete disk access.
Next, type the following to get a list of all the time machine backups you've made.
tmutil listbackups
Next, enter the following information:
tmutil restore '$BACKUP_PATH/$ORIGINAL_PATH’ '$DESTINATION'
In this way, you may access a Time Machine backup and retrieve a previously deleted file. When entering the file's name, don't forget to provide the full path.
For those who are intrigued by all of the Terminal and text-based terminology, there are full data recovery solutions that can be executed from inside the Terminal.
If you believe that an error on your Mac has erased all of your data, think again! When it comes to recovering files removed from Trash, Terminal can't do it. In truth, it just recovers the deleted files that were already in the Trash.
It is pointless to utilize Terminal data recovery if you have emptied your Trash or erased files from the Trash. Your permanently erased data can only be recovered with a Mac data recovery program.
Do Your Data Recovery for Mac
- Recover deleted, formatted and lost files.
- Recover inaccessible or corrupted files on Mac.
- Recover lost data from Mac, USB flash drive, HDD, SSD, memory card, camera, etc.
Step 1. Select the hard drive where you delete or lose your files.

Step 2. Click on Scan button to scan the hard drive.
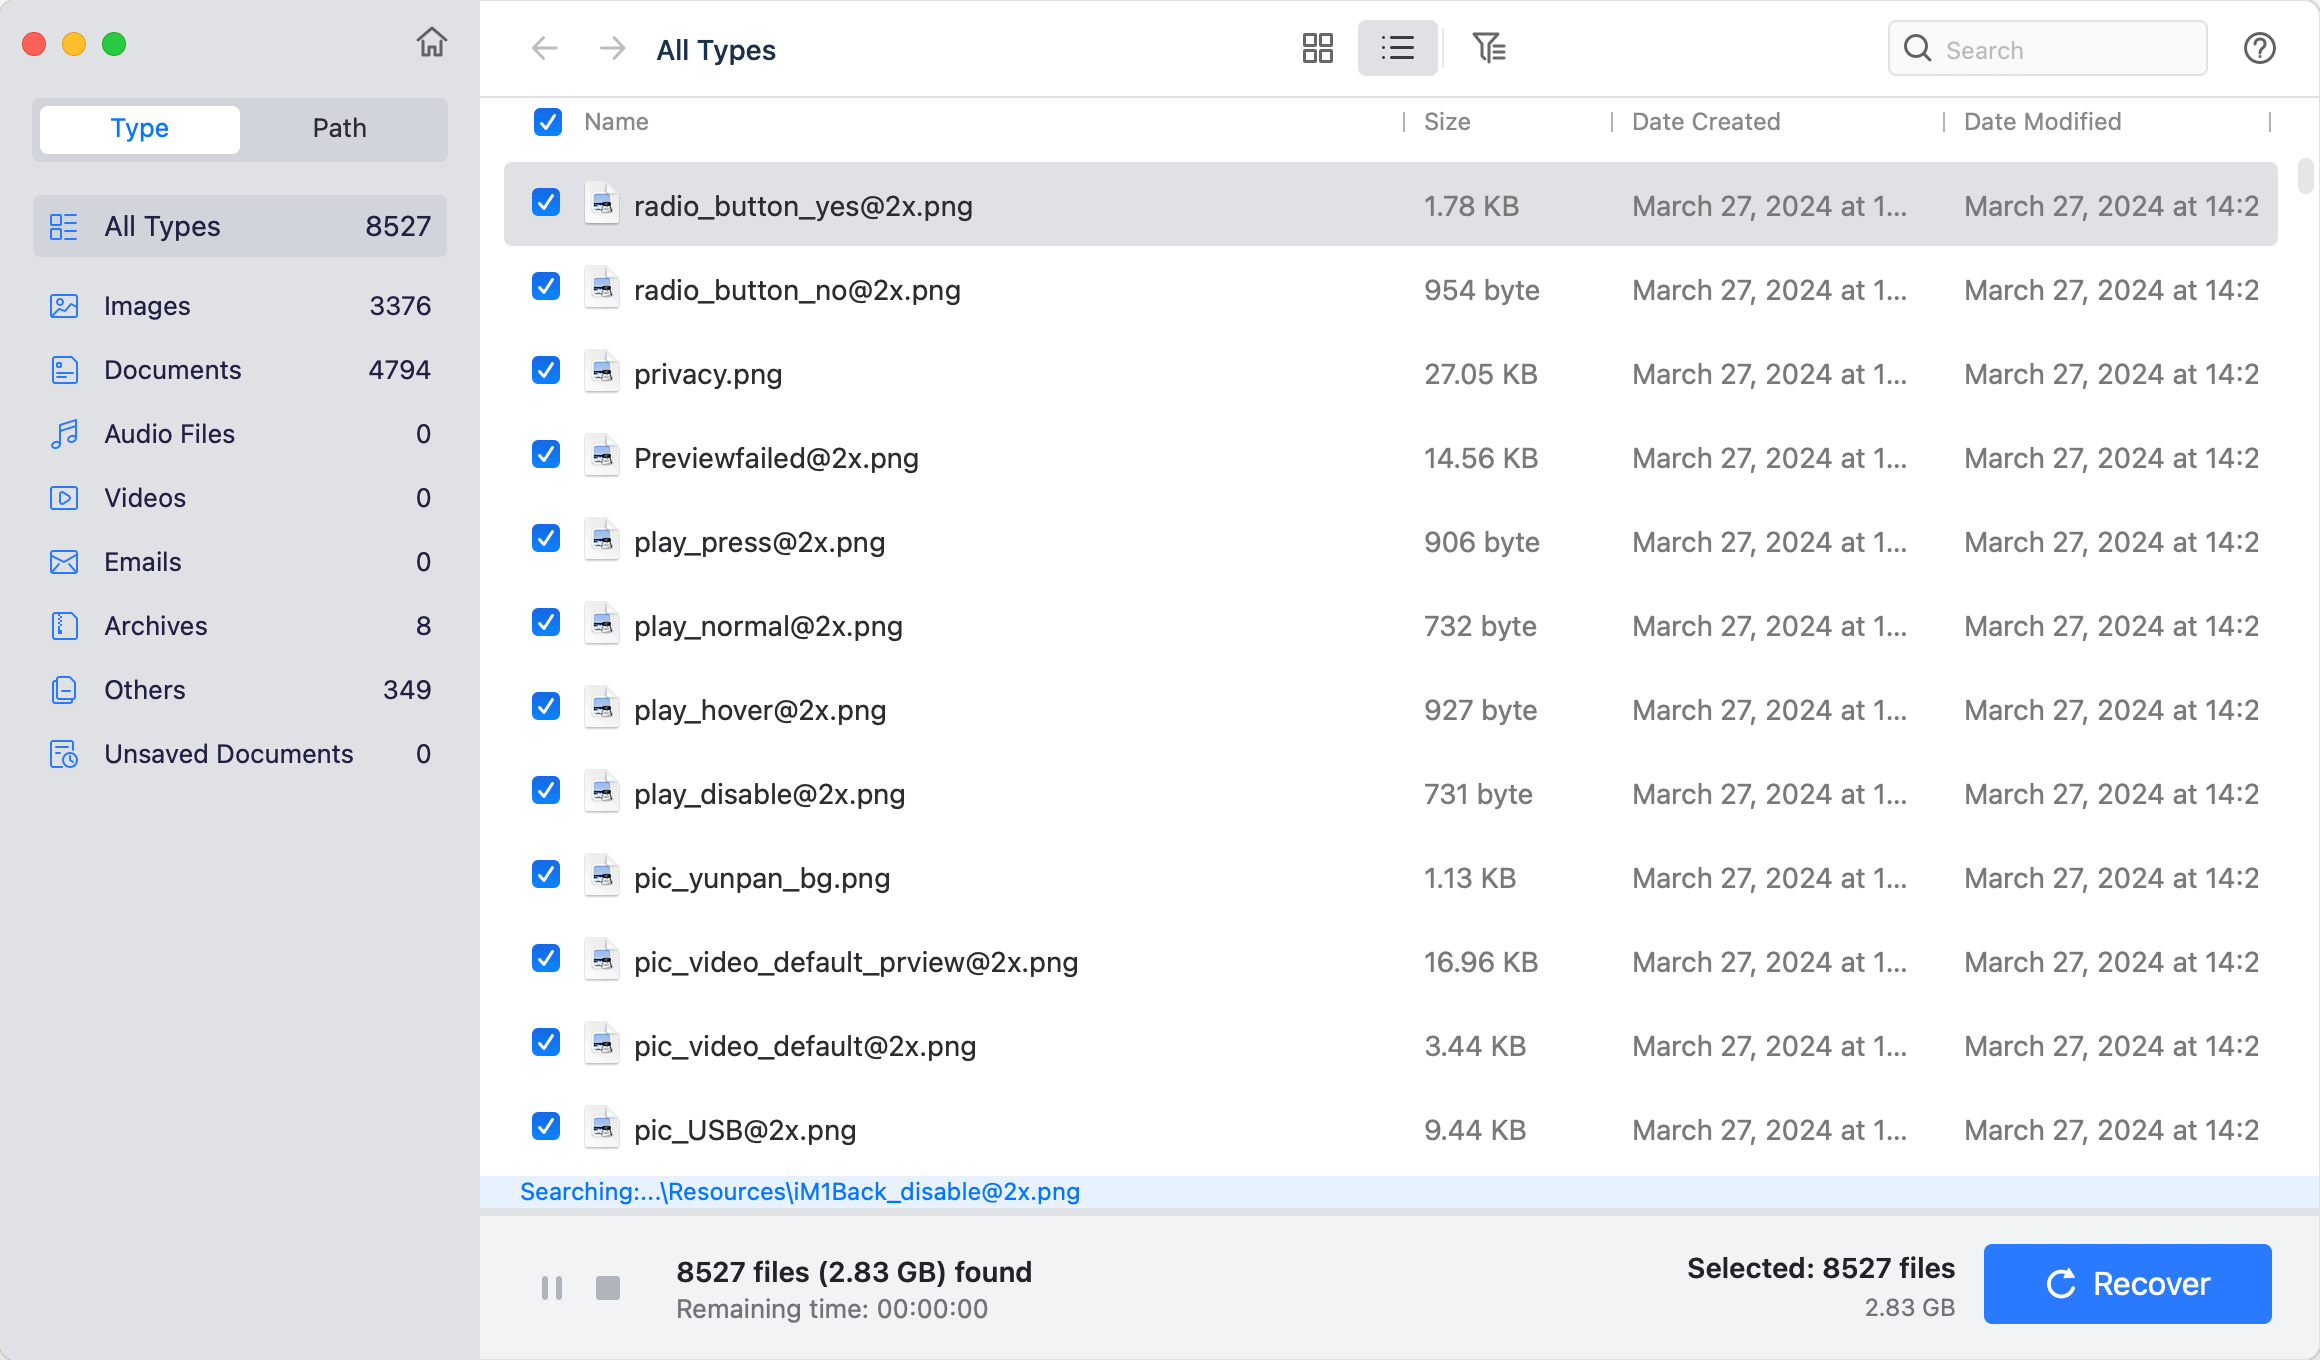
Step 3. Once the scan is completed, you can preview and recover lost files.

Written & Updated by Justin Kenny
Justin Kenny is a writer & editor of DoYourData. He joined DoYourData in 2016 and focuses on writing articles about Windows data recovery, Mac data recovery, external device data recovery, hard drive clone, data erasure, Mac cleanup, computer issue fixes, etc. He is a super fan of Apple devices and is big on testing new digital device and system utility software.