The reliable Mac data recovery software to recover deleted or lost files.
Free TrialHow to Change Where Screenshots Are Saved on Mac?
![]() Updated by Ricky Lin on 2022-04-26
Updated by Ricky Lin on 2022-04-26
While taking a snapshot on your Mac is straightforward, there are several aspects of the process that remain a mystery. Beginners may not realize where the snapshot is saved because it is saved on the desktop rather than the pasteboard by default (as on Windows). However, even expert users may be unaware that you may alter the destination, which you may want to do if your Mac desktop has become congested.
We'll teach you how to alter where screenshots are stored on your Mac in this post. We'll teach you how to have screenshots go to a directory or even your thumbnail view.
On a Mac, where are screenshots saved?
Mac screenshots are saved to the desktop by default, with a name like 'Screenshot 2018-09-28 at 16.20.56,' which indicates the date and time the screenshot was captured. If you use Desktop Stacks (another new feature in macOS Mojave), you may organize your desktop such that all of your screenshots are neatly tucked away into a folder. (How to organize your Mac desktop explains how to accomplish this, as well as several other methods to tidy up your desktop.)
You'll have a screenshotting tool named Grab if you haven't installed macOS 10.14 Mojave or later on your Mac (Mojave was released in 2018). Grab (included in the Applications folder's Utility section) may be used to grab screenshots. Normally, you save screenshots to your Documents folder, and the image is saved as Untitled if you don't modify the name.
On a Mac, how do you modify the position of a screenshot?
It's incredibly simple to modify where screenshots are stored if you have macOS Mojave, Catalina, Big Sur, or Monterey installed.
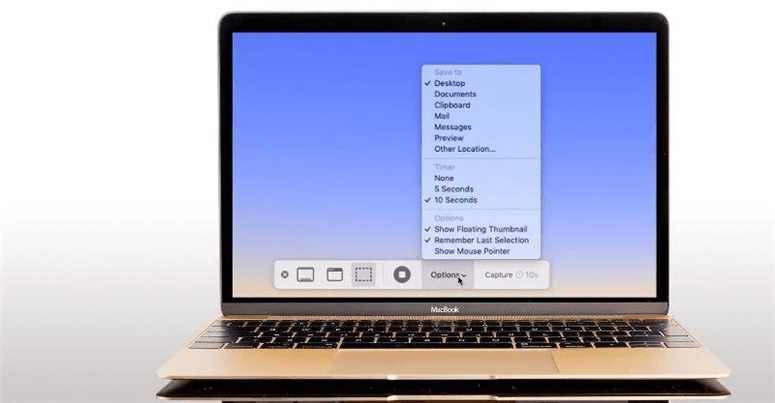
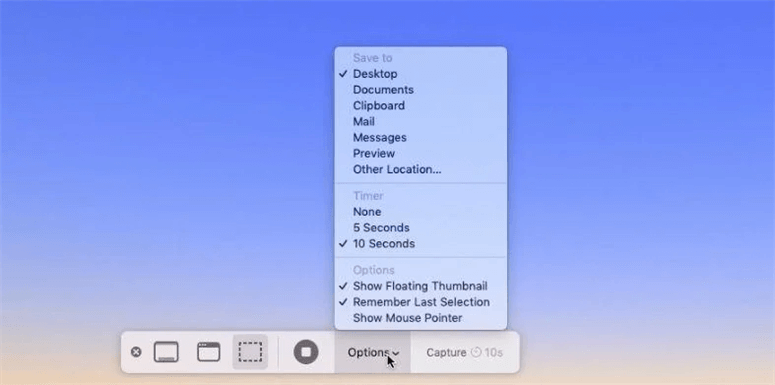
- Press Command + Shift + 5 at the same time.
- Select Options.
- Select a folder from the drop-down menu or choose Other Location.
- If you select Other Location, you may go to the folder where you want the screenshot to be saved, or you can create one if necessary.
- Once you've changed the location, your screenshots will be saved there until you change it again.
You can select from the following options in addition to your self-defined 'Other Location': Desktop, Documents, Clipboard, Mail, Messages, and Preview are all available options.
How to alter the location of Mac screenshots in previous macOS versions?
Before Mojave, it wasn't as simple to tell macOS to store screenshots somewhere else, such as a Screengrabs folder. We'll suppose we've established a desktop folder named just that in the given description, but you may adapt this method to various locations as long as you know the file path.
To open a new Finder window, click the Finder icon.
By right-clicking on the Finder window, you may create a folder. Screenshots is a good name for it (or whatever you want to call it).
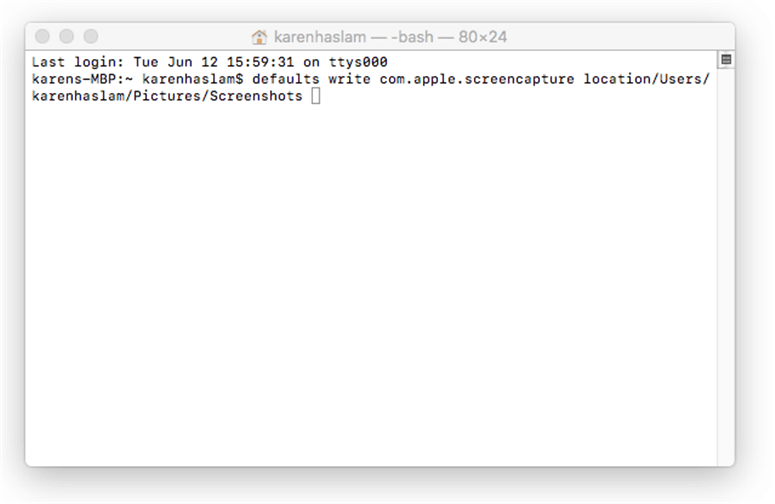
Open Terminal by pressing Command + Space and typing Terminal until the icon appears, then clicking on it to launch the software.
Type the following in Terminal:
write com. apple.screen capture location by default
(There must be a space after location; else, it will not function.) Drag & drop your Screenshots directory on top of the Terminal screen, and the directory information will be automatically filled in.
Now hit the Enter key.
Then type the following to ensure that the modification is applied:
SystemUIServer:killall
A word of caution: don't remove the folder you just made!
You may establish an alias if you still want convenient access to your screenshots from the desktop. Simply go to the Finder and right-click on the folder you created.
Select Create Alias from the drop-down menu.
The Alias should now be dragged and dropped to the desktop.
Take a few screenshots to make sure it's functioning.
Return to Terminal and type "defaults write com.apple.screen capture location /Desktop" (without quotation marks) and click Enter to return to the default screenshot location. Then, without quotes, write "killall SystemUIServer" and press Enter.

Copy screenshots to your clipboard.
- The Print Screen feature on a Windows PC differs from that on a Mac.
- In Windows, instead of saving a screenshot to the desktop, it is saved to the pasteboard. Then open Photoshop, Paint, or whichever image-editing program you want, make a new document and paste the screenshot into it.
- On a Mac, you may duplicate this function by altering the keys you hold when capturing a screenshot.
- After you've created the crosshairs with Command + Shift + 4, hold Ctrl while dragging the mouse across the appropriate region. The resulting screengrab will be transferred to the clipboard, allowing you to put it into Preview or a Keynote presentation.
- This method works on all Macs, regardless of whether they are running Mojave or later.
- On a Mac, here's how to save a snapshot to the pasteboard: Keep Command + Shift + 4 pressed. The crosshairs will appear on the screen. You are free to let go of the keys.
- Ctrl-drag the crosshairs across the region of the screen you want to screenshot using Ctrl.
- Relinquish control of the mouse button.
- The screenshot will be copied to the clipboard.
Here is how you can change where screenshots are saved on Mac.
DoYourData Products
DoYourData Super Eraser for Mac
Permanently shred files or wipe hard drive to prevent data recovery on Mac.
Free TrialClone HDD, SSD, Mac OS, external disk, USB drive, and more under Mac OS.
Free TrialWritten & Updated by Ricky Lin
Ricky Lin is an senior editor of DoYourData who lives in Adelaide, Australia. He is interested in writing technology articles related with data recovery, computer issue fixes, disk clone, iPhone data recovery, video edit, Mac optimization, etc. He Joined DoYourData in 2019 and have written 500+ articles to help both Windows users and Mac users to solve data or computer problems.