Recover deleted, formatted or corrupted data from hard drive or external device.
Free TrialHaving an email address at the core of your Apple ID is where it all begins and ends on your iPhone. What, then, should you do if you wish to alter it?
All Apple-related correspondence is routed via the email address associated with your Apple ID, so losing access to that account may be a huge headache. It’s possible you simply stopped checking that inbox. Regardless of the motivation, switching the Apple ID email address on an iPhone is a simple process. Take a look at this article for instructions.
Changing Your Apple ID Email Through The Website
Any Apple device connected to your Apple ID should be logged out before you start. To avoid losing data like contacts or other information, it’s also a good idea to have an up-to-date iCloud backup.
To complete the process, you’ll need access to the email address associated with your Apple ID. Make sure you access your email account’s password before making any changes.
After it is finished, let’s begin:
Sign in with your existing Apple ID and password at appleid.apple.com from your iOS device, Mac, or PC. The password for your Apple ID may be easily changed if you forget it.
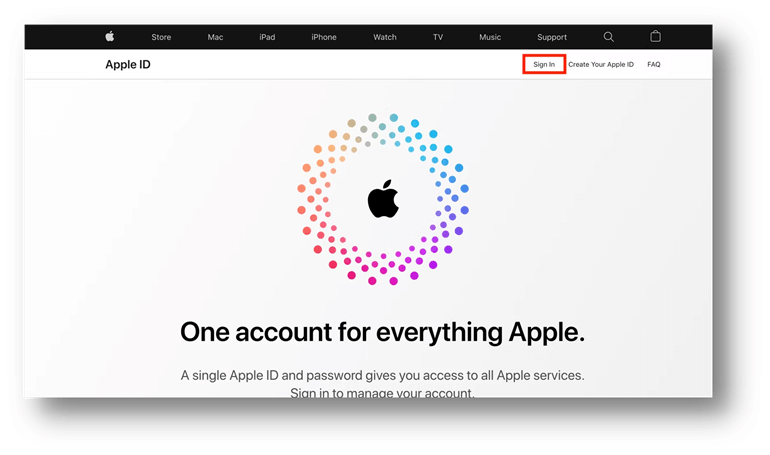
Your browser will automatically advance to the site’s login and security page. The next step is to choose the Apple ID tab.

Then, in the window that appears, click Change your Apple ID and input your new email address when prompted. If the email you tried to use is already in use by another Apple customer, you will get an error message.
You will be required to use a different email address or establish a new Apple ID unless the original user manually removes the email from their account.
You will be prompted to input a verification number given to your new email address after clicking Change Apple ID. Look at your mailbox and then fill in the appropriate fields with the information.
To find the verification code, make sure you’re checking the right inbox. The most recent email received from noreply@apple.com may also be located this way.
After putting in the verification code, the dialogue window will close when you’re done making changes to your Apple ID email.
Use your new Apple ID to log in to all of your Apple products and services. It’s important to remember that you can’t make another Apple ID update for 30 days.
Keep in mind that only non-Apple email addresses, such as those ending in @gmail.com, @hotmail.com, or @yahoo.com, may be changed to a new Apple ID. It is impossible to modify an Apple ID with the @me.com, @icloud.com, or @mac.com domain.
You may sign out, then sign in with a new Apple ID if you want to change to that account instead of just changing the email address associated with your current Apple ID.
Changing Your Apple ID Email on An iPhone
Here are the actions you must do to modify your Apple ID in the iPhone’s settings. On your iPhone, launch the Settings app.
Second, go to your Apple ID page by tapping your name at the top of the screen (where it should read Apple ID, iCloud, Media & Purchases).
As a quick suggestion, you may also log out of iCloud by visiting the Apple ID page on your iPhone and selecting Sign Out at the bottom.
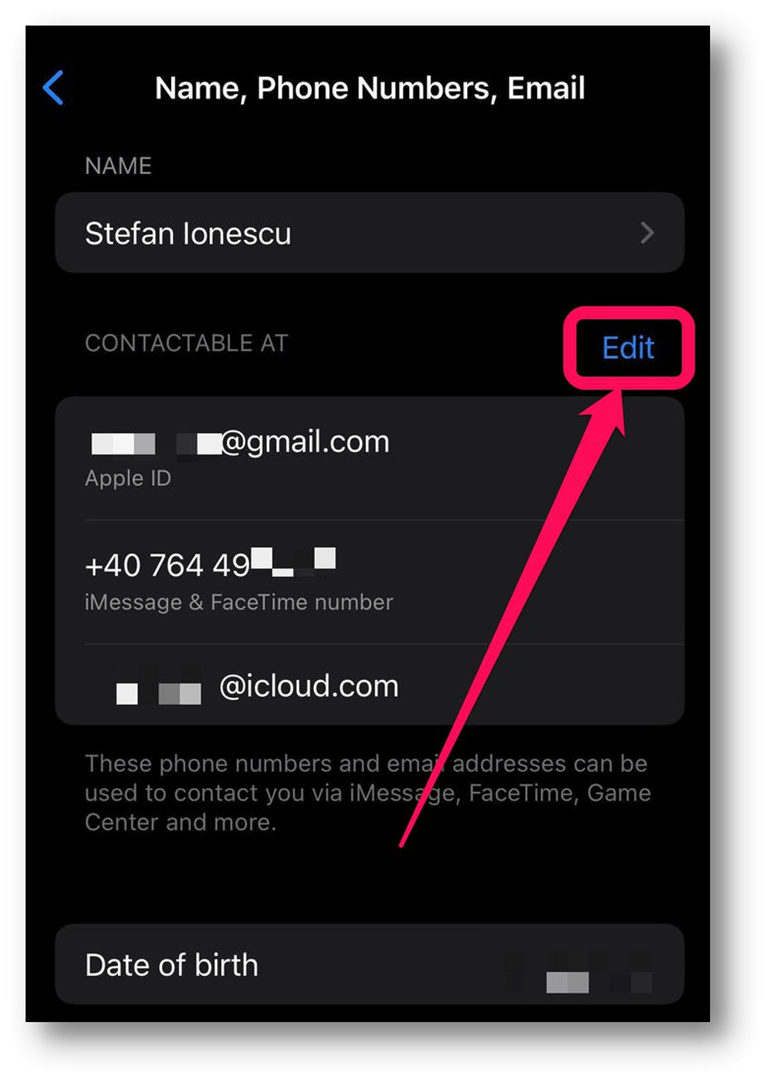
Fill up your personal information (name, phone, and email address). There may be a need for a password before you can proceed.
The part that says “Contactable At,“ choose the blue button labeled “Edit” on the right.
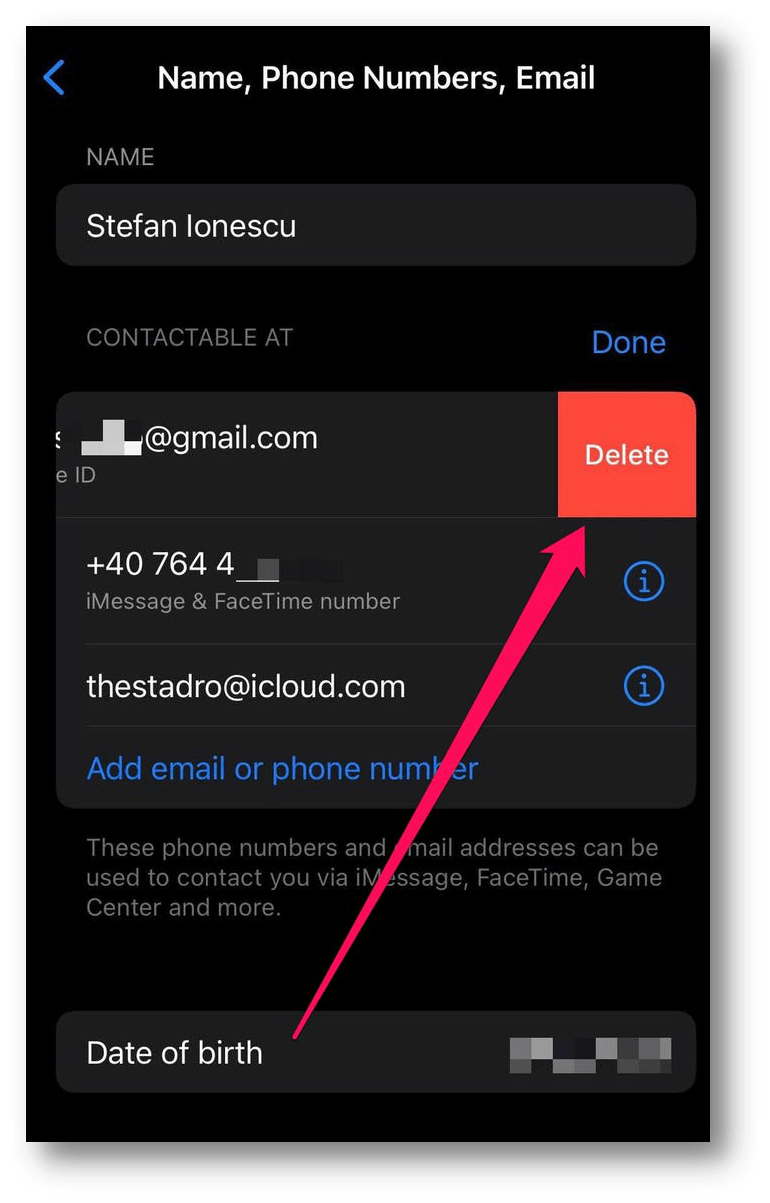
Select the negative (red minus) symbol to the left of your Apple ID.
Afterward, click the red Delete icon that appears to the right of the email address. Select “Delete” from the menu.
When prompted to add an additional email address for use with your Apple ID, choose to Continue in the resulting pop-up. After then, you may be asked to enter your password once again.
Click Next in the upper right after entering your new Apple ID email address.
To the email you provided, a verification code will be issued. Select it from your email and then type it into the iPhone’s verification window. Your Apple ID will be updated as soon as you enter the code.
Conclusion
You can’t get the most out of Apple’s products and services without an Apple ID, which serves as your entry point. If you have changed the email address associated with your Apple ID, you must log back into all Apple services using the new email address.
Just use your new Apple email address and password to log in to iMessage, iCloud, iTunes, the App Store, and any other Apple service you use. If you are currently logged in with your old Apple ID, you may easily switch to your new Apple ID by logging out and signing in with your new email and password.
DoYourData Products
Written & Updated by Ricky Lin
Ricky Lin is an senior editor of DoYourData who lives in Adelaide, Australia. He is interested in writing technology articles related with data recovery, computer issue fixes, disk clone, iPhone data recovery, video edit, Mac optimization, etc. He Joined DoYourData in 2019 and have written 500+ articles to help both Windows users and Mac users to solve data or computer problems.