Three Methods to Recover Lost Files after Upgrading to macOS Big Sur
![]() Updated by Justin Kenny on 2020-09-19
Updated by Justin Kenny on 2020-09-19

Many times it is necessary to perform updates on your Mac computer, however, this can represent an inconvenience on certain occasions, since it is increasingly common to experience the loss of information after performing this procedure on macOS. Although macOS is a very up-to-date and modern version, it is also vulnerable to so many flaws, which is why we must stay close to the important information that helps us recover all the data that has been lost.
Recently, many Mac users are updating macOS to macOS Big Sur. In order to prevent data loss, it is recommended to make a full backup before upgrading to macOS Big Sur. If you have lost important files after upgrading to macOS Big Sur, just follow this guide. We will introduce three methods to help you securely and easily recover deleted, formatted or inaccessible files on macOS Big Sur.
Three methods to recover deleted/lost files after upgrading to macOS Big Sur
- Method 1. Restore lost files from trash bin on macOS Big Sur.
- Method 2. Recover lost files with macOS Big Sur data recovery tool.
- Method 3. Just recover files from TemporaryItems folder.
Method 1. Restore lost files from trash bin on macOS Big Sur.
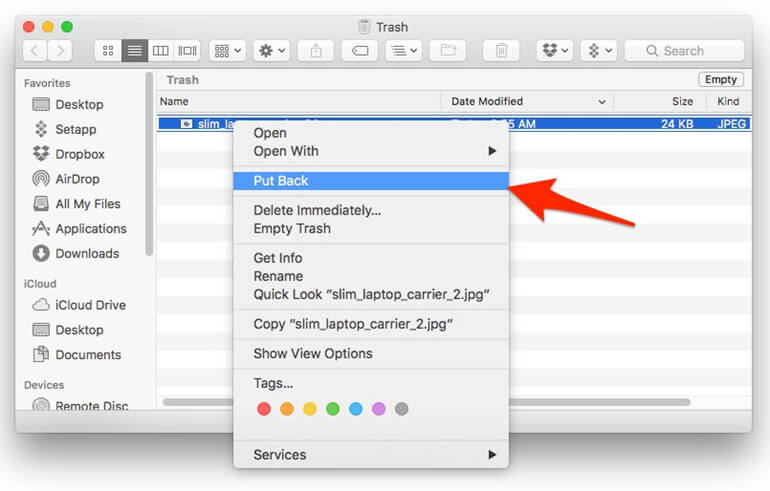
The first method to recover lost data on macOS Big Sur is checking trash bin. Mostly, the deleted files will be moved to the trash bin. Just open Trash on your Mac, and check if the deleted files are still there. If you can find your lost files, just select them - right-click them and choose 'Put Back'.
Method 2. Recover lost files with macOS Big Sur data recovery tool.
If you can’t find lost files in trash bin, you can try macOS Big Sur data recovery software. There is a data recovery application - Do Your Data Recovery for Mac that is compatible with almost all versions of macOS, including macOS Big Sur, so it is advisable to use this tool to recover lost files after upgrading to macOS Big Sur. Download it here:
Do Your Data Recovery for Mac is a powerful macOS Big Sur data recovery application. It supports to:
- Recover deleted files on macOS Big Sur.
- Recover lost files from emptied trash bin on macOS Big Sur.
- Recover lost data from local Mac HDD or SSD, portable hard drive, memory card, USB flash drive, digital camera, etc under macOS Big Sur.
- Recover lost data from formatted, damaged or erased hard drive/damage on macOS Big Sur.
- Export data from a inaccessible device to your Mac.
Once this application is downloaded to your Mac computer, you can start executing it, and you simply have to follow the steps that we will take below, don't worry, you will have your files back in less time than you expect.
Step 1. Choose the hard drive where you lose your files.
Run Do Your Data Recovery for Mac on your computer, then select the hard drive where you delete or lose your files. This macOS Big Sur data recovery software supports to recover all types of files.

Step 2. Scan the hard drive to find deleted/lost files.
Just click on Scan button to find deleted or lost files. If the quick scan can’t find all lost files, just try advanced recovery mode to find much more lost files.
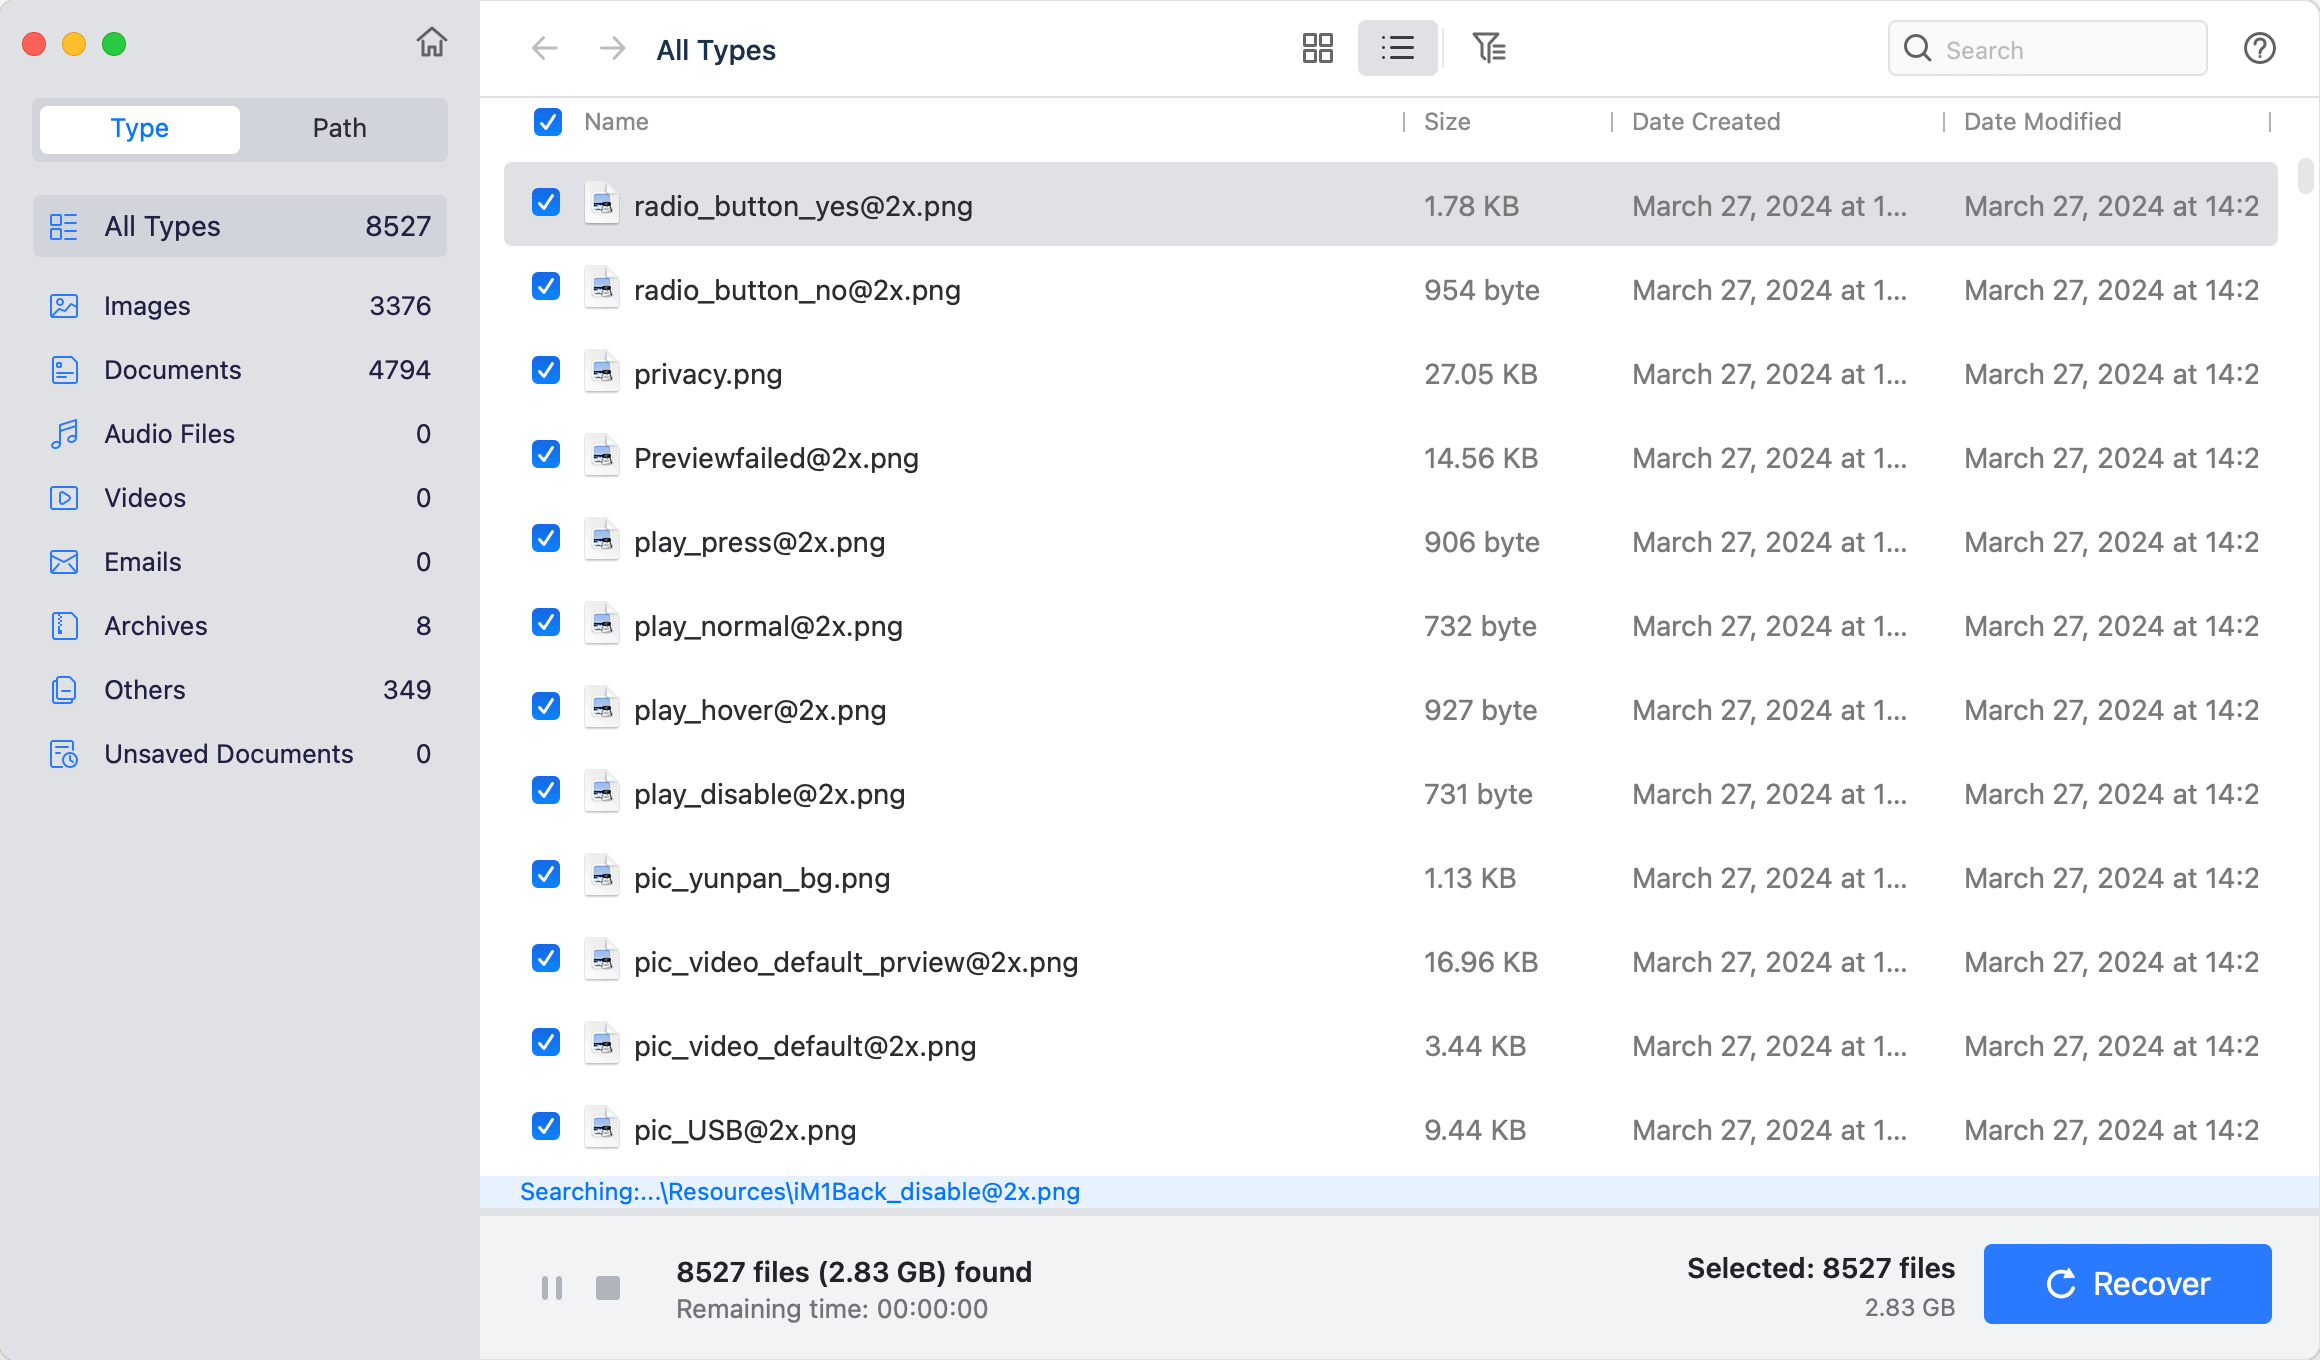
Step 3. Preview and recover lost files.
Once the scan is completed, you can preview all recoverable files. Then select the wanted files and save them.

Do Your Data Recovery for Mac is able to find every recoverable file on your hard drive. The advanced recovery mode is able to deeply scan your hard drive and find all lost files. Some users may think the deleted files on SSD can’t be recovered. It is not true, Do Your Data Recovery for Mac can help you completely recover deleted files from SSD on macOS Big Sur.
Method 3. Just recover files from TemporaryItems folder.
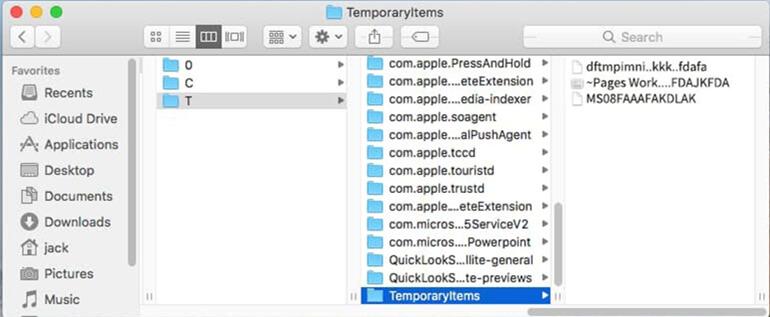
If you lose unsaved Pages, Word Documents, Excel Files, etc, you can check TemporaryItems folder. To access that folder, open Terminal from Applications/Utilities. Then type 'open $TMPDIR' in the terminal and press Return. This will open the TemporaryItems folder. Then find the files you want to recover.
The three methods above can help you easily and completely recover lost files after upgrading to macOS Big Sur. As you’ve seen, Do Your Data Recovery for Mac is the best data recovery tool for macOS Big Sur. If you lose files or can’t find your files on Mac computer, just download and install it. Then run it to scan the Mac hard drive to quickly find lost files. It also can help you recover lost files from external device including external hard drive, memory card, USB flash drive, digital camera, etc.
Written & Updated by Justin Kenny
Justin Kenny is a writer & editor of DoYourData. He joined DoYourData in 2016 and focuses on writing articles about Windows data recovery, Mac data recovery, external device data recovery, hard drive clone, data erasure, Mac cleanup, computer issue fixes, etc. He is a super fan of Apple devices and is big on testing new digital device and system utility software.