How to Wipe Everything for Good Before Selling an External Hard Drive
To wipe everything for good before selling an external hard drive, standard deletion or simple formatting is NOT enough. You must overwrite the drive's storage sectors using certified data wiping software like DoYourData Super Eraser or command-line overwrite tools. This destroys all trace files, preventing data recovery software from restoring your personal files.
 Updated by Shirly Chen on August 19, 2026
Quick Navigation:
- Why Wipe External Hard Drive before Selling It
- Essential Pre-Wipe Checklist for External Hard Drive
- HDD vs. SSD: Important Differences before Wiping
- How to Permanently Wipe External Hard Drive Data
- FAQs about Wiping External Hard Drive
- Final Words
Are you planning to sell, trade in, or give away your old external hard drive? That is a great way to declutter your tech setup or make a little extra cash. But before you ship it out or hand it over to a stranger, there is one crucial step you cannot afford to skip: erasing your personal data.
Think about what is stored on that drive. Financial records, tax returns, family photos, work files, stored passwords, and personal scans are often saved on external hard drives. If you do not erase this information completely, the next owner could easily recover it.
In this guide, we will explain why simple formatting is not enough and walk you through step-by-step methods to wipe everything for good before selling an external hard drive on both Windows and Mac.
Why Wipe External Hard Drive before Selling It
Most people assume that dragging files to the Recycle Bin or right-clicking a drive and selecting 'Format' completely removes their files. Unfortunately, that is a dangerous myth.
When you delete a file or perform a quick format, your operating system only removes the 'file index'—the map that tells the computer where the data lives. The actual data remains intact on the storage drive until new data overwrites it. Anyone with basic, free data recovery software can scan the drive and bring your private files back in minutes.
To protect your privacy and prevent identity theft, you must overwrite the entire drive with random bits of data (zeros and ones). Once data is overwritten, it is permanently gone and impossible to recover.
Essential Pre-Wipe Checklist for External Hard Drive
Before you start erasing your drive, take a few minutes to complete these essential preparation steps:
- Back Up Important Files: Once a professional wipe is complete, recovery is impossible. Double-check that you have copied all necessary files to your primary computer, cloud storage, or a new external drive.
- Safely Disconnect Unnecessary Drives: Disconnect all other USB flash drives, memory cards, or secondary external drives to avoid accidentally selecting and wiping the wrong device.
- Keep Power Connected: Ensure your laptop or desktop stays connected to a power supply throughout the wiping process to prevent power loss mid-operation.
HDD vs. SSD: Important Differences before Wiping
It is important to know what type of drive you own before wiping:
- Traditional HDDs (Hard Disk Drives): Magnetically store data on spinning platters. Standard multi-pass overwriting (like DoD standards) works perfectly on HDDs.
- External SSDs (Solid State Drives): SSDs use flash memory and wear-leveling algorithms. Repeatedly overwriting an SSD with legacy methods can degrade its lifespan. For SSDs, using dedicated software like DoYourData Super Eraser or manufacturer trim tools ensures full sanitization without unnecessary physical wear.
How to Permanently Wipe External Hard Drive Data
Method 1: The Best & Easiest Way - Use DoYourData Super Eraser
If you want a hassle-free, 100% secure way to wipe everything for good before selling an external hard drive, dedicated software is the safest choice. Built-in tools like disk utility or command prompts can be confusing and leave room for human error.
DoYourData Super Eraser is a powerful data destruction tool designed for both Windows and Mac. It uses military-grade overwriting algorithms (such as DoD 5220.22-M and Gutmann) to permanently overwrite all data, ensuring zero chance of recovery.
Key Advantages of DoYourData Super Eraser:
- 100% Irrecoverable: Overwrites data completely, rendering recovery tools useless.
- User-Friendly: Simple interface requiring no technical expertise.
- Cross-Platform: Works seamlessly on Windows 11/10/8/7 and macOS.
- Hardware Safe: Safely wipes mechanical HDDs, portable SSDs, USB drives, and SD cards without damaging the physical drive.
3 Steps to Wipe Your External Hard Drive with DoYourData Super Eraser:
Step 1: Launch the program and choose the Wipe Hard Drive mode. Select your external hard drive from the list of available drives.
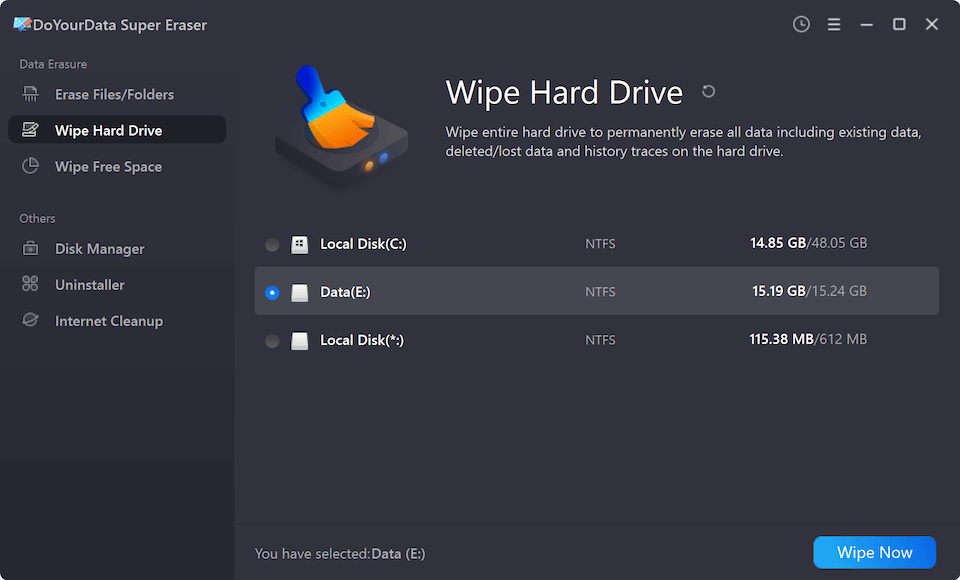
Step 2: Click the Wipe Now button. Then you need to select a data erasure standard for the permanent data wiping on the external hard drive.

Step 3: Click the Continue button to confirm the action, and the software will systematically wipe and overwrite every block of storage on the drive.
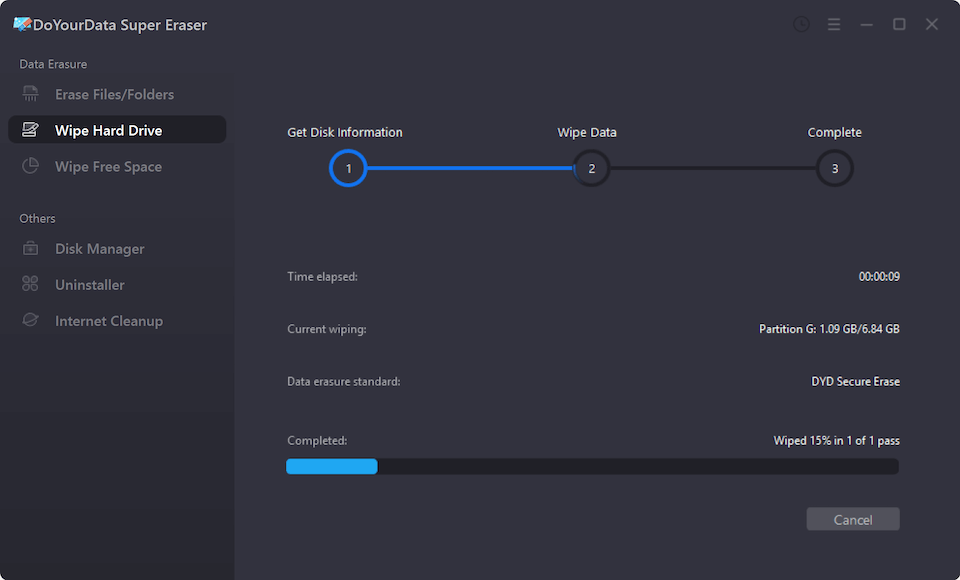
💡 Pro Tip for Sellers: After the wiping process completes, DoYourData Super Eraser provides a clean, fully formatted drive that is immediately ready for its new owner to plug in and use.
Method 2: Wipe an External Drive with Built-in Tools
If you prefer to use free, built-in Windows tools, you have two main options: Full Format and Command Prompt (Diskpart).
Option A: Use Full Format (Slower, Basic Protection)
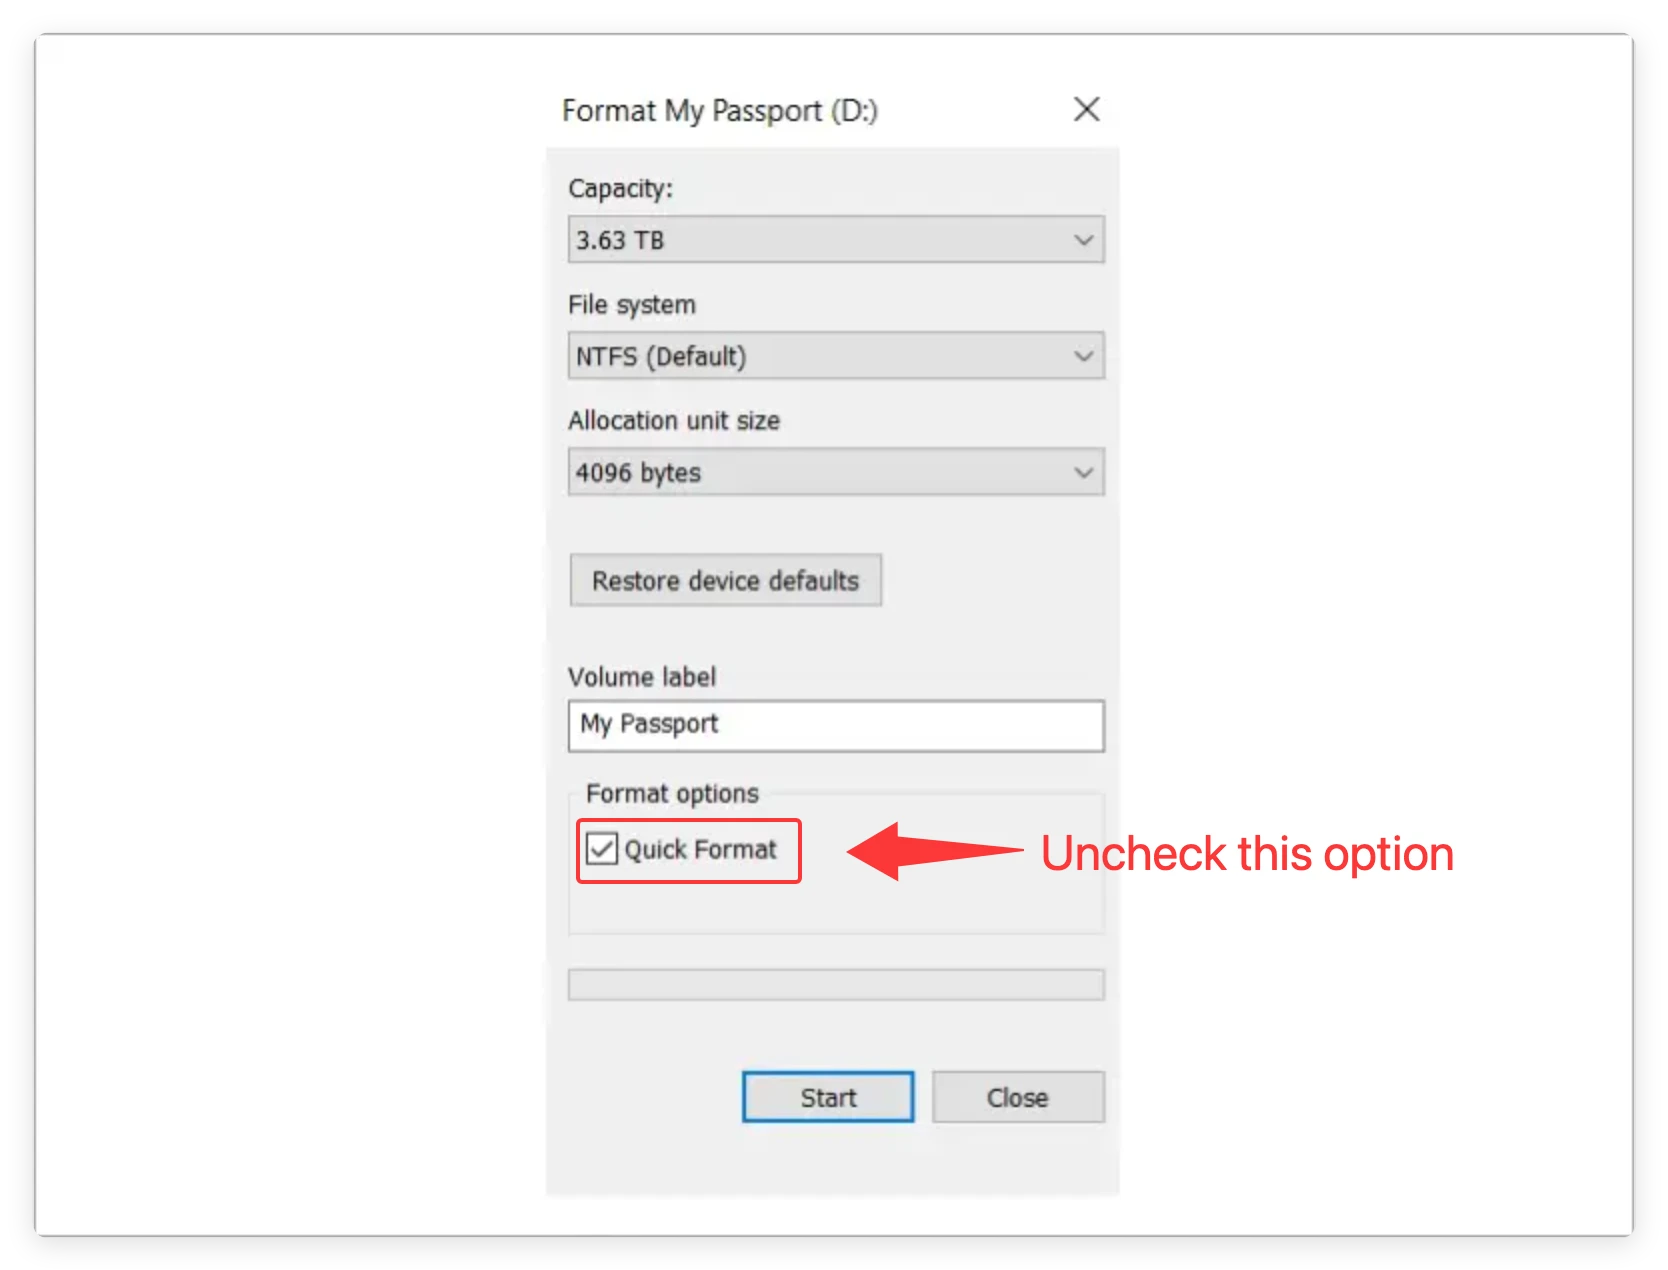
Starting with Windows Vista, running a Full Format (not Quick Format) writes zeros across the entire drive.
- Open 'This PC' or File Explorer.
- Right-click your external hard drive and select Format.
- Select your desired file system (NTFS or exFAT).
- Uncheck the 'Quick Format' box.
- Click Start. This process can take several hours depending on the size of the drive.
Option B: Use Command Prompt (Format with Zero Fill)
For a deeper cleaning via command line:
- Search for cmd in the Windows start menu, right-click, and select 'Run as Administrator'.
- Type format X: /fs:exFAT /p:1 (replace X: with your actual external drive letter).
- The /p:1 parameter instructs Windows to write zeros to every sector and then perform a single pass of random numbers over the drive.
FAQs about Wiping External Hard Drive
Final Words
Taking the time to wipe everything for good before selling an external hard drive is the best way to safeguard your personal identity and private information. Simple file deletion or quick formatting leaves your sensitive data exposed.
By using a dedicated tool like DoYourData Super Eraser, you can permanently destroy all existing data, hidden files, and trace remnants in just a few clicks. Clean your drive thoroughly, keep your data safe, and sell your drive with complete peace of mind!
DoYourData Super Eraser
DoYourData Super Eraser, the award-winning data erasure software, offers certified data erasure standards including U.S. Army AR380-19, DoD 5220.22-M ECE to help you securely and permanently erase data from PC, Mac, HDD, SSD, USB drive, memory card or other device, make data be lost forever, unrecoverable!
Written & Updated by Shirly Chen
Shirly Chen has been writing data recovery, data erasure articles for DoYourData over 4 years. She has been working as a professional website content writer & editor for quite a long time. She also writes articles about disk clone, Mac optimization, disk backup, etc.