
What is M1 Mac? A M1 Mac is the new Mac device which uses M1 Chip developed by Apple own. Apple’s newest MacBook and Mac mini don’t come with Intel processors. Instead, they use the brand-new Apple M1 chip, unveiled in 2020 as a powerful replacement for the many generations of Intel CPUs that have powered Apple computers since 2006.
Page Content:
Part 1. Why do you want to reset a M1 Mac to factory settings?
Part 2. Quickly reset a M1 Mac to factory settings.
Part 3. Recover lost data after resetting your M1 Mac to factory settings.
Part 4. Permanently erase data on M1 Mac to avoid data recovery.
Part 1. Why do you want to reset a M1 Mac to factory settings?
There are many reasons why you want to reset a M1 Mac to factory settings, for example:
- You are going to sell your M1 Mac or exchange a new device with Apple.
- You are going to donate your M1 Mac or give it away.
- You just want a fresh restart with the M1 Mac.
- There are many issues on your M1 Mac, you want to quickly fix them.
- You are not satisfied with the performance of the current macOS On your M1 Mac.
Whether you want to troubleshoot a weak M1 Mac or wipe data from a M1 Mac which will be sold, factory reset is the best method to meet your needs. Now, we will show you how to reset a M1 Mac to factory settings.
Part 2. Quickly reset a M1 Mac to factory settings.
Forcing a Intel-chip Mac to boot into Recovery Mode where you can erase disk or reinstall macOS has consisted of restarting the computer and holding Command + R on the keyboard. That trick will no longer work on an Apple Silicon M1 chip Mac.
In fact, the new process is much easier. Turn off the Mac, and then press and hold the power button. When the Apple logo first appears, you'll see text just below it letting you know to continue holding it in to access startup options. Keep pressing the button for about 5 seconds until the text switches to "Loading startup options." Next, click Options > Continue. (Type your admin password when asked.)
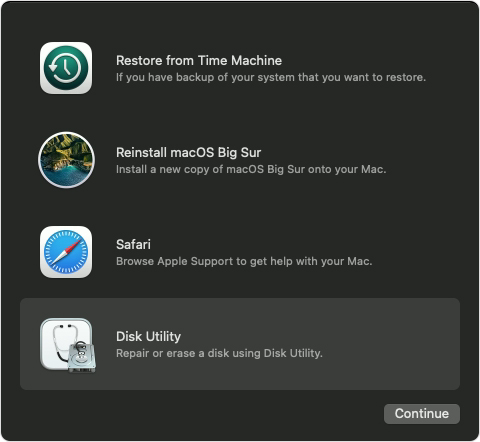
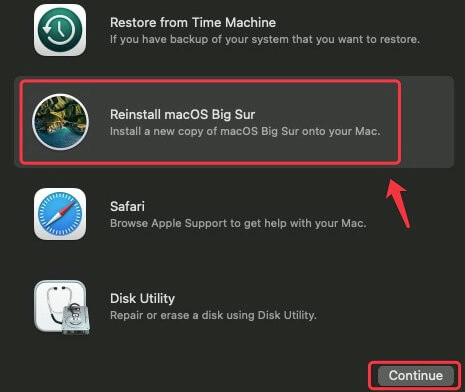
If you want to reset your M1 Mac to factory settings, just use Disk Utility to erase your startup disk.

Once that's done, close Disk Utility and then select Reinstall macOS from the list of options. You'll be asked to select where you want it installed, which should be Macintosh HD/Apple SSD (or whatever name you gave your hard drive if you decided to change it). Your Mac will then download the latest version of macOS, install it. After installing the macOS, you will get a brand new Mac.
Part 3. Recover lost data after resetting your M1 Mac to factory settings.
Actually, after factory reset, most of files on your M1 Mac disk are lost forever. However, some of the lost documents are still recoverable. You can run Data Recovery Software to scan the hard disk drive and find all your lost files.
Do Your Data Recovery is one of the best Mac data recovery software. It can help you recover lost data from a disk which has been erased by Disk Utility. If you don’t have a backup of your Mac and have reset this Mac to factory settings, you can use Do Your Data Recovery to rescue your lost files. Follow the steps below:
Step 1. Download and install Do Your Data Recovery on the M1 Mac which has been reset to factory settings. Then open it.
Step 2. Now, just select the hard drive where you lose your files. In this case, choose the M1 Mac startup disk.

Step 3. Click on Scan button to find deleted or lost files.
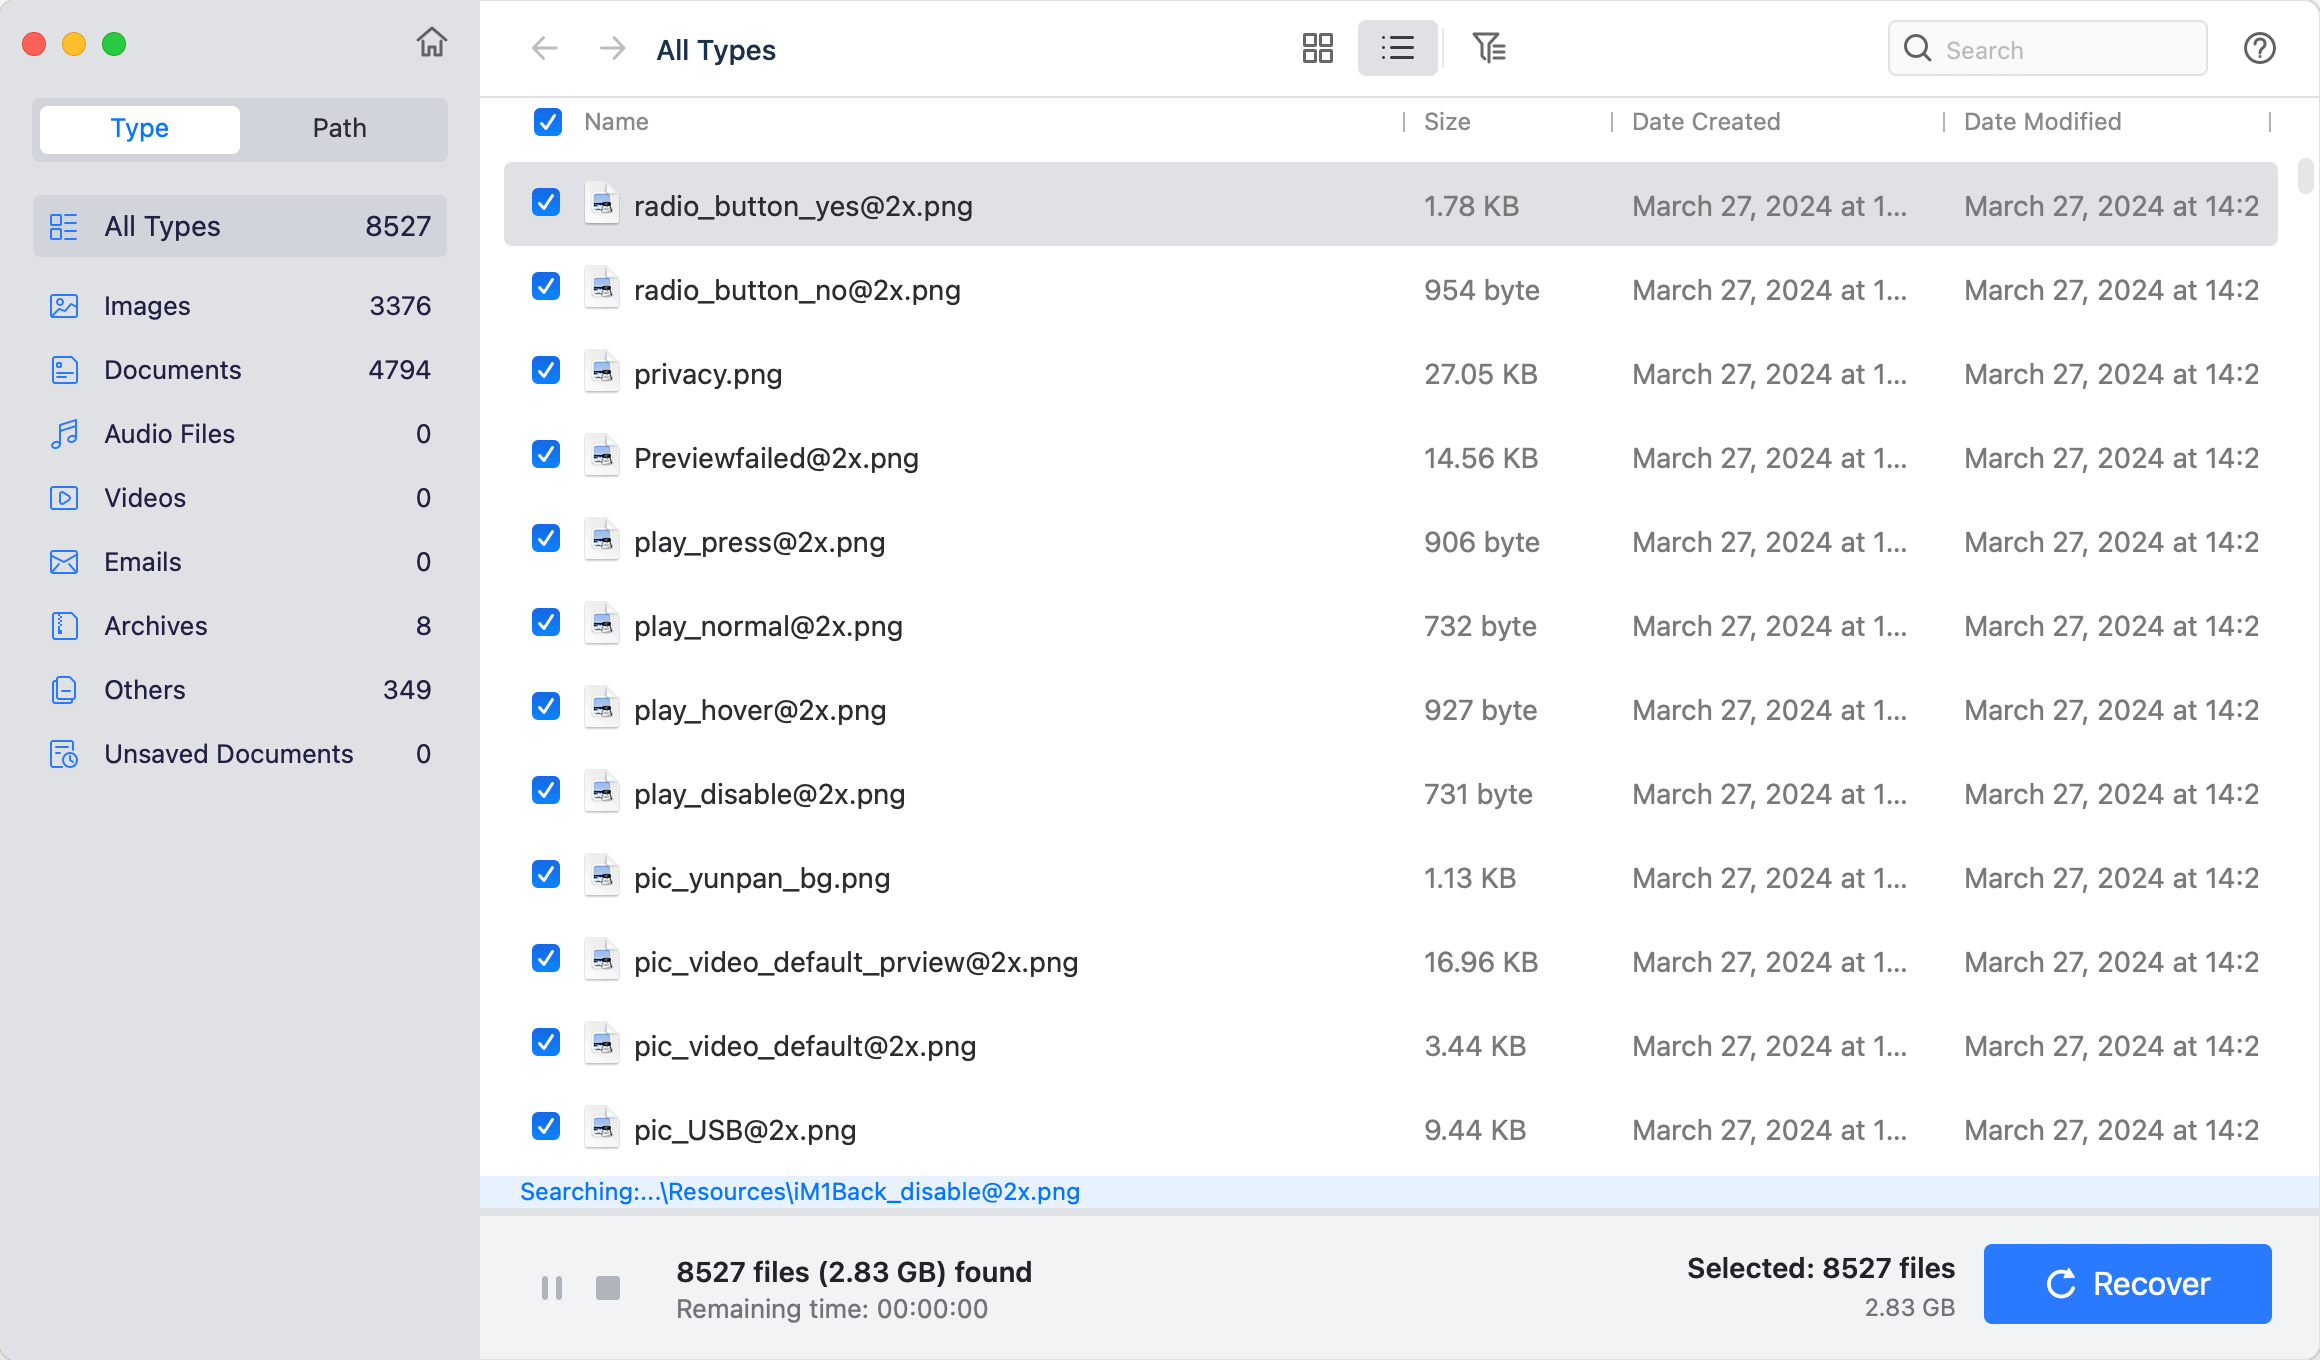
Step 4. Once the scan is completed, you can preview all recoverable files. Then select the wanted files and save them.

Part 4. Permanently erase data on M1 Mac to avoid data recovery.
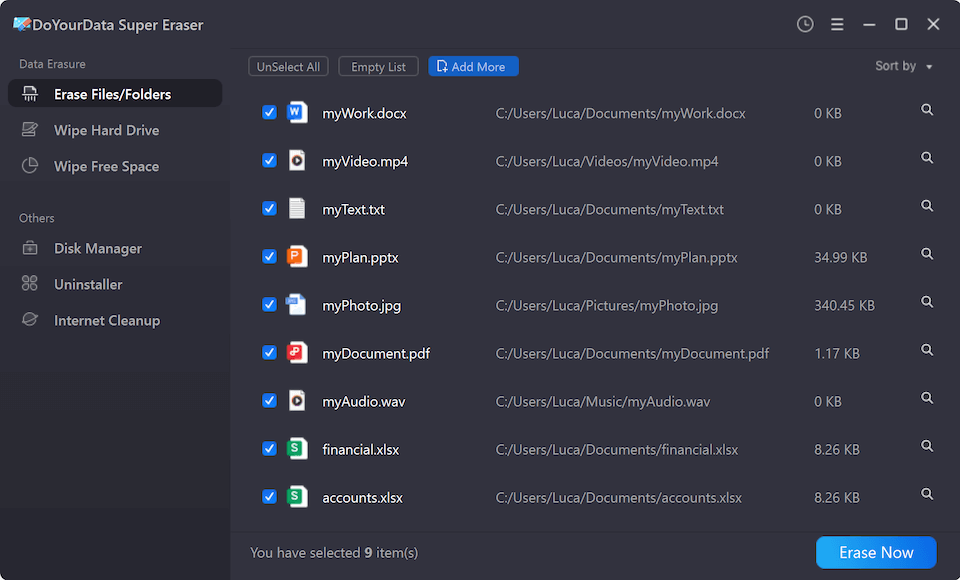
As you’ve seen, even you have reset your M1 Mac to factory settings, the erased files still can be recovered by data recovery software. Before you sell, donate or trade in your M1 Mac, you’d better permanently erase all your data on the disk so that the data can’t be recovered by next owners. DoYourData Super Eraser for Mac is a safe, powerful and easy to use Mac data erasure application. It offers advanced data erasure algorithms including HMG Infosec Standard 5 (1 pass), Peter Gutmann's algorithm 2 (2 passes), U.S. Army AR380-19 (3 passes), DoD 5220.22-M ECE (7 passes), Peter Gutmann's algorithm 35 (35 passes).
You can use this data erasure application to securely and permanently erase all private data before you sell, donate or trade in your M1 Mac computer. It offers three flexible data erasure modes.
Mode 1. Selectively shred files on M1 Mac.
Run DoYourData Super Eraser for Mac, choose data erasure mode - Erase Files. This mode will help you selectively and permanently erase files and folders on M1 Mac.
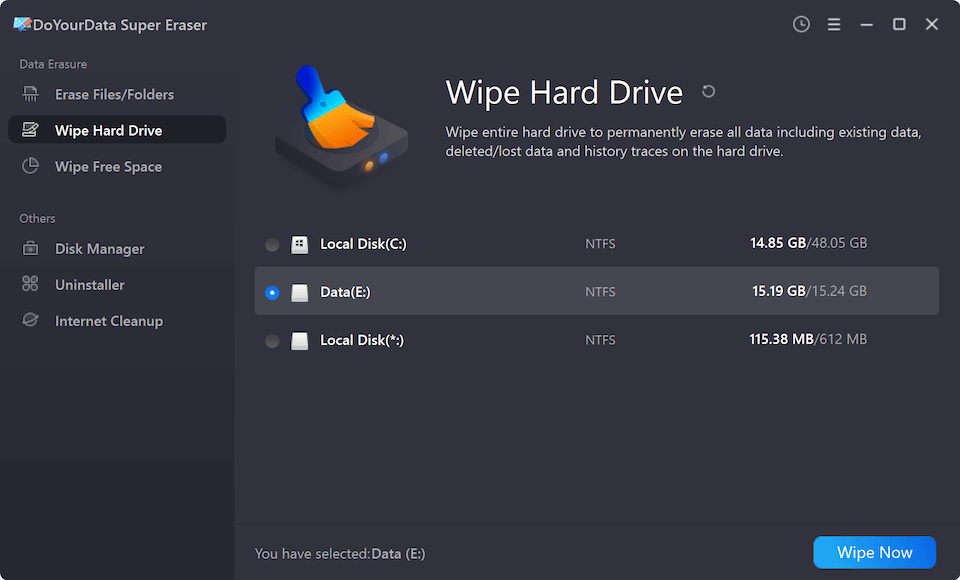
Mode 2. Wipe a hard drive on M1 Mac.
Wipe Hard Drive mode is able to help you wipe an entire hard drive. All data information on the hard drive will be permanently erased.
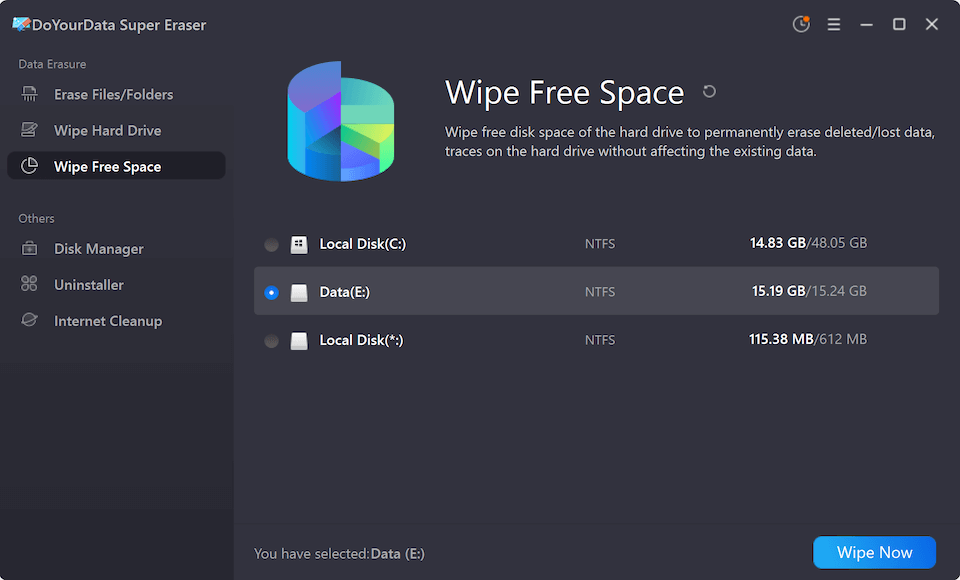
Mode 3. Wipe deleted data on M1 Mac.
Wipe Free Space mode will help you wipe free disk space of the hard drive, then permanently erase all deleted data on the hard drive. It will not affect the existing data on your hard drive.
Please note that once your data is erased by DoYourData Super Eraser for Mac, the data will be gone forever, can’t be recovered by any data recovery method. So, please make a backup before you wipe your hard drive.
Written & Updated by Nancy
Nancy works as a tech columnist at DoYourData. She is familiar with macOS and Windows OS and writes computer solution, data recovery, disk clone, data erasure articles for DoYourData. She is a big fan of Mac products and is fond of testing utilities software (such as cleaner, recovery, eraser, NTFS for Mac, video editor, etc) on Mac.