Undo Erase on MacBook Pro [Apple silicon chip MacBook Pro Included]
If you have erased the hard drive on MacBook Pro with Disk Utility, you can restore the lost files from Time Machine backup or use the data recovery software to scan the erased hard drive & get all lost files back. Just follow this guide to undo erase on your MacBook Pro.
![]() Updated by Justin Kenny on November 28, 2023
Updated by Justin Kenny on November 28, 2023
Quick Navigation:
- How Does Mac Disk Utility Erase Hard Drive on MacBook Pro?
- Use Time Machine Backup to Undo Erase Disk on MacBook Pro
- Undo Erase and Recover Lost Data on MacBook Pro with Data Recovery Software
“Hi, my MacBook Pro (M3 Pro chip) has a issue and I have to reformat the startup disk in macOS Recovery mode, then reinstall macOS. All my personal documents have been erased by Disk Utility, is there any way to get them back?” - Chardy
Restoring deleted/erased files on a MacBook Pro may be a terrifying experience, especially if they are critical. The fear of losing important data due to careless actions like accidental deletion or drive formatting is understandable. However, a wide range of options are available in macOS to undo these changes and restore erased files. Here, we'll show you how to recover lost data from a hard drive on MacBook Pro after Disk Utility erase.

How Does Mac Disk Utility Erase Hard Drive on MacBook Pro?
Disk Utility is a built-in disk management application for macOS. It offers a tool named Erase to help Mac users to reformat a hard drive. Many MacBook Pro users use this tool to erase a disk, reformat an external hard drive, etc.
1. If you want to erase an external device such as external HDD/SSD, SD card, USB flash drive on MacBook Pro, just connect the external device to your Mac and open Disk Utility. Then select the external device, click Erase button. It will quickly reformat the external device as you want.

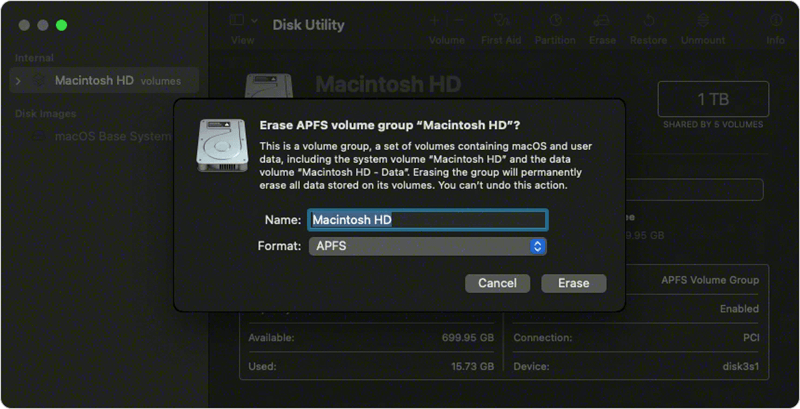
2. If you want to erase the startup disk of the MacBook Pro, just restart the Mac, hold and press Power button (For Intel-based Mac, hold and press Command+R) to enter into macOS Recovery mode. Select Options and click on Continue button.
Then just select Disk Utility and choose the startup disk of your MacBook Pro, click Erase button to reformat the startup disk.
Use Time Machine Backup to Undo Erase Disk on MacBook Pro
One of macOS's most potent native features, Time Machine is a trustworthy backup utility. It takes regular snapshots of your system, letting you roll back individual files and directories or the whole thing if necessary.
Here's How to Restore Your Data Using Time Machine:
- Connect Your Time Machine Backup Disk: Ensure your Time Machine backup disk is linked to your MacBook Pro.
- Open the Way-Back Machine: Click the Apple menu's "System Settings" button and then General > Time Machine. To access the past, select "Enter Time Machine."
- Browse Through Backups: You can flip between different copies using the timeline on the right. Locate the data set that needs to be restored.
- Select and Restore: As soon as you find the file, click on it and then on "Restore." Alternatively, choose "Restore All" to return your system to a specific backup point.

You also can restore your Mac in macOS Recovery mode:
- Connect the Time Machine backup disk to your MacBook Pro.
- Restart the MacBook Pro, press and hold Power button until you see the startup disk and Options.
- Click Options and then click on Continue button. (Select a user account and enter the password to continue.)
- Choose Restore from Time Machine backup. Follow the wizard to restore the Mac from previous Time Machine backup.

Undo Erase and Recover Lost Data on MacBook Pro with Data Recovery Software
Data recovery software such as Do Your Data Recovery for Mac, Disk Drill, Donemax Data Recovery, and Stellar Data Recovery can help you unformat hard drive on Mac and get all lost erased files back after the hard drive is erased by Disk Utility.
Here, we will show you how to undo erase on MacBook Pro with Do Your Data Recovery for Mac:
Step 1. Download and install Do Your Data Recovery for Mac on your MacBook Pro, then open it from Launchpad.
Do Your Data Recovery for Mac
- Unformat hard drive on MacBook Pro.
- Recover permanently deleted files.
- Recover inaccessible or overwritten files on Mac.
Step 2. Select the erased hard drive to start data recovery.

Step 3. Click on Scan button to deeply scan the erased hard drive, find all erased files and deleted files.
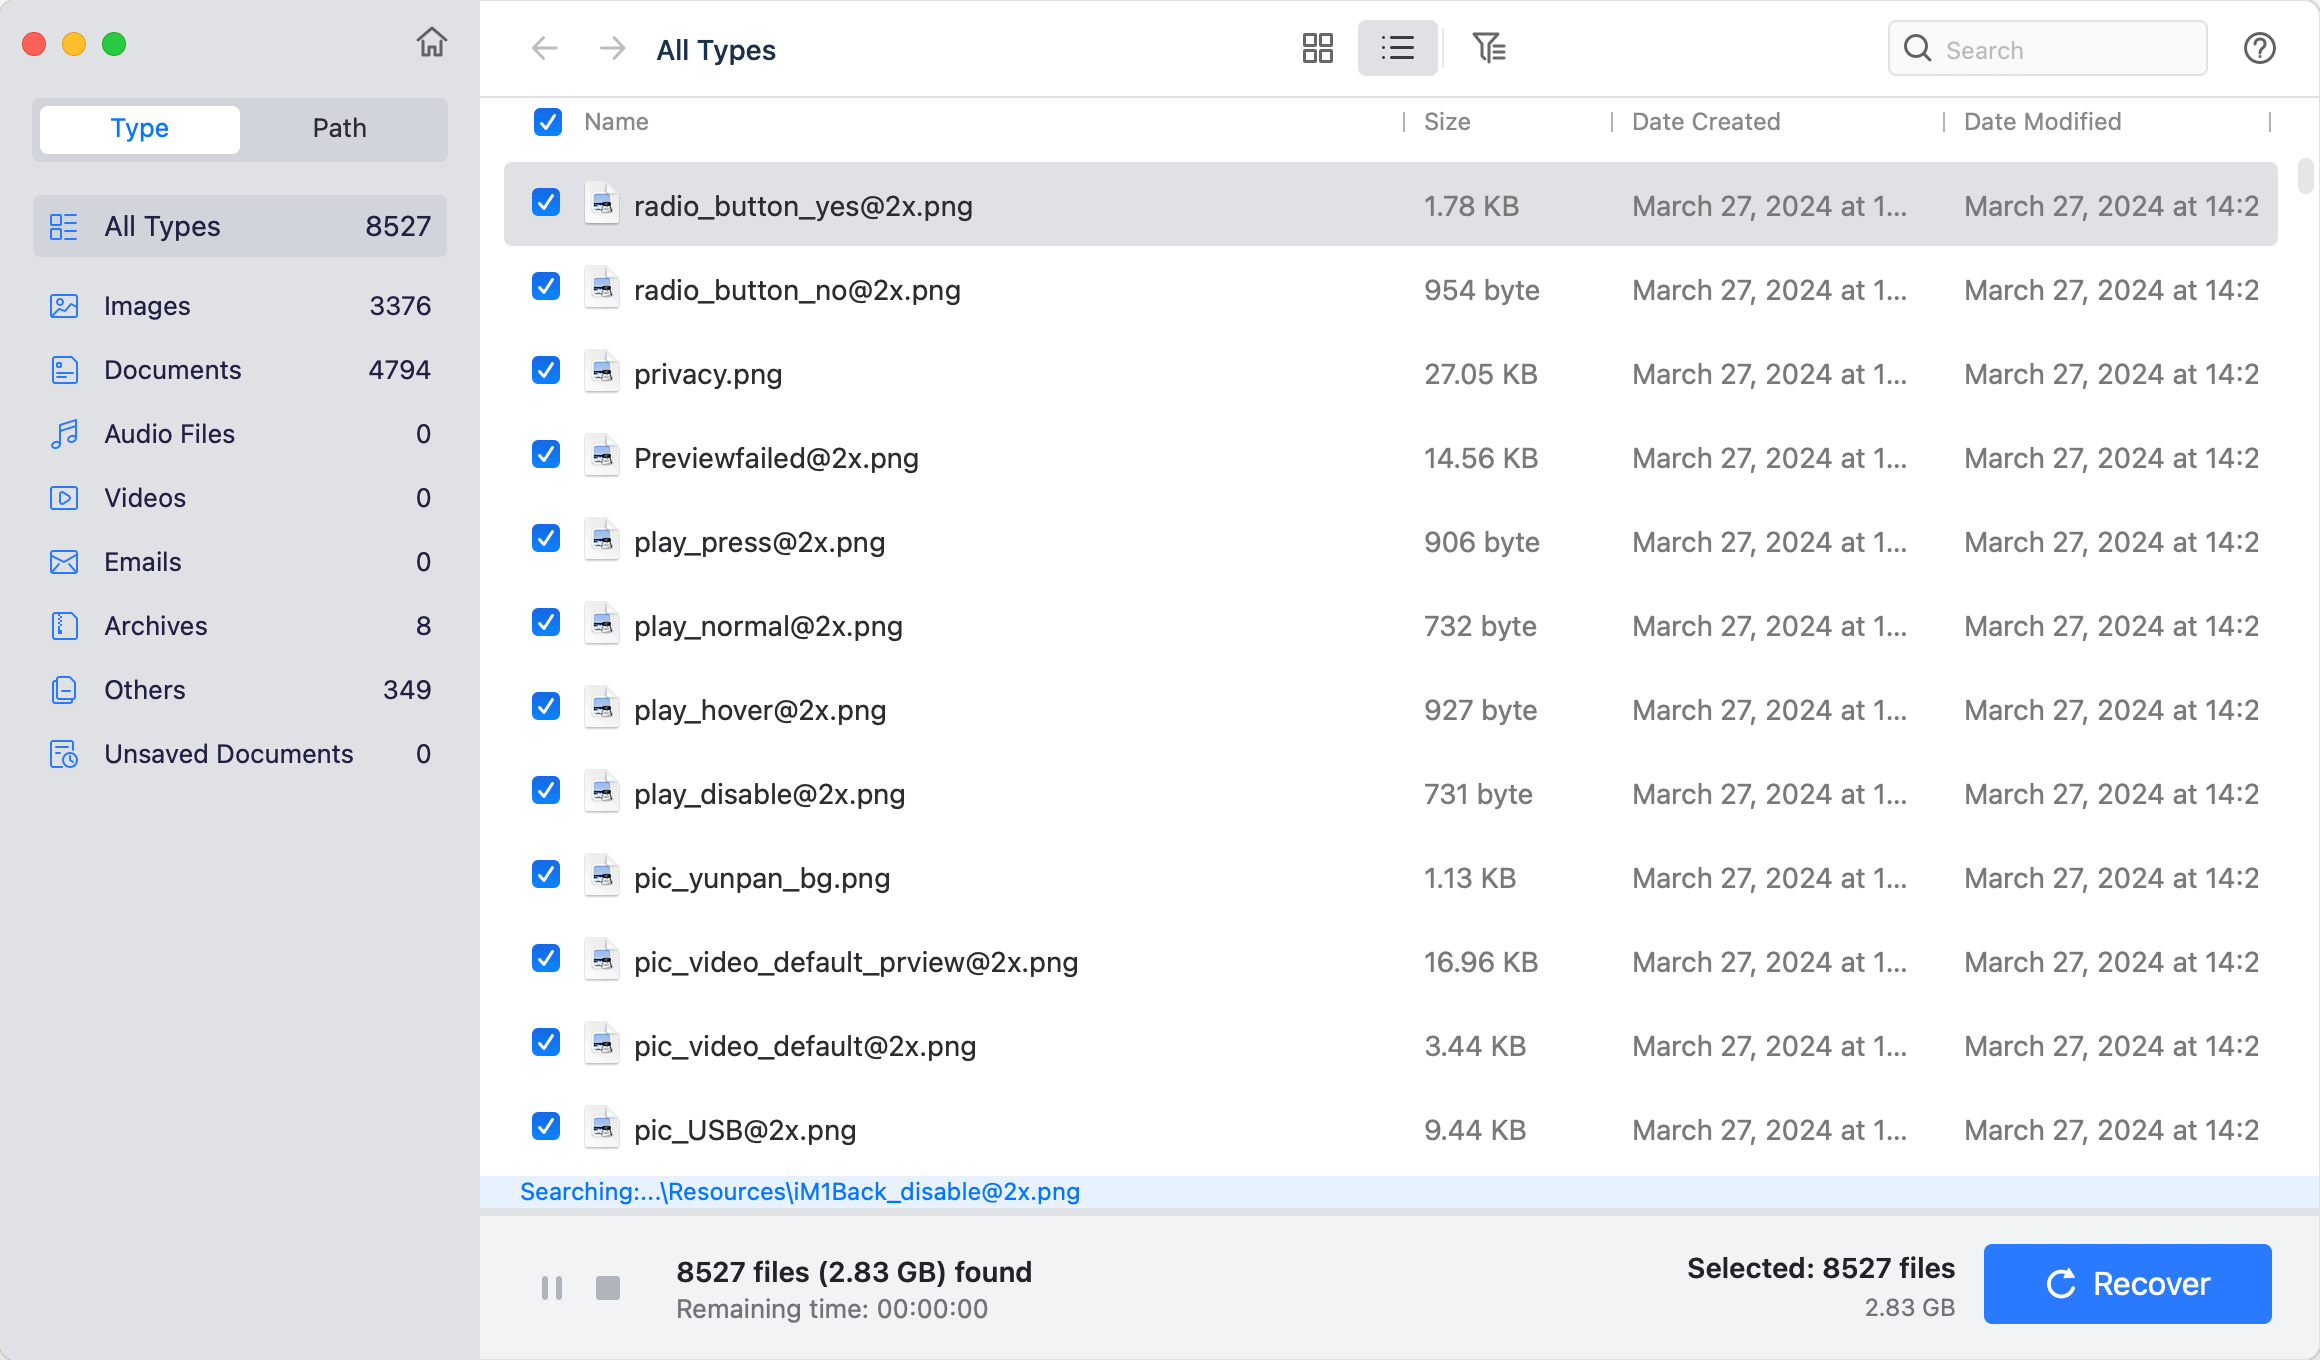
Step 4. Once the scan is completed, select all files and click on Recover button to save the files.

This is the 100% effective method to undo erase on MacBook Pro. If you have lost data on your MacBook Pro, just run Do Your Data Recovery for Mac to scan the hard drive and then get all lost files back.
Conclusion:
In conclusion, macOS provides many robust options for MacBook Pro users to undo deletes and recover lost information. Time Machine backups are reliable, but other options exist, such as 'undo' functions built into applications and data recovery programs available for download online.
Terminal commands provide advanced recovery possibilities, even for experienced users. Regular backups are still the best method of protection, though. The process of undoing erase hard drive on your MacBook Pro, whether using in-built features or other applications, exemplifies the robustness and adaptability of macOS, enabling paths to recover critical information and prevent future data loss.
Written & Updated by Justin Kenny
Justin Kenny is a writer & editor of DoYourData. He joined DoYourData in 2016 and focuses on writing articles about Windows data recovery, Mac data recovery, external device data recovery, hard drive clone, data erasure, Mac cleanup, computer issue fixes, etc. He is a super fan of Apple devices and is big on testing new digital device and system utility software.