How to Format Hard Drive in macOS 10.14 Mojave?
Formatting a hard drive in macOS 10.14 is easy with Disk Utility or other tools. It will remove all the files from the hard drive after formatting it. However, the files can still be recovered if you accidentally formatted a hard drive. If you wanted to permanently wipe the data while formatting a hard drive, it's necessary to format the drive and wipe data with professional data erasure tool, like DoYourData Super Eraser for Mac.
![]() Updated by Shirly Chen on April 25, 2025
Updated by Shirly Chen on April 25, 2025
Quick Navigation:
- How to Format Hard Drive in macOS 10.14 Mojave?
- Format hard drive with Disk Utility in macOS 10.14 Mojave
- Using Terminal to format hard drive in macOS 10.14 Mojave
- Conclusion:
- FAQs about formatting hard drive in macOS 10.14 Mojave
"I want to know how to format a hard drive on my Mac (installed macOS 10.14 Mojave). I will give this hard drive to my friend, so I want to format the hard drive and permanently erase my data, what should I do?" - Dinna.

Formatting is one of the most elementary and quick ways to eliminate all the information contained on a hard disk. But if you are going to discard, donate or sell a hard drive, it is important that all the information you have had at some point should disappear quickly and safely.
Disk Utility is an application that is included in macOS 10.14 Mojave that can format hard disks, but its effectiveness is not 100% since it can leave some traces of data that can be recovered after formatting by using data recovery software. So if you want to format a hard drive in Mac OS X 10.14 Mojave safely, we'll show you how to do it without fear and with ease.
The best way to format hard drive in macOS 10.14 Mojave
We present DoYourData Super Eraser for Mac that is a powerful and safe tool that will allow you to format hard drives safely under macOS 10.14 Mojave without leaving margin of recovery thanks to an advanced data erasure algorithm. It will not only format the disk under macOS 10.14 Mojave, it will also permanently erase all data/files on the hard disk drive so that there is no way to recover them. So it is a much safer and simpler method than Disk Utility.
DoYourData Super Eraser for Mac
- Format drive and wipe data in macOS 10.14 Mojave and other systems.
- Erase data permanently to prevent sensitive data being recovered.
- Three modes to shred files, wipe free space and erase entire drive.
DoYourData Super Eraser for Mac is very simple to use. So you can format your hard drive in macOS 10.14 Mojave and permanently remove all your information contained just by following these simple steps:
Step 1: Download and install DoYourData Super Eraser for Mac on your Mac. Once installed, run it from the Launchpad of macOS 10.14 Mojave.
Step 2: In the main interface of DoYourData Super Eraser for Mac choose the second option from the menu located on the left side Wipe Hard Drive.
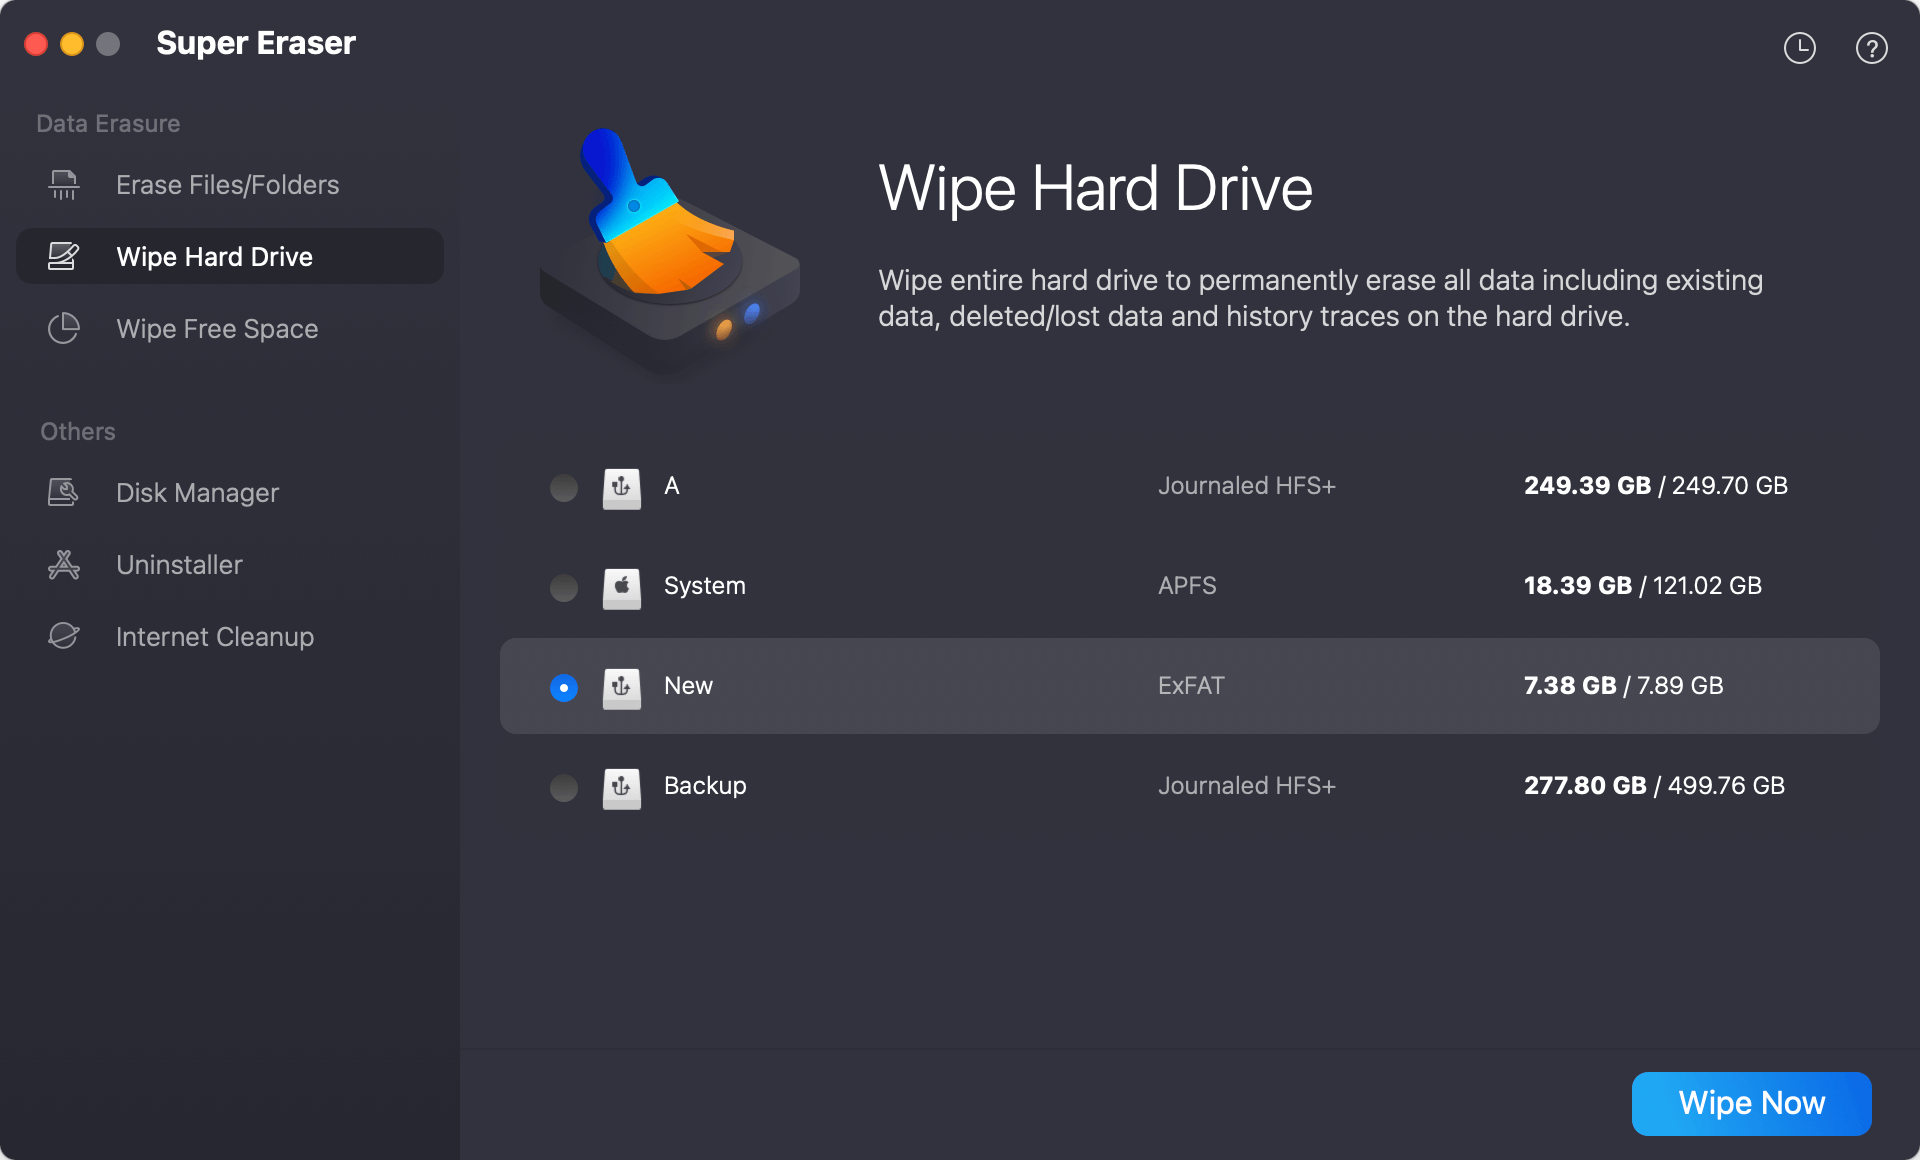
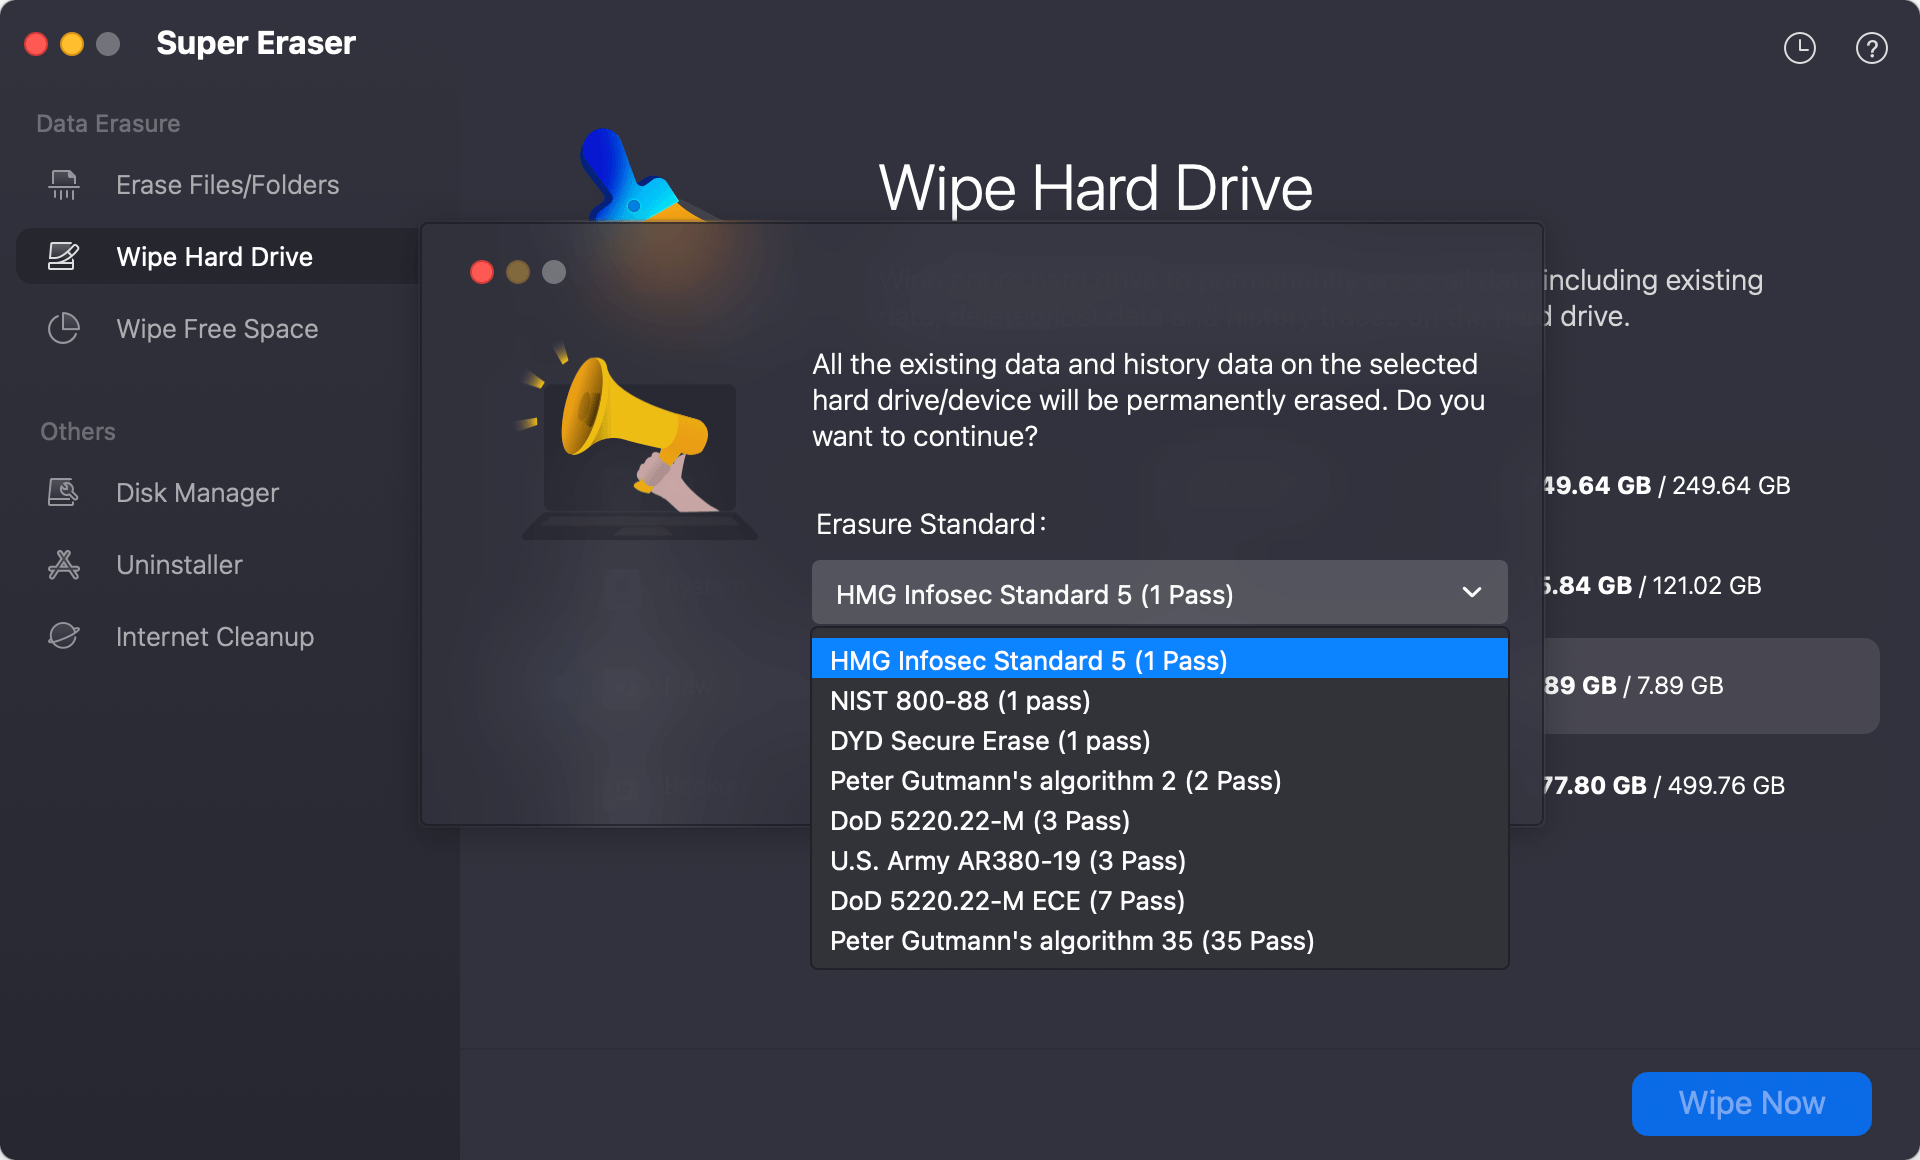
Step 3: Select the connected hard drive you want to format and click on the Wipe Now button. Then you need to select a data erasure standard to wipe data permanently from the drive.
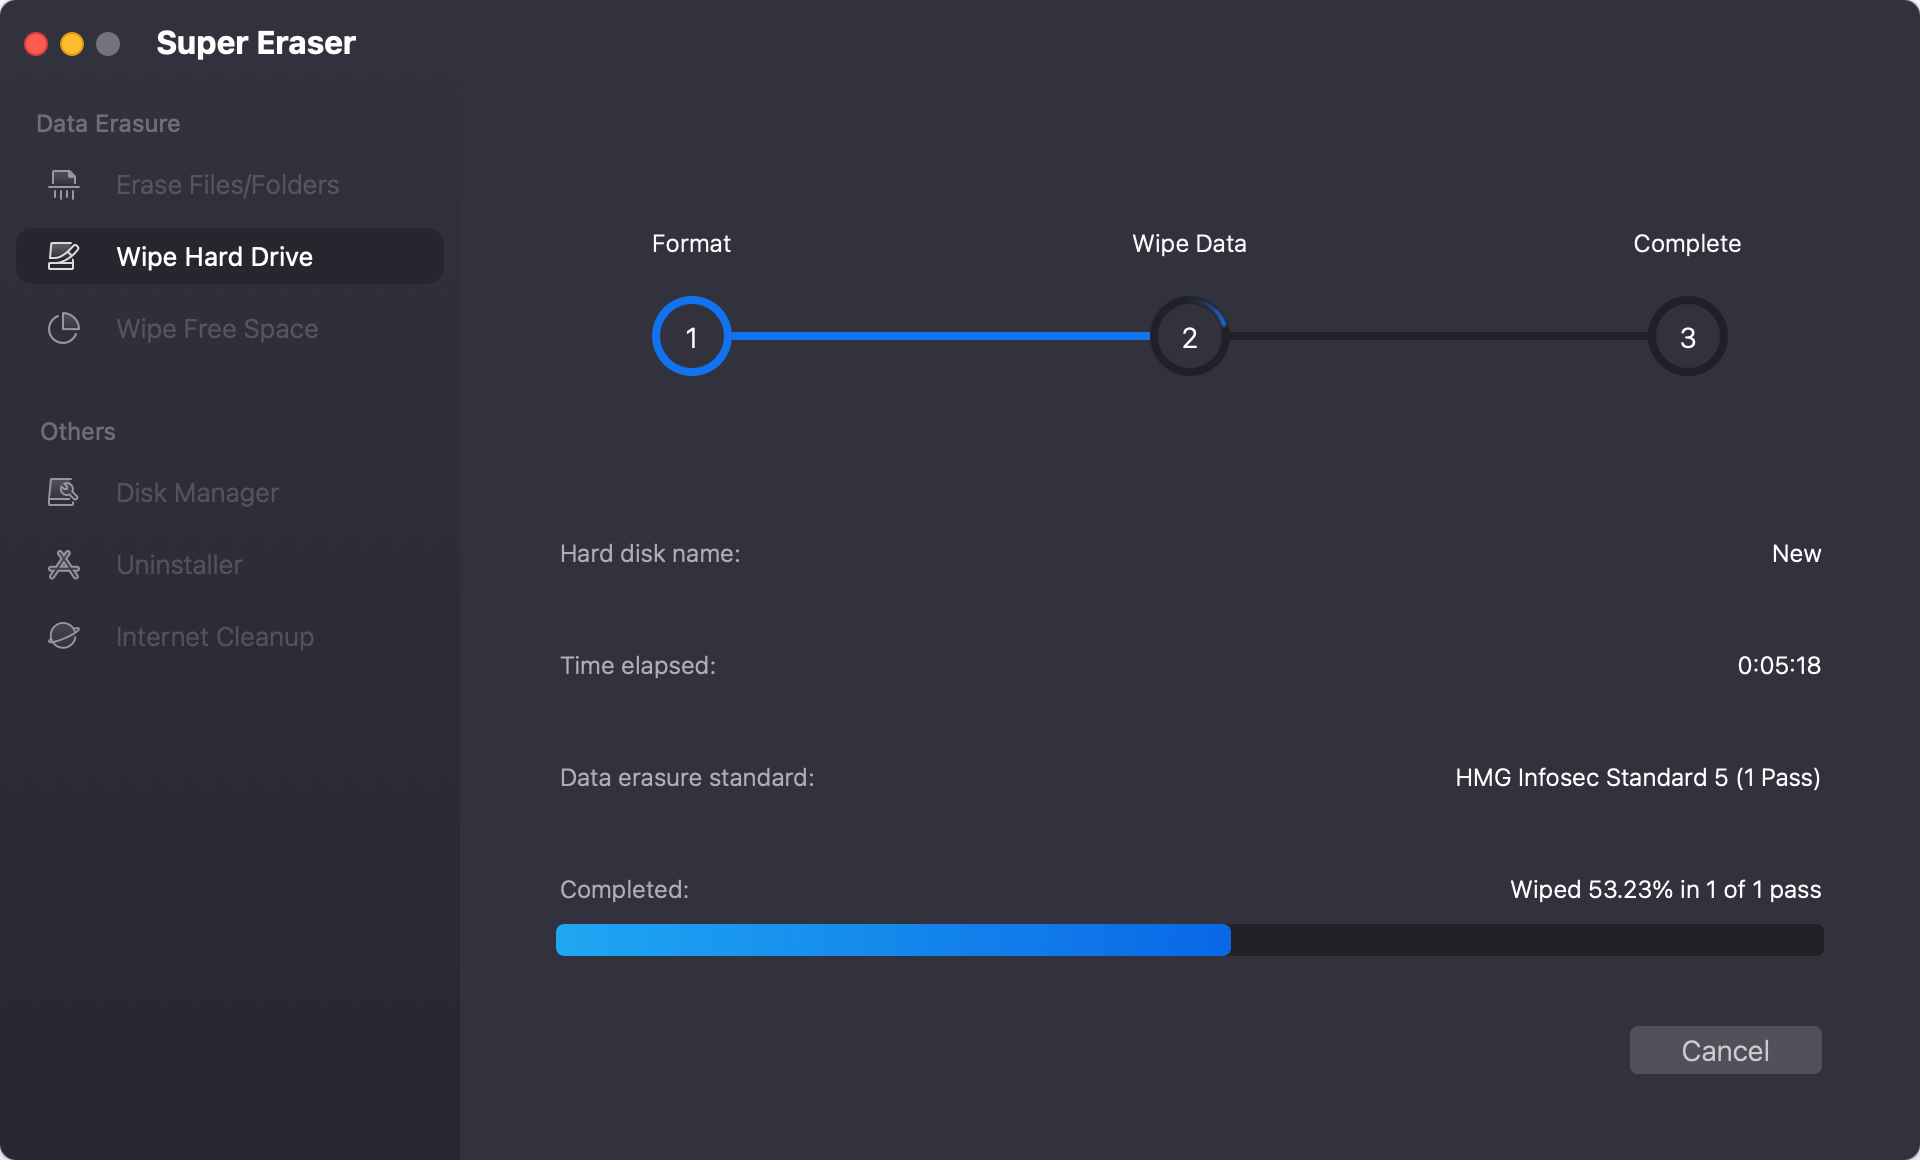
Step 4: At last, click Continue button, then DoYourData Super Eraser for Mac will start formatting and erase the selected hard drive.
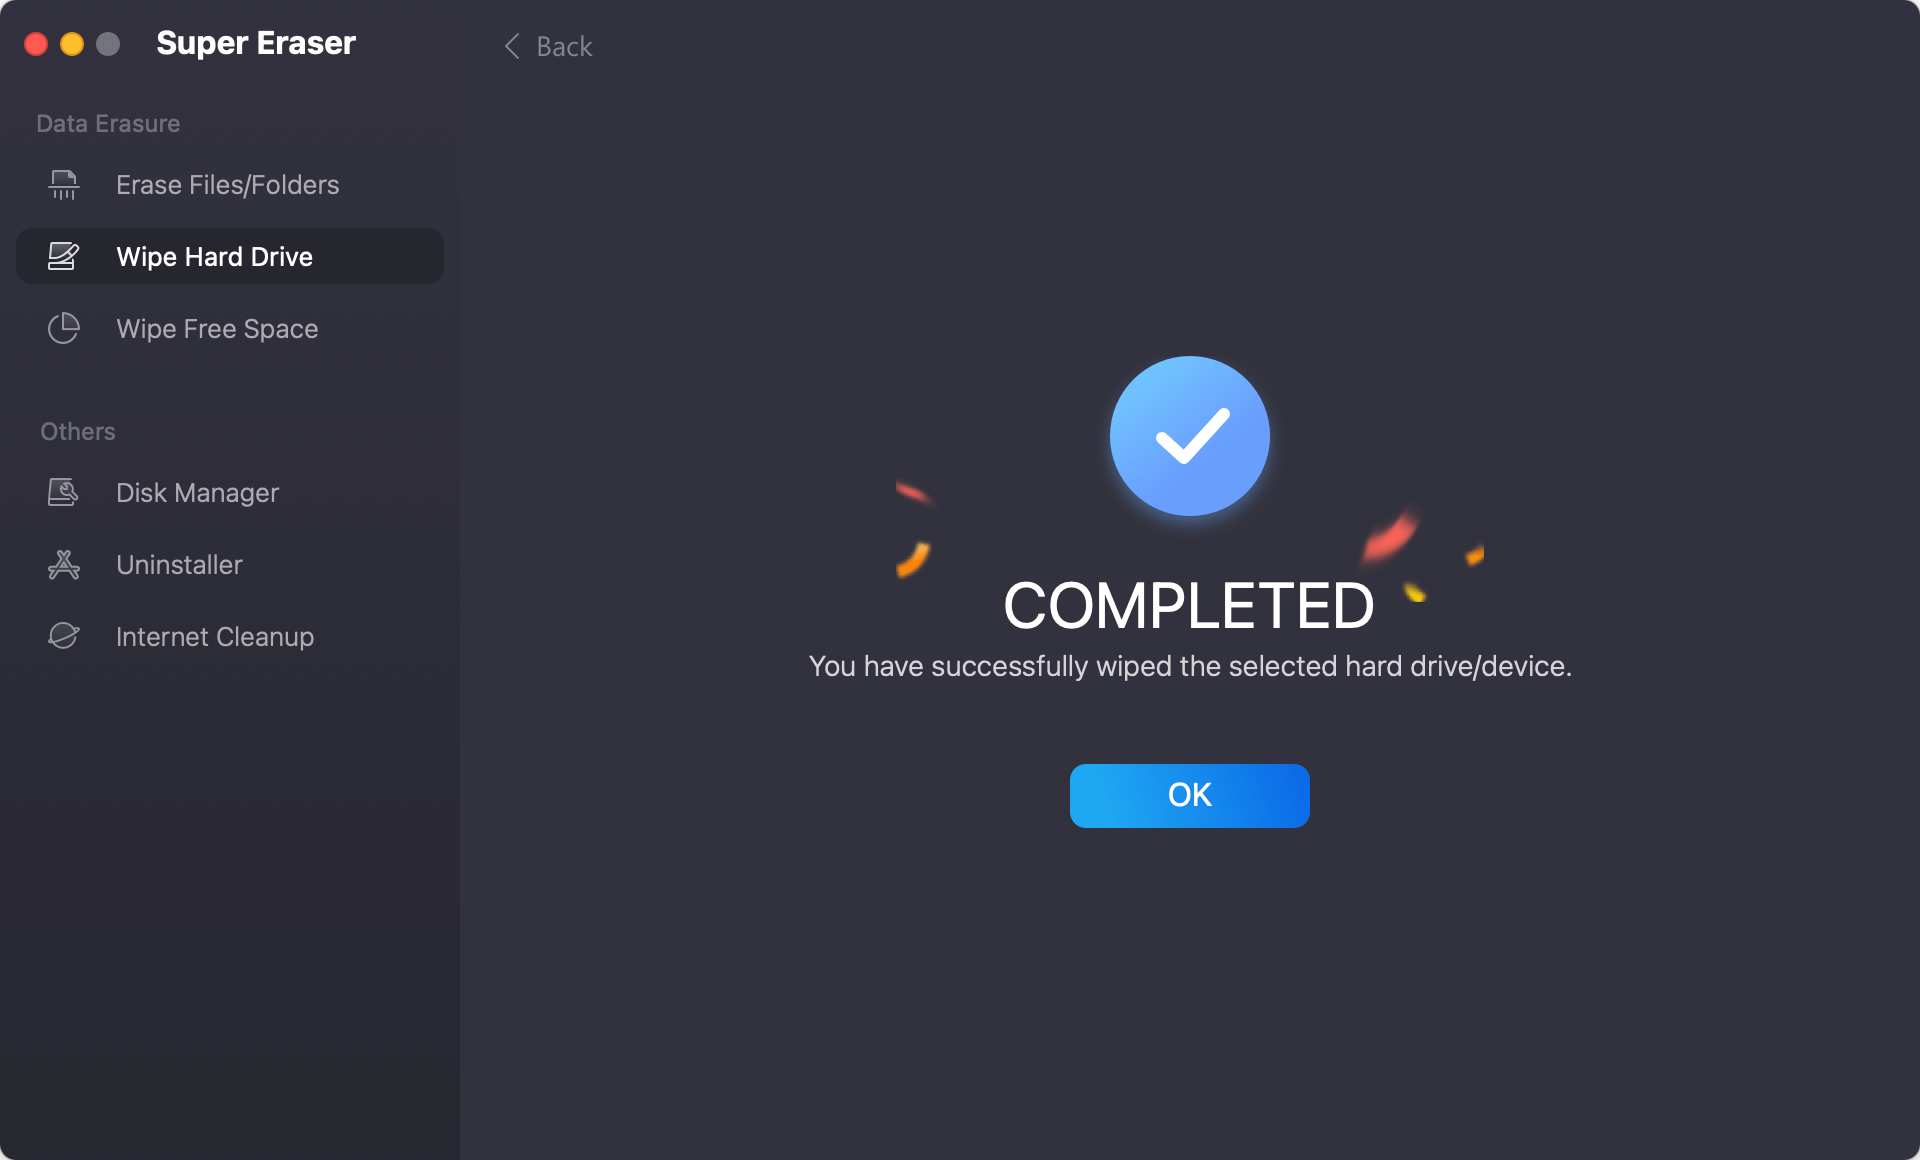
Once the process gets finished, the selected hard drive will be permanently erased and formatted. It is like you get a brand new hard drive.
DoYourData Super Eraser for Mac can help you securely format hard drive under macOS 10.14 Mojave:
- Format/erase hard disk drive in macOS 10.14 Mojave.
- Format/fix inaccessible or damaged hard drive in macOS 10.14 Mojave.
- Format external hard drive, USB flash drive, memory card under macOS 10.14 Mojave.
- No damage, will never shorten the service life of the hard drive/digital device.
If you want to format hard drive in macOS 10.14 Mojave, this is the best solution. Just download DoYourData Super Eraser for Mac here:
Format hard drive with Disk Utility in macOS 10.14 Mojave
If you don't care about the data on the drive when formatting a hard drive, you can also use Disk Utility to format it in macOS 10.14 Mojave. The tool is free and built-in for macOS.
Connect the drive, which you want to format, to the Mac. Then do as follows to format it in Disk Utility:
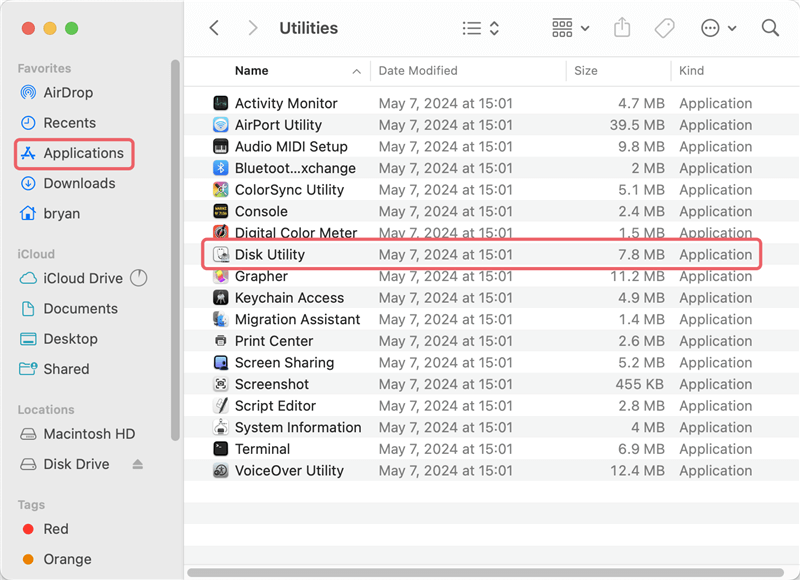
Step 1. Open Disk Utility. You can find and open it from "Applications" and then "Utilities" folder. You can also find it in "Others" from launchpad.
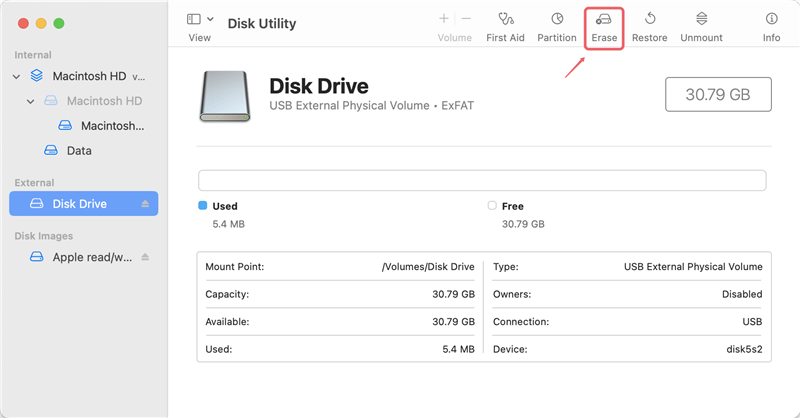
Step 2. The tool will show all the connected drives on your Mac. Check and locate the drive you want to format, and then click Erase button at the top of the Disk Utility window.
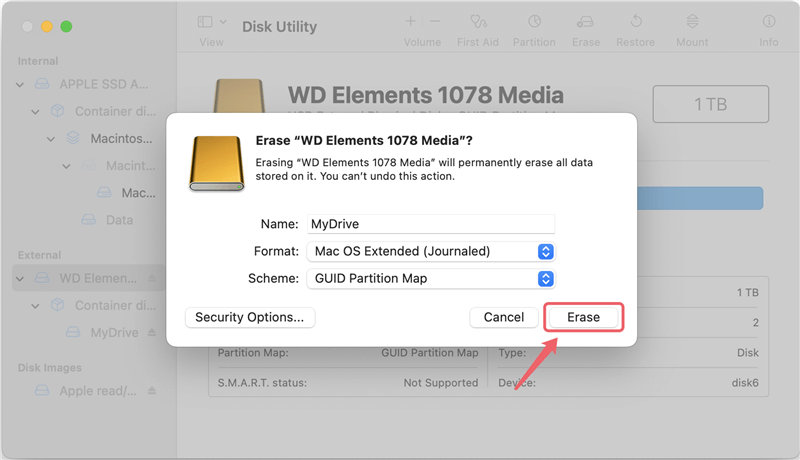
Step 3. If you want, you can change the name and select a new file system for the drive to format. Otherwise, just keep the original ones.
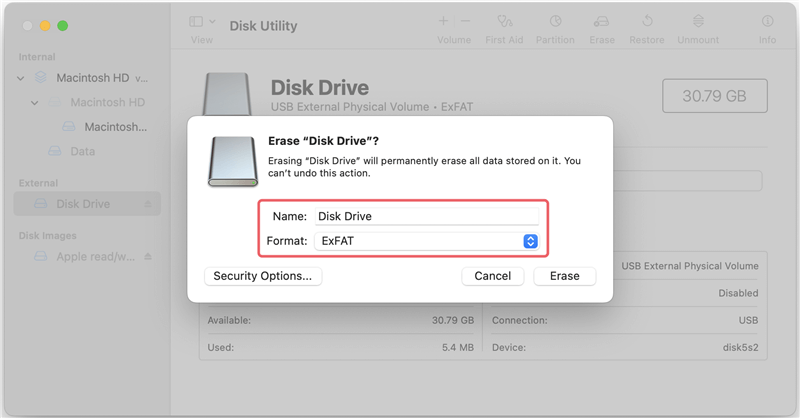
Step 4. Click the Erase button and the tool will start to format the drive and remove all the files from the hard drive.
Step 5. It will be very fast to format the drive. Click Done button to close it and then exit the Disk Utility.
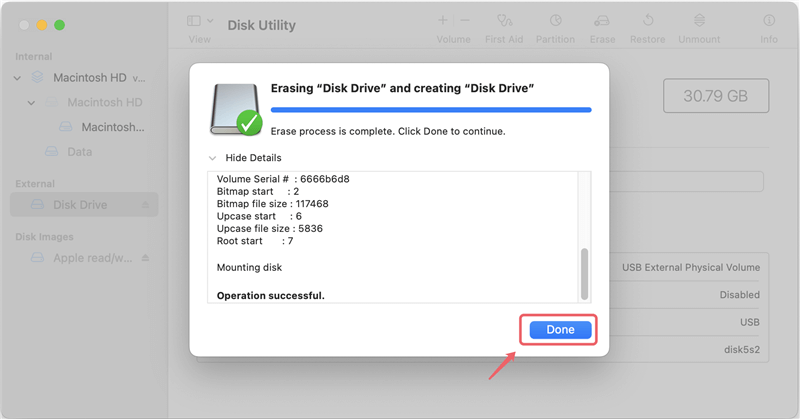
📒 Note: The data is still recoverable after formatting the drive in this method. If the formatted drive will be given to another person, it's not safe especially if there was sensitive or private data on the drive.
Using Terminal to format hard drive in macOS 10.14 Mojave
Disk Utility is not the only built-in tool in macOS 10.14 Mojave for disk formatting. If you were an advanced user and preferred to use commands, Terminal is another choice for you to format hard drive in macOS.
When using commands in Terminal, it's important to check twice before executing a command to avoid damages to the data and drive.
After connecting the drive which you want to format, then follow the below steps to format the drive in Terminal:
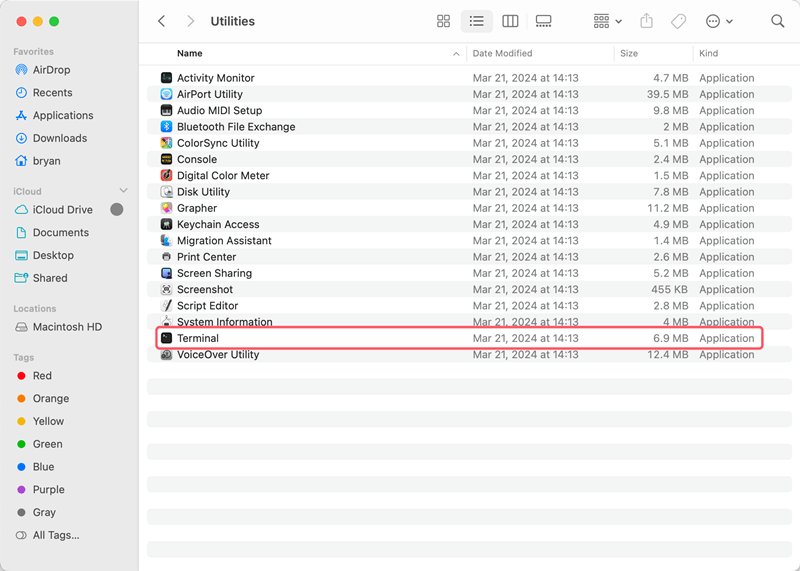
Step 1. Open Finder, access "Applications" and then "Utilities" folder. You can find and open Terminal there.
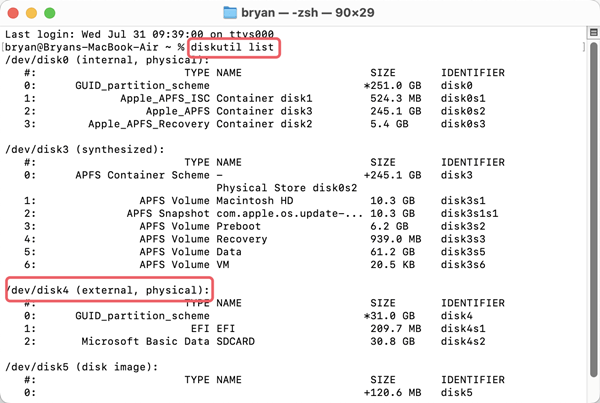
Step 2. First, you need to locate the identifier information for the disk. Enter the command: diskutil list
It will show the information for all the connected drives. Check and find the disk information of the drive you want to format.
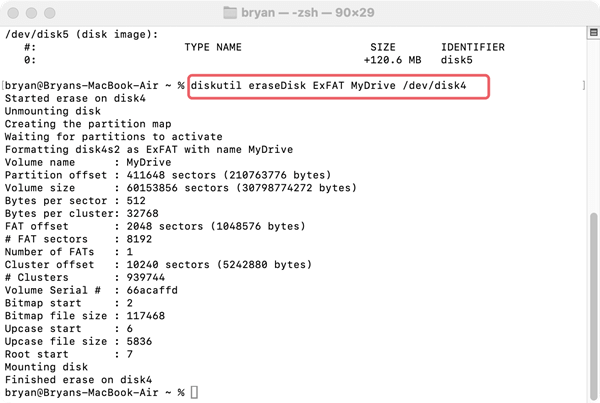
Step 3. Then you can start to format the hard drive using the command: diskutil eraseDisk ExFAT MyDrive /dev/diskX
- ExFAT can also be change to another file system, like APFS, HFS+, etc.
- MyDrive can be change to any name for your hard drive.
- X should be replaced with the right disk number on your Mac.
📒 Tips: For the users who are not familiar with commands, it's better to choose another method to format the hard drive in macOS 10.14 Mojave, such as using Disk Utility or DoYourData Super Eraser for Mac.
Conclusion:
Formatting a hard drive is a way to reset a hard drive in macOS 10.14 Mojave. When you need to format a hard drive, you can choose macOS built-in tools Disk Utility and Terminal. However, the formatted data is recoverable with data recovery software.
Before you reselling or donating an old hard drive, it's not safe by simply formatting the hard drive. You can use the professional tool DoYourData Super Eraser for Mac to wipe the data permanently and format the hard drive in macOS 10.14 Mojave or other macOS versions. It can make sure the data is gone forever after formatting and wiping the hard drive. It's a good solution to prevent data leakages for Mac users. Should you need to wipe data from memory card, SSD, hard drive, USB flash drive or other devices, download and use this software.
FAQs about formatting hard drive in macOS 10.14 Mojave
- Remove all files quickly to release space of the hard drive.
- Format a hard drive to fix the file system errors or other issues.
- Change the file system of the hard drive for certain devices.
- Wipe data before selling or donating an old hard drive.
- Download and install the software in macOS 10.14 Mojave.
- Connect the drive to the Mac and start the software from launchpad.
- Choose the mode "Wipe Hard Drive" and select the drive you want to format.
- Select a data erasure standard and continue.
- The software will format the drive and wipe all the data permanently.
DoYourData Super Eraser for Mac
DoYourData Super Eraser for Mac is a 100% safe, powerful and easy-to-use data erasure program. It offers certified data erasure standards including Peter Gutmann, U.S. Army AR380-19, DoD 5220.22-M ECE to permanently erase data from Macs and external devices, making data recovery be impossible.
Written & Updated by Shirly Chen
Shirly Chen has been writing data recovery, data erasure articles for DoYourData over 4 years. She has been working as a professional website content writer & editor for quite a long time. She also writes articles about disk clone, Mac optimization, disk backup, etc.