Quick Navigation:
- Importance of Wiping Your LaCie External HDD/SSD
- Preparing to Wipe Your LaCie Portable Hard Drive on Mac
- Wiping the LaCie Portable Hard Drive Using Disk Utility
- Wiping LaCie Portable Hard Drive Using Mac Disk Wipe Software
- Conclusion
- FAQs About Wiping LaCie External Hard Drive on Mac
"I will sell my old 1TB LaCie portable hard drive and want to erase all data from it. Every time I use Disk Utility to erase it, the data recovery app still can find the erased files after a deep scan. Is there any way to permanently erase all data from the old LaCie portable hard drive on my Mac?" - Lisa

Some might think wiping your LaCie portable hard drive on a Mac is difficult, but protecting your private data and getting the drive ready to sell or start over is necessary. Removing your data permanently is important whether you're a creative worker with many big files or someone who values their privacy.
It's always possible to get back files you delete, which could be dangerous if someone gets their hands on your drive. This guide will show you how to do everything safely with macOS's built-in tools or third-party disk wipe software. You will quickly learn about the easy steps to wipe your old LaCie portable hard drive on your Mac and permanently erase all data from it.
Importance of Wiping Your LaCie External HDD/SSD
It is important to wipe your LaCie portable hard drive for several reasons:
Data Privacy and Security
Delete files doesn't get rid of them. Specialized tools are often needed to return deleted data, which is risky if the drive moves hands. Wiping the drive permanently deletes all sensitive data, keeping your personal and business files safe from people who shouldn't have access to them.
Preparing for Resale or Donation
If you want to sell or give away your LaCie drive, you must clean it so the new owner can't access your files. After a thorough wipe, you can be sure that other people won't be able to access your private information.
Fixing Performance Issues
Over time, hard drives can become clogged with broken files and data, slowing them down. Wiping the drive removes these problems, giving it a new start and making it faster and more reliable.
Maintaining Data Integrity
Maintaining data integrity is very important for professionals with large or sensitive files. Wiping the drive can fix errors caused by damaged files or bad sectors and keep the drive in good shape.
Preparing to Wipe Your LaCie Portable Hard Drive on Mac
While you're getting ready to wipe your LaCie hard drive, you should do a few things to ensure everything goes easily and no important data is lost.
Backup Important Data
If you wipe a drive, you will lose all of its data, so ensure you have a copy of any important files before you start. You can use Time Machine, macOS's built-in backup tool, or any other backup software to copy your data on another drive or in the cloud. Check if the backup is full and you can still access your files after the wipe.
Disconnect Other Drives
Disconnect any other external drives connected to your Mac to avoid accidentally wiping the wrong drive. This ensures that Disk Utility only sees the LaCie drive, lowering the chance of making a mistake.
Ensure Sufficient Power
Cleaning a drive may take a long time, based on the type of drive and the clean size you choose. For the process to continue, ensure your Mac is plugged into a power source, especially if you're working on a laptop.
Wiping the LaCie Portable Hard Drive Using Disk Utility
Disk Utility is a powerful tool for macOS that lets you control and format drives and safely delete data. The steps below show you how to use Disk Utility to erase your LaCie portable hard drive.
Step 1: Open Disk Utility.
Open Disk Utility on your Mac to begin. To get to it, go to Applications > Utilities > Disk Utility or use Spotlight to look for it (Press Command + Space and type "Disk Utility").
Step 2: Select the LaCie Drive.
You'll see a list of all the linked drives on the left side of Disk Utility. From this list, find and choose your LaCie portable hard drive. Make sure you pick the right drive so you don't delete data from the wrong one.
Step 3: Erase the Drive.
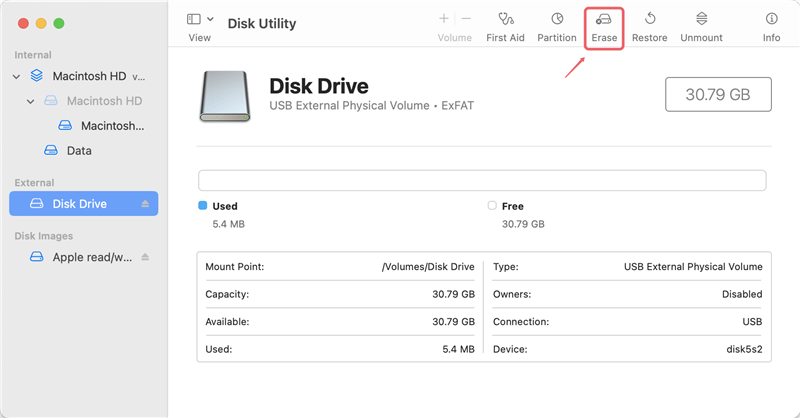
Click the "Erase" at the top of the Disk Utility once you've chosen the LaCie drive. When you do this, a new box will appear where you can name and format the drive.
Step 4: Choose the Format.
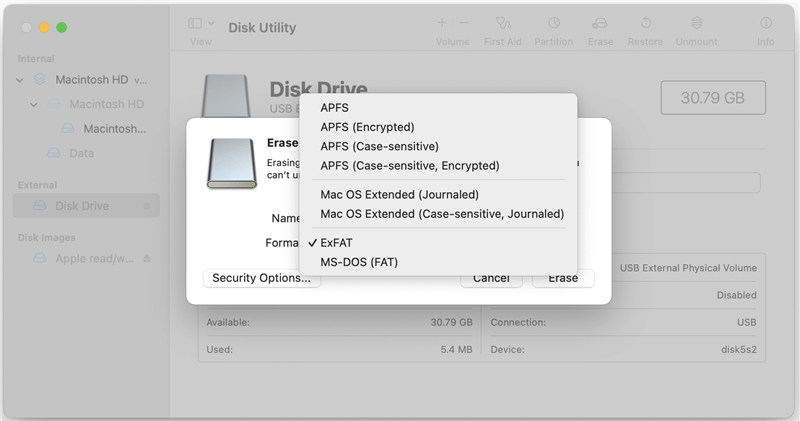
There will be a box to choose a file for your drive. ExFAT is a good choice if you want to use the drive with Mac and Windows computers. If you want to use the drive only with Mac computers, it is best to use APFS or Mac OS Extended (Journaled).
Step 5: Select the Security Options.
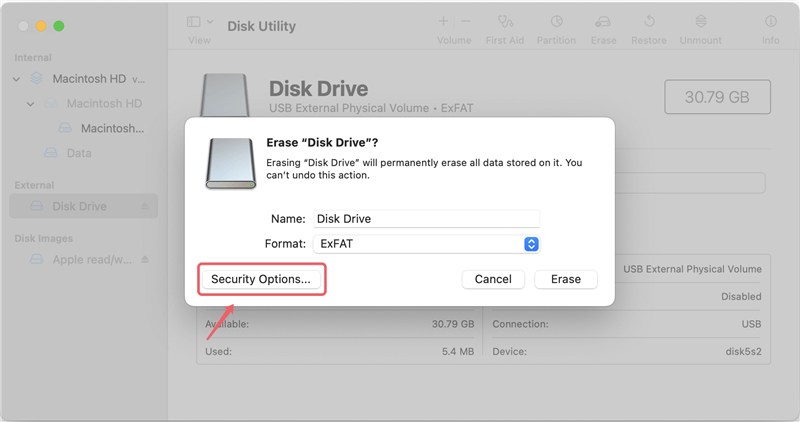
You should click on Security Options before you erase. You can then pick how completely you want to delete the info. The slider lets you choose between a quick erase that only deletes the file directory and a more safe erase that writes over the whole drive several times.
Step 6: Erase the Drive.
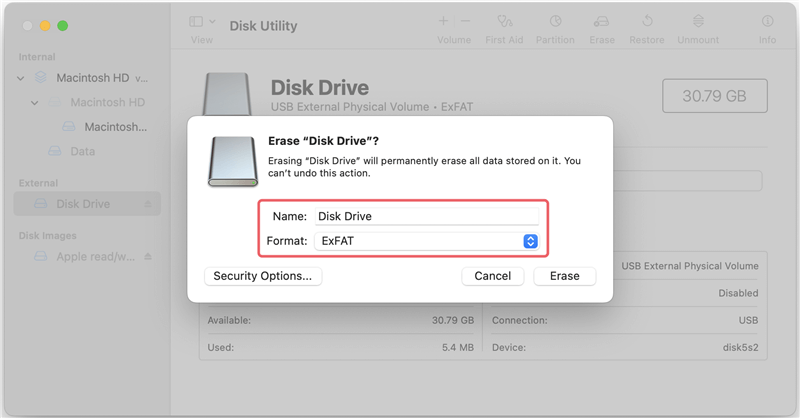
Once you've chosen the security level you want, click "Erase." This process will start. It will take a certain amount of time, depending on the size of the drive and the level of security you selected. Don't unplug the drive or turn off your Mac during this time.
Here are some tips to safely wipe the hard drive using Disk Utility:
Backup Important Data
Ensure you have copies of all your important things before wiping your LaCie drive. Wiping deletes all data, so having a backup keeps you from losing data.
Disconnect Other Drives
Take out all your other USB drives from your Mac so you don't accidentally delete the wrong one. It makes it less likely that you will choose the wrong drive in Disk Utility.
Choose the Right Erase Option
In Disk Utility, choose a protection setting that works for you. For most purposes, a medium level of protection that writes over data twice is enough. If you need to protect sensitive data, choose a better security option that writes over the drive more than once.
Ensure Power Stability
If you're cleaning a MacBook, make sure it's plugged into a power source so the process doesn't get interrupted, which could damage the drive.
Verify the Wipe
Use Disk Utility's "First Aid" tool to look for errors on the drive and ensure the wipe worked after the process.
Note: Mac data software still can recover some of the erased files from a drive which is erased by Disk Utility. If you want to permanently erase all data from your LaCie portable hard drive, just use a Mac disk wipe program to wipe the drive.
Wiping LaCie Portable Hard Drive Using Mac Disk Wipe Software
Mac disk wipe software - such as DoYourData Super Eraser for Mac is able to completely wipe your LaCie portable hard drive and permanently erase all data from it, leaving no trace behind.
Step 1. Download and install DoYourData Super Eraser on your Mac and connect your LaCie portable hard drive to your Mac via USB hub.
Step 2. Open DoYourData Super Eraser for Mac, then choose Wipe Hard Drive mode. (Wipe Hard Drive mode is able to format and wipe a drive, permanently erasing all data such as existing data, deleted/formatted/lost data from the drive.)

Step 3. Select the LaCie portable hard drive, then click on Wipe Now button.
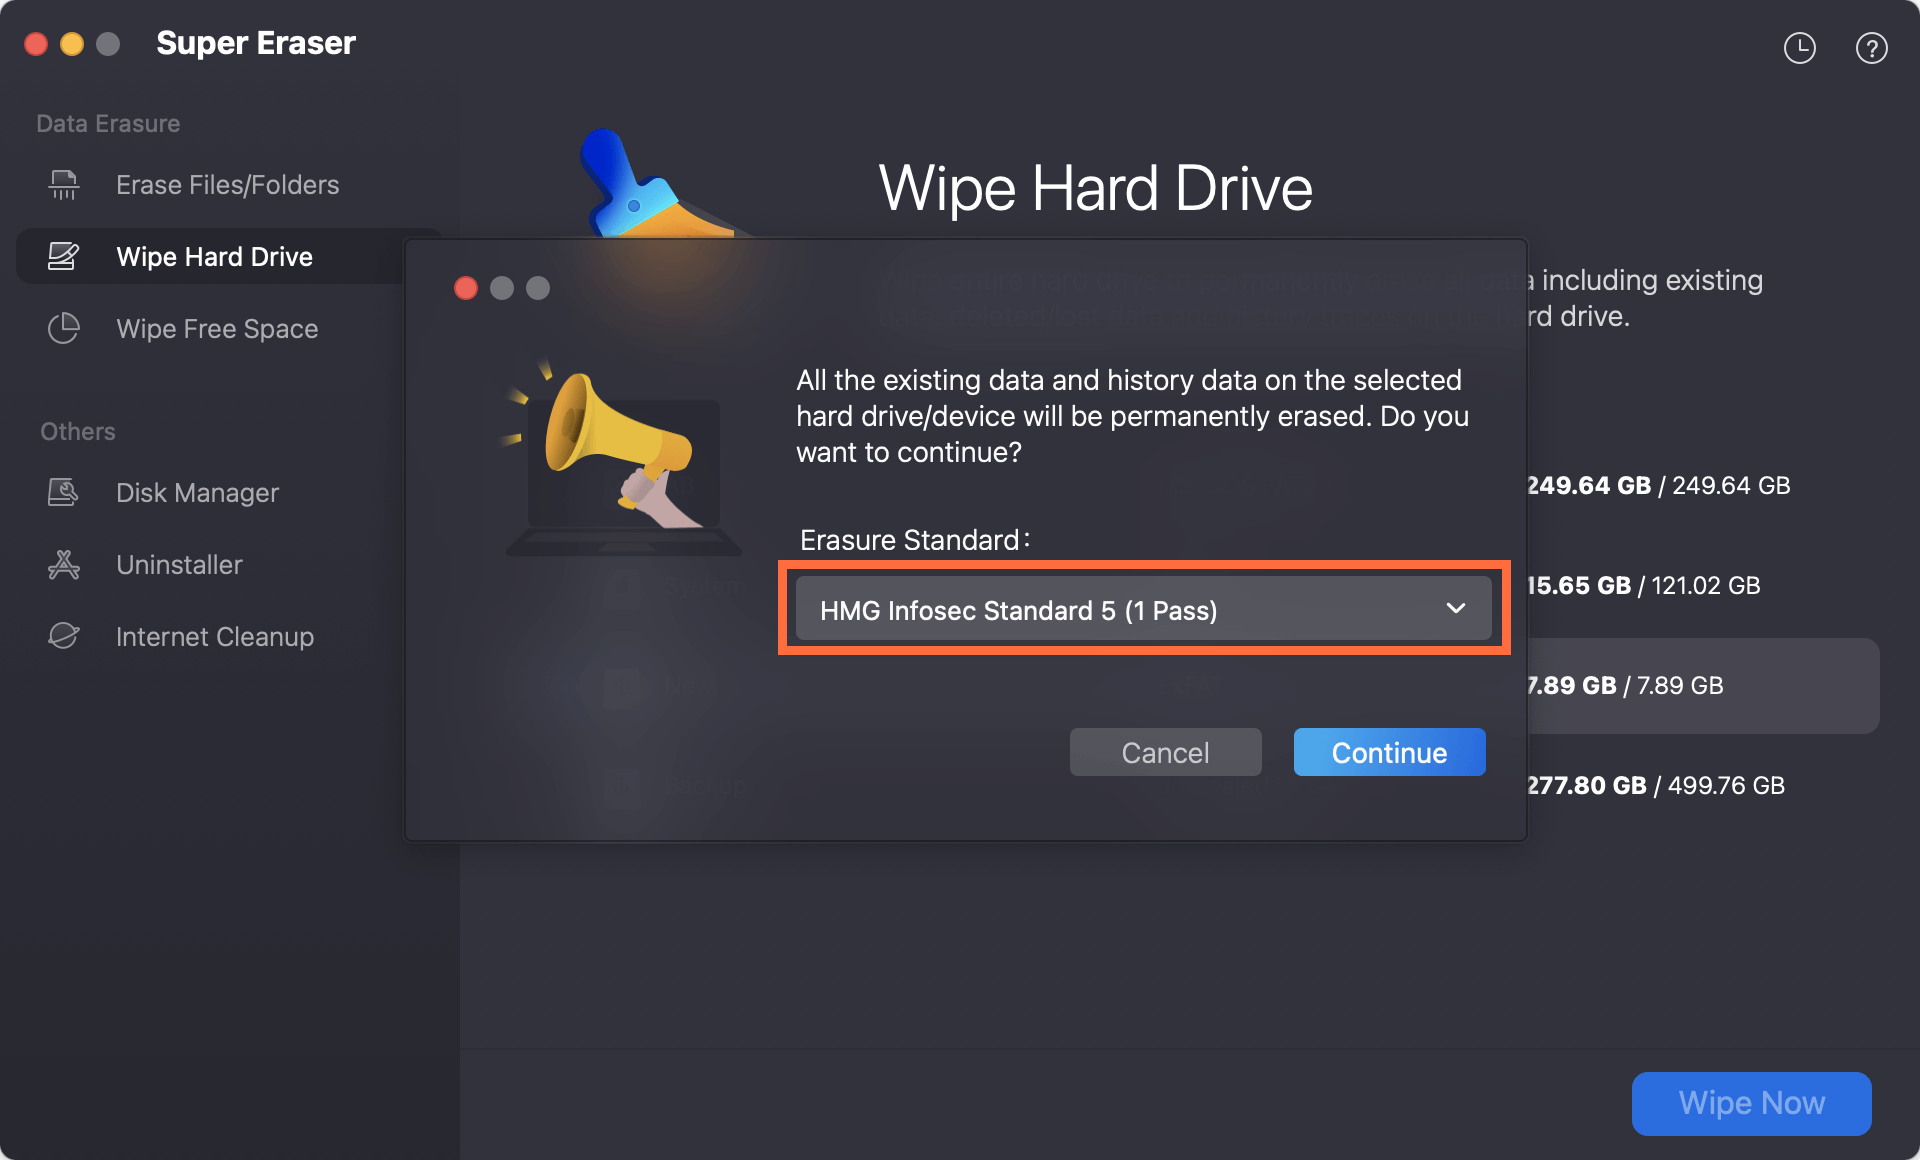
Step 4. Select a data erasure standard, then click on Continue button.
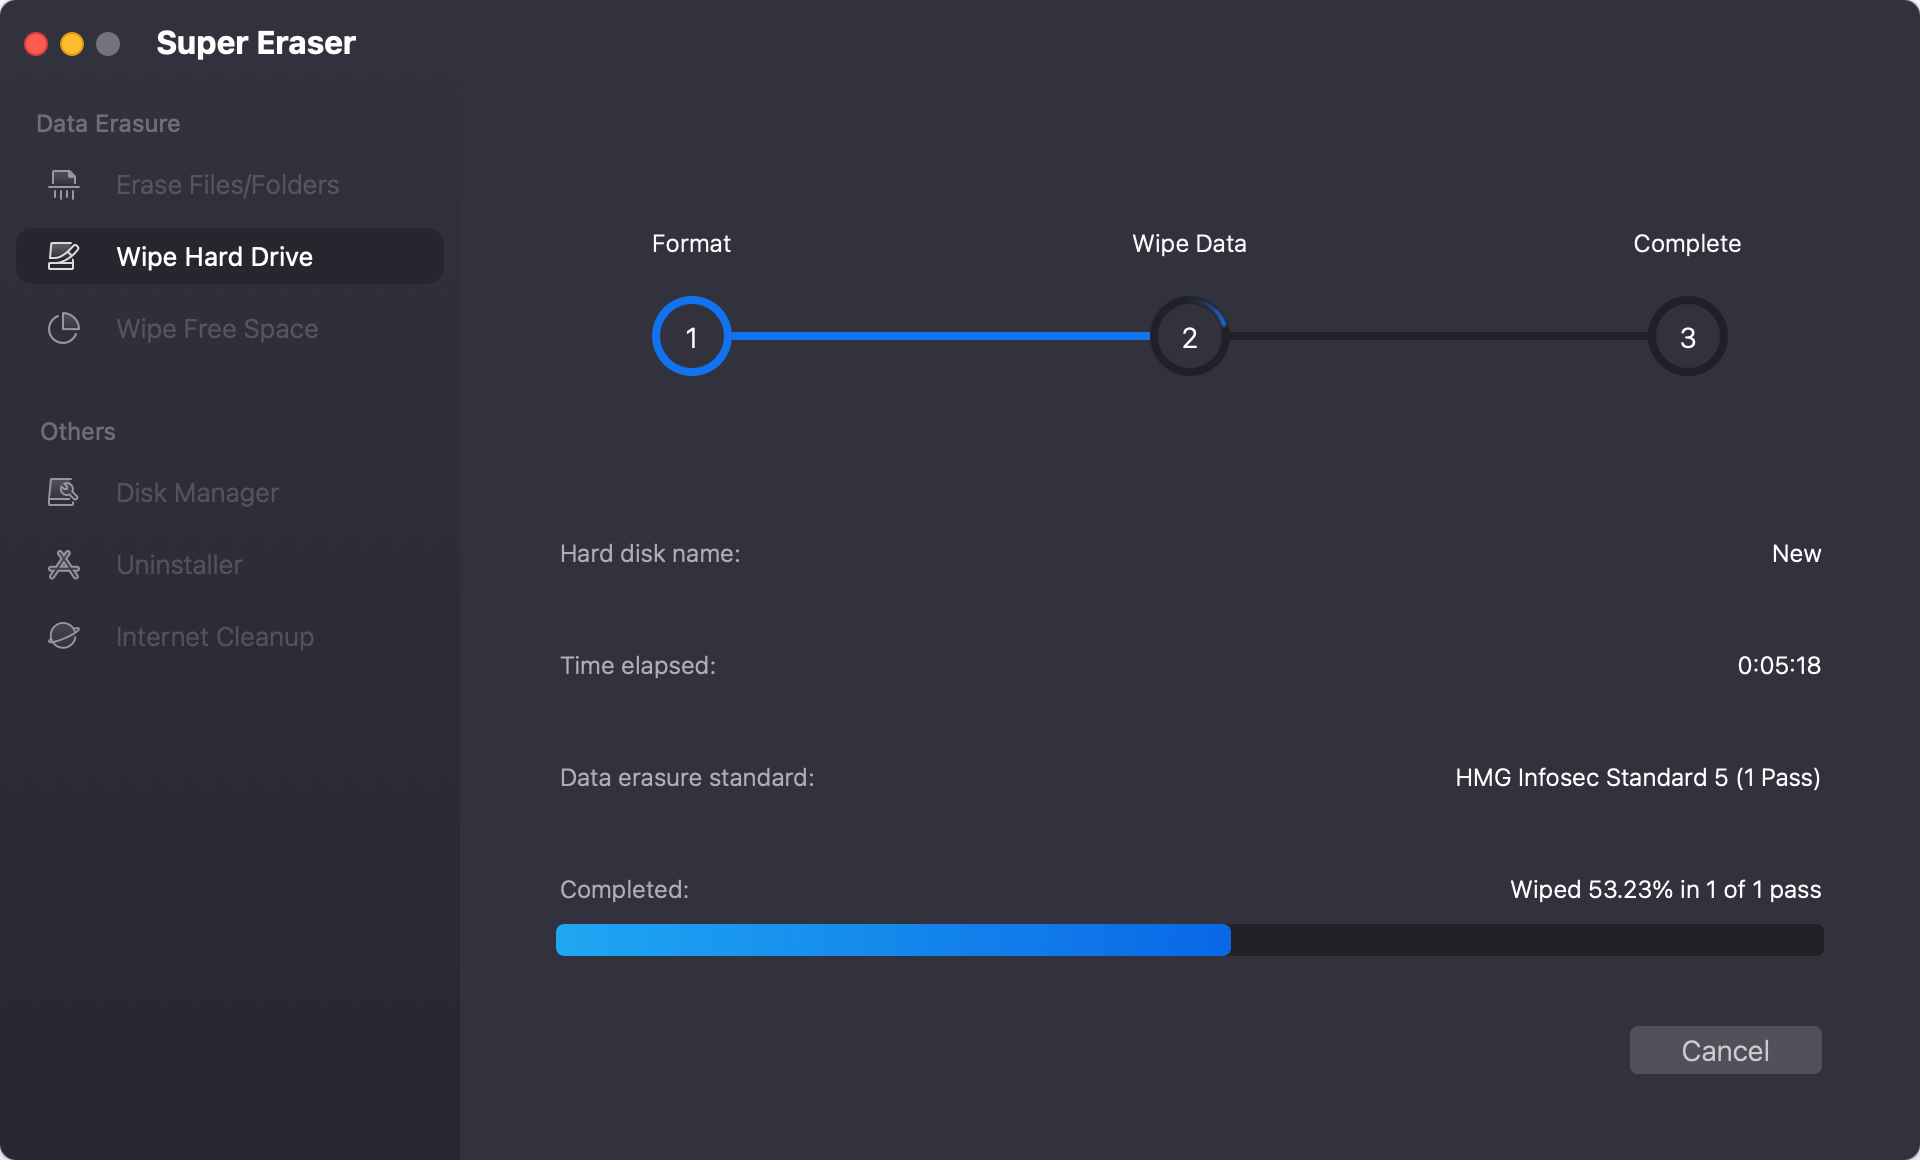
Step 5. Securely and permanently erase all data from your LaCie portable hard drive.
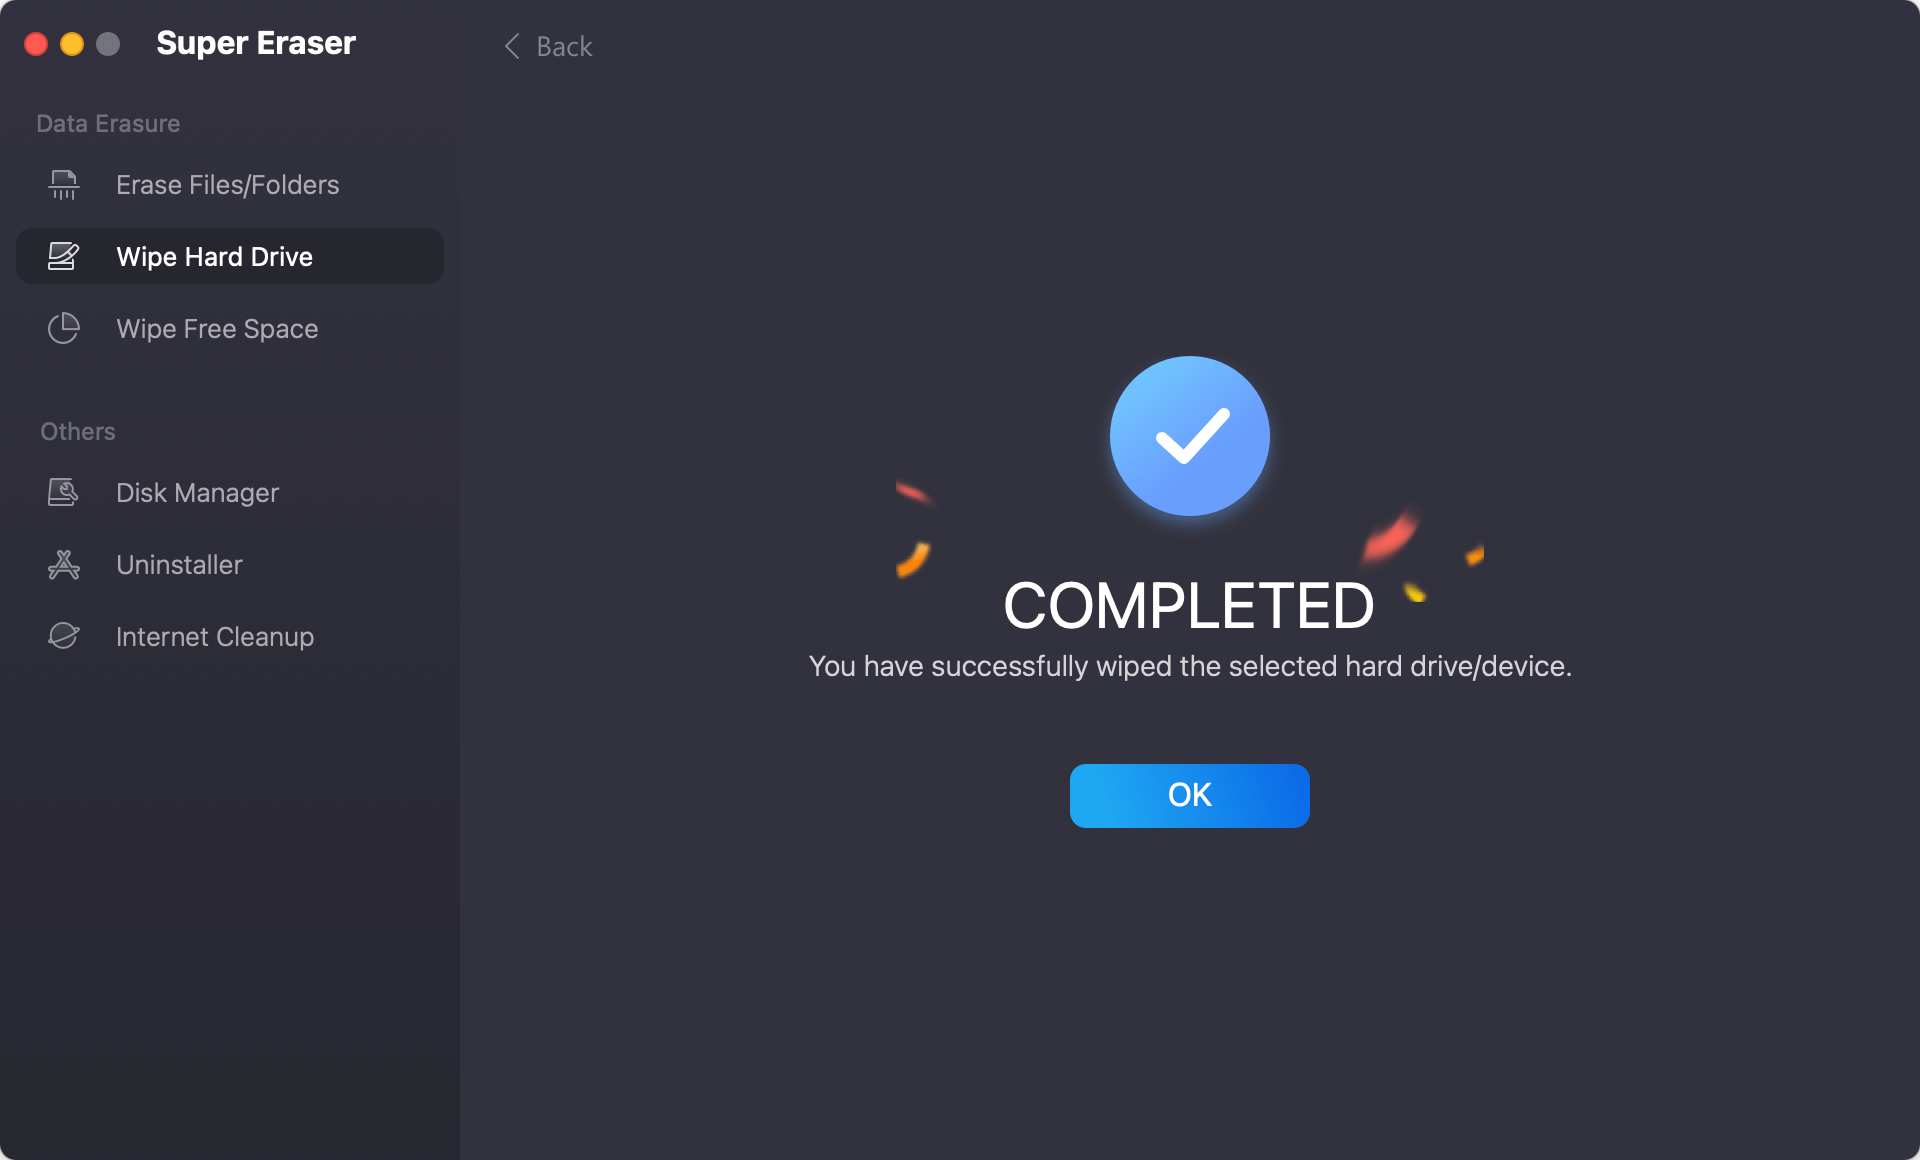
It also can help you shred files or only wipe deleted/lost data:
- Erase Files/Folders - This option allows you to selectively erase files or folders from your LaCie portable hard drive under Mac OS. Just select the files or folders you want to destroy, then click on "Eraser Now" button to permanently erase the selected files/folders. You don't have to wipe the entire LaCie portable hard drive when you only want to destroy some files or folders that contain your private information.
- Wipe Free Space - Deleted data or lost data is stored on the unused disk space of your LaCie portable hard drive. This option is designed for wiping all the deleted/lost data or traces on your LaCie portable hard drive without erasing the existing data.
Note: Once the data is erased by DoYourData Super Eraser for Mac, the data is lost for good, can't be recovered by any data recovery software.
Conclusion:
It is important to wipe your LaCie portable hard drive on a Mac to keep your data safe, protect your privacy, and keep the drive running well. Following the steps in this guide will help you safely delete all data from the drive, whether you're getting it ready to sell, fixing performance problems, or starting over.
To ensure the process is complete, always back up important files, pick the right security settings, and check that the wipe worked. After following these steps, you can use, sell, or find another use for your LaCie drive without worrying about losing your info.
FAQs About Wiping LaCie External Hard Drive on Mac
1. How to reformat a LaCie portable hard drive for Windows and Mac?
- Open Disk Utility from Launchpad > Other.
- Select the LaCie portable hard drive, click Erase.
- Select the ExFAT as the file system, click Erase again.
- Once the process gets finished, click Done.
The data which is erased by Disk Utility is not lost for good and it can be recovered by data recovery software. Check how to unformat LaCie portable hard drive on Mac >>
2. How to wipe LaCie portable hard drive on Mac?
DoYourData Super Eraser for Mac is a powerful disk wipe program. It can help you securely wipe a LaCie portable hard drive on Mac:
- Download and install DoYourData Super Eraser on your Mac, open it.
- Choose Wipe Hard Drive mode, select the LaCie portable hard drive.
- Click on Wipe Now button.
3. Is it possible to use a NTFS LaCie portable hard drive on Mac without formatting?
Yes, you can download a NTFS for Mac tool on your Mac, then you can read-write any NTFS drive on your Mac.
Step 1. Download and install DoYourData NTFS for Mac and connect your LaCie portable hard drive to your Mac.
Step 2. Open DoYourData NTFS for Mac.
Step 3. Select the NTFS LaCie portable hard drive.
Step 4. Click on Enable Writable button. Then you can read-write your LaCie portable hard drive without limitation.

If the LaCie portable hard drive is not mounting on your Mac, just click on Mount button or click on First Aid button to repair the damaged drive.

DoYourData Super Eraser for Mac
DoYourData Super Eraser for Mac is a 100% safe, powerful and easy-to-use data erasure program. It offers certified data erasure standards including Peter Gutmann, U.S. Army AR380-19, DoD 5220.22-M ECE to permanently erase data from Macs and external devices, making data recovery be impossible.