How to Wipe Trash Bin Permanently on Mac to Avoid Data Recovery
When you empty the Trash, macOS does not actually erase the contents of your files. Instead, the deleted files can be recovered with data recovery software. Fortunately, DoYourData Super Eraser for Mac can wipe the deleted files permanently beyond data recovery.
 Updated by Shirly Chen on September 1, 2026
Quick Navigation:
- Why Emptying Trash Doesn't Permanently Delete Files
- Why Apple Removed 'Secure Empty Trash' Option
- How to Wipe Trash on Mac to Avoid Data Recovery
- Best Practices for Mac File Destruction
- FAQs about Wiping Deleted Files on Mac
- Conclusion
Have you ever emptied the Trash on your Mac, assuming those sensitive files were gone forever? If so, you are not alone. Most Mac users believe that clicking 'Empty Trash' completely removes their files from the computer. However, behind the scenes, macOS handles file deletion in a way that leaves your private data vulnerable to recovery.
If you are preparing to sell your Mac, hand it over for repairs, or simply want to protect confidential personal and business documents, relying on standard deletion is a massive risk. In this guide, you will learn why normal trash emptying falls short and how to wipe trash bin on Mac to avoid data recovery permanently.
Why Emptying Trash Doesn't Permanently Delete Files
To understand why data remains vulnerable, it helps to know how macOS manages file storage. Modern storage drives—whether traditional Hard Disk Drives (HDDs) or modern Solid State Drives (SSDs)—organize data using file system pointers. Think of a file as a book in a library, and the file system as the card catalog.
- When you move a file to Trash: Finder removes the index entry (the card catalog entry). The actual data blocks on the disk remain untouched.
- When you click 'Empty Trash': macOS marks the disk sectors as 'free space'. However, the raw binary data stays written on the drive until overwritten by new files.
Because the underlying data remains on the disk, basic data recovery tools can scan the drive, locate these orphaned sectors, and fully reconstruct your files. If you deleted bank statements, private photos, corporate contracts, or passwords, anyone with access to your Mac could retrieve them in just a few clicks.
Why Apple Removed 'Secure Empty Trash' Option
In older operating systems like OS X Yosemite and earlier, Apple included a built-in feature called 'Secure Empty Trash'. This feature overwrote deleted files with random data as they were emptied. However, starting with OS X El Capitan and continuing through macOS Ventura, Sonoma, Sequoia, and beyond, Apple permanently removed this feature.
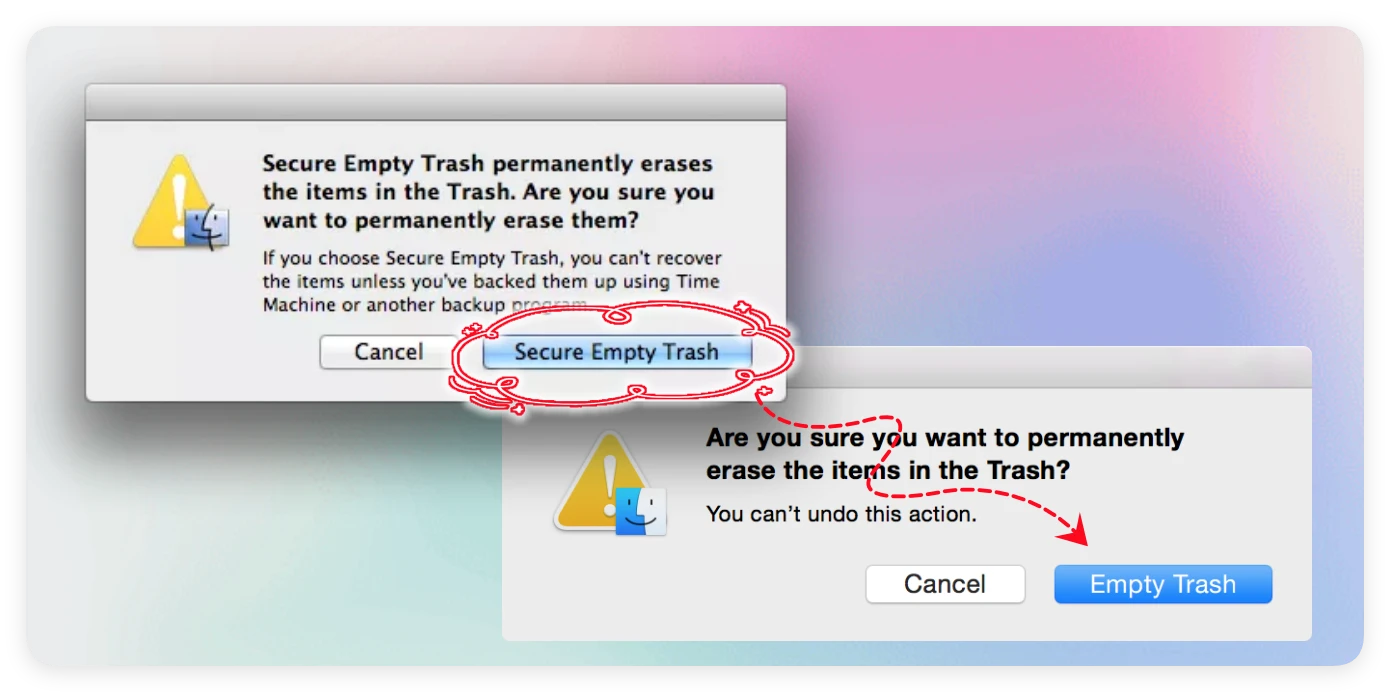
Why did Apple remove it? The main reason is hardware evolution. Modern Macs rely heavily on SSDs and Apple Silicon chips. SSDs utilize complex wear-leveling algorithms and TRIM functions to prolong drive lifespan, which prevents standard software commands from targeting individual disk sectors reliably. Furthermore, Apple introduced FileVault hardware encryption to protect data at rest.
While FileVault encrypts your entire drive, it does not securely wipe individual files that you have already deleted. If someone gains access to your logged-in Mac or recovers your account credentials, your previously 'deleted' files in the free space remain accessible to recovery algorithms unless the free disk space is thoroughly sanitized.
The Solution: Wiping Free Disk Space to Prevent Recovery
Since you cannot target individual files after the Trash has already been emptied, the only reliable way to ensure those files are unrecoverable is to wipe the drive's free space. Wiping free space scans all available, unallocated storage blocks on your Mac and fills them with random binary data, zeros, or multi-pass overwrite patterns.
By overwriting every free sector, any leftover traces of previously deleted files are completely destroyed. Once a sector is overwritten with new data patterns, original file fragments disappear forever—making forensic or software recovery impossible.
How to Wipe Trash on Mac to Avoid Data Recovery
To safely wipe free space on modern macOS versions without complex command-line scripts or risking system integrity, using professional data erasure software is the most effective approach. DoYourData Super Eraser for Mac is a certified, easy-to-use data sanitization tool designed specifically for macOS.
DoYourData Super Eraser for Mac
- Wipe deleted files permanently to avoid data recovery.
- Shred specified files or folders on Mac.
- Erase enter hard drive along with all data on the drive.
It employs government-standard data wiping algorithms—such as DoD 5220.22-M, U.S. Army AR380-19, and Gutmann—to guarantee that erased data is 100% unrecoverable. Crucially, wiping free space with DoYourData Super Eraser only target deleted file remnants; your existing apps, operational system files, and intact documents remain entirely untouched and safe.
Steps to Permanently Erasing Deleted Files
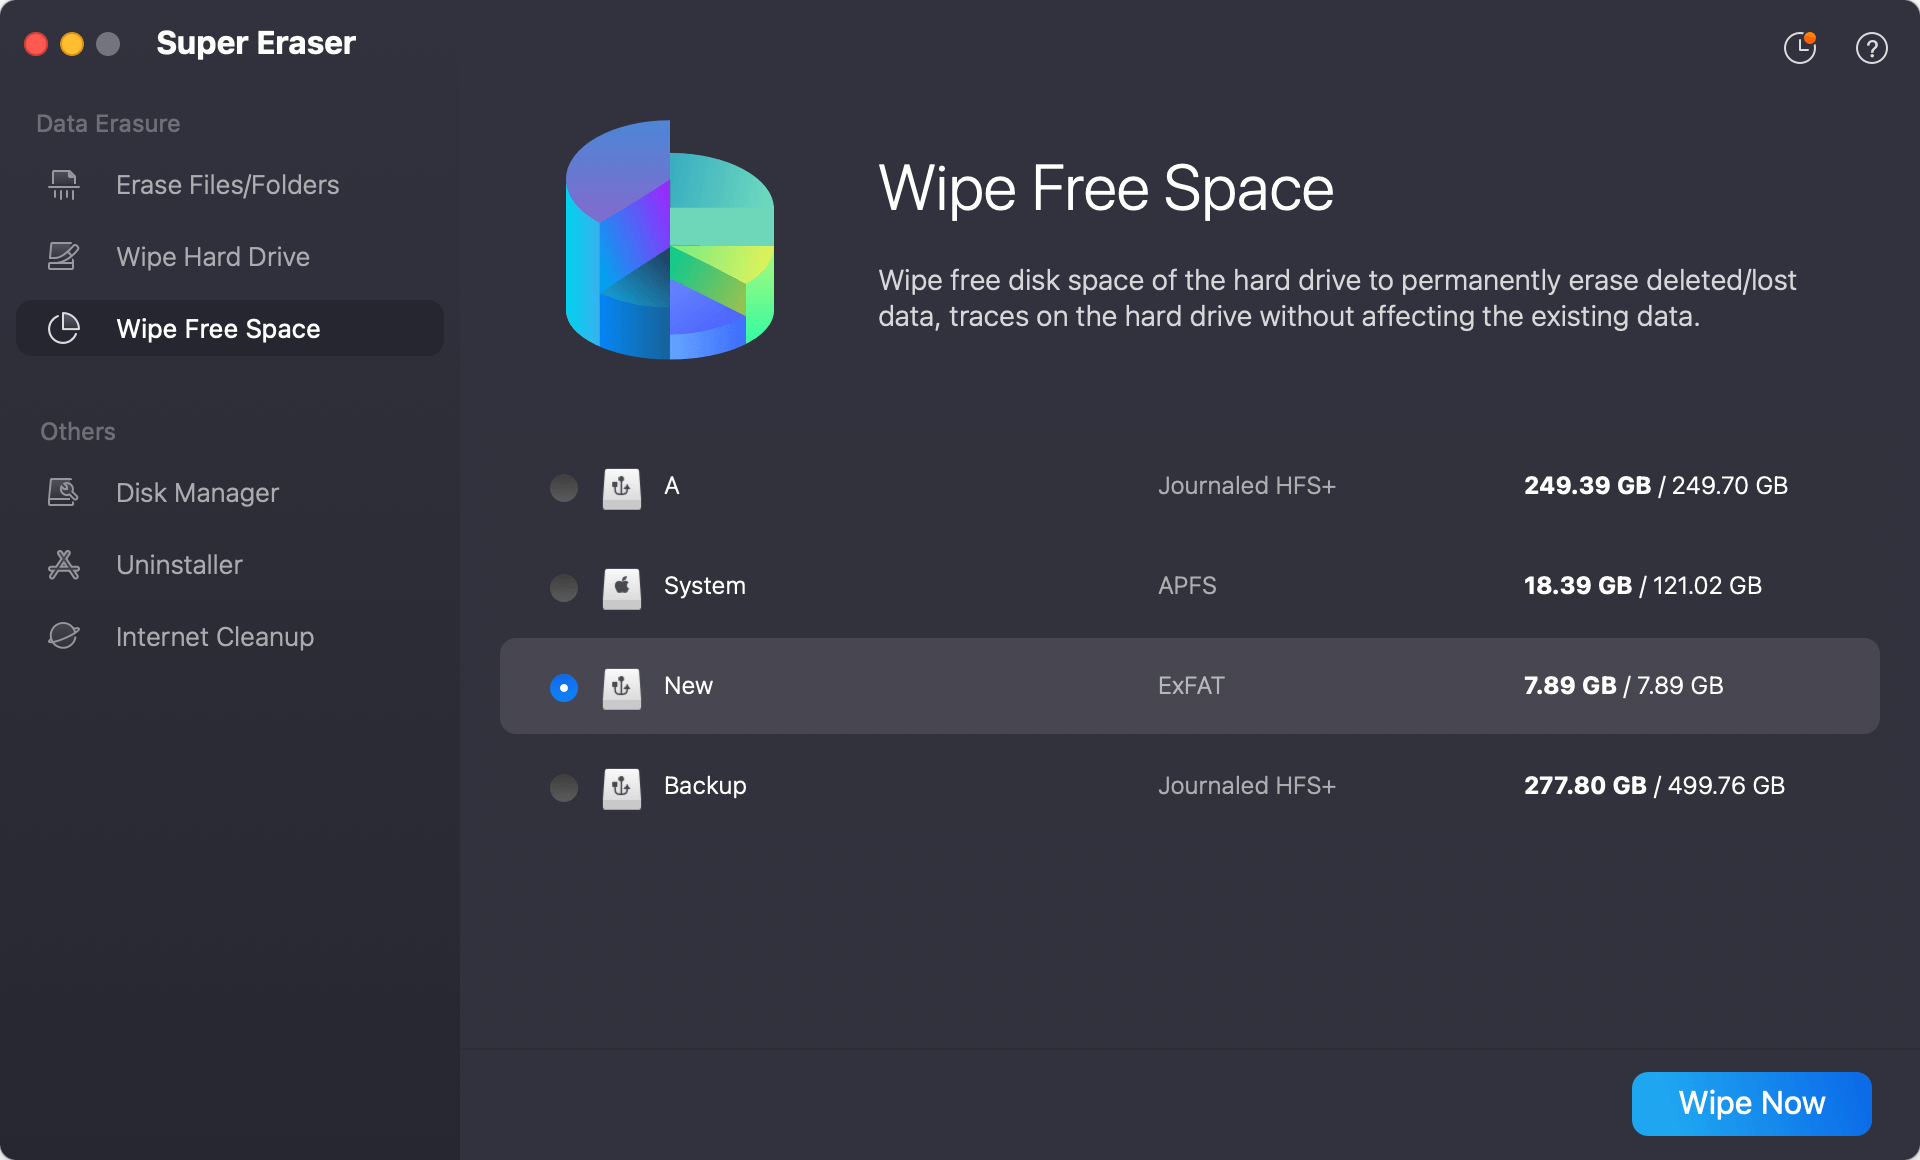
Step 1: Select the Target Drive – Launch the application from your Launchpad (Apps) or Applications folder. From the main screen, select the Wipe Free Space mode. You will see a list of available drives and volumes connected to your Mac. Choose the drive where your deleted files were stored (typically your main startup disk, 'Macintosh HD' or 'Macintosh HD - Data'). Click the Wipe Now button to continue.
Step 2: Select the Data Erasure Standard – Choose your preferred data erasure standard from the settings or drop-down menu. You can select standard single-pass overwriting for high speed, or military-grade standards like DoD 5220.22-M (3 passes) or Gutmann (35 passes) for maximum security.
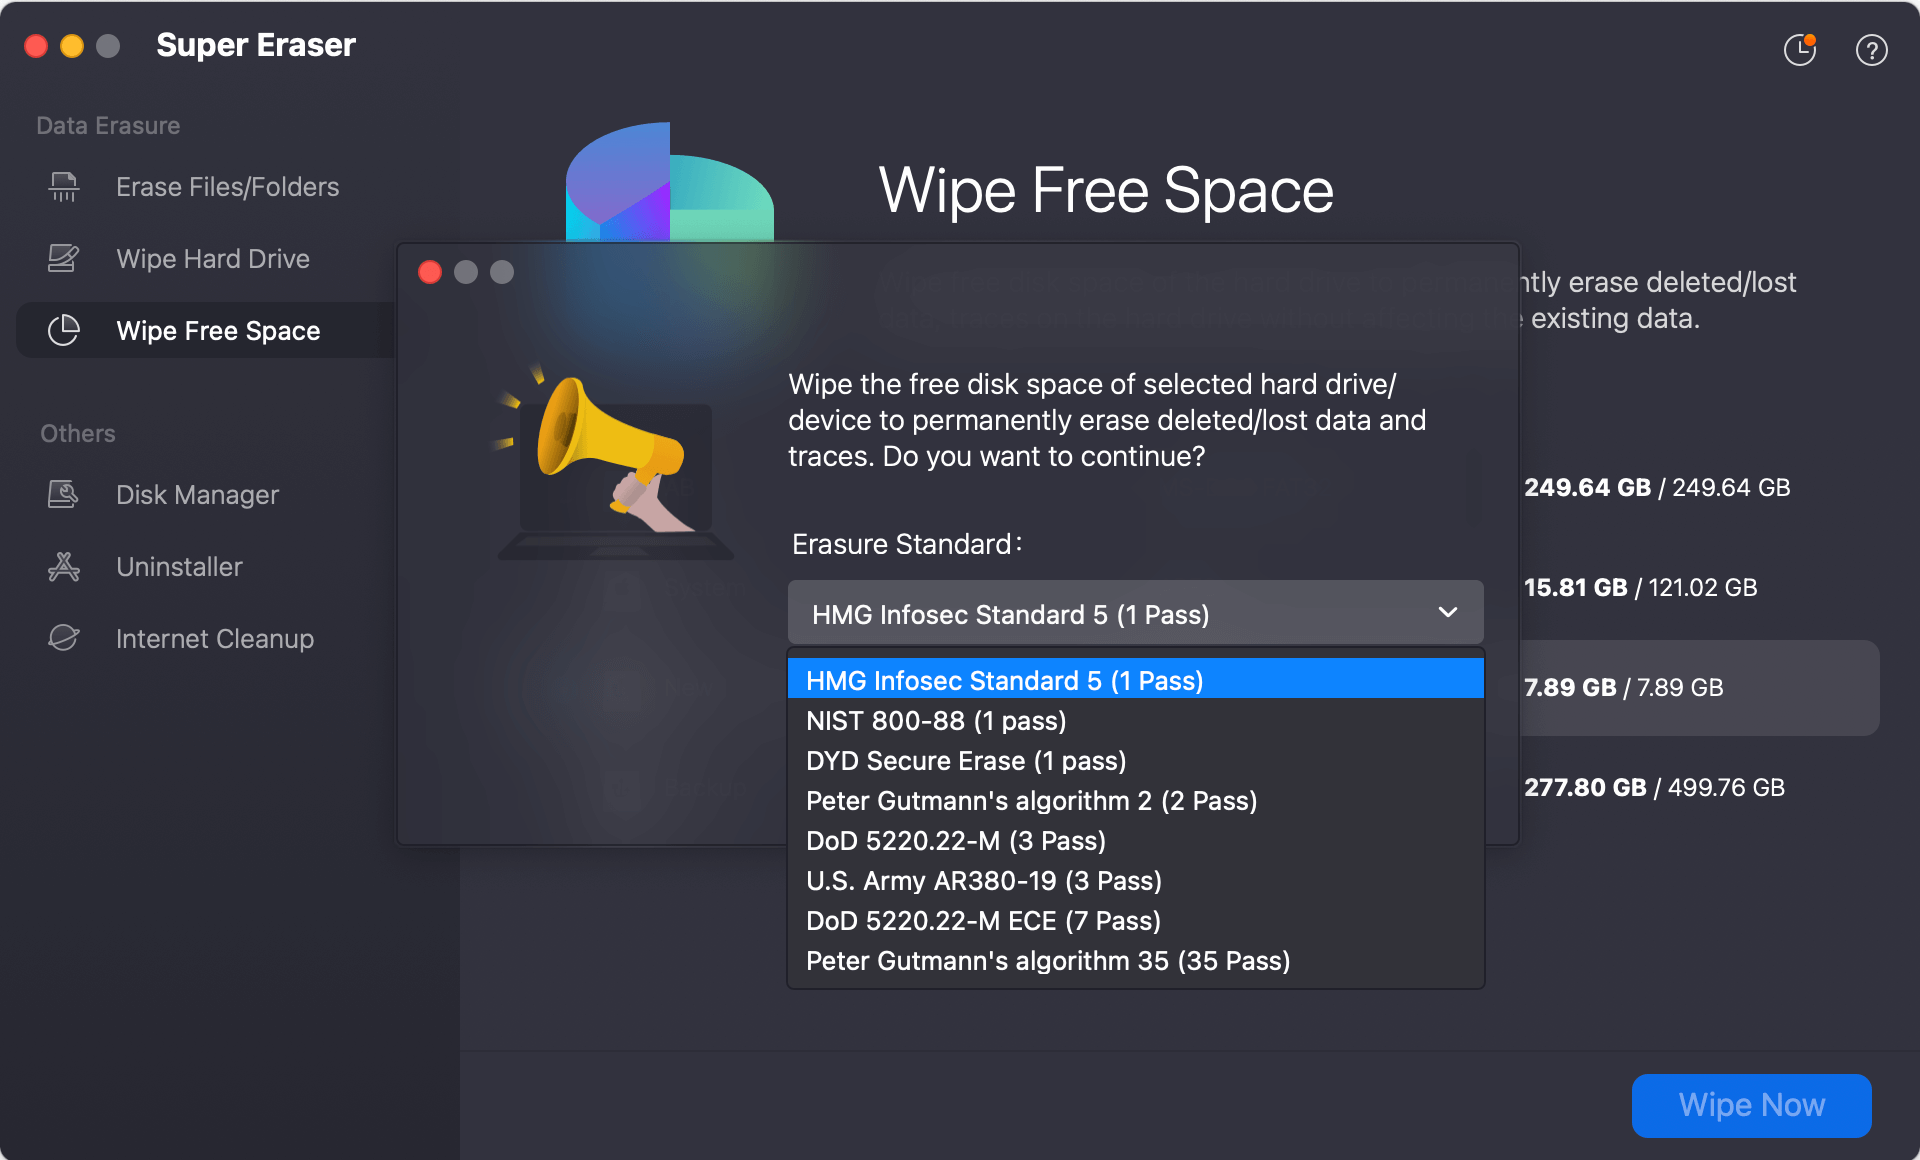
Step 3: Proceed with Data Wiping – Click the Continue button to initiate the data wiping process. The software will thoroughly overwrite all unallocated space on the selected drive. Once finished, all previously deleted files that were sitting in the Trash free space will be permanently destroyed and completely unrecoverable.
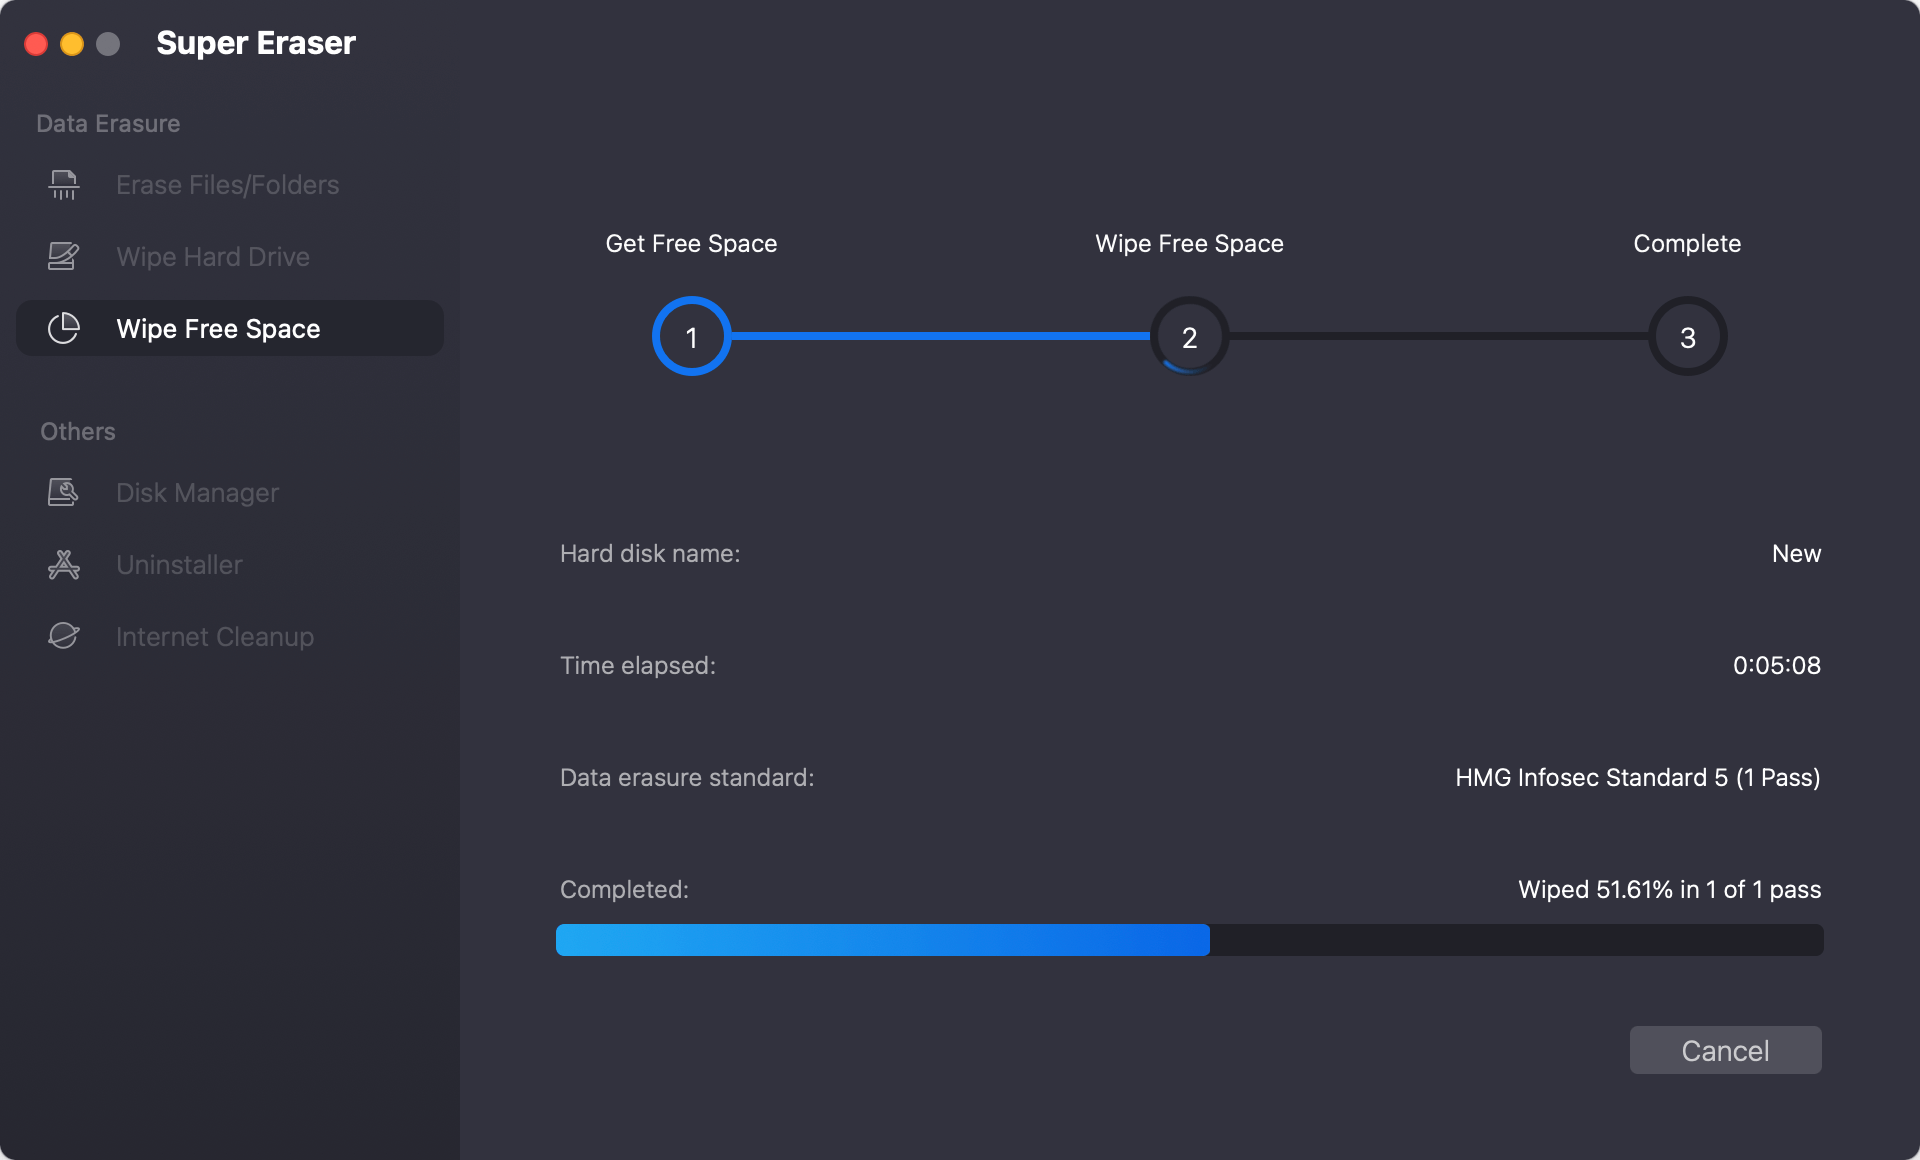
💡 Note: Once the Wipe Free Space process completes, no data recovery software, forensic tool, or specialist in the world can restore those deleted files. Always double-check that you have backed up any important documents before running a wiping operation.
Best Practices for Mac File Destruction
To keep your private information completely secure going forward, adopt these proactive data hygiene practices:
- Erase Sensitive Files Directly: If you know a file contains sensitive financial or personal data, don't just drag it to Trash. Use DoYourData Super Eraser's 'Erase Files/Folders' mode to shred it directly on the spot.
- Keep FileVault Enabled: Ensure FileVault is enabled under System Settings > Privacy & Security. FileVault encrypts your entire startup disk, providing an extra layer of protection.
- Routine Free Space Sanitization: Make it a habit to wipe your free disk space regularly, especially after cleaning out large folders containing sensitive work or personal documents.
- Complete Drive Wipe Before Transfer: Before selling, trading in, or giving away your Mac, perform a full disk wipe or use system factory reset to protect your personal identity.
FAQs about Wiping Deleted Files on Mac
Conclusion
Simply dragging files to the Trash and clicking 'Empty Trash' is not enough to safeguard your private data. Because macOS leaves deleted file content intact until overwritten naturally, sensitive files remain exposed to recovery tools long after you think they are gone.
By learning how to wipe trash bin on Mac to avoid data recovery, you take complete control of your digital privacy. Using DoYourData Super Eraser for Mac, you can wipe free disk space in just a few clicks, permanently destroying all traces of previously deleted files while keeping your current data completely safe. Download DoYourData Super Eraser for Mac today and ensure your deleted files stay deleted forever.
DoYourData Super Eraser for Mac
DoYourData Super Eraser for Mac is a 100% safe, powerful and easy-to-use data erasure program. It offers certified data erasure standards including Peter Gutmann, U.S. Army AR380-19, DoD 5220.22-M ECE to permanently erase data from Macs and external devices, making data recovery be impossible.
Written & Updated by Shirly Chen
Shirly Chen has been writing data recovery, data erasure articles for DoYourData over 4 years. She has been working as a professional website content writer & editor for quite a long time. She also writes articles about disk clone, Mac optimization, disk backup, etc.