How to Permanently Wipe MacBook's Internal Disk Before Selling or Donating
How to make sure the data is wiped and gone forever? Use the professional tool DoYourData Super Eraser. The software can not only shred specified files, but also wipe deleted/lost files or erase entire drive permanently.
 Updated by Shirly Chen on August 26, 2026
Quick Navigation:
- Phase 1: Essential Pre-Wipe Preparations
- Phase 2: Wipe MacBook's Internal Disk in Recovery Mode
- Phase 3: Ensure Data is 100% Unrecoverable
- Phase 4: Preparing the MacBook for the Next Owner
- FAQs about Wiping MacBook's Internal Disk
- Conclusion
Are you planning to sell, trade in, or give away your old MacBook? Before handing over your laptop to a new owner, there is one crucial task you must complete: wipe MacBook's internal disk permanently. Leaving behind personal photos, saved passwords, tax records, or work documents opens the door to serious privacy risks and identity theft.

Many users assume that performing a standard macOS factory reset or erasing the drive via Disk Utility is enough. However, due to how modern Solid State Drives (SSDs) operate, standard formatting often leaves traces of deleted data lingering in the drive's unused storage. With basic data recovery software, a tech-savvy buyer could potentially recover your sensitive files.
To ensure your personal information remains 100% unrecoverable, you need a complete, two-phase sanitization process. In this guide, we will walk you through the proper steps to wipe your MacBook's internal disk, reinstall a clean operating system, overwrite remaining free space, and prepare your Mac safely for its next owner.
Phase 1: Essential Pre-Wipe Preparations
Before wiping your MacBook's internal disk, you must back up important files and sign out of personal Apple services. Removing your accounts ensures the next owner will not be blocked by Activation Lock.
1. Create a Complete File Backup
Wiping your internal disk is permanent. Ensure you back up all personal files, documents, and photos to an external drive or cloud storage service like iCloud Drive, Google Drive, or Dropbox.
2. Sign Out of iCloud and Apple Services
- Sign out of Apple ID: On macOS Ventura, Sonoma, Sequoia, or later: Open System Settings > click your Apple ID name > scroll down and click Sign Out.
- Sign out of iMessage: Open the Messages app > Settings > iMessage > click Sign Out.
- Deauthorize Music/iTunes: Open Music > Account > Authorizations > Deauthorize This Computer.
3. Turn Off Find My Mac and Activation Lock
Go to System Settings > Apple ID > iCloud > Find My Mac, and toggle it Off. This removes the hardware link between your MacBook and your personal Apple ID, allowing the new owner to set up the laptop smoothly.
4. Unpair Bluetooth Devices
If you plan to keep your wireless keyboard, mouse, or AirPods near the MacBook after wiping, unpair them under System Settings > Bluetooth to prevent accidental connections later.
Phase 2: Wipe MacBook's Internal Disk in Recovery Mode
The first major step to wipe MacBook's internal disk is entering macOS Recovery Mode. This built-in utility lets you unmount and format the primary startup drive, removing the operating system and all active user profiles.
The process to enter Recovery Mode depends on whether your MacBook runs on Apple Silicon or an Intel processor.
How to Enter Recovery Mode on Apple Silicon MacBooks
- Shut down your MacBook completely.
- Press and hold the Power button (Touch ID button) until you see 'Loading startup options'.
- Select Options, then click Continue.
- Select an administrator user account if prompted, and enter your password.
How to Enter Recovery Mode on Intel-Based MacBooks
- Shut down your MacBook completely.
- Press the Power button, then immediately hold down Command (⌘) + R until the Apple logo or spinning globe appears.
- Release the keys once the Utilities window loads.
Step-by-Step Instructions to Erase the Internal Disk
Step 1: Open Disk Utility. In the macOS Utilities window, select Disk Utility and click Continue.
Step 2: Display Physical Disks. Click the View icon in the top-left corner and select Show All Devices. This displays the top-level internal disk container (usually named 'Apple SSD').
Step 3: Select Internal Drive. Select your main internal drive from the left sidebar.
Step 4: Configure Erase Settings. Click the Erase button in the top toolbar.
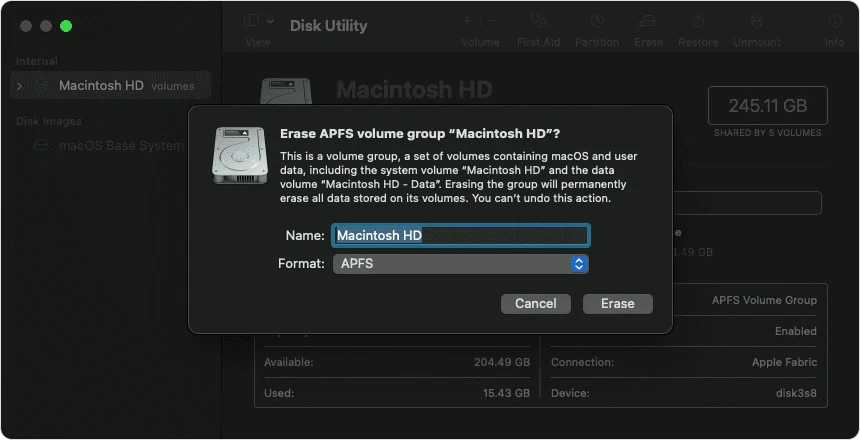
Step 5: Set Parameters. Set the Name to 'Macintosh HD', the Format to 'APFS' (or Mac OS Extended Journaled for older macOS versions), and the Scheme to 'GUID Partition Map'.
Step 6: Execute Erase. Click Erase Volume Group (or Erase) to confirm. Wait for the formatting process to complete.
Reinstalling a Fresh Copy of macOS
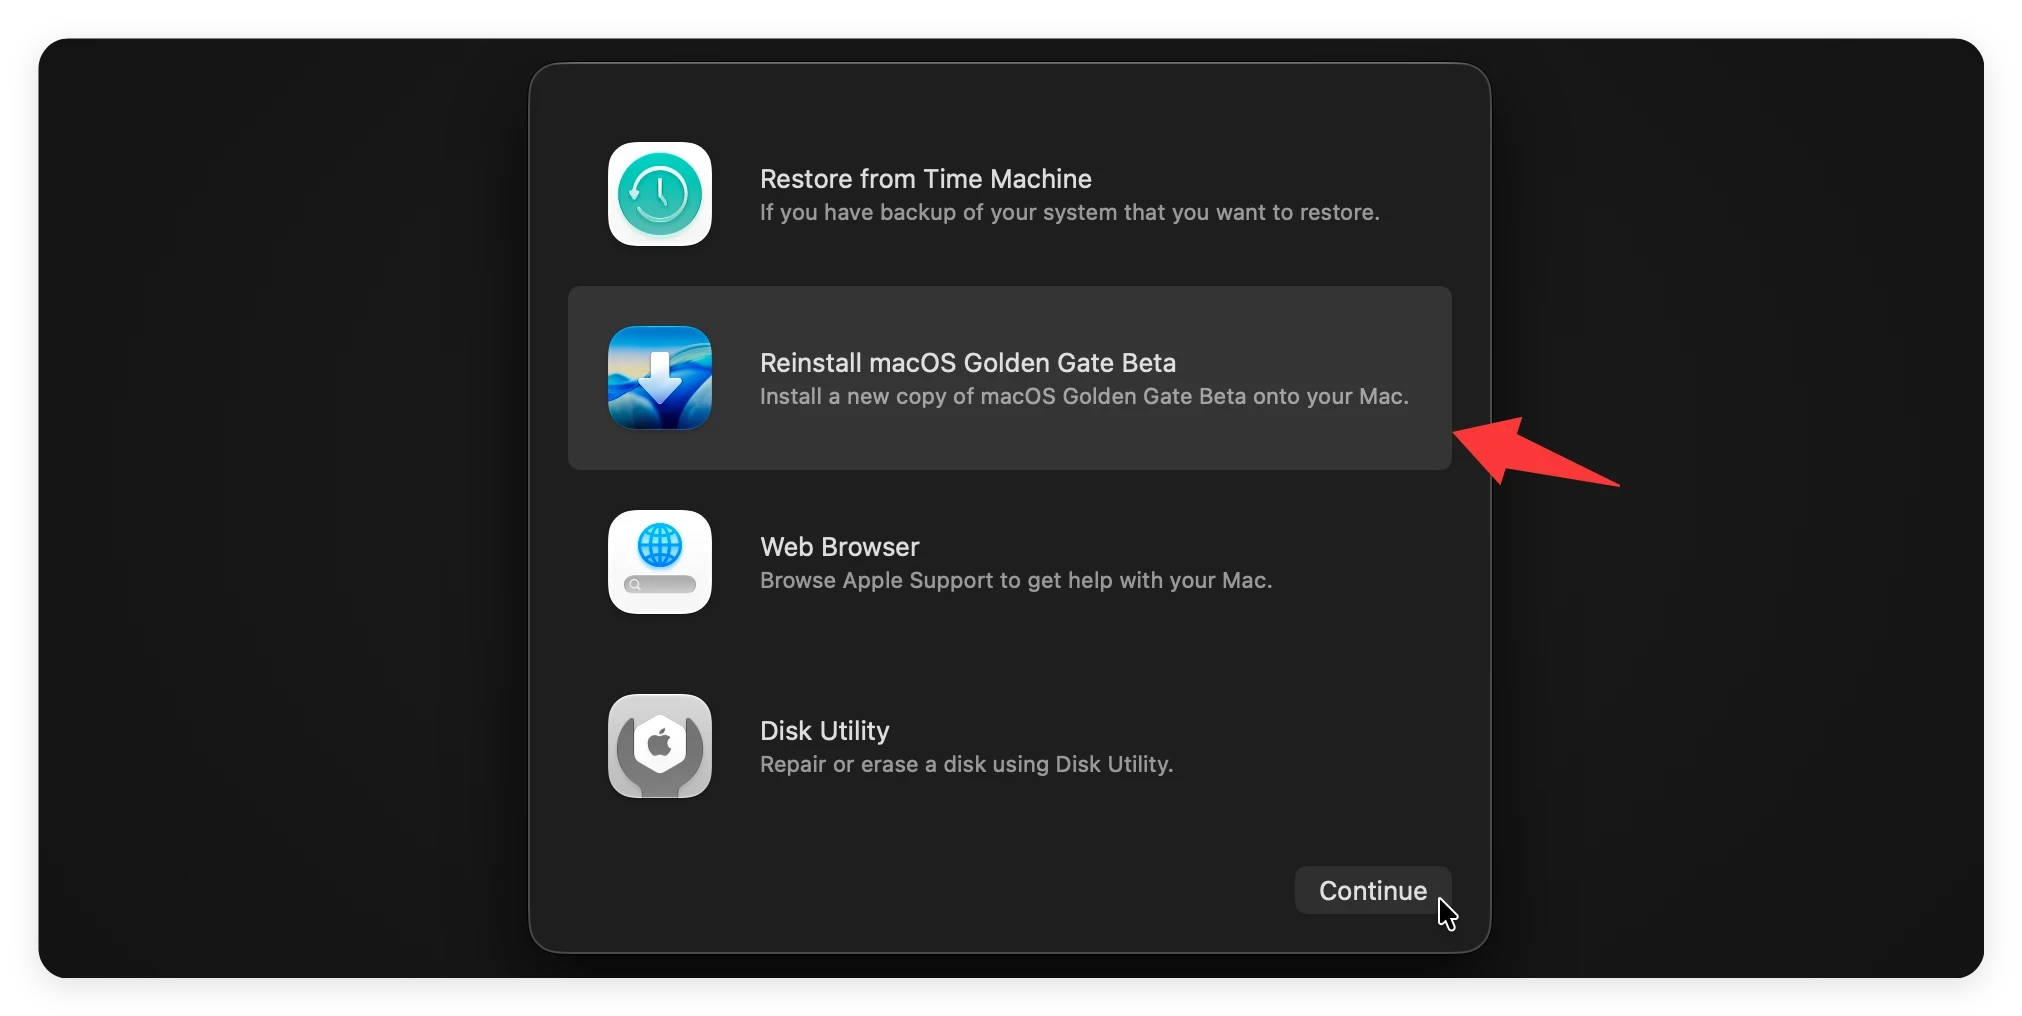
Once the disk format finishes, quit Disk Utility to return to the main Recovery window. Select Reinstall macOS, click Continue, and follow the on-screen prompts to install a clean operating system. When the installation finishes and the initial 'Hello' setup screen appears, do not complete the setup—simply close your MacBook lid or shut it down.
Phase 3: Ensure Data is 100% Unrecoverable
Reinstalling macOS clears active file systems, but residual data blocks on the SSD free space can still retain recoverable fragments. To ensure complete privacy protection before selling or donating, you must overwrite all remaining free space on the internal drive.
Because macOS native tools no longer offer free-space shredding on modern SSDs, you need specialized disk sanitization software: DoYourData Super Eraser for Mac.
Why Use DoYourData Super Eraser for Mac?
DoYourData Super Eraser for Mac is a powerful, military-grade data erasure tool designed specifically for macOS. It uses certified overwriting algorithms—such as DoD 5220.22-M, U.S. Army AR380-19, and Peter Gutmann's algorithm—to write random binary patterns over deleted data blocks.
- Certified Erasure Standards: Permanently erases data without degrading your MacBook SSD health.
- Free Space Erasure: Wipes unused storage space where recoverable deleted files hide.
- 100% Unrecoverable Guarantee: Ensures erased files cannot be restored by any data recovery software.
- Modern macOS Compatibility: Fully compatible with macOS Sequoia, Sonoma, Ventura, and Apple Silicon chips.
How to Wipe Free Space on MacBook Internal Disk
To wipe free space while keeping the fresh macOS installation ready for the buyer, follow these simple steps:
Step 1: Boot up your MacBook after reinstalling macOS and complete a temporary user setup (e.g., set username as 'Test'). Download and install DoYourData Super Eraser for Mac.
DoYourData Super Eraser for Mac
- Best data erasure software for MacBook and other Macs.
- Permanently wipe data with certified data erasure algorithms.
- Ensure the wiped data is 100% unrecoverable.
Step 2: Launch the application from your Applications folder. From the left sidebar, choose the Wipe Free Space module. Select your main internal drive (Macintosh HD) from the list of available volumes.
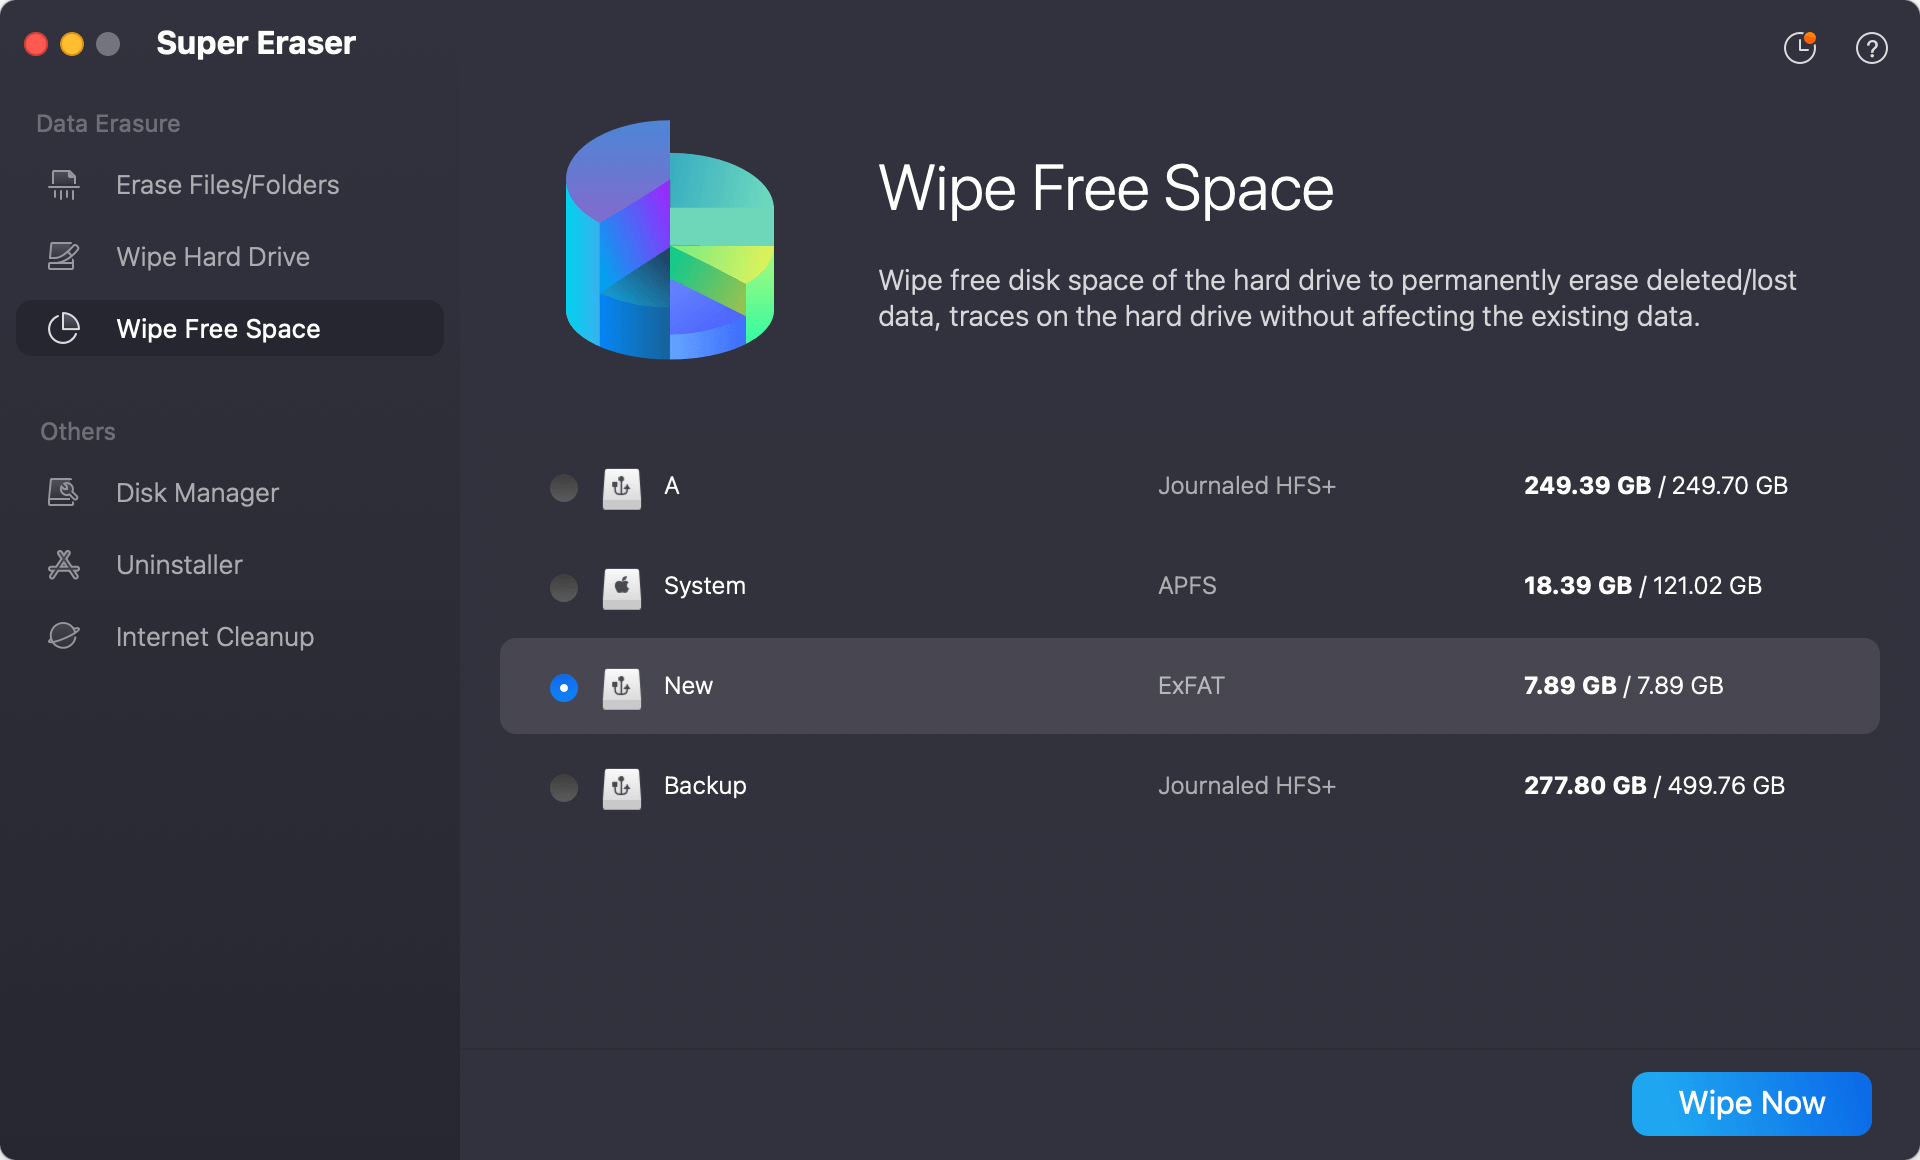
Step 3: Click the Wipe Now button. The software will ask you to select a data wiping method.
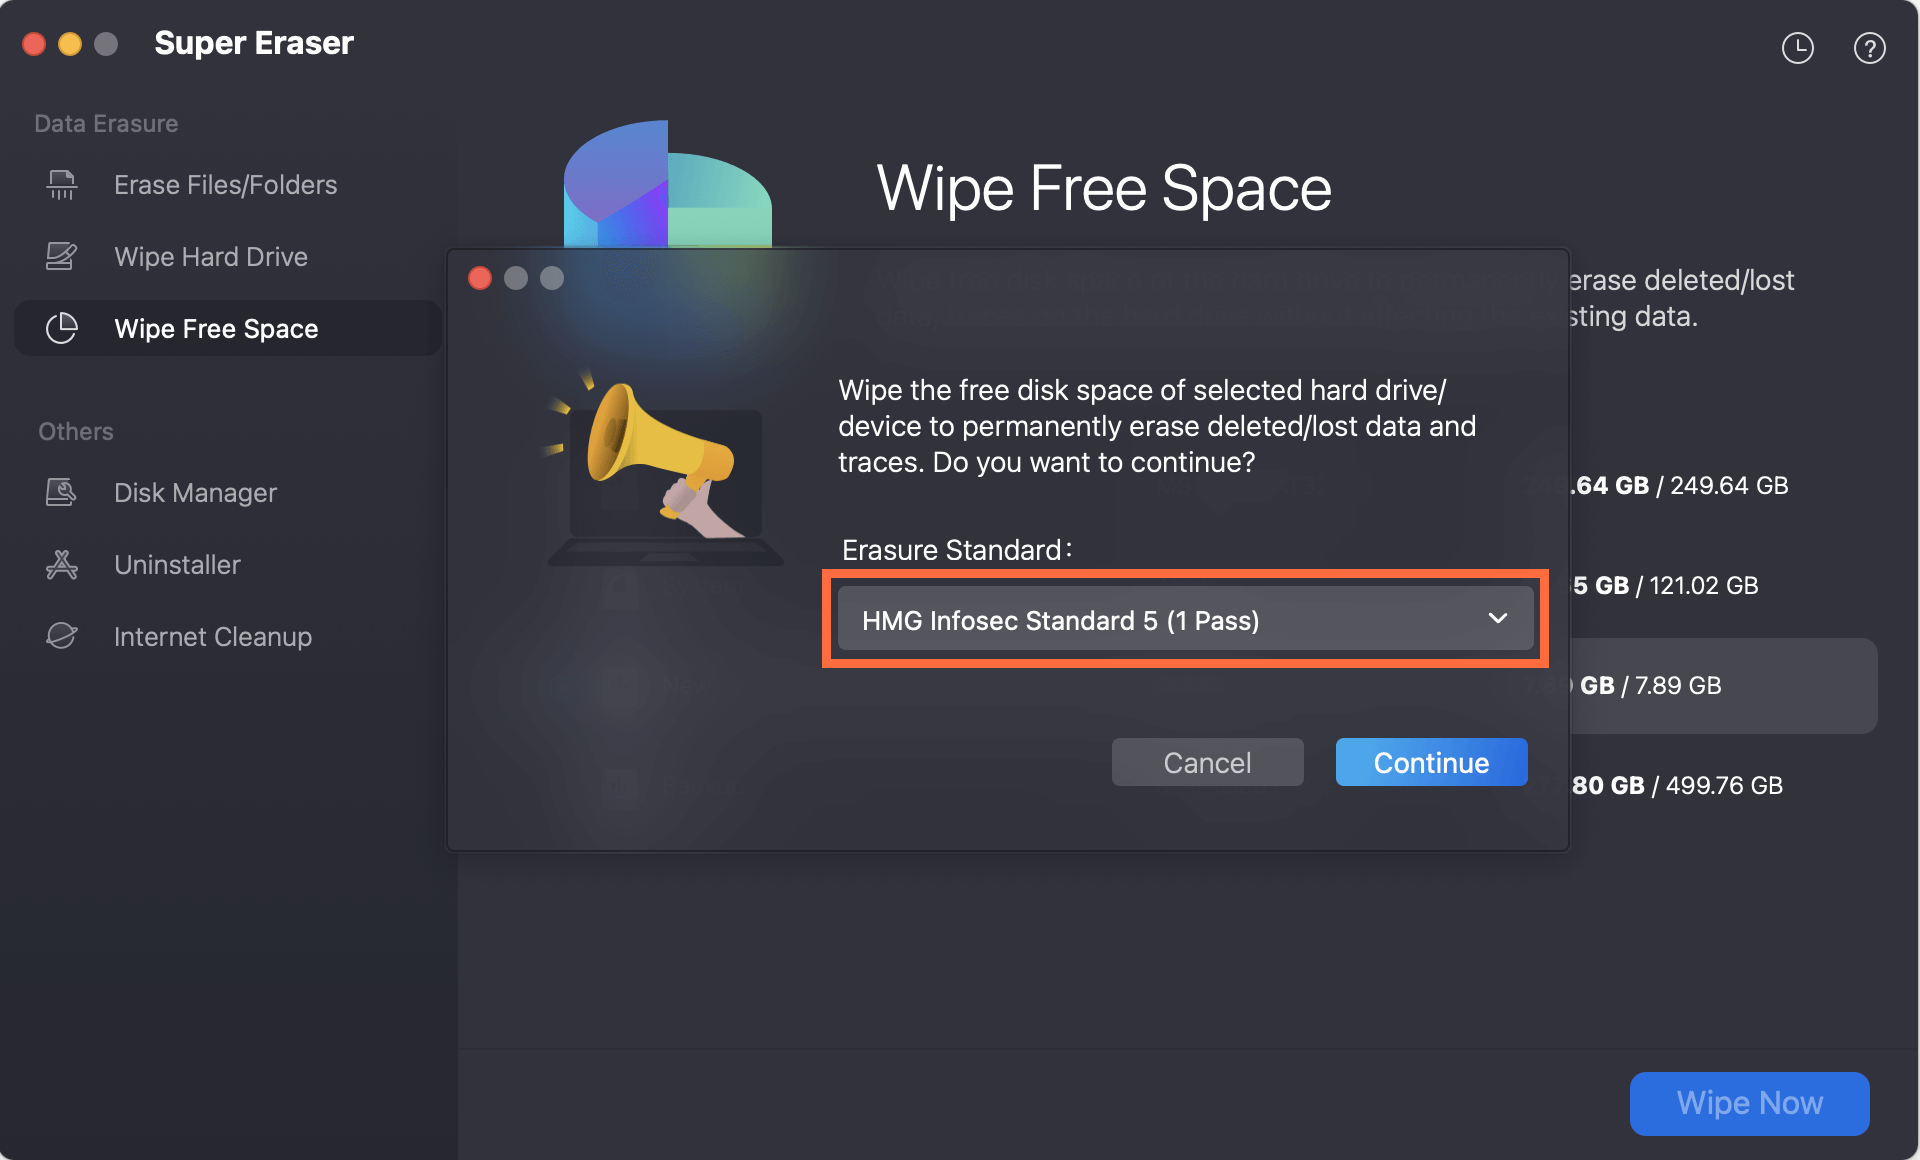
Step 4: Click the Continue button. DoYourData Super Eraser will systematically overwrite all unused storage sectors with zero-fill and random algorithms.
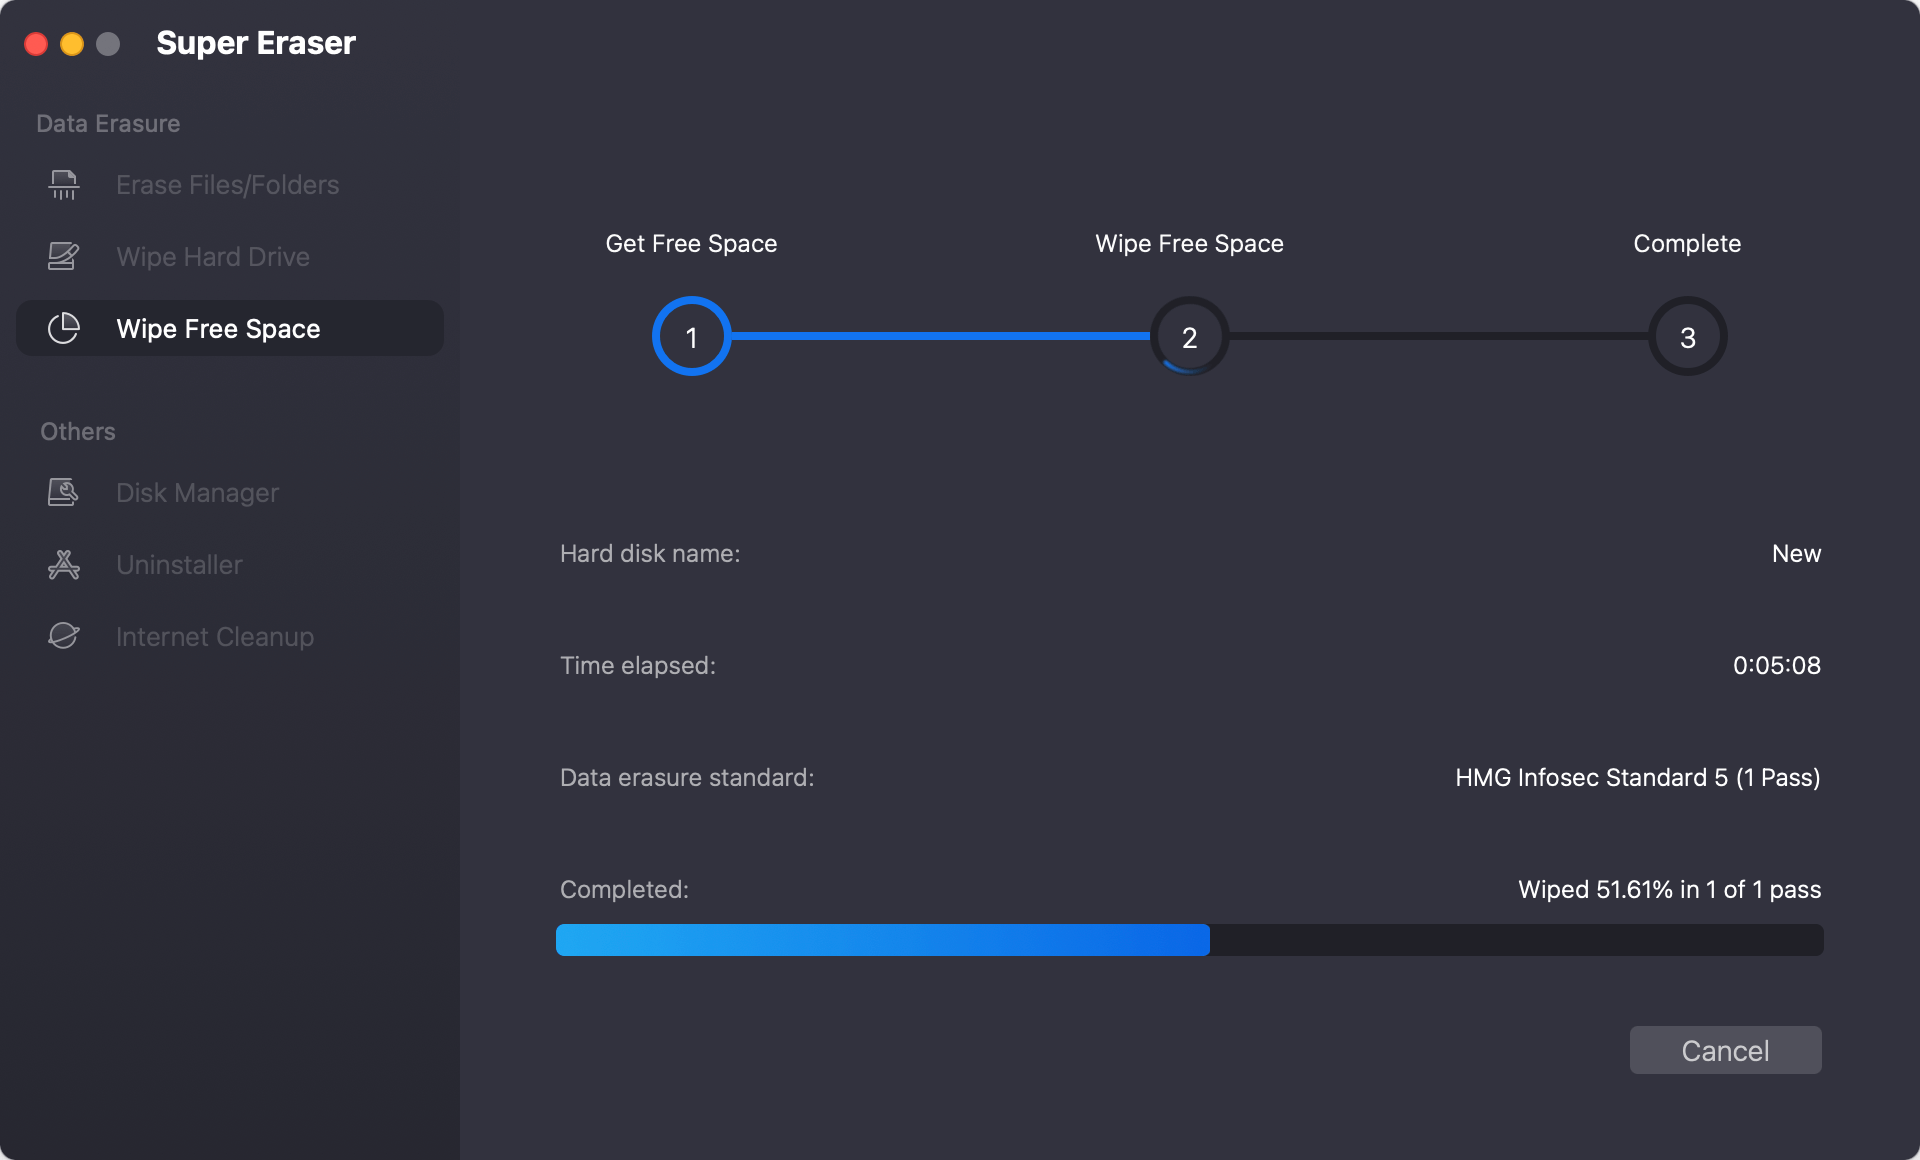
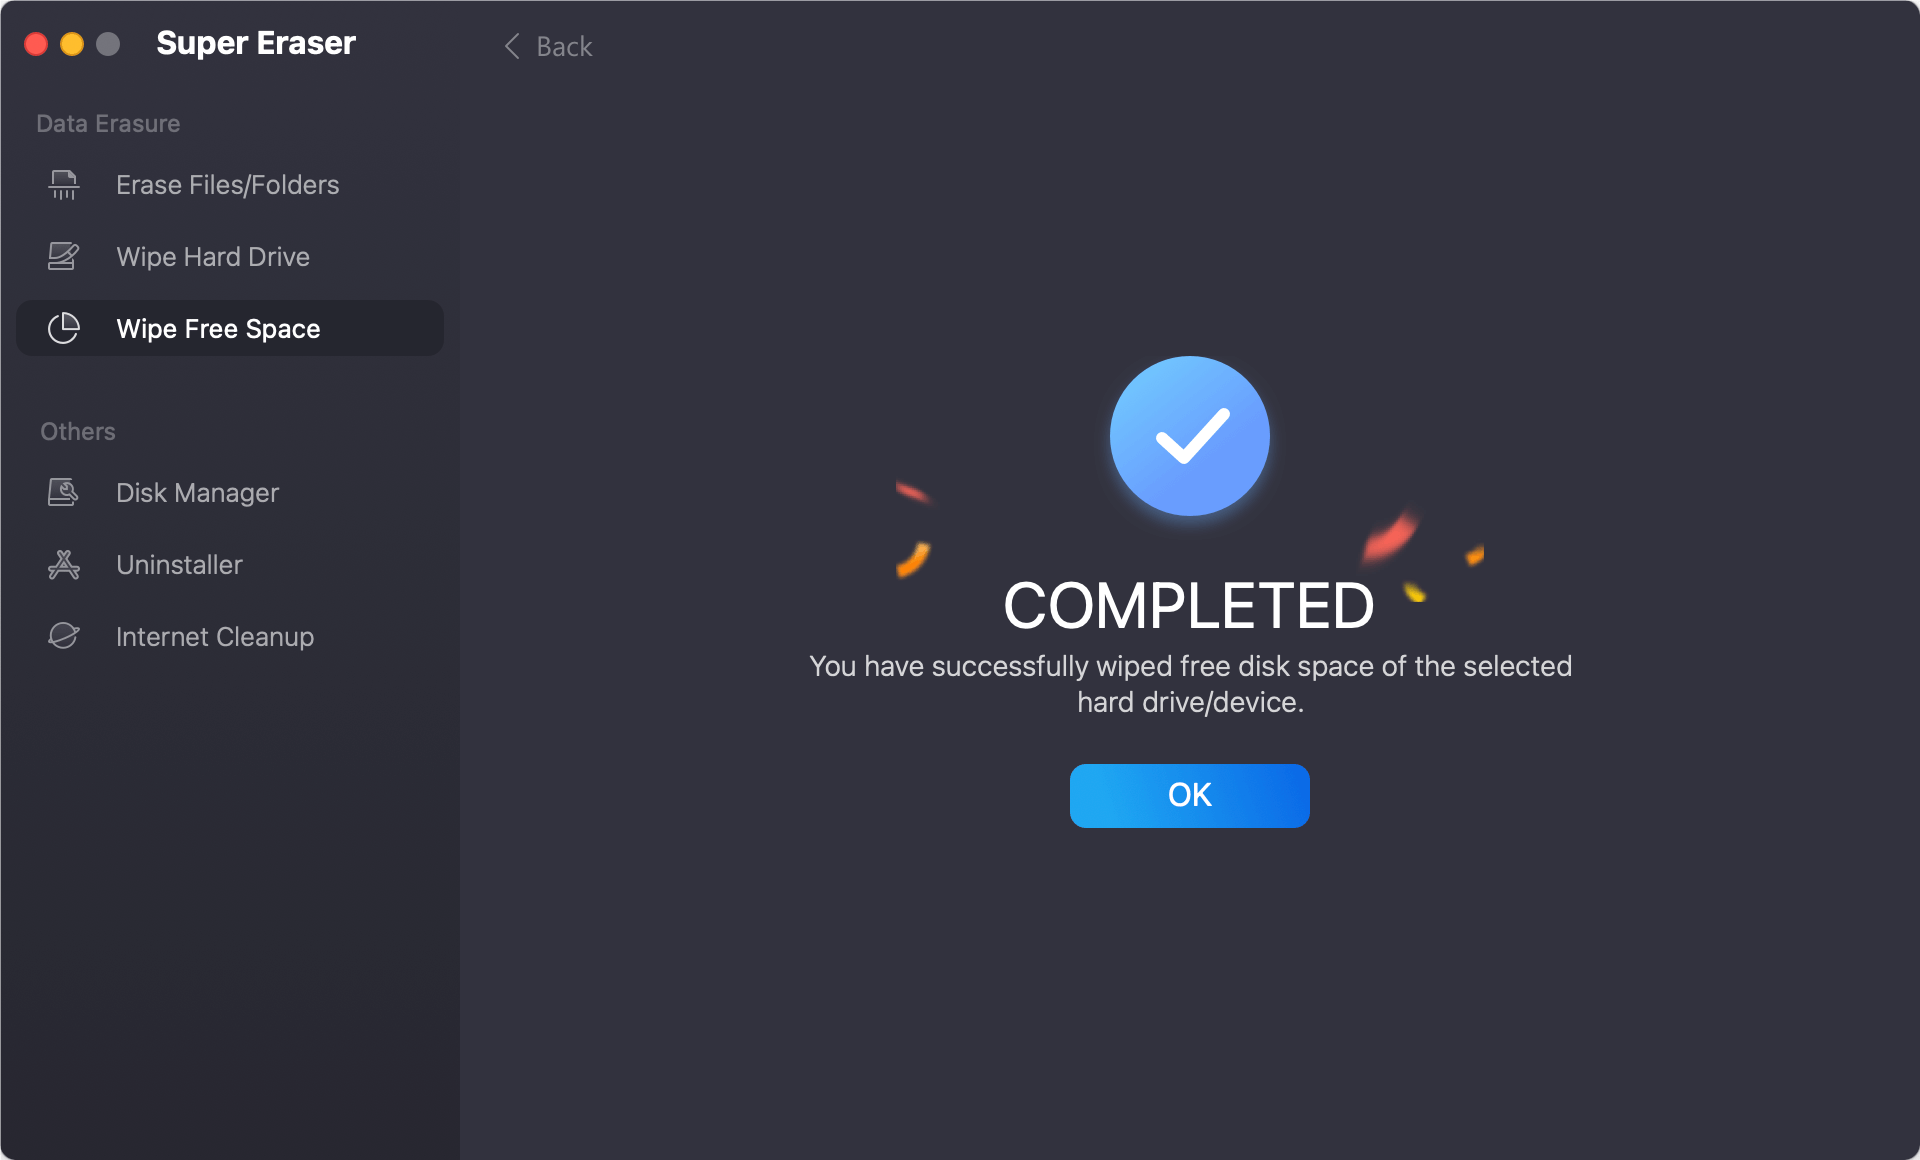
Step 5: Allow the process to finish. Once completed, all previously deleted files, temp files, and private logs are permanently destroyed.
Phase 4: Preparing the MacBook for the Next Owner
Now that your internal drive is completely sanitized and free space is permanently wiped, your MacBook is secure. The final step is preparing the laptop so the new owner enjoys a seamless out-of-box experience.
1. Remove Temporary User Account and Reset macOS Setup Assistant
If you created a temporary user account to run DoYourData Super Eraser, you can quickly reset your Mac back to its factory setup wizard:
- Restart your MacBook into Recovery Mode (hold Power button or Cmd + R).
- Open Disk Utility, erase the 'Macintosh HD' volume once more, and run the macOS Reinstallation wizard.
- Alternatively, on modern macOS versions, go to System Settings > General > Transfer or Reset > Erase All Content and Settings.
- When the reinstallation finishes and the multi-language 'Hello' welcome screen appears, press Command (⌘) + Q and click Shut Down.
2. Clean the Physical Hardware
First impressions matter when selling or gifting your laptop. Use a micro-fiber cloth with a tiny amount of 70% isopropyl alcohol to gently wipe down the screen, aluminum chassis, and keyboard. Remove dirt, fingerprint smudges, and dust.
3. Package Accessories and Original Box
Gather the original MagSafe or USB-C power adapter, charging cable, and original packaging if available. Including original accessories increases resale value and builds buyer trust.
FAQs about Wiping MacBook's Internal Disk
Conclusion
Taking the time to properly wipe MacBook's internal disk is the single most important step when preparing your Mac for resale, trade-in, or donation. Standard disk formatting removes operating system files, but only a dedicated solution like DoYourData Super Eraser for Mac ensures that residual data hiding in free space is permanently erased.
By following the complete workflow outlined in this guide—backing up files, erasing the drive in Recovery Mode, reinstalling macOS, and shredding free space with DoYourData—you can hand over your old MacBook with total confidence knowing your private data is completely unrecoverable.
DoYourData Super Eraser for Mac
DoYourData Super Eraser for Mac is a 100% safe, powerful and easy-to-use data erasure program. It offers certified data erasure standards including Peter Gutmann, U.S. Army AR380-19, DoD 5220.22-M ECE to permanently erase data from Macs and external devices, making data recovery be impossible.
Written & Updated by Shirly Chen
Shirly Chen has been writing data recovery, data erasure articles for DoYourData over 4 years. She has been working as a professional website content writer & editor for quite a long time. She also writes articles about disk clone, Mac optimization, disk backup, etc.