What to Check When Purchasing or Receiving a Secondhand Mac
To remove and wipe data permanently on a secondhand Mac, you need a professional data erasure software, such as DoYourData Super Eraser for Mac. The software can make sure data is gone for good and unrecoverable.
 Ricky Lin updated on September 22, 2026
Quick Navigation:
- Full Guide to Check a Secondhand Mac
- Checklist Table for Checking Secondhand Mac
- FAQs about Checking A Secondhand Mac
- Conclusion
Buying or receiving a pre-owned Mac is a fantastic way to save money while securing a high-performance machine. Whether you are buying a used MacBook Pro from an online seller, picking up a secondhand iMac, or receiving a handed-down MacBook Air from a friend, you want to make sure the computer is in great working condition.
So, what should you check when purchasing or receiving a secondhand Mac?
To protect your investment and your privacy, you need a complete step-by-step checklist. In this guide, we break down everything you need to test—from physical condition and hardware health to security locks and total data erasure.
Full Guide to Check a Secondhand Mac
Step 1: Verify Ownership and Device History
Before inspecting the physical hardware, ensure the device is legitimate and safe to buy.
Ask for Proof of Purchase
Ask the seller for the original invoice or purchase receipt. Matching the buyer's name or receipt details helps confirm the Mac is not stolen property.
Verify the Serial Number
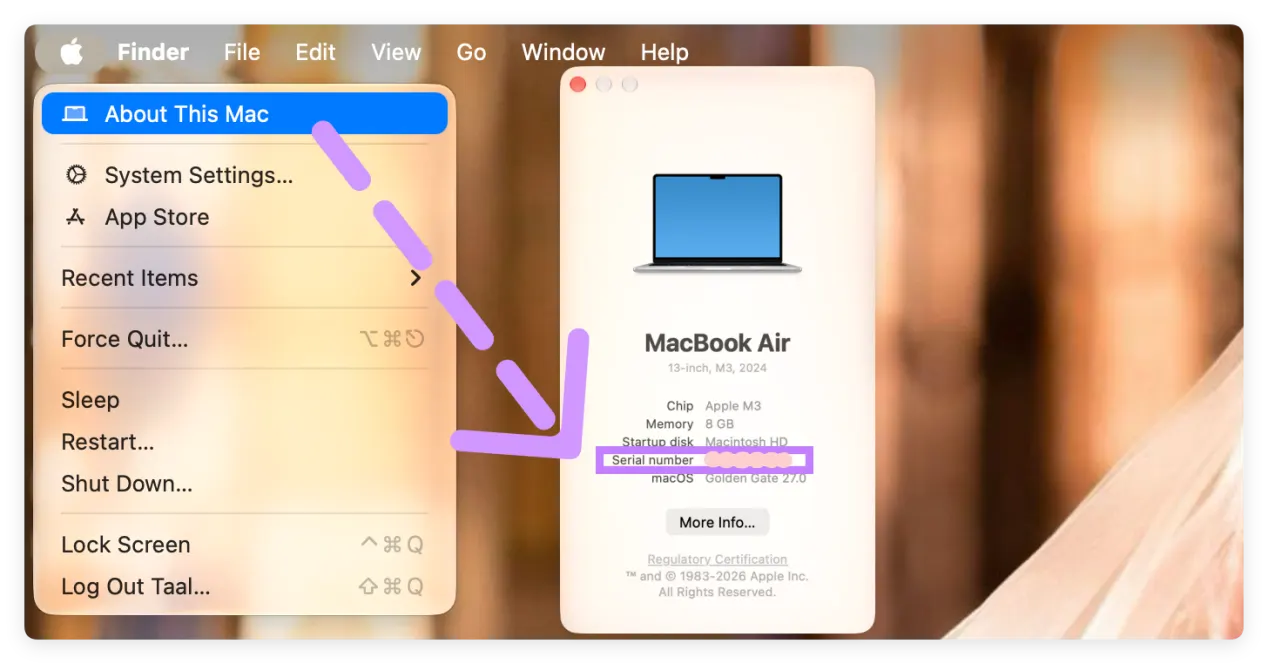
Find the serial number on the bottom case of the Mac or click the Apple logo > About This Mac.
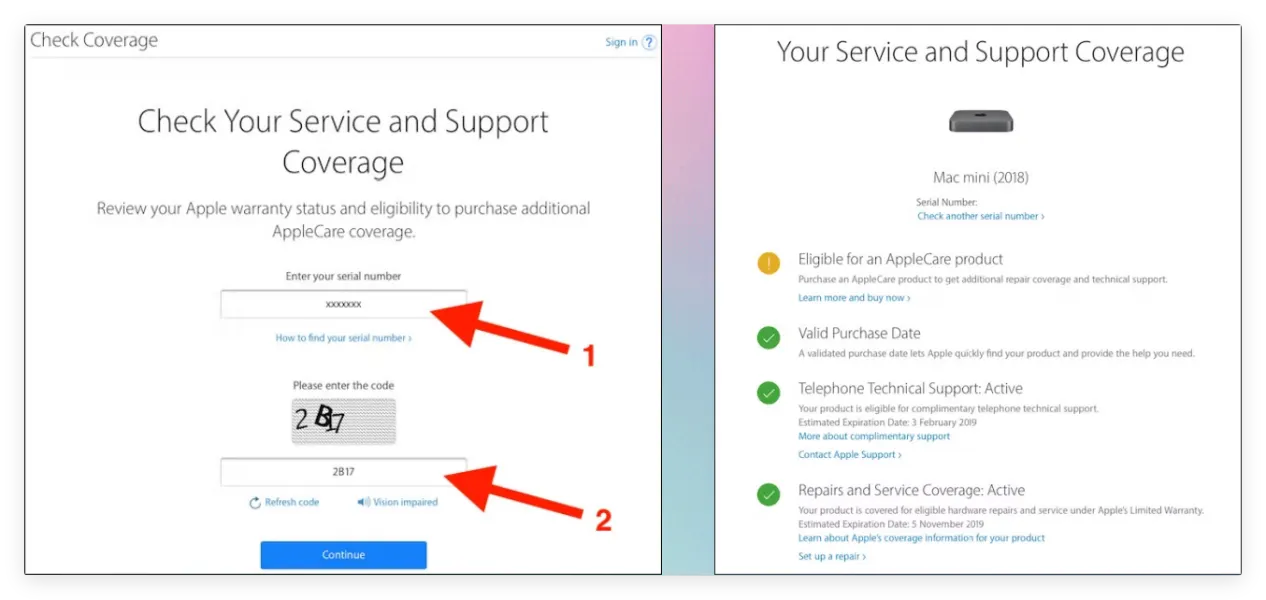
Go to Apple's official Check Coverage page (checkcoverage.apple.com) and enter the serial number. This confirms:
- The exact model year and specifications.
- Valid warranty or AppleCare coverage status.
- Whether the hardware description matches the seller's claim.
Step 2: Physical & Exterior Inspection
A thorough visual check helps you spot hidden structural damage or past accidents.
Body Shell and Hinges
Inspect all four corners and the display hinge. Deep dents near corners can indicate severe drops that might have damaged internal components or loosened ribbon cables. Open and close the display lid smoothly to check for display wobble or stiffness.
Screen and Display Panel
Turn on the Mac and set the screen background to solid white, then solid black. Look closely for:
- Dead pixels: Small black or colored dots.
- Backlight bleed: Uneven bright spots along the edges.
- Staingate / Delamination: Peeling anti-reflective coating on older Retina displays.
Liquid Damage Indicators
Look closely at the air intake vents, keyboard gaps, and USB-C/Thunderbolt ports. Rust, corrosion, or discoloration often signals liquid exposure.
Step 3: Check Security Locks (Critical Step)
Never complete a purchase or sign off on a received Mac if it is tied to someone else's security account.
1. Check Activation Lock and Find My
Activation Lock prevents anyone else from using a Mac if it is lost or stolen.
- On macOS Ventura or later: Go to System Settings > [Seller's Name] at the top. If an account is logged in, ask the seller to log out completely.
- Ask the seller to disable Find My Mac before handing over the machine.
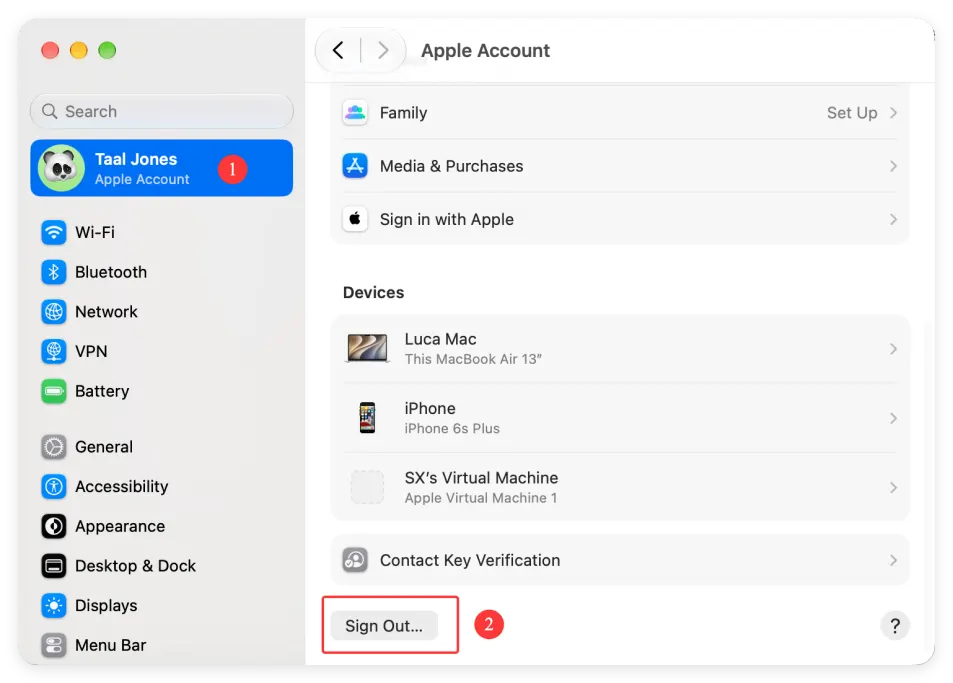
If a Mac has Activation Lock enabled and you cannot contact the seller, the computer becomes virtually unusable.
2. Firmware / EFI Lock
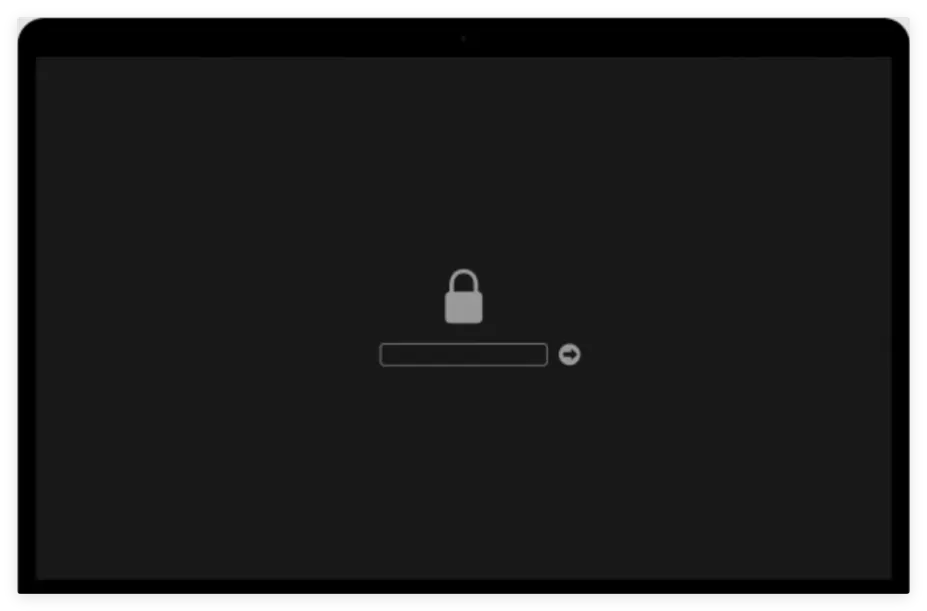
Restart the Mac and immediately press and hold Option (⌥) or the Power button (on Apple Silicon).
If a padlock icon appears on the screen, the Mac has a Firmware Password. The seller must enter this password and remove it before you complete the transaction.
3. MDM (Mobile Device Management) Profile
Some secondhand Macs originate from corporate fleets or schools.
Go to System Settings > Privacy & Security > Profiles (or System Preferences > Profiles). If an MDM profile is active, the remote company can lock, monitor, or wipe the Mac at any time. Do not buy a Mac with an active MDM profile unless it is removed.
Step 4: Run Apple Diagnostics to Uncover Hidden Issues
Apple includes a built-in diagnostic tool to test internal components like RAM, power supply, logic board, and fans.
How to Run Apple Diagnostics:
For Apple Silicon Macs (M1, M2, M3, M4, M5, M6, etc):
- Shut down the Mac completely.
- Press and hold the Power button until you see "Loading startup options".
- Press Command (⌘) + D on your keyboard.
For Intel-Based Macs:
- Turn on the Mac and immediately press and hold the D key.
- Release the key when the progress bar appears or when asked to select a language.
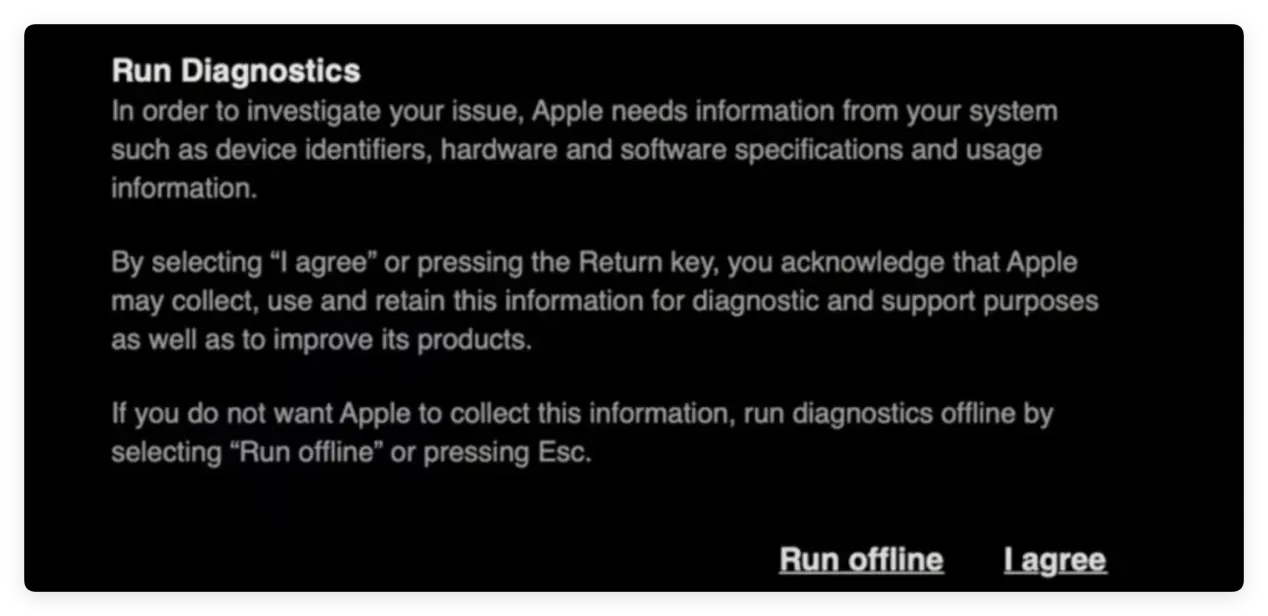
The test takes a few minutes. If it displays code ADP000, no hardware problems were found. Any other error codes suggest potential hardware faults.
Step 5: Check Battery Health & Power System
MacBook batteries degrade over time. Checking the battery status gives you insight into potential future repair costs.
Check Cycle Count & Condition
Hold the Option (⌥) key and click the Apple menu at the top left.
- Select System Information.
- Under the Hardware section on the left sidebar, select Power.
- Look at Cycle Count and Condition:
- Normal: The battery functions properly.
- Service Recommended: The battery capacity is degraded and needs replacement soon.
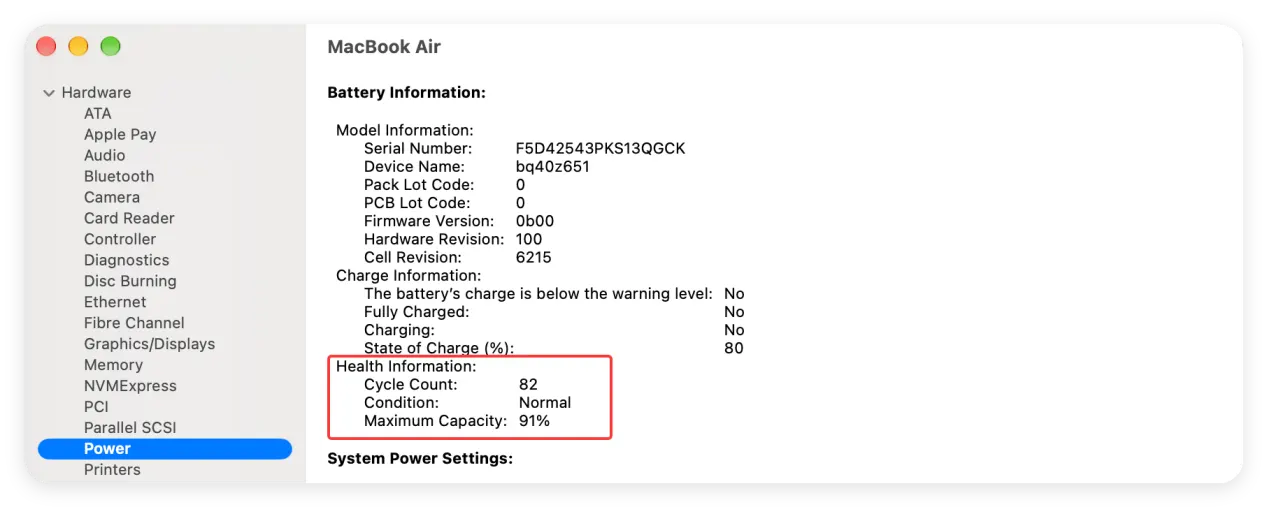
Most modern MacBooks are rated for 1,000 charge cycles. If the cycle count is close to or above 1,000, factor the cost of a battery replacement into your purchase price.
Test the Charger and Charging Ports
Plug the power adapter into every USB-C or MagSafe port. Ensure the charging icon appears instantly on each port and that the cable fits snugly without wobbling loose.
Step 6: Test Display, Keyboard, Trackpad, and Audio
Before finishing your review, test the basic user input and output hardware.
Keyboard Test
Open TextEdit or a web browser and press every single key, including Function keys, Caps Lock, Spacebar, and Return. Pay special attention to MacBooks from 2015–2019 equipped with the "Butterfly" keyboard mechanism, as keys frequently stick or double-type.
Trackpad & Touch ID
- Drag windows around the screen and test multi-touch gestures (two-finger scroll, pinch-to-zoom).
- Test the physical click feedback across all corners of the trackpad.
- Test Touch ID by registering your fingerprint in System Settings.
Speakers, Microphone, and Camera
- Play a YouTube video or audio file to check both left and right speakers for crackling or distortion at high volume.
- Open the Photo Booth app to confirm the built-in FaceTime camera lights up clearly.
- Record a quick voice memo to test the microphone.
Step 7: Perform a Deep Data Erasure & Clean Setup
When you receive a secondhand Mac, simply reinstalling macOS or dragging files to the Trash is not enough. Residual personal files, cached credentials, or even hidden malware from the previous owner could linger on the drive. Likewise, if you are trading in a Mac, leaving old data exposed poses severe privacy risks.
To guarantee complete privacy, clean performance, and permanent data destruction, use professional Mac wiping software like DoYourData Super Eraser for Mac.
Why Standard Formatting Isn't Always Enough
Standard disk utility formatting often leaves raw file traces in unallocated storage space. Advanced recovery tools can easily retrieve photos, documents, and browsing history from reformatted drives.
How to Permanently Wipe Mac Data with DoYourData Super Eraser:
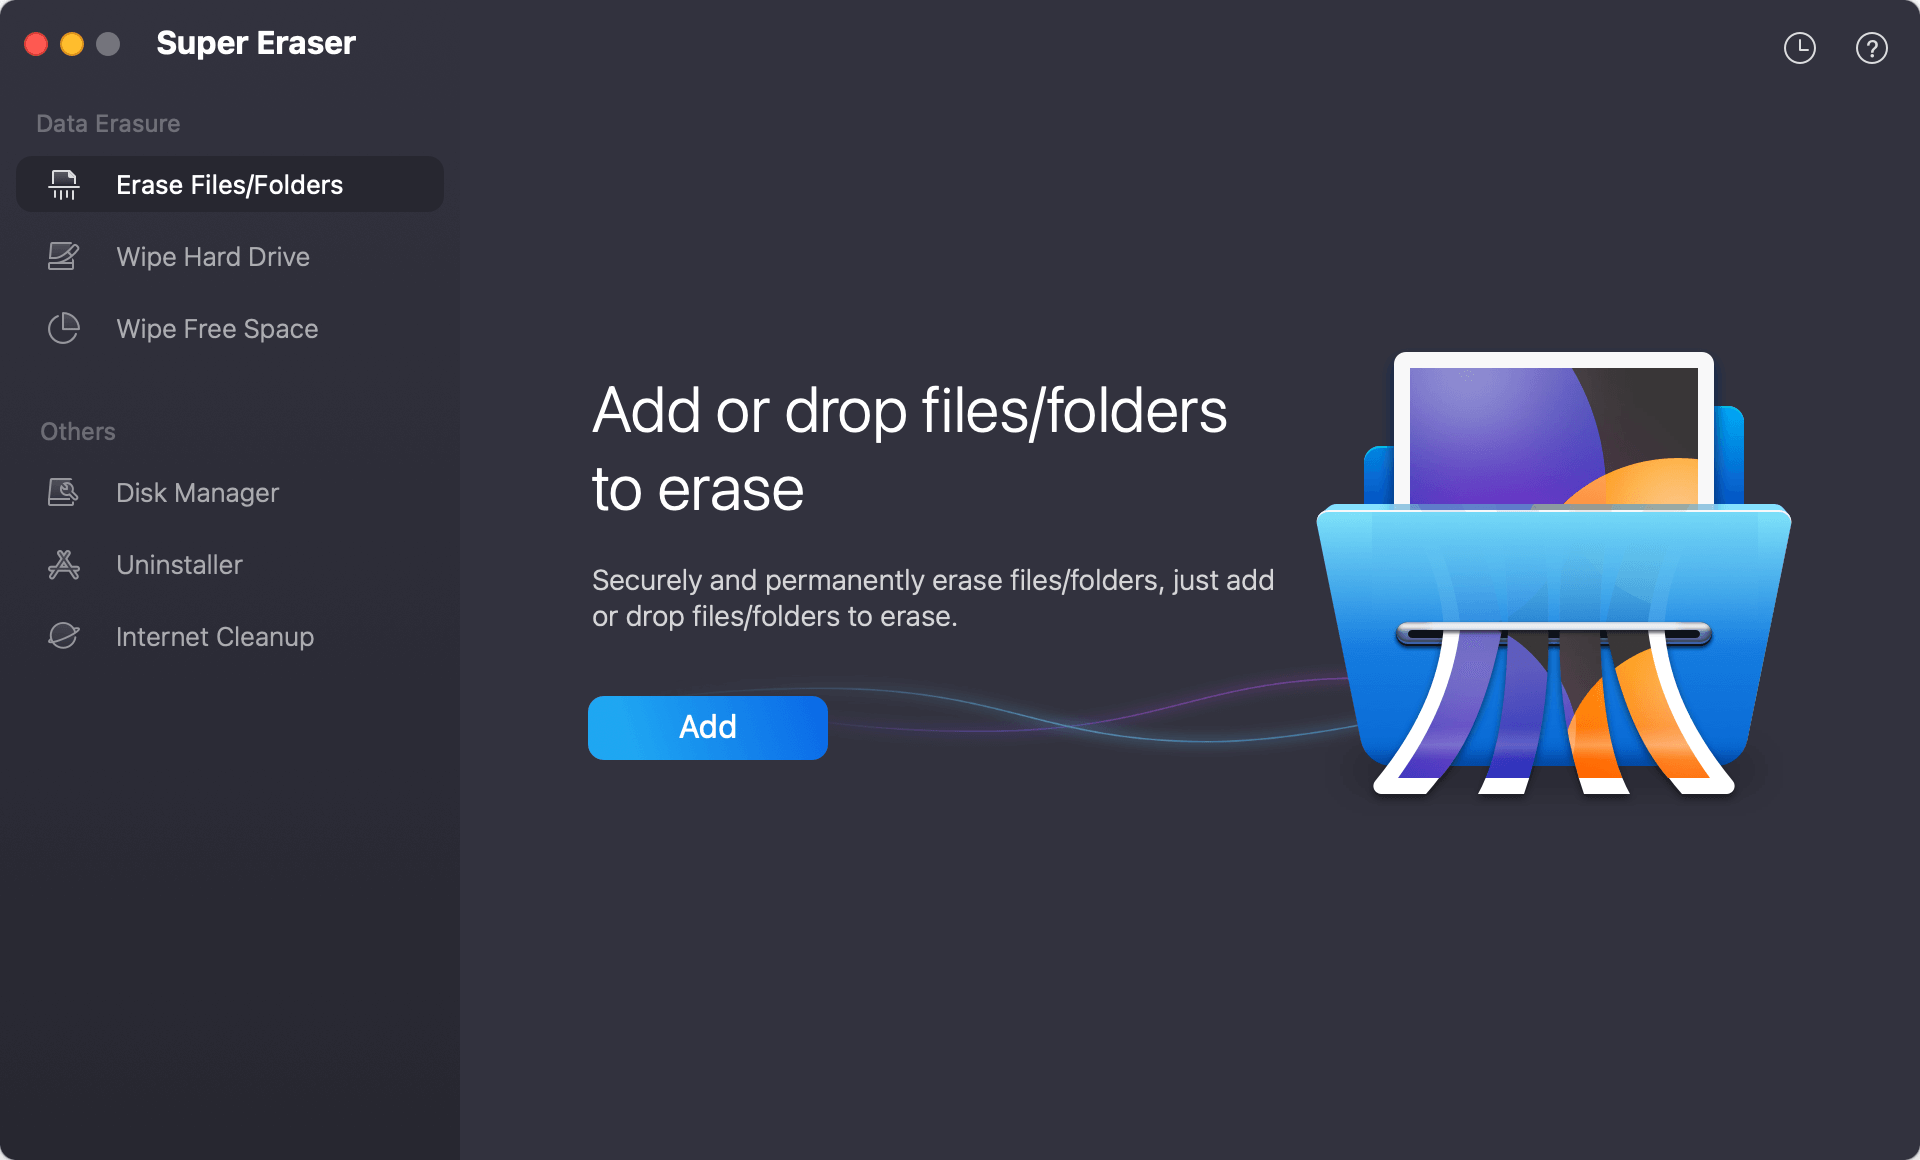
- Download and Install: Download, install and launch DoYourData Super Eraser for Mac on the computer.
- Select Erasure Mode:
- Wipe Files/Folders: Selectively shred sensitive personal folders before handing the Mac over.
- Wipe Hard Drive: Completely destroy all existing data on a specific partition or external disk.
- Wipe Free Space: Permanently erase deleted files lingering in the drive's free storage without touching current system files.
![What to Check When Purchasing or Receiving a Secondhand Mac]()
- Execute Safe Erasure: Select military-grade erasure standards (such as DoD 5220.22-M or Gutmann) and click Continue button to start wiping.
![What to Check When Purchasing or Receiving a Secondhand Mac]()
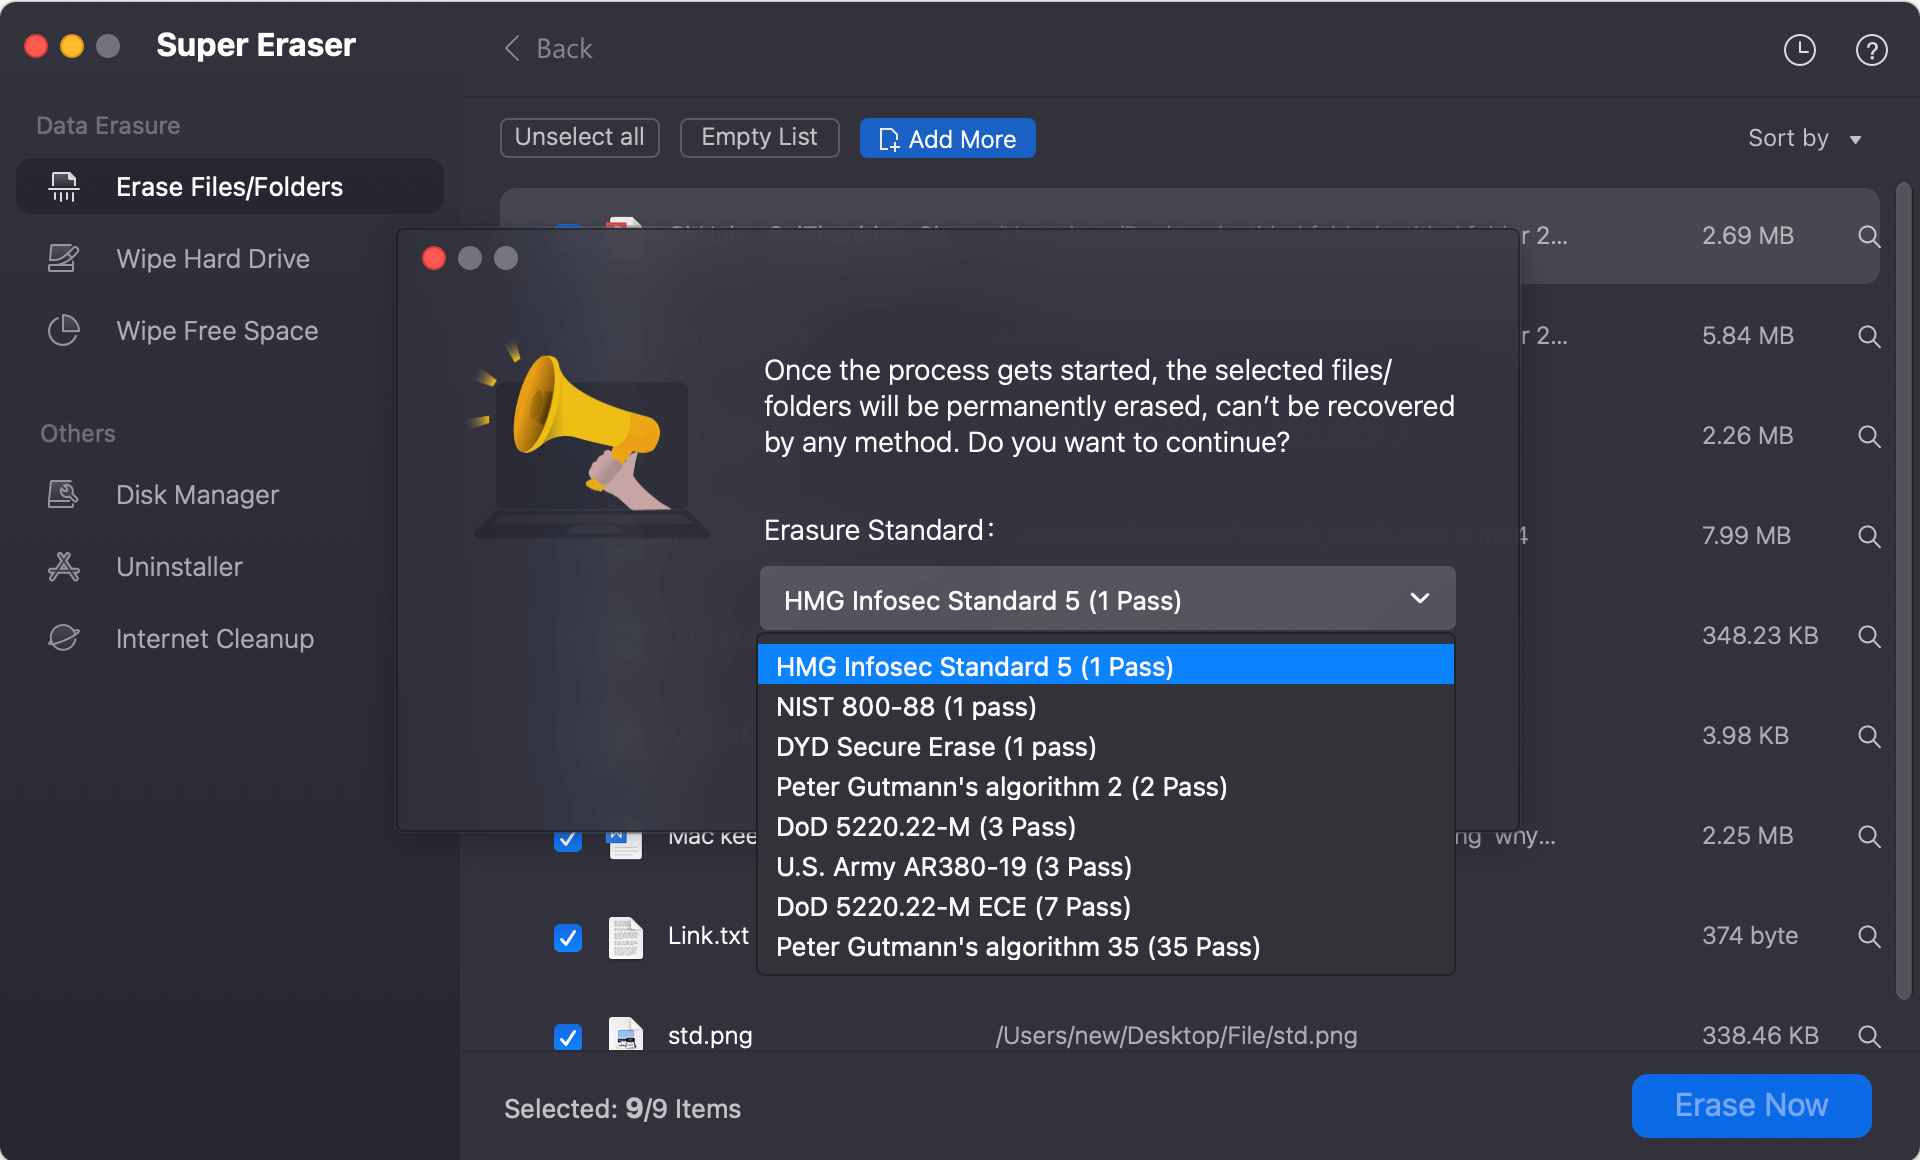
Once erased with DoYourData, the data is destroyed permanently and becomes 100% unrecoverable by any data recovery software, giving both buyers and sellers complete peace of mind.
Checklist Table for Checking Secondhand Mac
| Feature / Hardware | What to Look For |
|---|---|
| Serial Number | Matches Apple Coverage database and purchase receipt |
| Activation Lock | Seller logged out of iCloud & Find My Mac |
| Firmware Lock | No padlock screen when holding Option/Power |
| MDM Profile | No corporate management profile installed |
| Apple Diagnostics | Shows Code ADP000 (No issues found) |
| Battery Health | Condition reads "Normal"; low cycle count |
| Ports & Charging | All USB-C / MagSafe ports charge and transfer data |
| Keyboard & Trackpad | All keys register smoothly; Touch ID works |
| Storage & Privacy | Completely wiped with DoYourData Super Eraser |
FAQs about Checking A Secondhand Mac
Conclusion
Knowing what to check when purchasing or receiving a secondhand Mac protects you from hidden hardware faults, lockouts, and privacy risks. Always take your time to inspect the body, test every port, verify Activation Lock removal, and run Apple Diagnostics. Finally, start fresh by using DoYourData Super Eraser for Mac to securely wipe old data so you can enjoy a clean, fast, and secure Mac experience.
DoYourData Super Eraser for Mac
DoYourData Super Eraser for Mac is a 100% safe, powerful and easy-to-use data erasure program. It offers certified data erasure standards including Peter Gutmann, U.S. Army AR380-19, DoD 5220.22-M ECE to permanently erase data from Macs and external devices, making data recovery be impossible.
Written & Updated by Ricky Lin
Ricky Lin is an senior editor of DoYourData who lives in Adelaide, Australia. He is interested in writing technology articles related with data recovery, computer issue fixes, disk clone, iPhone data recovery, video edit, Mac optimization, etc. He Joined DoYourData in 2019 and have written 500+ articles to help both Windows users and Mac users to solve data or computer problems.
Hot Articles
- Fix External Hard Drive Read-Only Issue on Mac
- How to Wipe Trash Bin on Mac?
- Recover Lost Data from WD (Western Digital) External Hard Drive on Mac
- Fix External Hard Drive Not Showing Up on Mac
- How to Wipe SD Card on Mac?
- Mount and Unmount the External Hard Drive on the Mac
- Run First Aid on Mac to Repair Disks
- Fix Can't Save Files to An External Hard Drive on Mac
- (Solved) External SSD Not Detected in Disk Utility on Mac
- Why Can't Format A Hard Drive To NTFS on Mac? Can We Fix It?