Back Up Mac to iCloud (Step-by-Step Guide)
In this comprehensive guide, you will learn how to back up Mac to iCloud step by step. If you want more full and comprehensive backups, you can also try Time Machine or using disk clone software DoYourClone for Mac.
![]() Updated by Darren on March 18, 2026
Updated by Darren on March 18, 2026
Quick Navigation:
- What Exactly Is iCloud Backup for Mac?
- Phase 1: How to Back Up Mac to iCloud (The Step-by-Step)
- Phase 2: Beyond the Cloud – Pro Backup Options
- FAQs about Backing Up Mac to iCloud
- The Verdict: The Hybrid Strategy is King
Let's be real: your Mac is probably your life. Whether it's that "top secret" novel you've been writing, years of family vacation photos, or critical business spreadsheets, losing that data would be a total nightmare. Hardware fails, coffee spills, and system crashes happen to the best of us.
That's why mastering how to back up Mac to iCloud and understanding how to back up Mac data properly isn't just a "good idea"—it's your digital insurance policy. In this guide, we'll walk through the easy steps to get your files into the cloud and explore some heavy-duty alternatives for total peace of mind.
What Exactly Is iCloud Backup for Mac?
Before we dive in, let's clear up a common myth. Unlike your iPhone, your Mac doesn't just "mirror" its entire soul (operating system and all) into iCloud. Instead, iCloud acts as a super-smart syncing service.
iCloud allows you to:
- Store Desktop and Documents folders in the cloud
- Sync Photos, Contacts, Calendars, and Notes
- Save Safari bookmarks and passwords
- Keep Keychain passwords secure
- Access files from other Apple devices
It is also important to distinguish between iCloud and Time Machine.
Time Machine:
- Creates a full system backup
- Requires an external drive
- Allows complete system restoration
iCloud:
- Syncs and stores selected files
- Cloud-based and accessible anywhere
- Does not create full system restore points
For complete protection, many users combine both solutions. To learn more about the specifics of Apple's cloud service, check out this iCloud wiki.
Phase 1: How to Back Up Mac to iCloud (The Step-by-Step)
Ready to sync? Here is how to get your files floating safely in the cloud.
1. The Pre-Check 📋
Before starting the backup process, ensure you meet the following requirements:
1. Apple ID
You must be signed in with a valid Apple ID. This account links your Mac to iCloud storage.
2. Stable Internet Connection
Backing up files to iCloud requires uploading data to Apple's servers. A fast and stable internet connection ensures smooth syncing.
3. Sufficient iCloud Storage
Apple provides 5GB of free storage, which is usually not enough for full Desktop and Documents backups. You may need to upgrade your storage plan.
4. Updated macOS
Your Mac should be running a recent version of macOS to ensure compatibility and optimal performance.
To check your macOS version:
- Click Apple logo (top-left corner)
- Select "About This Mac"
2. Turn on the Magic 🪄
Now let's walk through the actual process of how to back up Mac to iCloud.
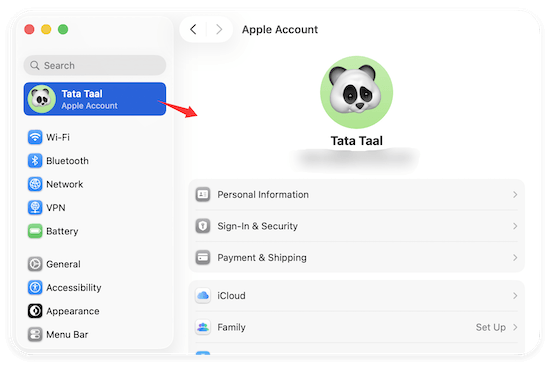
Step 1: Sign in to iCloud on Your Mac
- Click the Apple menu.
- Open System Settings (or System Preferences on older macOS).
- Click your name at the top (or Apple ID).
- Sign in with your Apple ID credentials if not already logged in.
Once signed in, your Mac is connected to iCloud.
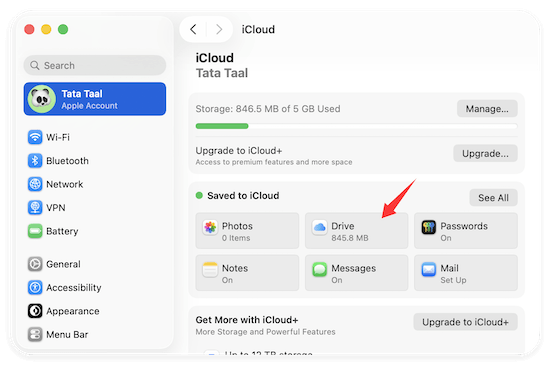
Step 2: Enable iCloud Drive
- In System Settings, select iCloud.
- Turn on iCloud Drive.
- Click Options next to iCloud Drive.
This feature allows your Mac files to sync to Apple's cloud storage system.
Step 3: Enable Desktop & Documents Backup
Inside iCloud Drive options:
- Check the box for Desktop & Documents Folders.
- Click Done.
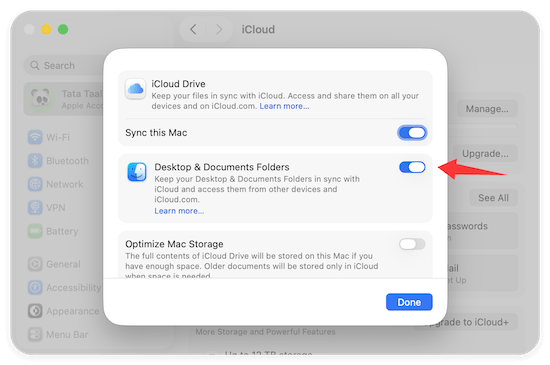
This step is crucial. It moves your Desktop and Documents folders into iCloud Drive, ensuring that all files stored there are uploaded and continuously synced.
Once enabled:
- Any file added to Desktop or Documents automatically backs up.
- Files are accessible from other Apple devices.
- You can log in to iCloud.com to view them.
This is the core method when learning how to back up Mac to iCloud.
Step 4: Enable iCloud Photos (Optional)
If you want your photo library backed up:
- Open System Settings.
- Click iCloud.
- Enable Photos.
- Turn on Sync this Mac.
Your Photos library will upload to iCloud.
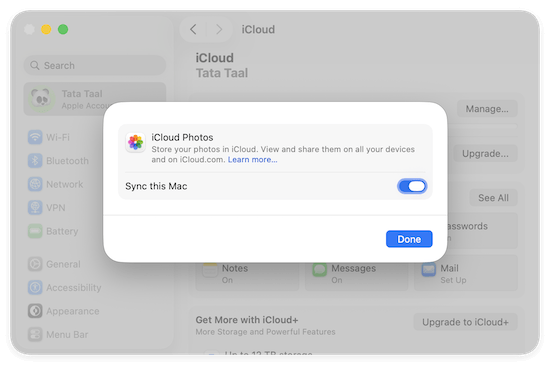
You can choose:
- Download Originals to this Mac (stores full copies locally)
- Optimize Mac Storage (keeps smaller versions locally)
For users with limited storage, optimization is recommended.
Step 5: Enable Other iCloud Services
To ensure full data synchronization, consider enabling:
- Contacts
- Calendars
- Safari
- Notes
- Reminders
- Keychain (password storage)
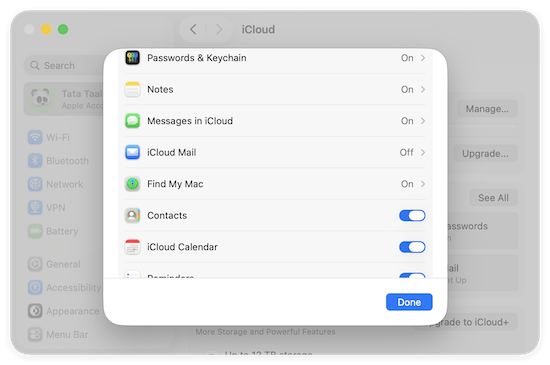
Each service ensures your personal data remains backed up and accessible.
3. Verify Your Safety ✅
After enabling backup, you should verify that syncing is active.
Check Sync Status
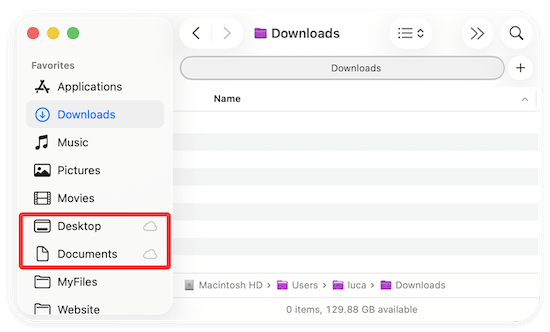
- Open Finder.
- Click iCloud Drive in the sidebar.
- Look for cloud icons beside files:
- Cloud with arrow = uploading/downloading
- No icon = fully synced
Check via iCloud Website
- Visit iCloud.com.
- Log in with your Apple ID.
- Open iCloud Drive.
If your Desktop and Documents files appear there, your backup is working correctly.
How to Manage iCloud Storage
Storage management is critical when learning how to back up Mac to iCloud effectively.
Check Available Storage
- Open System Settings.
- Click iCloud.
- View storage usage bar.
Upgrade Storage Plan
If 5GB is insufficient:
- Choose 50GB
- 200GB
- 2TB
- Higher-tier plans (depending on region)
Paid plans are affordable and essential for users with large photo or document libraries.
Free Up Space
You can also:
- Delete unnecessary files
- Remove large backups
- Clear duplicate content
- Disable syncing for unused apps
Common Roadblocks (And How to Smash Them)
Even though the process is straightforward, users may encounter issues.
1. iCloud Not Syncing
Possible causes:
- Weak internet connection
- Apple server issues
- iCloud Drive disabled
Solution:
- Restart your Mac
- Log out and log back in
- Check Apple System Status page
2. Insufficient Storage
If storage is full:
- Upgrade plan
- Delete large files
- Remove duplicate photos
3. Slow Upload Speed
Large file uploads may take hours or days depending on internet speed. Keep your Mac powered and connected.
4. Sign-In Problems
Ensure:
- Correct Apple ID credentials
- Two-factor authentication completed
- Date and time settings are correct
Phase 2: Beyond the Cloud – Pro Backup Options
While iCloud is amazing for accessing files on the go, it isn't a "bootable" backup. If your Mac's internal drive dies, you can't plug iCloud into a new Mac and hit "go." For that, you need local solutions.
Option A: The Classic Time Machine
Time Machine is Apple's built-in tool for external drives. It saves "versions" of your files, so if you accidentally deleted a paragraph three days ago, you can go back in time to find it. For a deep dive into this method, see how to back up Mac with Time Machine.
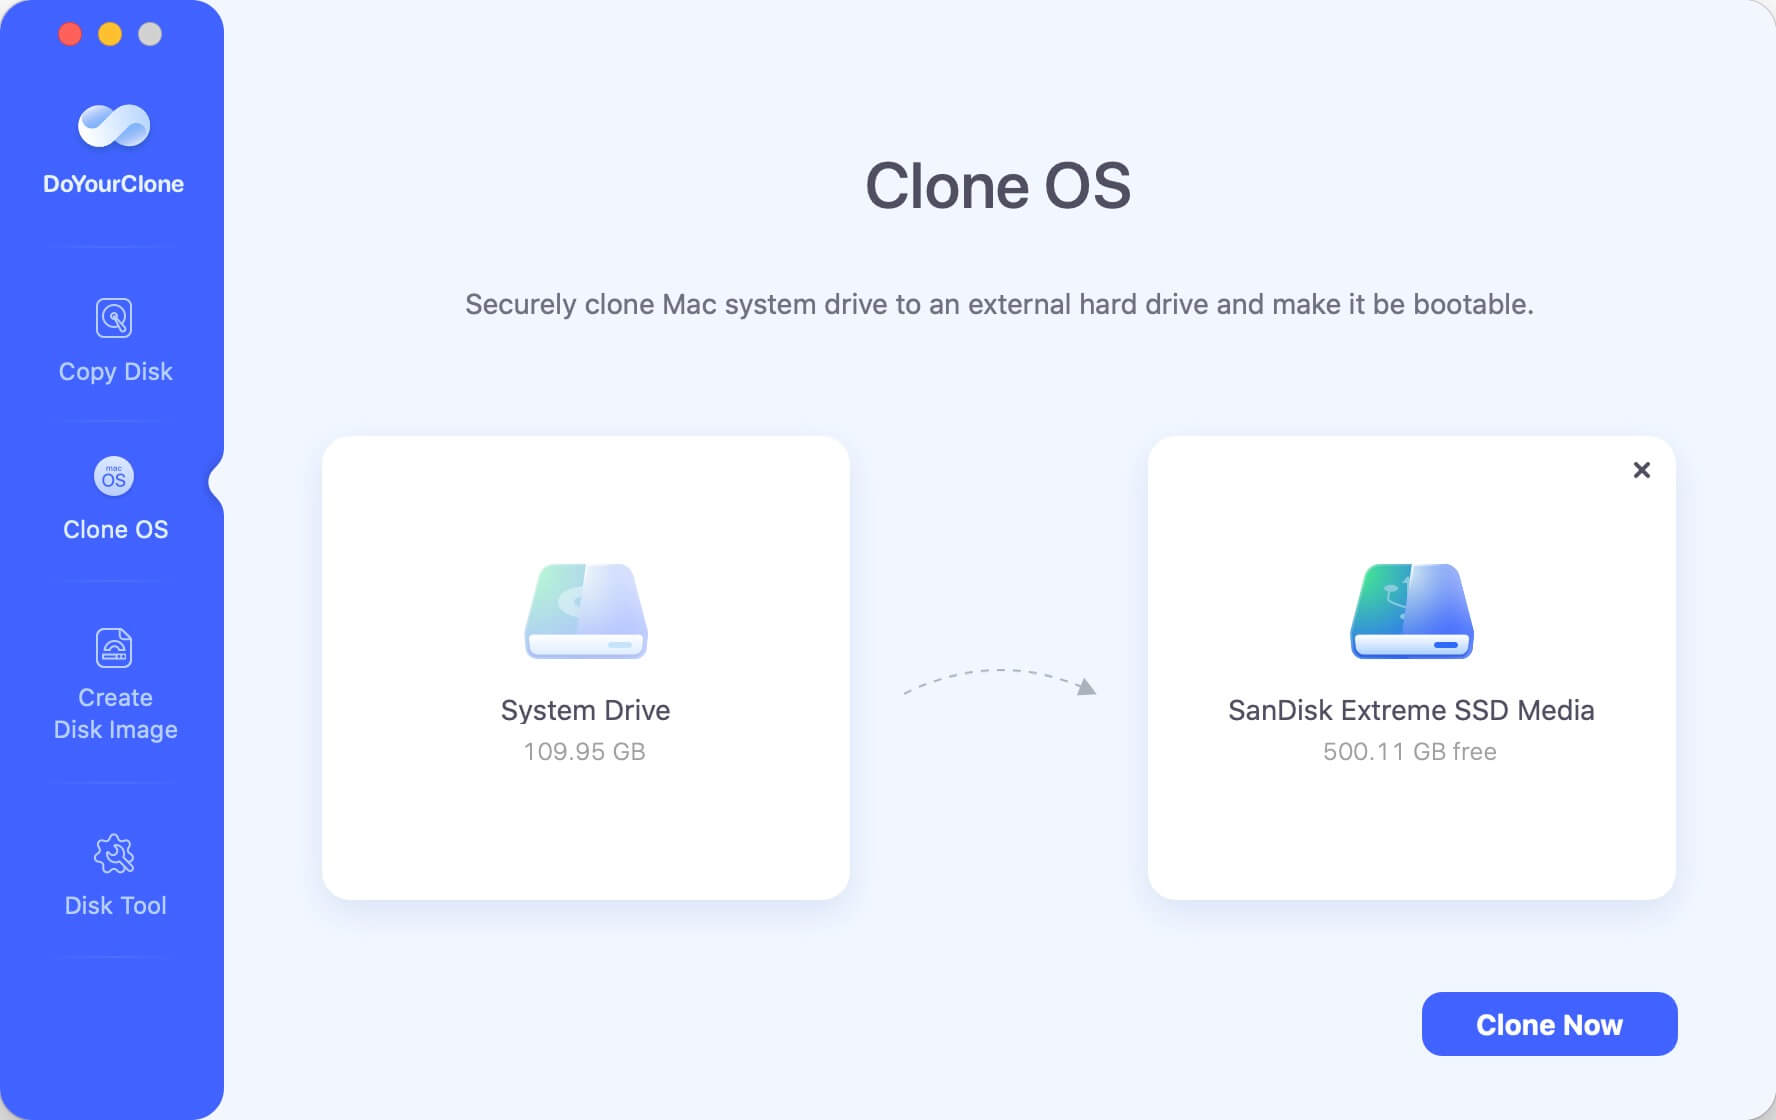
Option B: The "Ultimate" Protection – DoYourClone for Mac
If you want the highest level of security, you should make a full clone of your Mac. A clone is an exact, bit-by-bit copy of your entire hard drive—OS, apps, settings, and files. Using DoYourClone for Mac, you can create a bootable backup.
DoYourClone for Mac
- Best disk copy software for macOS.
- Create bootable clone for Mac system drive.
- Fully clone everything from the Mac disk.
This means if your Mac's internal disk fails, you can actually boot your Mac directly from your external backup drive and keep working as if nothing happened! It's the perfect companion to iCloud's file-syncing.
Best Practices for Backing Up Your Mac
iCloud protects essential files online, while Time Machine provides full system recovery. To maximize data security:
1. Use Multiple Backup Methods
Cloud + External drive = Maximum protection.
2. Enable Two-Factor Authentication
Adds an extra layer of security to your Apple ID.
3. Regularly Review Storage
Ensure files are syncing properly.
4. Organize Important Files
Keep essential documents inside Desktop or Documents for automatic syncing.
5. Keep macOS Updated
Updates improve security and sync reliability.
FAQs about Backing Up Mac to iCloud
If you need:
- Full system restoration
- Bootable backup
- Version history of entire system
Then you must use Time Machine alongside iCloud.
Understanding this distinction is crucial when researching how to back up Mac to iCloud.
The Verdict: The Hybrid Strategy is King
To truly back up Mac data like a pro, don't just pick one method. Use the Hybrid Strategy:
- iCloud: For instant syncing and easy file access across all your Apple devices.
- Time Machine: For local version history.
- DoYourClone: For a bootable "clone" that ensures you're never down for more than a few minutes if your hardware fails.
Don't wait for the "Beach ball of Death" to appear! Start your backup today and sleep better tonight.
DoYourClone for Mac
DoYourClone for Mac, one of the best Mac disk cloning software, can help you clone HDD, SSD, external storage device on Mac, upgrade HDD to SSD, create full disk image backup, etc. It also can clone everything from your Mac to an external HDD/SSD and create a full bootable clone backup. 100% safe and easy-to-use.
Written & Updated by Anderson
Anderson is a big fan of computer technology. He joined DoYourData in 2018 and has been writing 200+ articles about disk clone, data recovery, computer technology, data erasure, Mac system optimization, etc. He loves music, movie, and reading. In his spare time, he’s studying music and playing tennis.