Make Bootable USB on Mac: Step-by-Step Guide
To make a bootable USB is necessary in some cases. You can make bootable USB for macOS, Windows, or Linux systems on Mac directly. For Mac users, you can also creating a bootable USB by cloning the Mac system to a USB drive directly with DoYourClone for Mac.
![]() Updated by Darren on March 12, 2026
Updated by Darren on March 12, 2026
Quick Navigation:
- Why Create a Bootable USB on Mac?
- Requirements Before Making Bootable USB on Mac
- How to Make a Bootable USB for macOS on Mac
- How to Make a Bootable USB for Windows on Mac
- How to Make a Bootable Linux USB on Mac
- FAQs about Making Bootable USB on Mac
- Conclusion
Creating a bootable USB on a Mac is an essential skill for anyone who wants to install or reinstall an operating system, recover data, or troubleshoot a computer. Whether you need a bootable USB for macOS, Windows, or Linux, this guide provides a comprehensive, step-by-step process suitable for beginners and advanced users alike. By the end, you'll know exactly how to create bootable USB on Mac safely and efficiently.
Why Create a Bootable USB on Mac?
A bootable USB is a portable drive that contains a complete operating system installer. It allows your Mac to start up from the USB drive rather than the internal hard drive. Some common reasons to create one include:
- Reinstalling macOS: If your Mac is slow, facing errors, or you want a fresh installation.
- Installing Windows or Linux: Especially useful if you run dual-boot configurations.
- System Recovery: Access tools to repair or recover your Mac in emergencies.
- Testing New OS Versions: Try beta or new releases without affecting your main system.
Having a bootable USB makes the installation process faster, more reliable, and portable for multiple machines.
Requirements Before Making Bootable USB on Mac
Before starting, ensure you have the following:
- Compatible Mac Model: Check that your Mac supports the OS you intend to install.
- USB Flash Drive: Minimum 16GB for macOS; 8GB may work for Windows or Linux. High-quality drives are recommended.
- Stable Internet Connection: Required for downloading OS installers.
- Installer File: macOS from App Store or official site; Windows ISO from Microsoft; Linux ISO from the official distribution website.
- Terminal Knowledge (Optional): Advanced users can use Terminal commands like createinstallmedia for macOS or dd for Linux.
- Back up data: Creating bootable USB may erase existing data on the USB drive.
How to Make a Bootable USB for macOS on Mac
Creating a bootable USB for macOS is the most common requirement. The process involves downloading the macOS installer, formatting the USB drive, and using Terminal.
Step 1: Download the macOS Installer
The first step is obtaining the macOS installer from an official source. Apple provides several ways:
- From the App Store: Open the App Store, search for your desired macOS version (like Tahoe, Sequoia, or Sonoma), and click Get. This downloads the installer to your Applications folder automatically.
- From System Settings (macOS Ventura and later): Navigate to System Settings → General → Software Update → More Info. Here, you can download older macOS versions that are compatible with your Mac model.
- Official Apple Website: Apple offers direct links to download previous macOS versions. Make sure to download the full installer, not a small updater file, to create a bootable USB.
📍 Tip: Check the installer size. macOS installers are usually 12–18GB. Ensure your USB drive has enough free space.
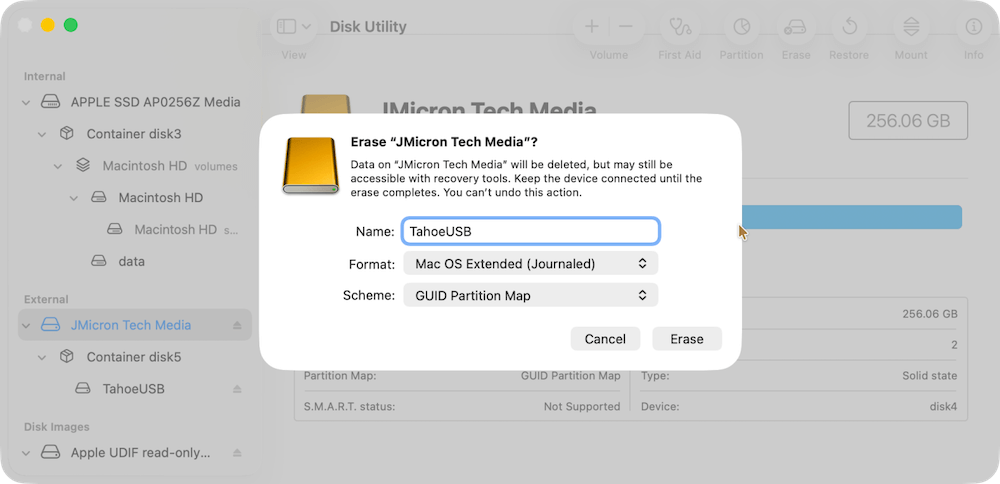
Step 2: Format the USB Drive
Properly formatting the USB is crucial because an incorrectly formatted drive will not be recognized as a bootable device.
- Open Disk Utility (Applications → Utilities → Disk Utility).
- Select your USB drive from the sidebar. Make sure you select the device, not the volume beneath it.
- Click Erase and configure the following:
- Name: Choose something simple like MyBootableUSB
- Format: Select Mac OS Extended (Journaled) for compatibility with older Macs or APFS for newer macOS.
- Scheme: Choose GUID Partition Map to allow booting.
- Click Erase to start formatting. Wait until the process finishes and the drive is ready.
📍 Pro Tip: Avoid using USB drives with multiple partitions. A single partition ensures that the bootable installer works without conflicts.
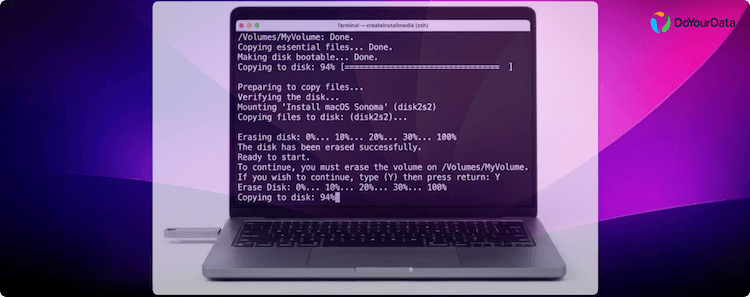
Step 3: Create the Bootable USB Using Terminal
The Terminal method uses Apple's built-in createinstallmedia command. This is reliable and preferred over third-party apps for macOS installations.
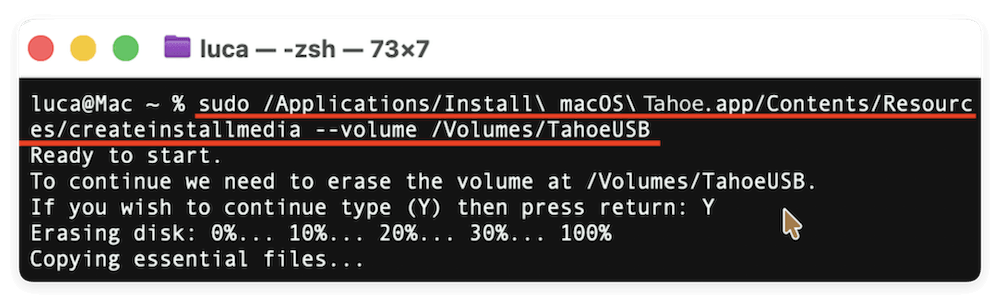
- Open Terminal from Applications → Utilities → Terminal.
- Type the following command (replace MyBootableUSB with the name of your USB drive and ensure the installer path matches the downloaded version):
sudo /Applications/Install\ macOS\ Tahoe.app/Contents/Resources/createinstallmedia --volume /Volumes/MyBootableUSB
- Press Enter, then input your Mac's administrator password when prompted.
- Confirm the process by typing Y and pressing Enter.
- Wait for Terminal to copy the installer files to your USB drive. This can take 20–40 minutes depending on your USB speed.
📍 Pro Tips:
- Do not eject the USB while Terminal is copying files.
- Use a high-speed USB 3.0 drive for faster creation.
- Double-check the installer path using Tab auto-completion in Terminal to avoid errors like "No such file or directory."
Step 4: Boot Mac from USB
Once the bootable USB is ready, you can test it by starting your Mac from it:
- Insert the USB into your Mac.
- Restart your Mac and hold down the Option (⌥) key immediately after the startup chime.
- You'll see the Startup Manager, which displays all available bootable drives.
- Select your USB drive and press Enter.
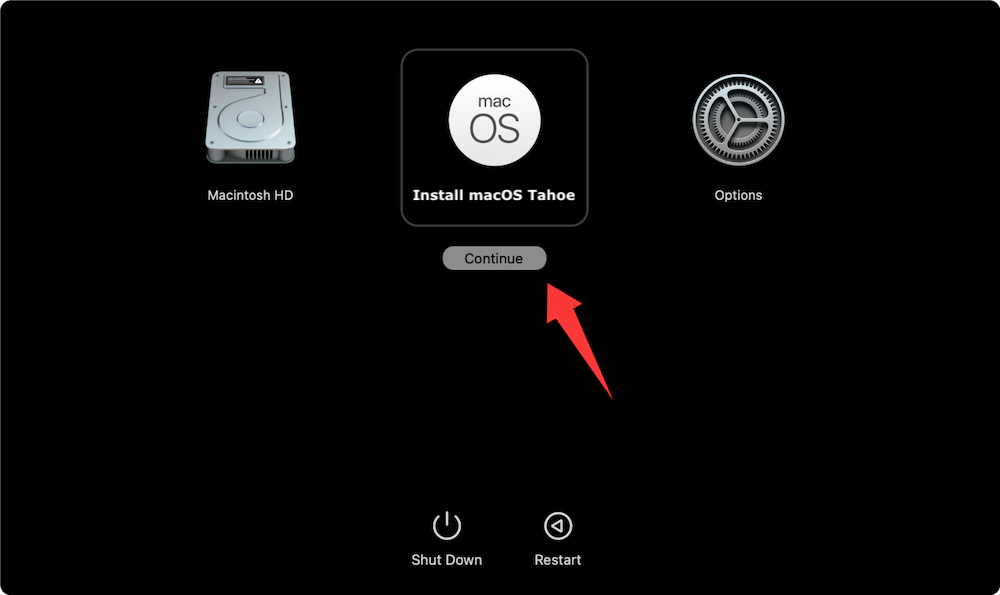
- The macOS installer will load. You can now:
- Install macOS on your Mac
- Format or partition internal drives
- Access recovery tools
📍 Tip: If the USB doesn't appear in Startup Manager, double-check that it was formatted correctly and that the installer was fully copied.
Making A Bootable Clone for Mac
There is another way to create a bootable USB for Mac - creating a bootable clone for macOS system disk. After that, you can boot your Mac from the cloned USB disk directly.
To do the job, you can use the software DoYourClone for Mac. The software is easy and safe to clone Mac system disk to a USB drive and make the cloned drive bootable.
DoYourClone for Mac
- Create bootable clone backup for macOS.
- Make an exact copy of everything of Mac disk.
- Easy and safe to clone Mac drive to USB drive.
Here are the simple steps to clone Mac system disk to USB drive with the software:
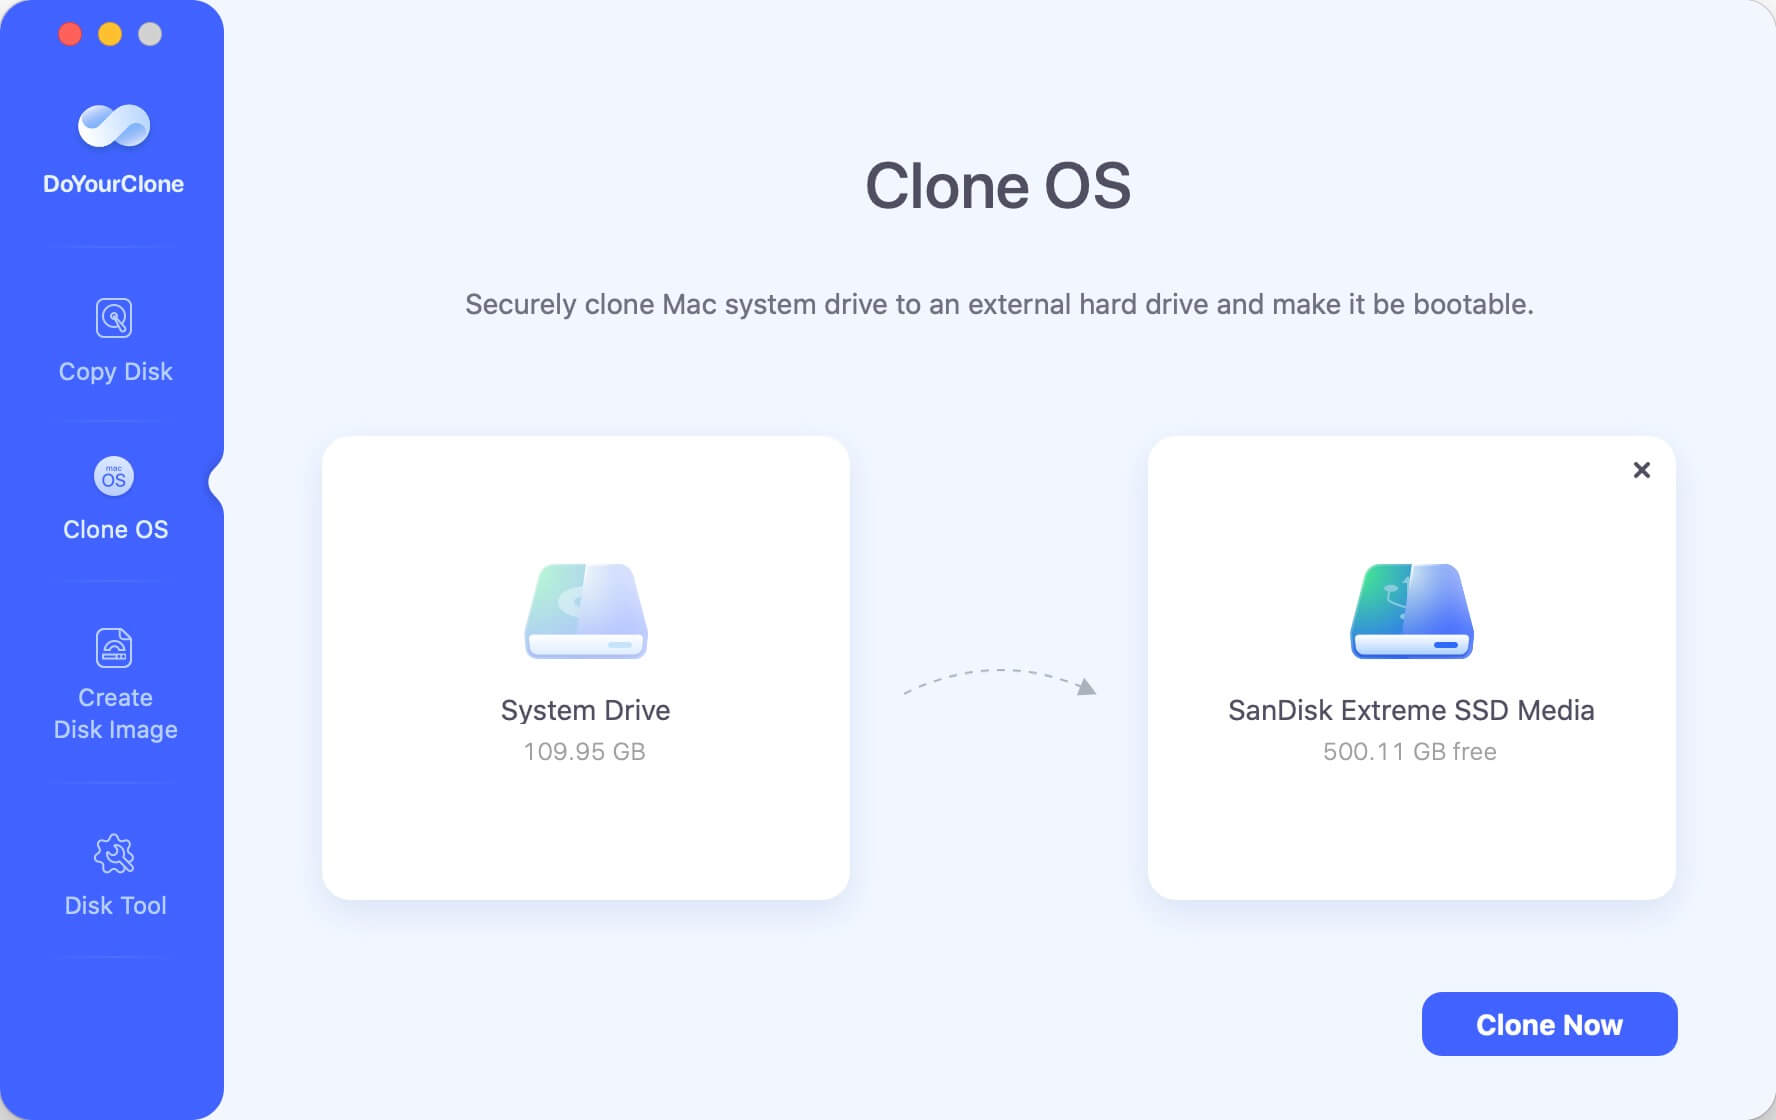
Step 1. Start the software DoYourClone for Mac and select the mode Clone OS. The Mac system disk is selected as source automatically. You can just select the USB disk as destination and click Clone Now button to start.
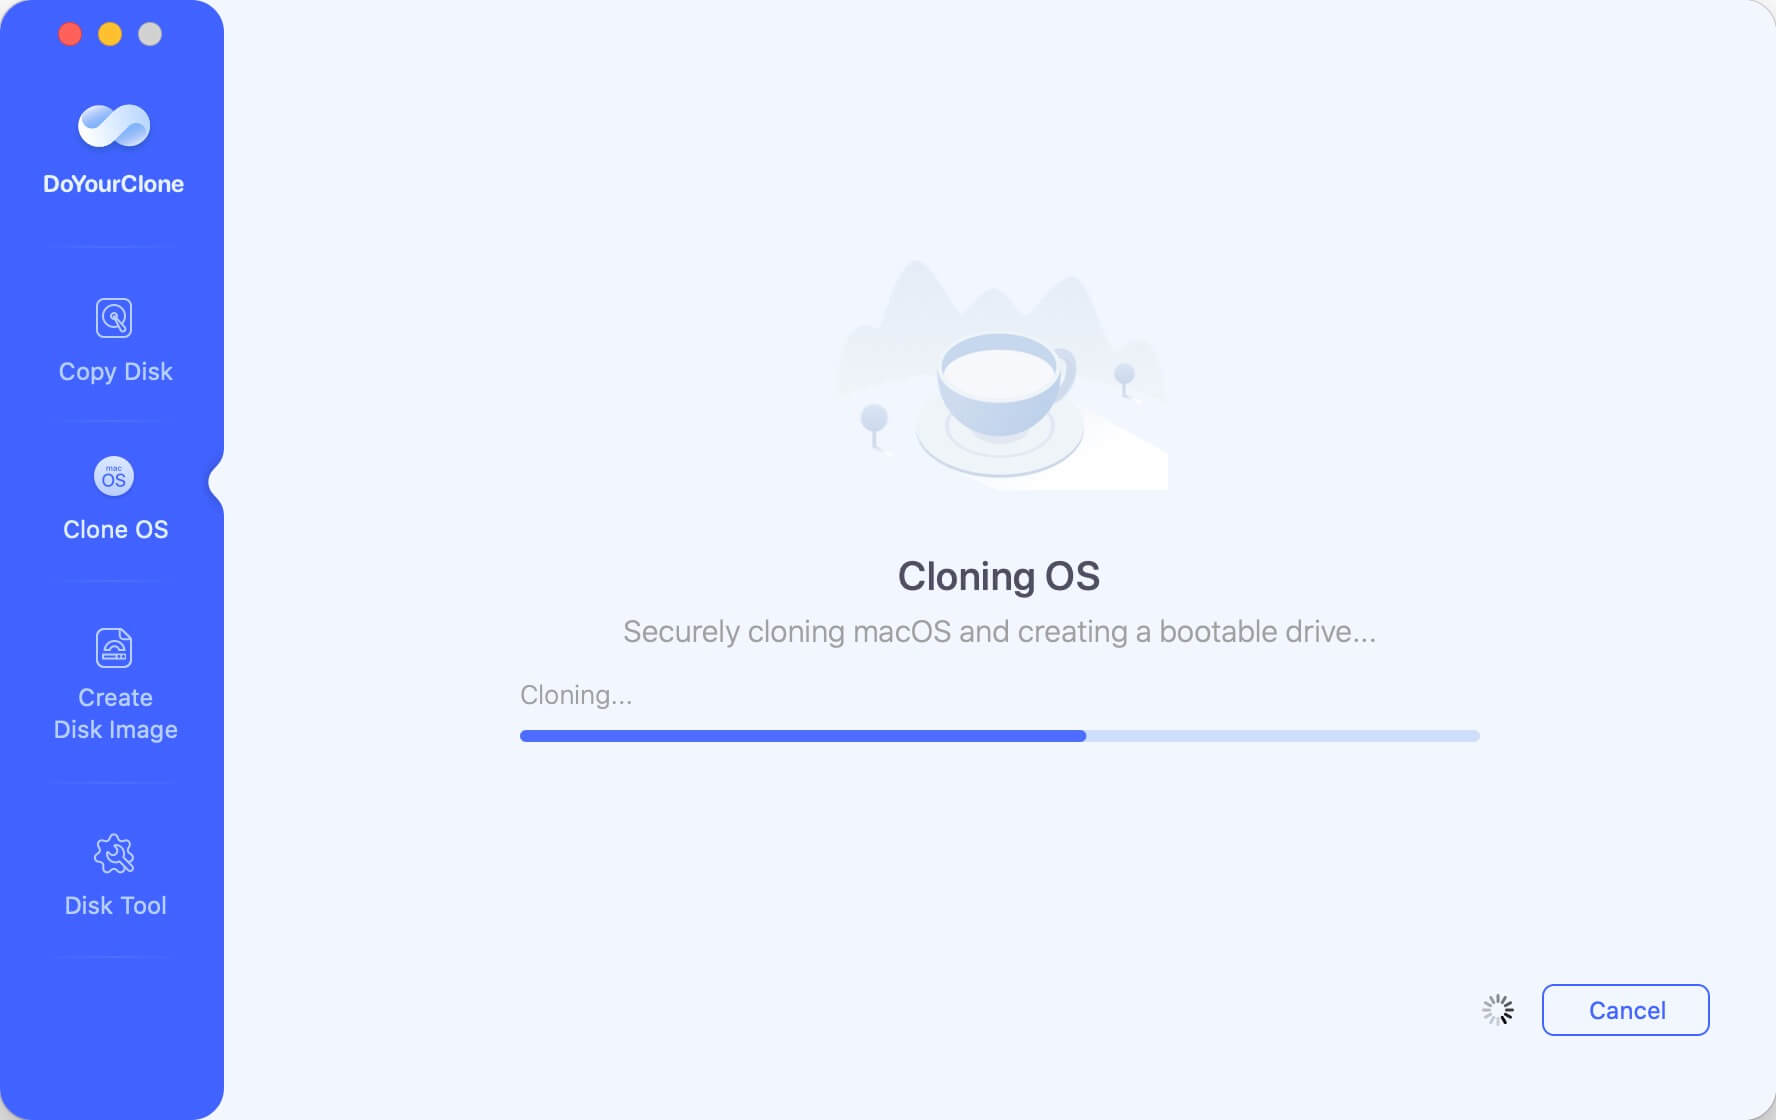
Step 2. The software will clone the Mac disk to USB disk. Please note that this process will format the USB disk first, then complete the cloning task. Everything in the system disk like system data, programs and personal files will be cloned to the USB disk.
After the cloning process is done, the cloned USB disk is bootable directly. You can set the USB disk as startup disk. Then check if the cloned USB disk is bootable.

How to Make a Bootable USB for Windows on Mac
Installing Windows on a Mac requires a slightly different approach. This can be done using Boot Camp Assistant or third-party tools.
Step 1: Download Windows ISO
- Visit the Microsoft official website.
- Select the correct version and download the ISO file.
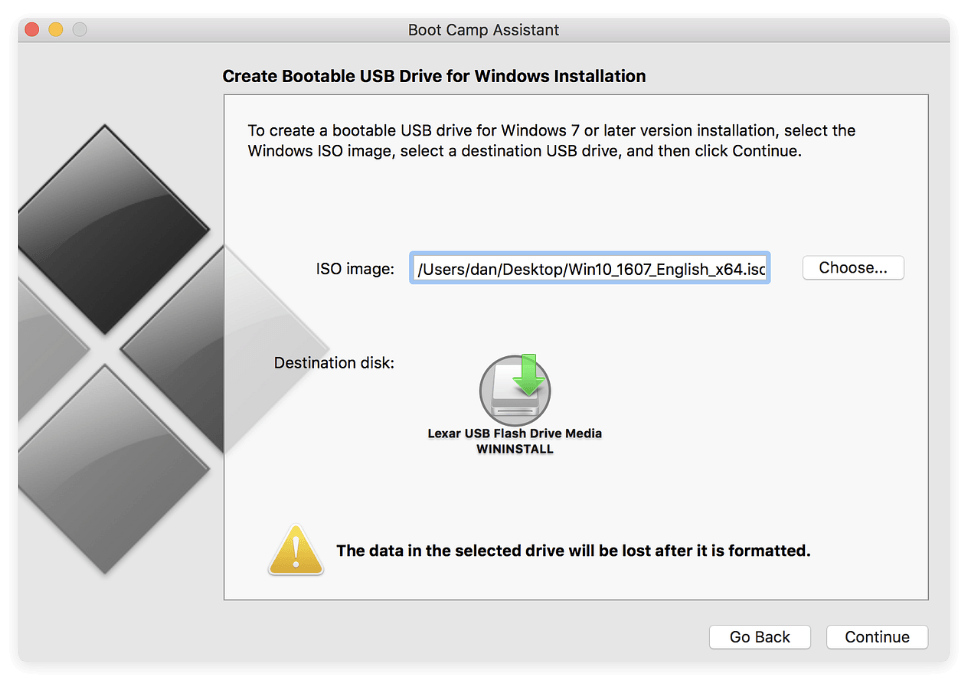
Step 2: Use Boot Camp Assistant (Intel Macs)
Intel Macs support Windows installation using Boot Camp:
- Open Boot Camp Assistant from Applications → Utilities.
- Select Create a Windows Install Disk.
- Choose the ISO file and USB drive.
- Follow the prompts to partition your drive and copy files to USB.
After completion, restart your Mac and hold Option (⌥) to boot from Windows USB.
Step 3: Alternative for Apple Silicon Macs
Apple Silicon Macs do not support Boot Camp. You'll need:
- Virtualization software: Parallels Desktop, UTM, or VMware Fusion.
- Third-party tools: Create bootable drives using software compatible with ARM-based Macs.
📍 Note: Installing Windows on Apple Silicon requires ARM-compatible versions of Windows.
How to Make a Bootable Linux USB on Mac
Creating a Linux bootable USB is useful for testing distributions, server deployment, or lightweight OS alternatives.
Step 1: Download Linux ISO
- Visit the official Linux distribution website (Ubuntu, Fedora, Debian, etc.).
- Download the ISO file for your preferred distribution.
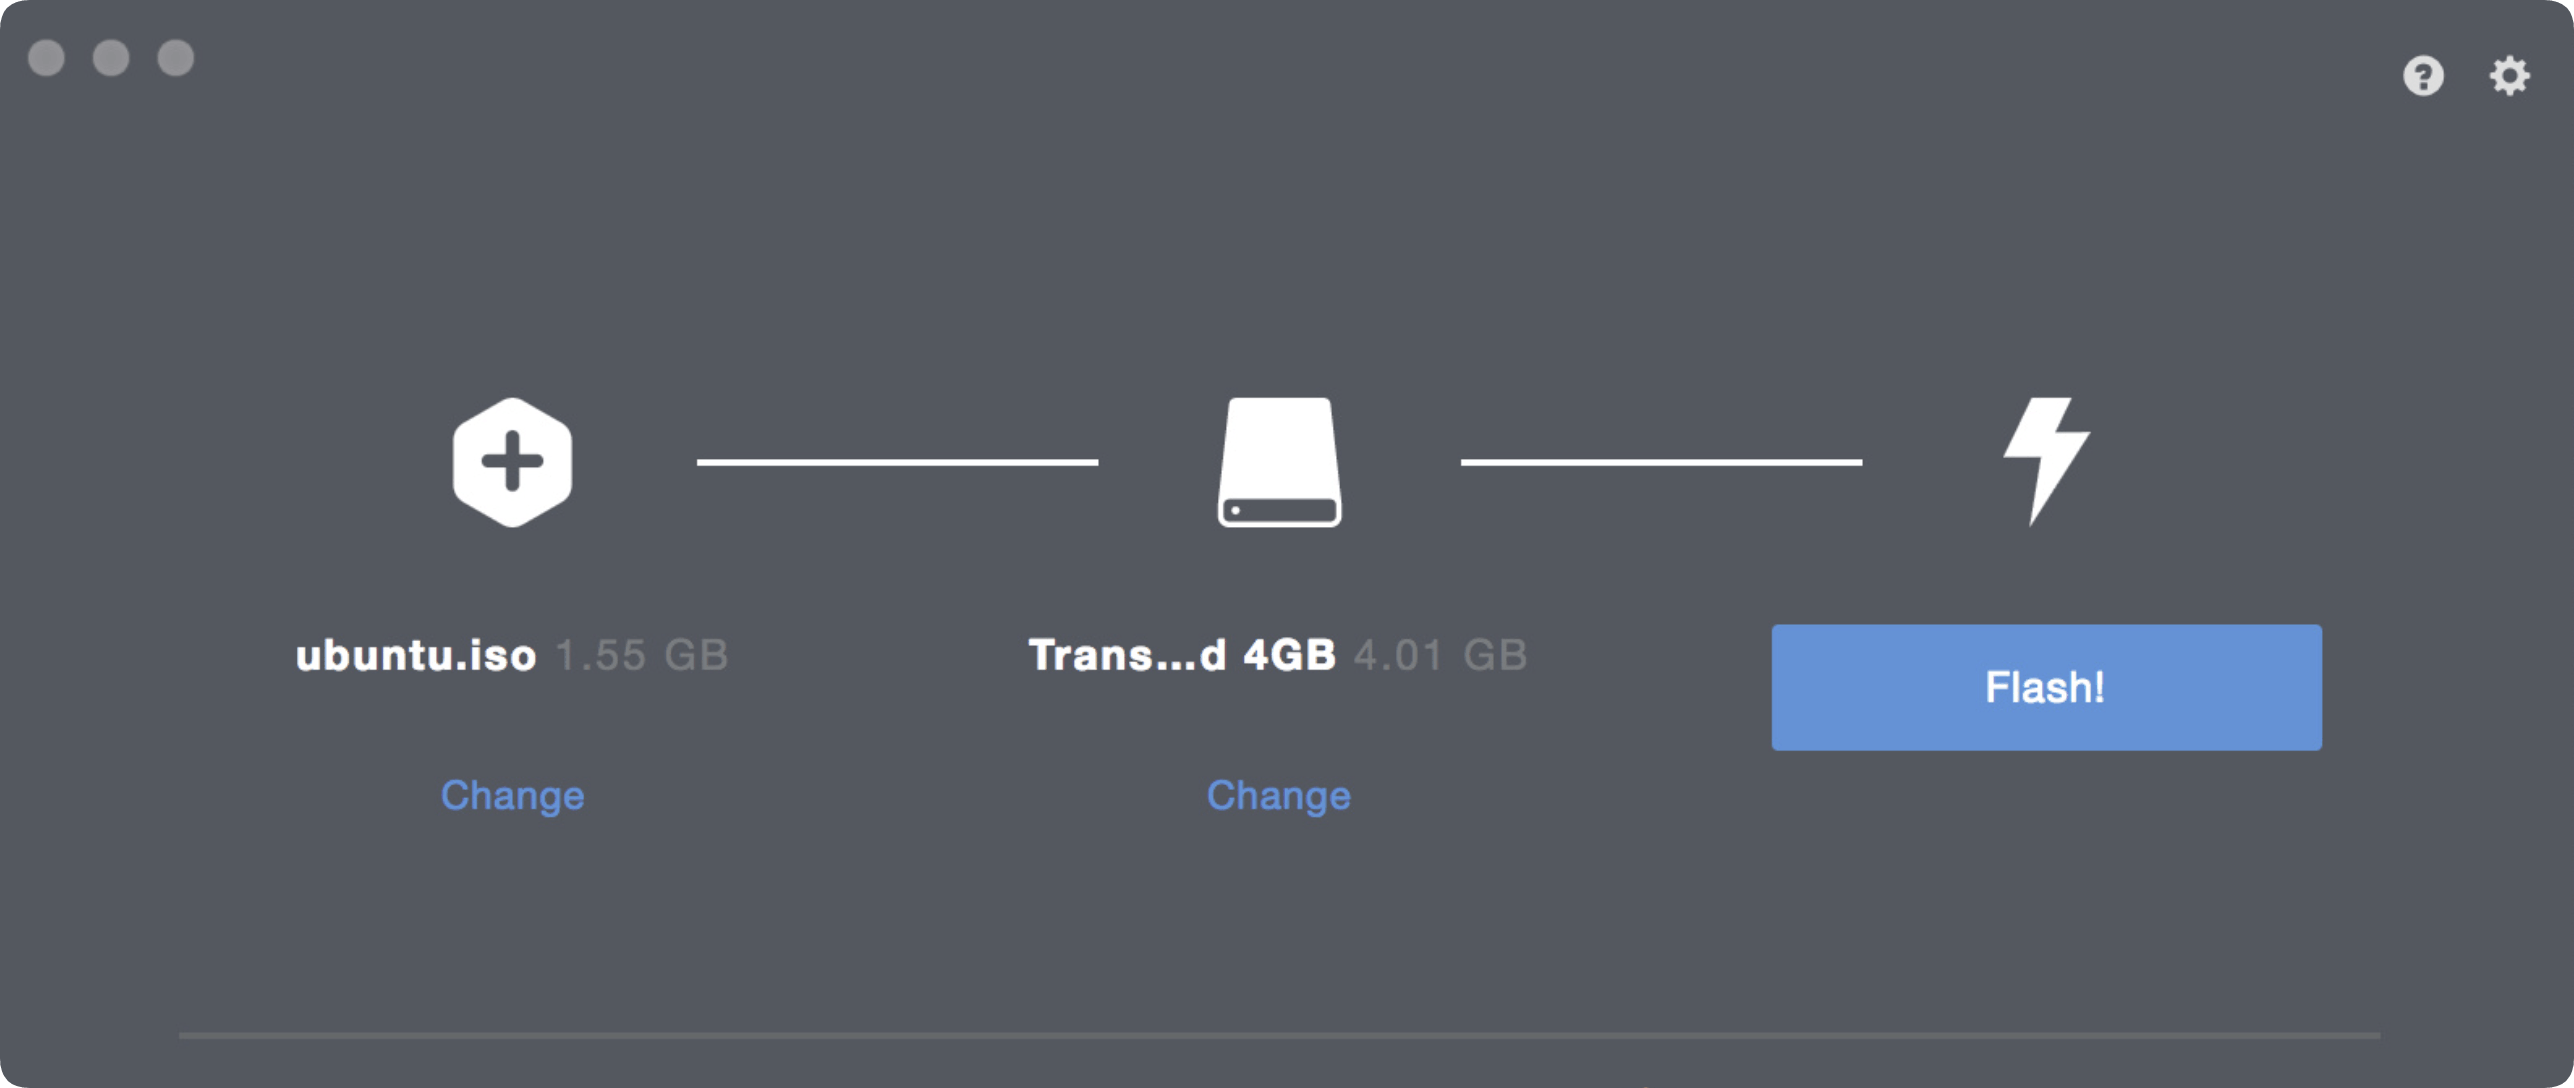
Step 2: Use BalenaEtcher (Recommended Method)
BalenaEtcher is a user-friendly tool to create bootable USB drives:
- Download and install BalenaEtcher.
- Open the app, select the Linux ISO file, and choose your USB drive.
- Click Flash! and wait for the process to finish.
Step 3: Using Terminal (Advanced Method)
For experienced users, Terminal provides the dd command:
sudo dd if=/path/to/linux.iso of=/dev/diskN bs=1m
- Replace /path/to/linux.iso with the ISO path.
- Replace /dev/diskN with your USB disk identifier (diskutil list to find it).
📍 Warning: Using dd can overwrite any drive. Double-check the disk identifier.
After creation, restart your Mac, hold Option (⌥), and select the Linux USB to boot.
FAQs about Making Bootable USB on Mac
Conclusion
Creating a bootable USB on a Mac is an invaluable skill, whether for reinstalling macOS, installing Windows, or testing Linux. Following the steps outlined above ensures a smooth process with minimal errors. Remember to always use official installers, format your USB correctly, and verify ISO integrity before starting.
With these methods, you can confidently make bootable USB drives for macOS, Windows, and Linux and be prepared for installations, recovery, or testing on multiple machines.
DoYourClone for Mac
DoYourClone for Mac, one of the best Mac disk cloning software, can help you clone HDD, SSD, external storage device on Mac, upgrade HDD to SSD, create full disk image backup, etc. It also can clone everything from your Mac to an external HDD/SSD and create a full bootable clone backup. 100% safe and easy-to-use.
Written & Updated by Anderson
Anderson is a big fan of computer technology. He joined DoYourData in 2018 and has been writing 200+ articles about disk clone, data recovery, computer technology, data erasure, Mac system optimization, etc. He loves music, movie, and reading. In his spare time, he’s studying music and playing tennis.