How to Downgrade from macOS 27 Golden Gate to macOS 26 Tahoe
 Updated by Ricky Lin on June 23, 2026
Quick Navigation:
- Back Up Mac Data before macOS 27 Downgrade
- 2 Methods to Downgrade macOS 27 to macOS 26
- Forgot a Backup? How to Recover Lost Files After Downgrading
- FAQs about the macOS 27 Golden Gate Downgrade
- Wrapping Up
Upgrading to the latest operating system is always an exciting experience. macOS 27 Golden Gate brings many brilliant new AI features, a refreshed interface, and performance boosts to the table. However, bleeding-edge tech isn't always smooth sailing for everyone.
You might find that your essential legacy apps fail to launch, your battery life takes a noticeable hit, or the system feels a bit unstable for your daily work. If you are experiencing these issues, don't worry. You can easily go back to the highly stable macOS 26 Tahoe.
This comprehensive, step-by-step guide will show you exactly how to downgrade from macOS 27 Golden Gate to macOS 26 Tahoe safely and without losing your precious files. Let's get started!
Back Up Mac Data before macOS 27 Downgrade
Downgrading an operating system requires wiping your primary drive. This means your files, apps, and settings will be deleted. To avoid a data disaster, you need to back up your Mac data completely.
Since your hard drive will be erased, backing up your data is non-negotiable. You can drag and drop your critical files to an external hard drive, sync them to iCloud, or create a full system backup using Time Machine.
💡 Note: A Time Machine backup created on macOS 27 Golden Gate cannot be restored directly onto a macOS 26 Tahoe system. However, you can manually extract files from it later.
2 Methods to Downgrade macOS 27 to macOS 26
Method 1: Downgrade Using a Bootable USB Installer
If you want to perform a clean installation to downgrade macOS 27 Golden Gate to macOS 26 Tahoe, you can use a bootable USB drive. This requires an empty USB flash drive with at least 16GB of storage space.
Step 1: Download the macOS 26 Tahoe Installer
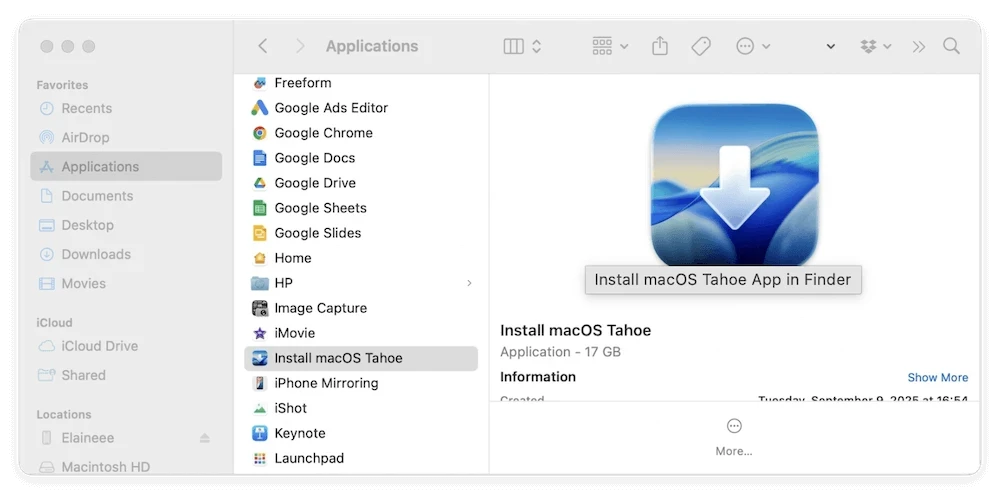
Open the Mac App Store on a machine running a supported OS and search for 'macOS Tahoe'. Download the installer file. If it automatically tries to open after downloading, close it immediately. The file 'Install macOS Tahoe' should sit safely inside your Applications folder.
Step 2: Format Your USB Drive
- Plug your 16GB+ USB flash drive into your Mac.
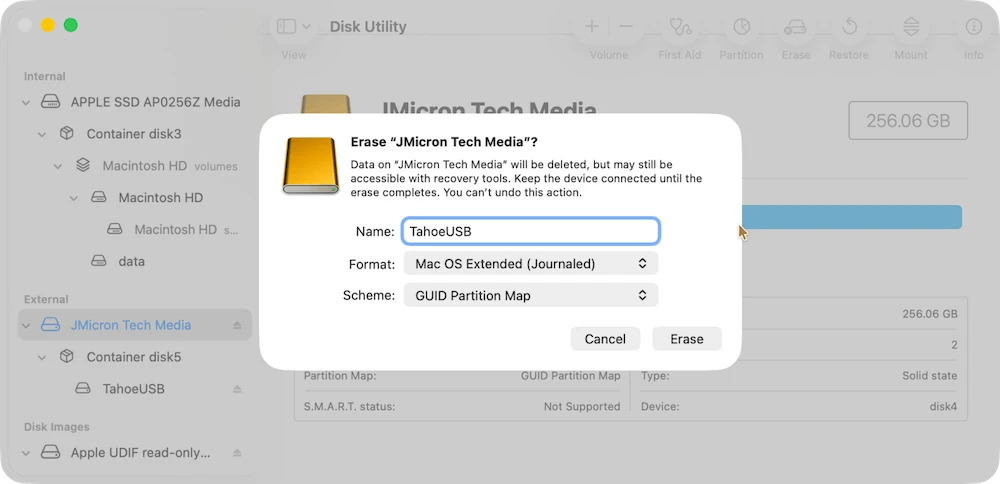
- Open Disk Utility, select the USB drive, and click Erase.
- Set the format to Mac OS Extended (Journaled) and name the drive 'TahoeUSB'. Click Erase.
Step 3: Create the Bootable Installer via Terminal
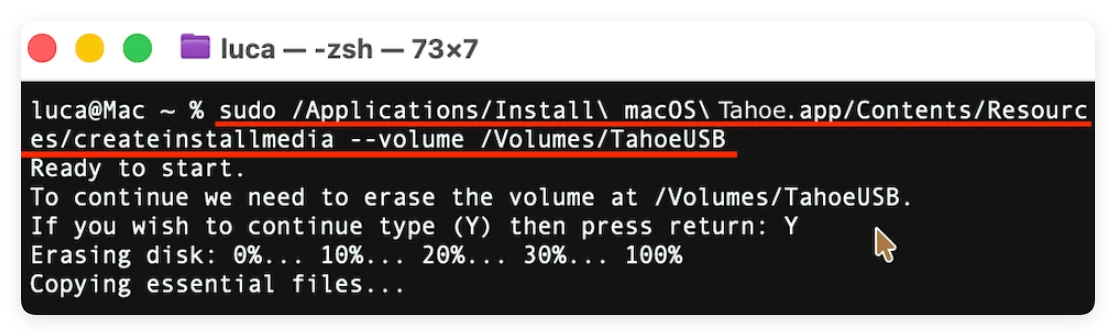
Open Terminal from your Applications > Utilities folder. Copy and paste the following command, then hit Enter:
sudo /Applications/Install\ macOS\ Tahoe.app/Contents/Resources/createinstallmedia --volume /Volumes/TahoeUSB
Type your Mac admin password when prompted, press 'Y' to confirm erasing the volume, and wait. When Terminal says Install media now available at "/Volumes/Install macOS Tahoe", your bootable installer is ready.
Step 4: Erase and Clean Install macOS 26 Tahoe
- Keep the USB installer plugged in and shut down your Mac.
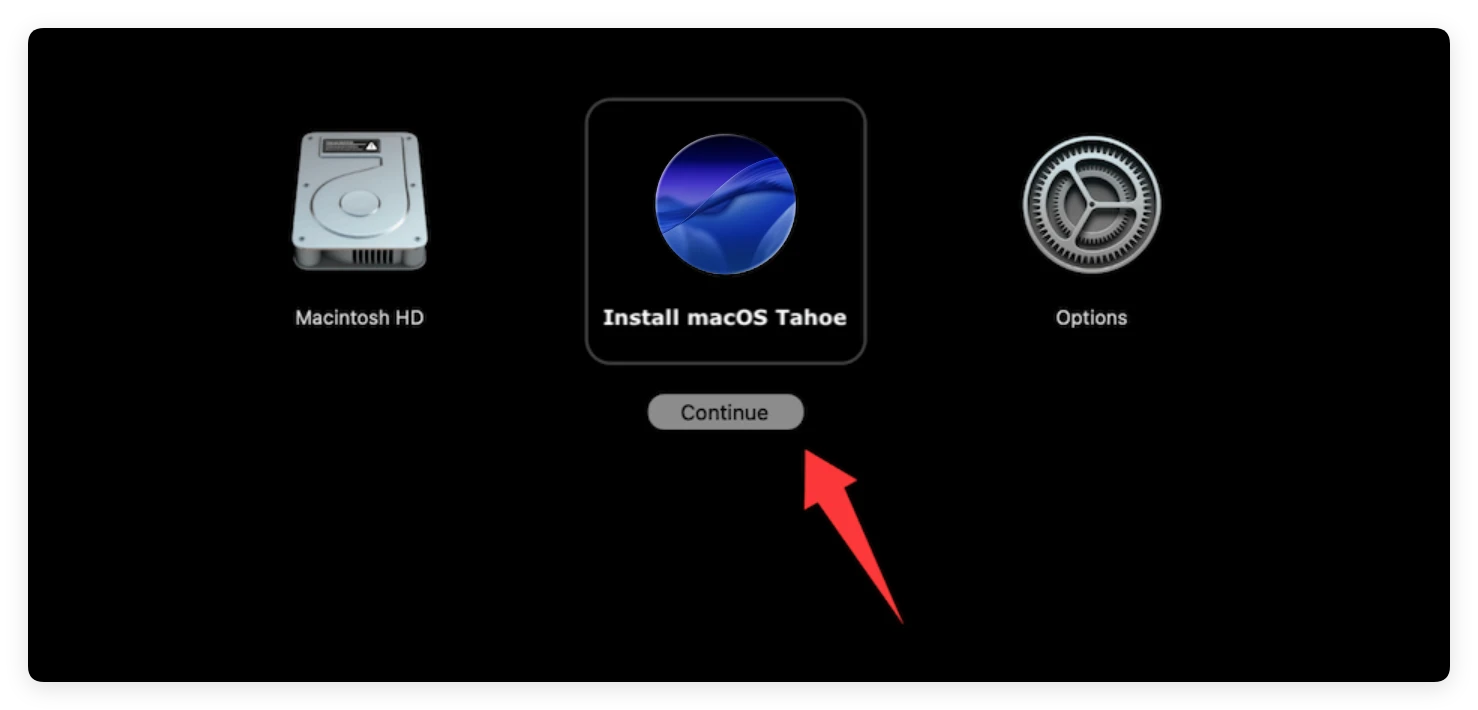
- Turn on your Mac and hold the Power button (Apple Silicon) to load the boot selection menu.
- Select 'Install macOS Tahoe' from the screen and press Enter. Follow the onscreen setup prompts.
Method 2: Downgrade via macOS Recovery Mode
You can also downgrade using macOS Recovery mode. This method can help you wipe the drive and then install the last stable version of macOS.
- Turn off your Mac completely.
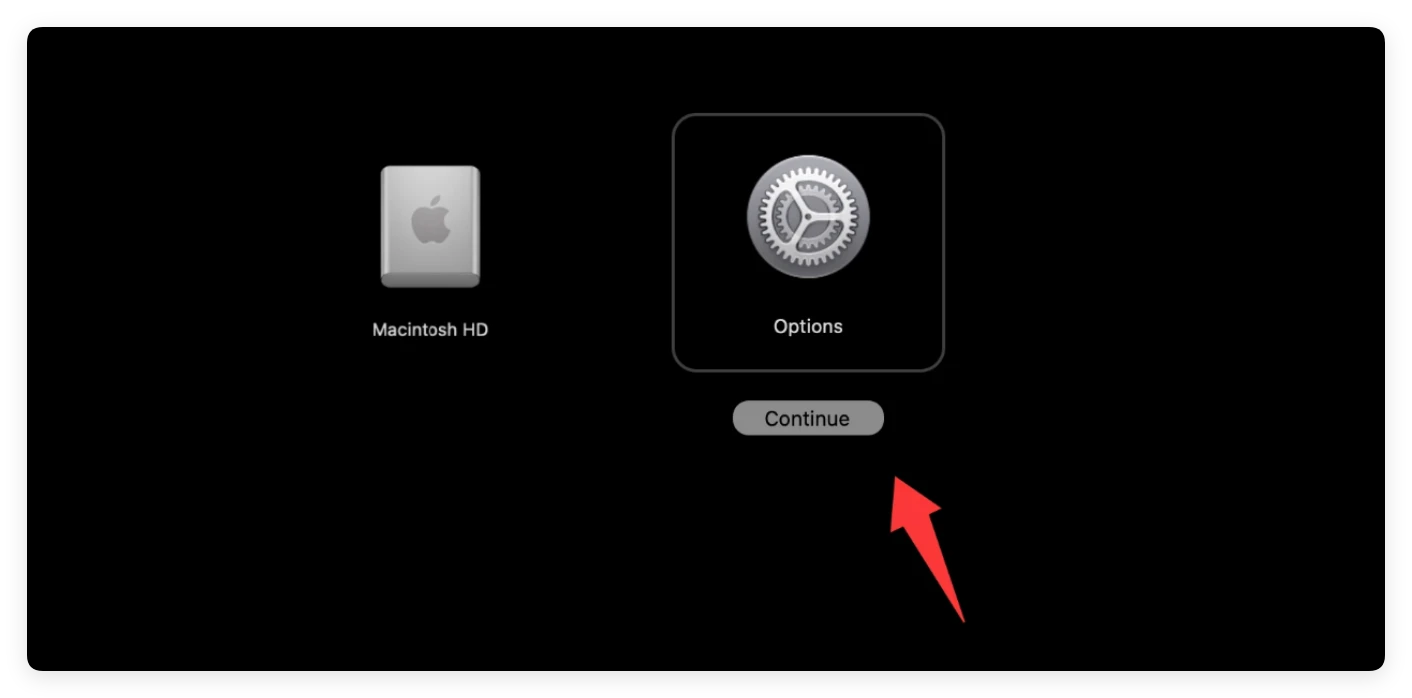
- Press and hold the Power button until you see "Loading startup options" message. Select Options and click Continue.
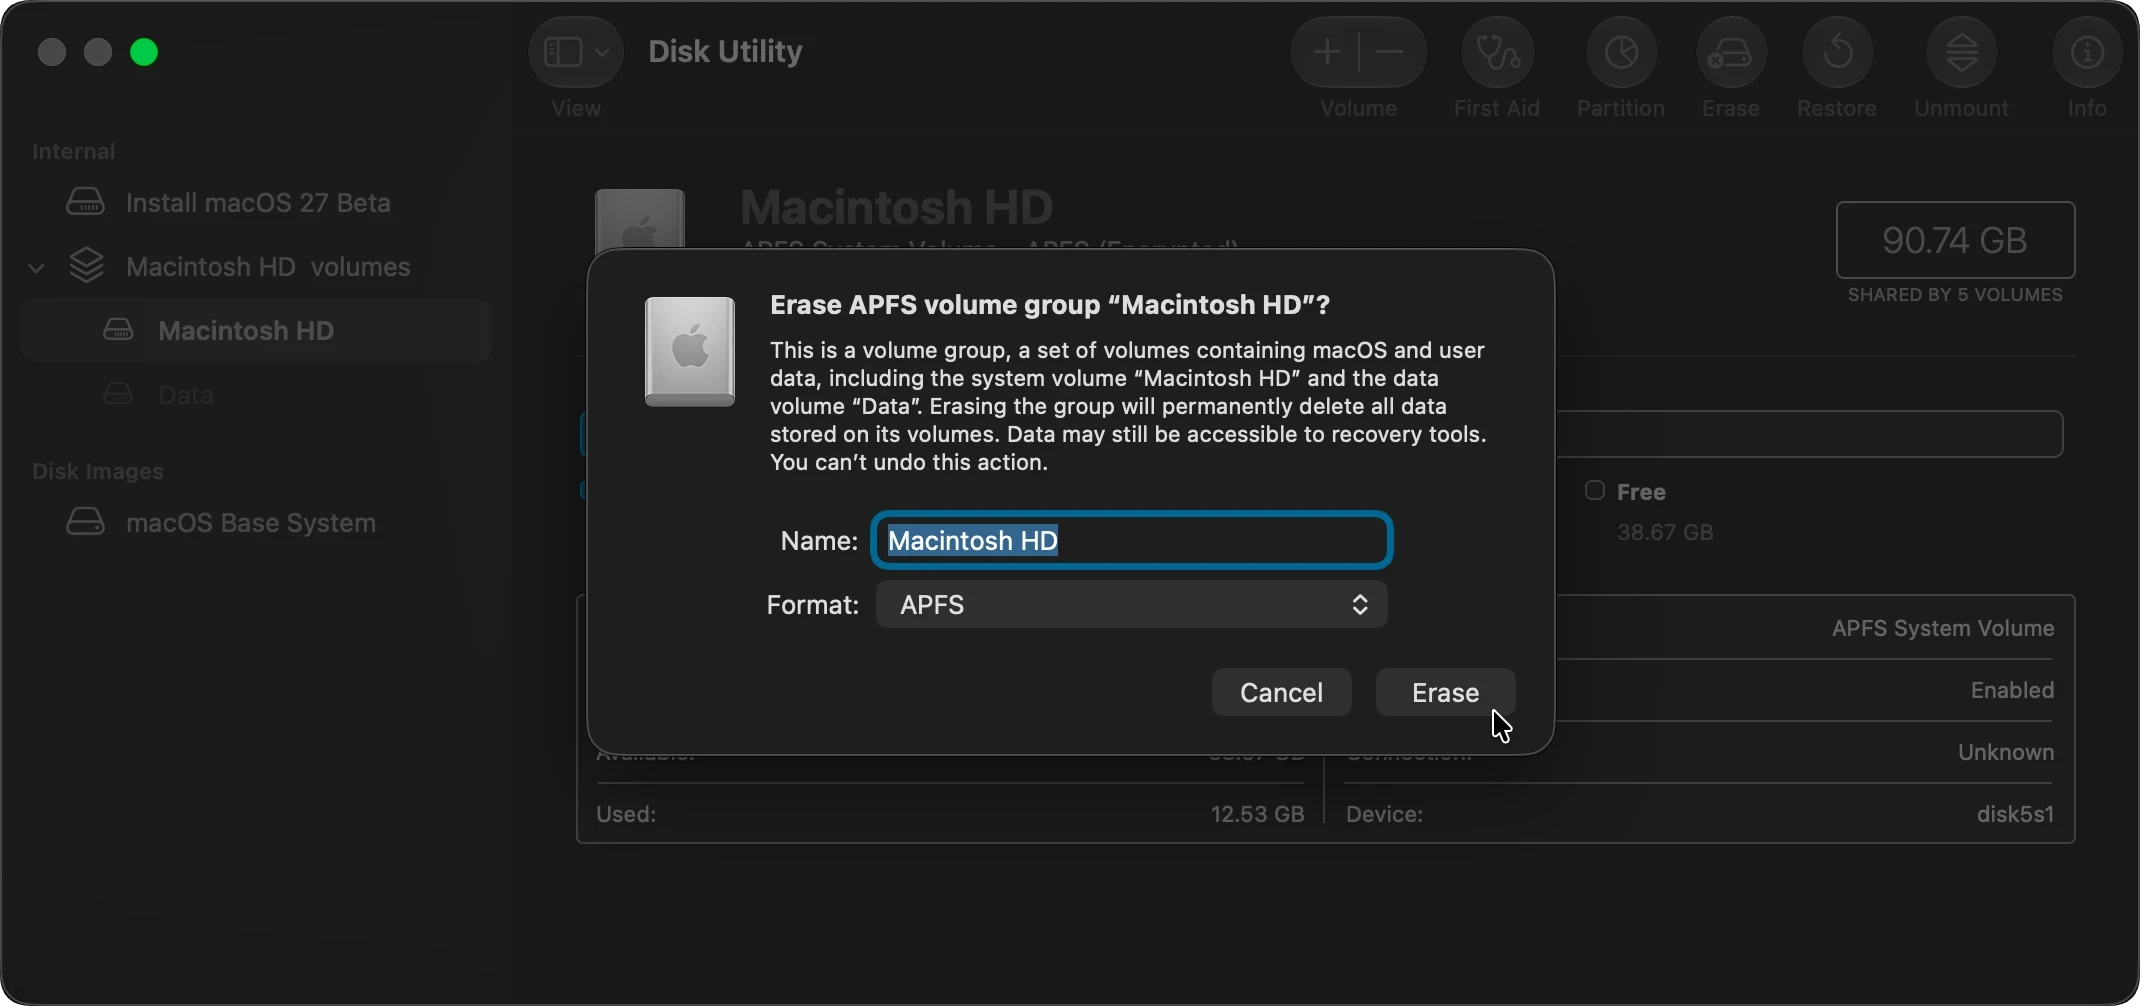
- Once the macOS Utilities window opens, select Disk Utility to erase your internal drive (APFS format).
- Exit Disk Utility, select 'Reinstall macOS Tahoe', and follow the installation steps.
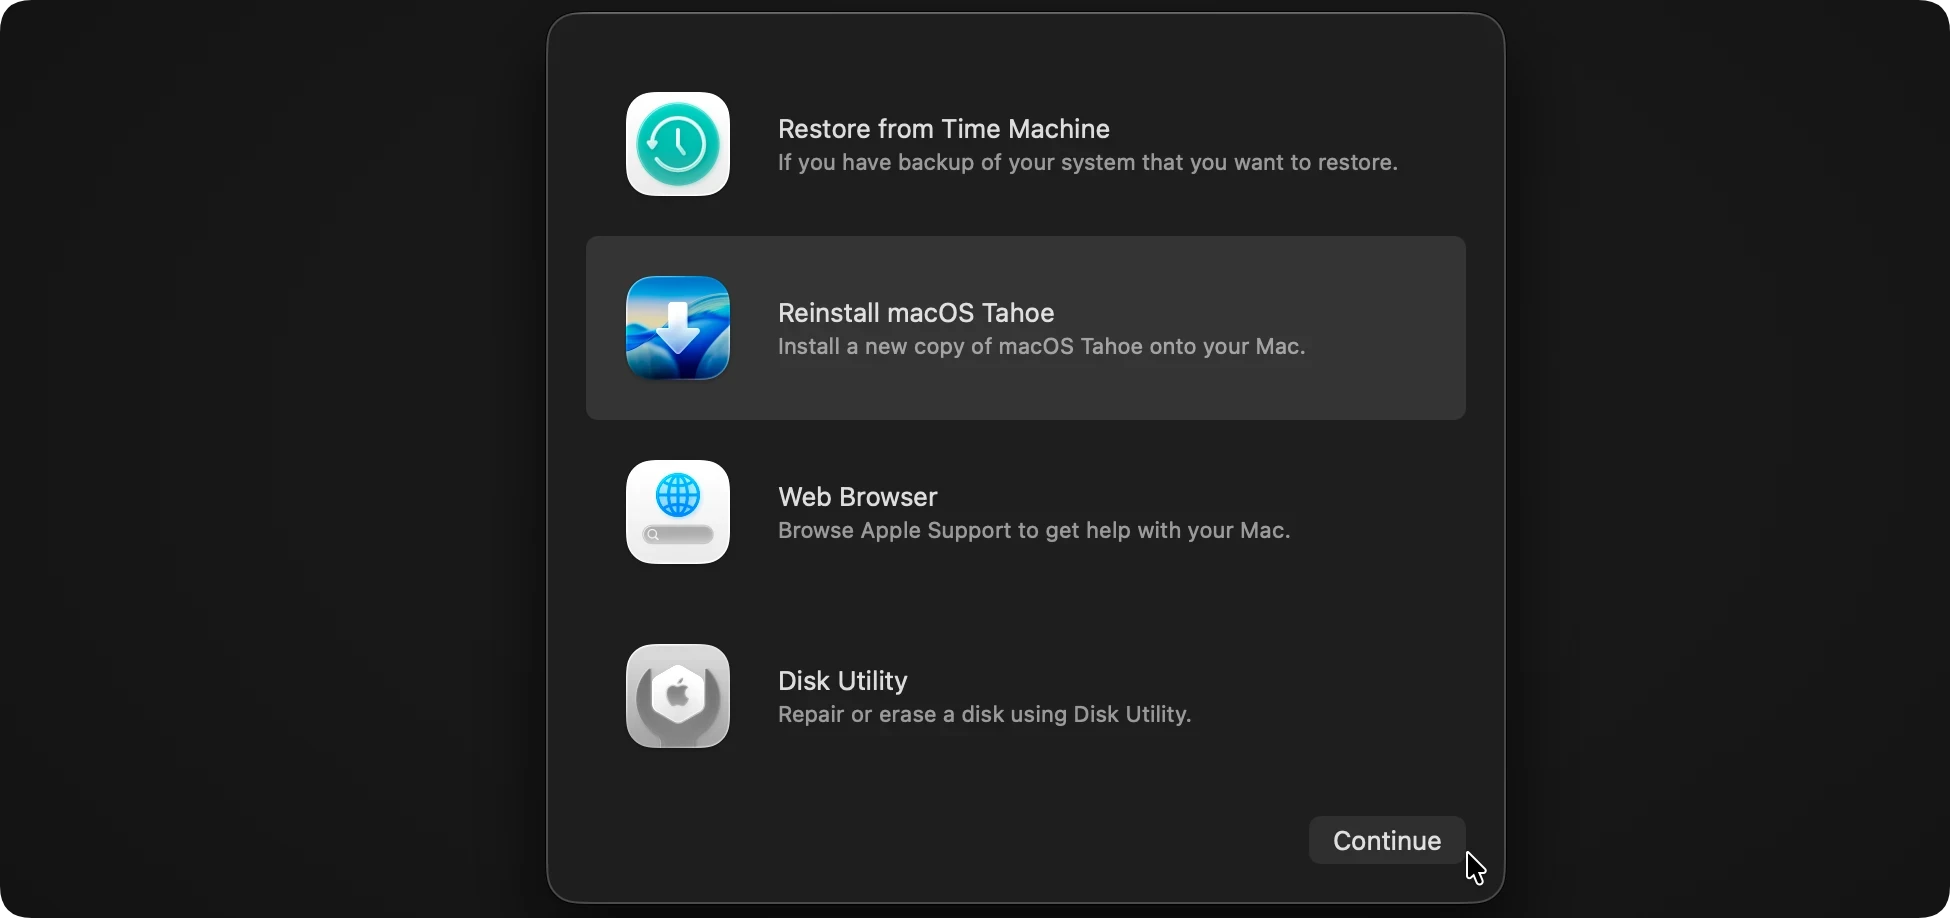
This will install the factory version of macOS. If that version is older than macOS 26 Tahoe, you can simply boot up and upgrade to Tahoe via the App Store later.
Forgot a Backup? How to Recover Lost Files After Downgrading
Erasing your Mac drive to downgrade from macOS 27 Golden Gate can easily result in accidental data loss. Perhaps you forgot to save a folder on your desktop, or your backup drive corrupted during the process. Do not panic—your data isn't permanently gone yet.
When a drive is erased, the files still physically exist on the storage sectors until they are overwritten by new system data. By using a professional data recovery tool like Do Your Data Recovery for Mac, you can scan the disk deep below the surface and pull those files back safely.
Step 1: Download and open DoYourData Recovery on your newly downgraded Mac.
Step 2: Select your internal hard drive (Macintosh HD) from the interface list.
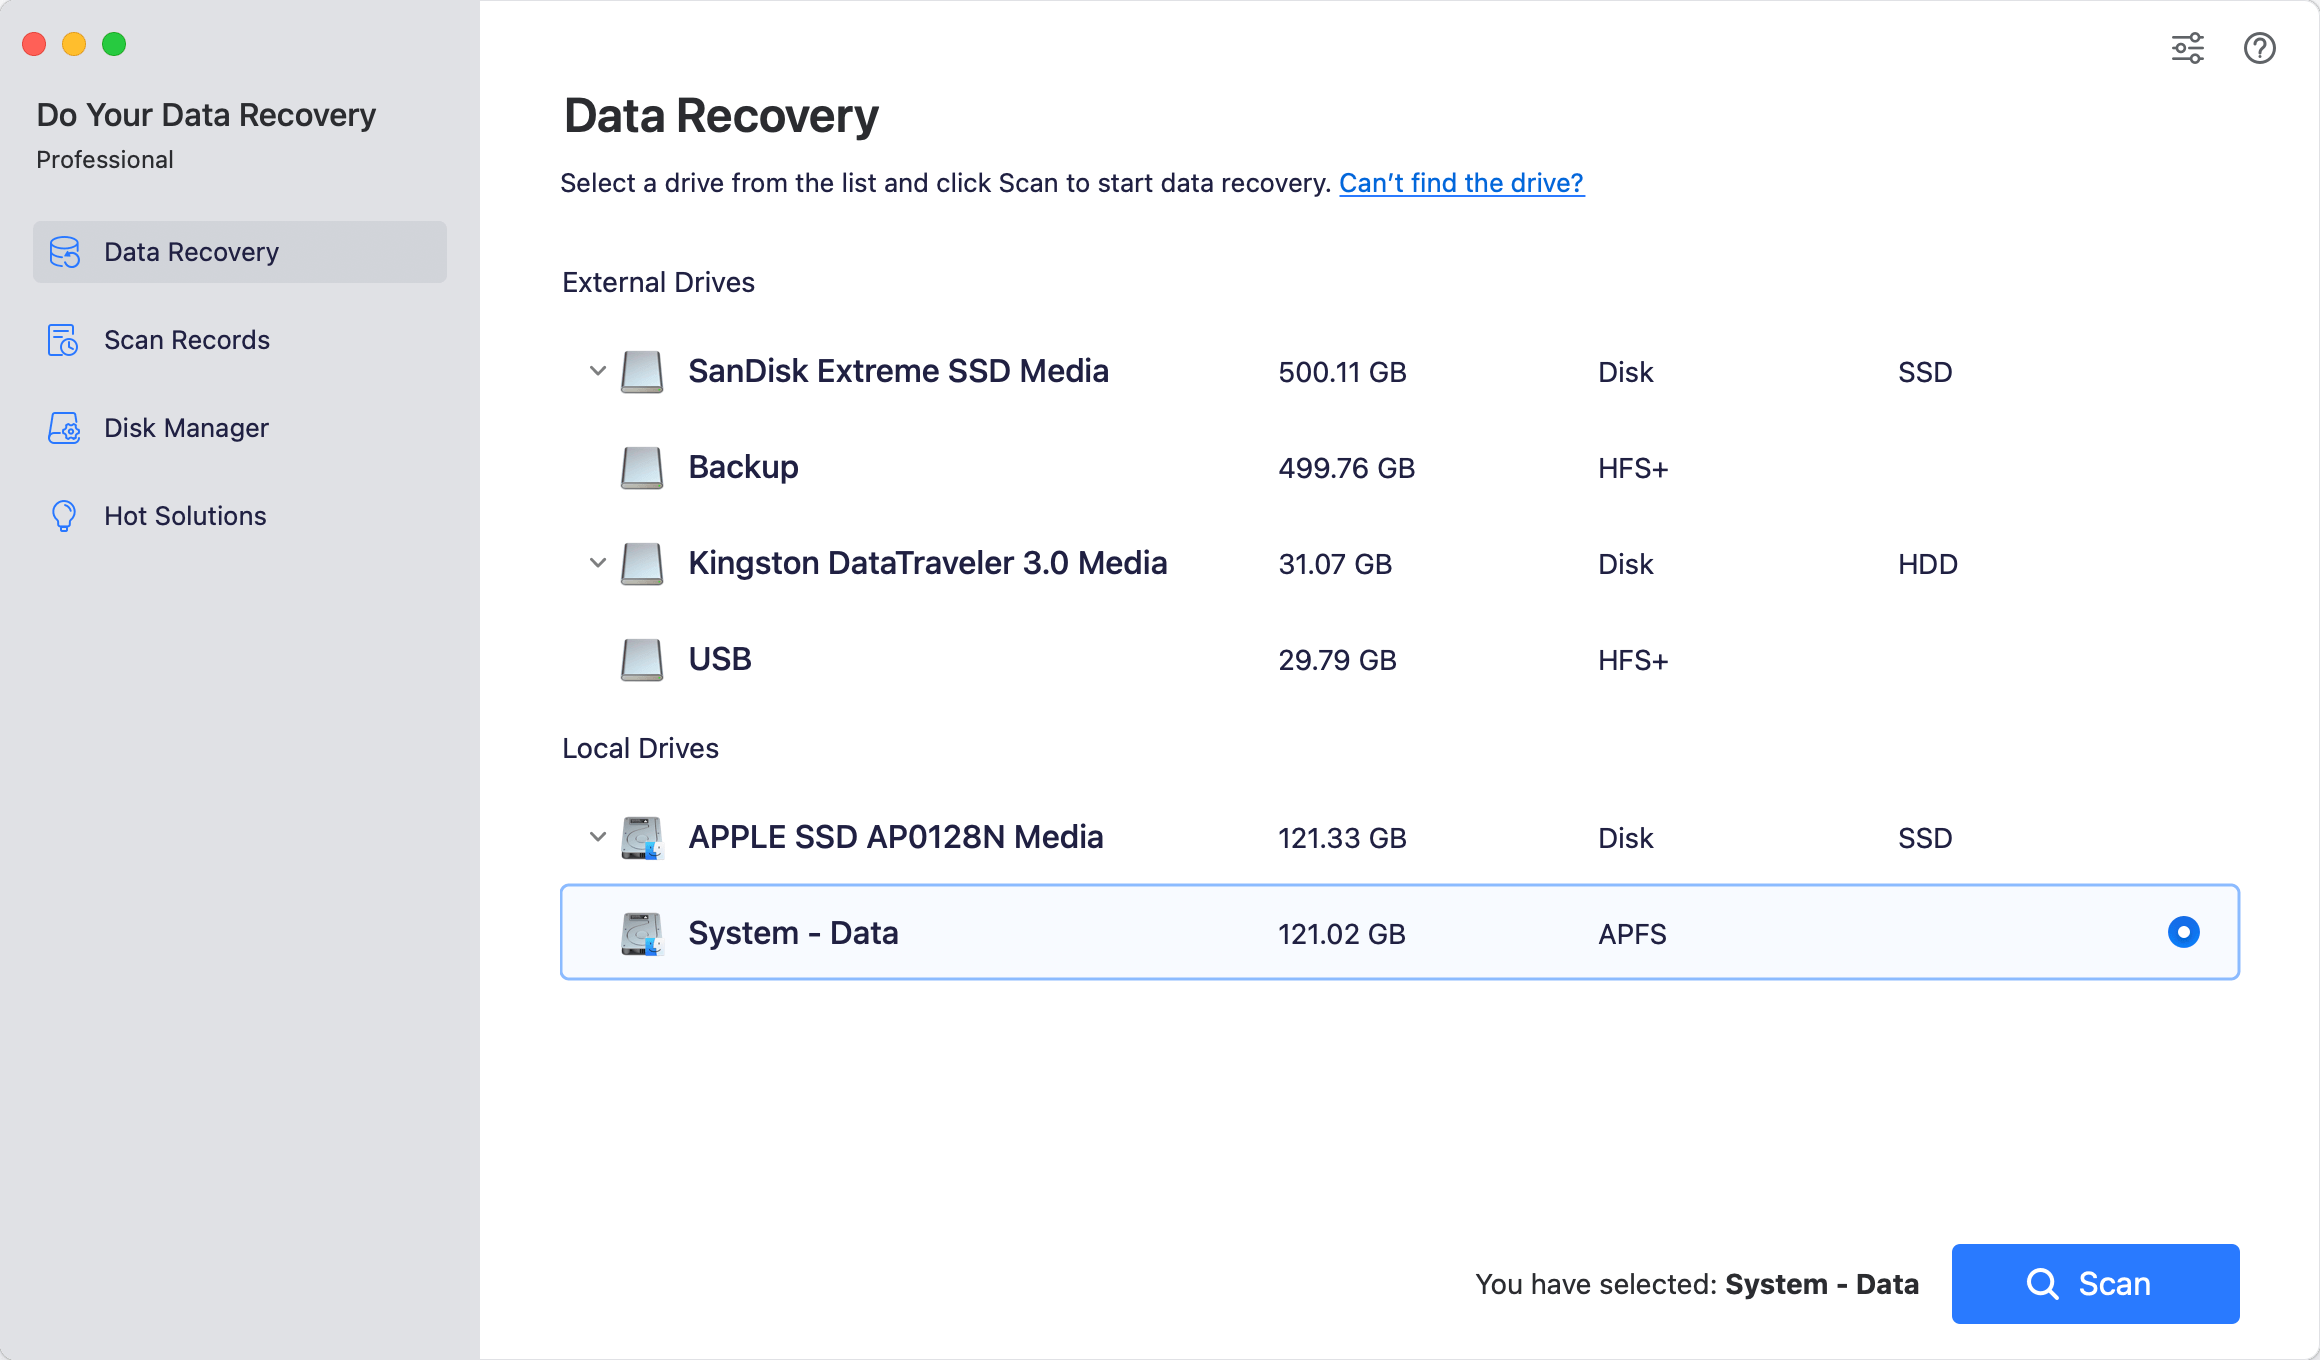
Step 3: Click the Scan button. The software will run both a Quick Scan and a Deep Scan to look for lost documents, photos, videos, and settings.
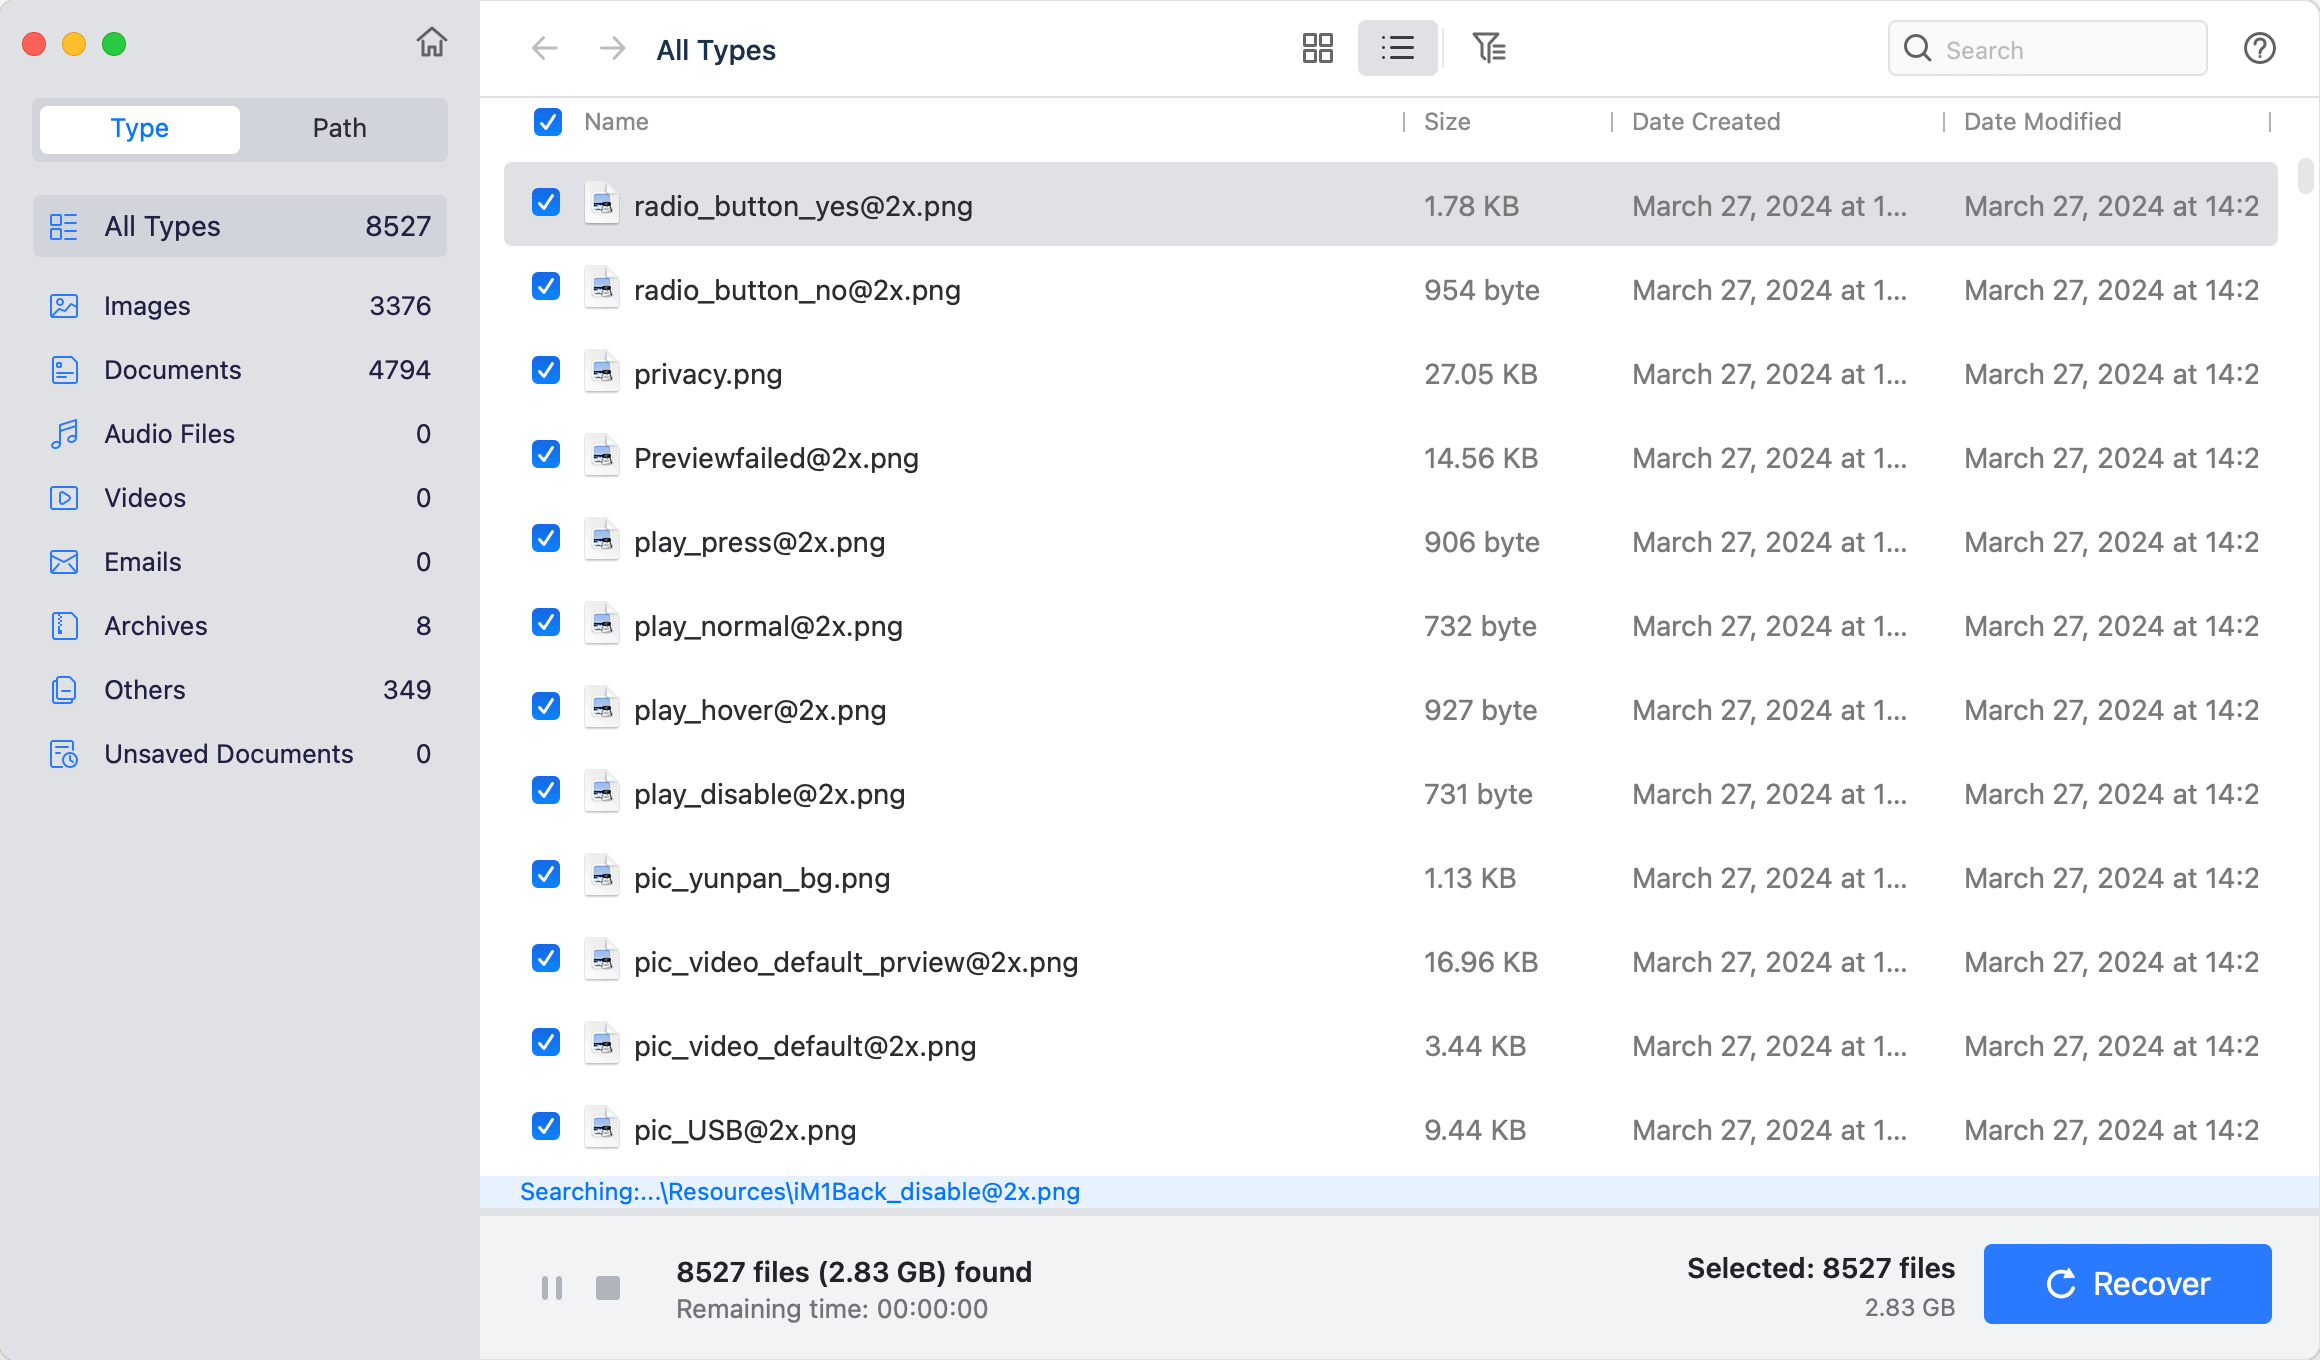
Step 4: Browse the file preview list, tick the boxes next to the files you need to rescue, and click Recover to save them onto an external drive.
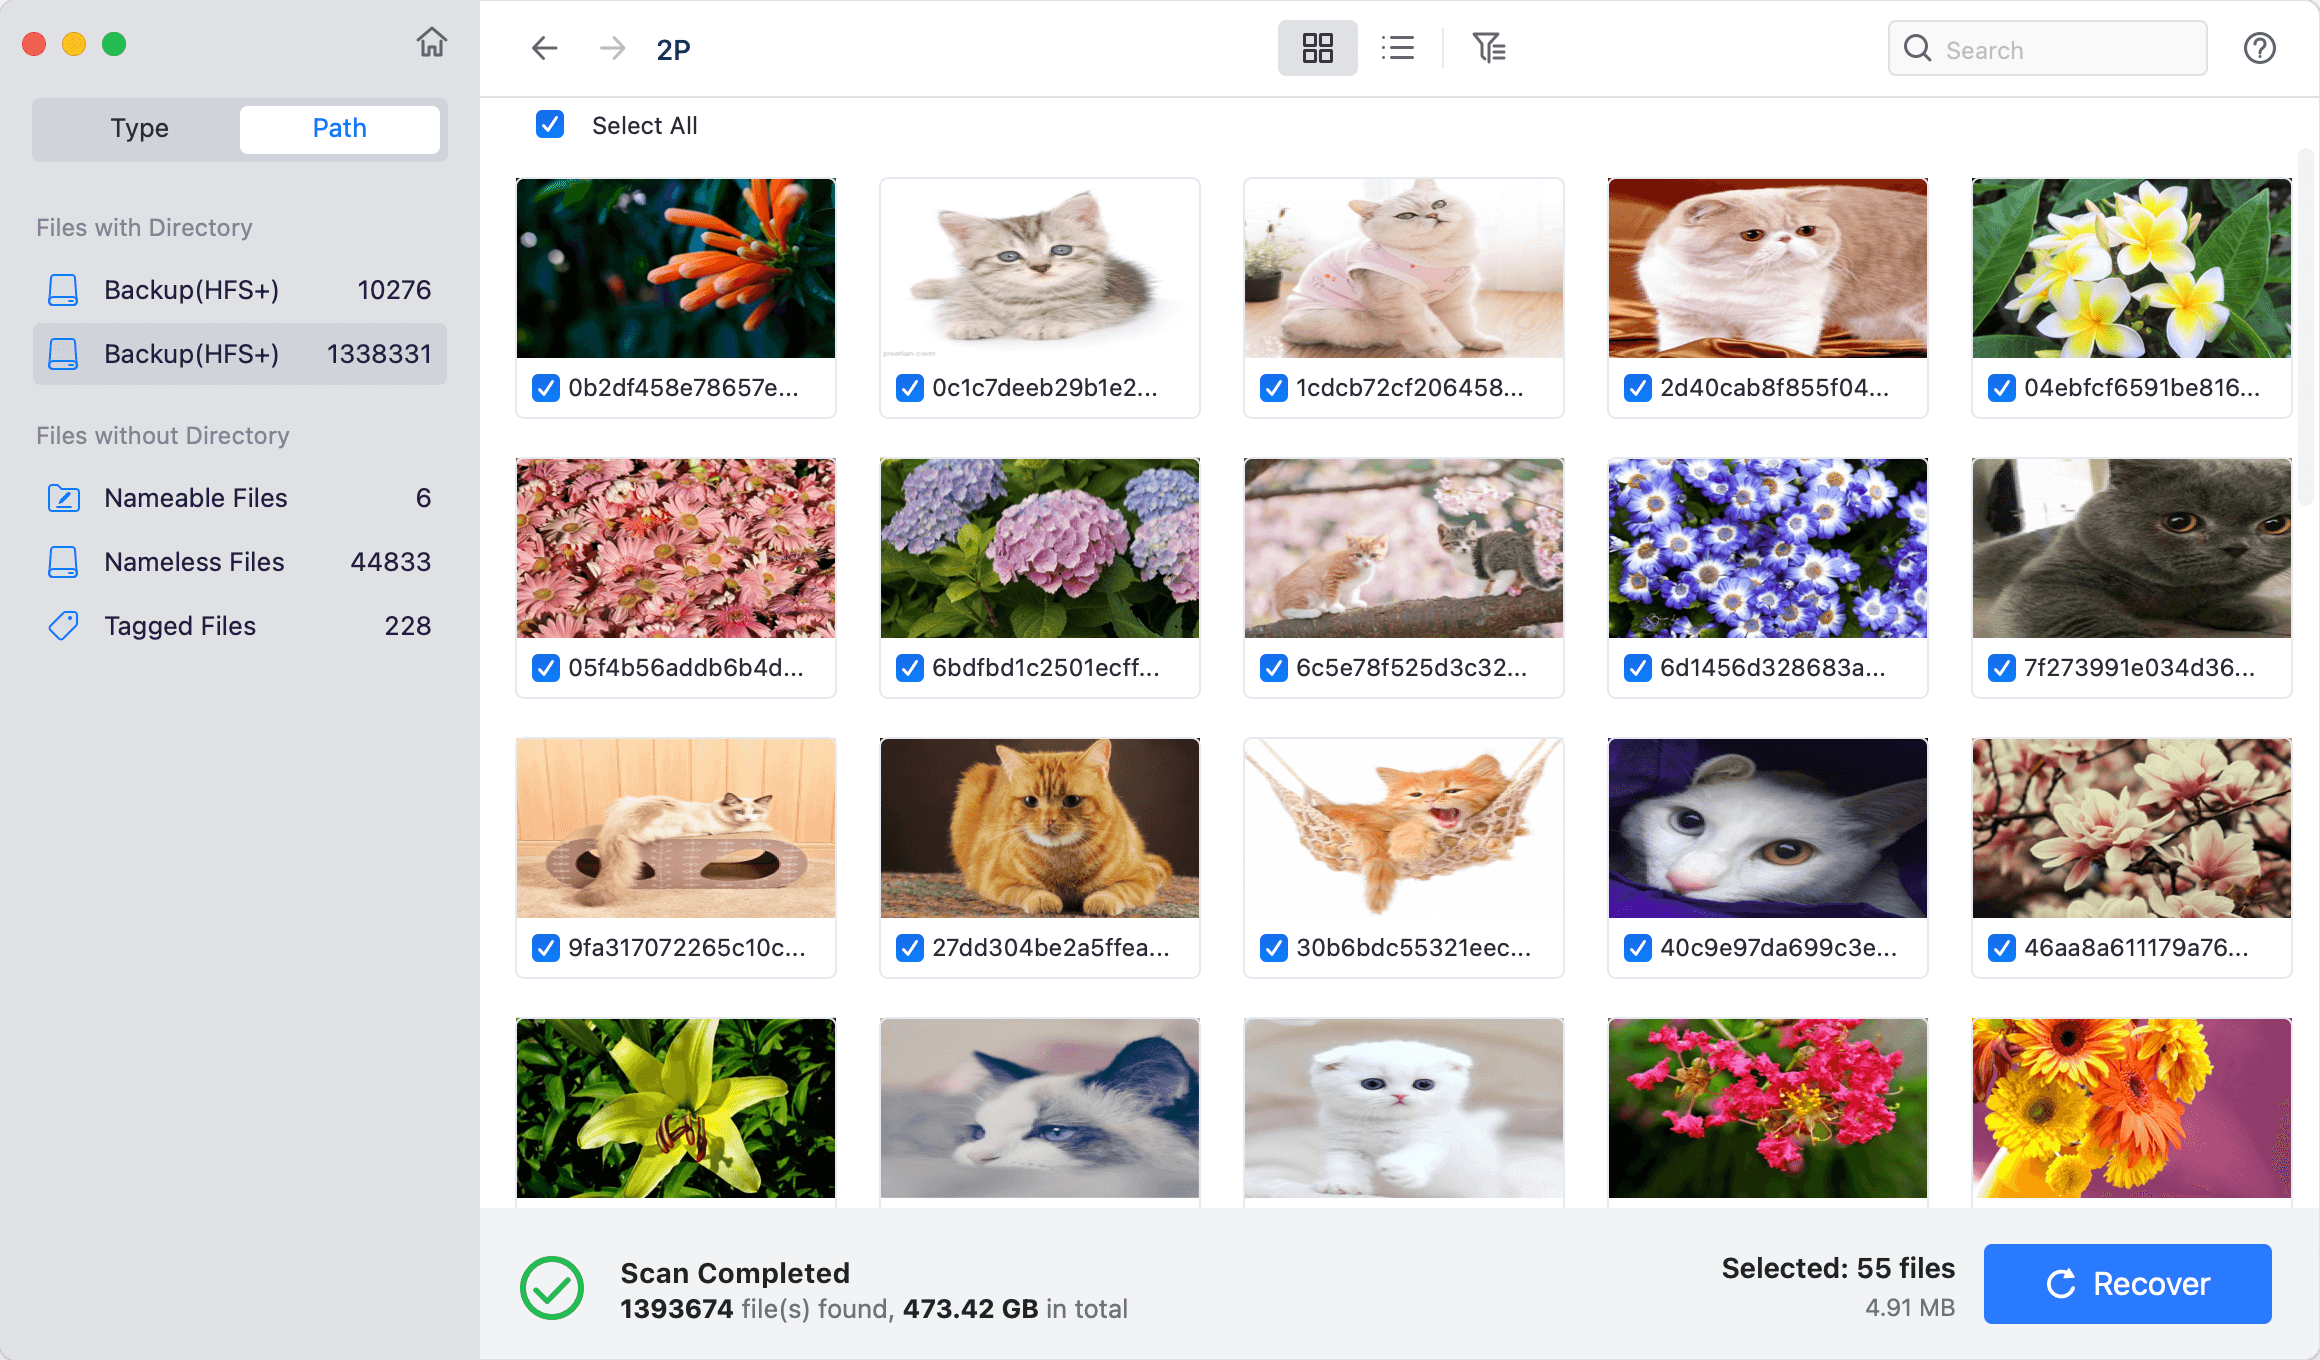
To ensure the highest recovery success rate, stop downloading apps or saving large movies onto your Mac immediately after the downgrade, as doing so could overwrite the invisible lost data.
FAQs about the macOS 27 Golden Gate Downgrade
Wrapping Up
Moving back from macOS 27 Golden Gate to macOS 26 Tahoe is the best way to get your system stability and application compatibility back. Whether you use an old Time Machine backup, a bootable USB installer, or Internet Recovery, the process is straightforward when broken down step by step.
Always remember to back up your critical items first, and keep a dependable data safety net like Do Your Data Recovery ready on the side to make your operating system migration entirely stress-free.
Do Your Data Recovery for Mac
Do Your Data Recovery for Mac, one of the best Mac data recovery software, can help you easily and completely recover deleted, formatted or lost files from Mac HDD/SSD, external HDD/SDD, USB drive, memory card, digital camera, or other storage devices.
Written & Updated by Ricky Lin
Ricky Lin is an senior editor of DoYourData who lives in Adelaide, Australia. He is interested in writing technology articles related with data recovery, computer issue fixes, disk clone, iPhone data recovery, video edit, Mac optimization, etc. He Joined DoYourData in 2019 and have written 500+ articles to help both Windows users and Mac users to solve data or computer problems.