Top 4 Methods to Recover Lost Data after Upgrading to macOS Monterey
Data loss might happen after upgrading to macOS Monterey for some reasons. No matter the files were deleted or lost because of other factors, there are several ways to rescue the lost files. This write-up here will provide the instructions to hep you recover deleted or lost files on macOS Monterey with 4 different methods.
![]() Updated by Justin Kenny on September 5, 2024
Updated by Justin Kenny on September 5, 2024

Quick Navigation:
- How to Recover Lost Data on macOS Monterey?
- Method 1: Recover Lost macOS Monterey Data from A Time Machine Backup
- Method 2: Recover Deleted Files from macOS Monterey Trash
- Method 3: Recover Files from iCloud Backup on macOS Monterey
- Method 4: Recover Lost Data with Software on macOS Monterey
- Bonus Tips: Back Up macOS Monterey to Prevent Data Loss
- Conclusion
- FAQs About Data Recovery on macOS Monterey
If you're curious about those files that disappear on your desktop after an update of macOS Monterey or where the deleted files are gone. We'll teach you how to get them back securely. Accidental data loss is a common issue for Mac OS Monterey users. Even if you have the most up-to-date MacBook Pro, you still run the risk of accidentally erasing crucial data.
It might be a stressful situation that has to be resolved immediately. Using the cleaning drive, you were able to remove all of your Mac's unnecessary and space-hogging files. However, there were a few crucial files that you didn't want to remove.
Later, when you realize that those files are gone and no longer accessible in their respective directories, you begin to regret the action. And now you're desperate to get back the data you accidentally erased from your Mac’s hard drive.
In this article, we'll go through top 4 ways to get back files that have been accidentally deleted from your macOS Monterey system or external device.
How to Recover Lost Data on macOS Monterey?
Files on macOS Monterey might be lost due to different issues. You may deleted files by mistake, formatted a drive accidentally, or lost files due to macOS Monterey system updates, etc. In different situations, there are different methods to get back the lost files.
For instance, if you deleted some files wrongly, you can first go to check and restore the deleted files from the Trash. If you have backed up your files with system built-in tools or third-party software, you can try to extract the specified files from the backups. If you don't even have backed up the files in any way, then you can still try the last method to recover the lost files with a professional data recovery software for macOS Monterey. Here we will try to explain and guide you to recover deleted or lost files on macOS Monterey with 4 different methods.
Method 1: Recover Lost macOS Monterey Data from A Time Machine Backup
Before installing macOS 12 Monterey, every instruction will encourage you to create a recent backup of your Mac if there are any difficulties, such as data loss, after the upgrade. Using a Time Machine backup to restore files and even the whole system is quite simple.
Get your Time Machine backup disk attached and powered on before you begin. You'll want to make sure your Mac and disk are linked to the same network. If you accidentally deleted files, you may restore them by following the steps outlined below.
📄 Restore specified files from Time Machine backup
If you only want to restore specified and individual files from the Time Machine Backups, you can do as follows.
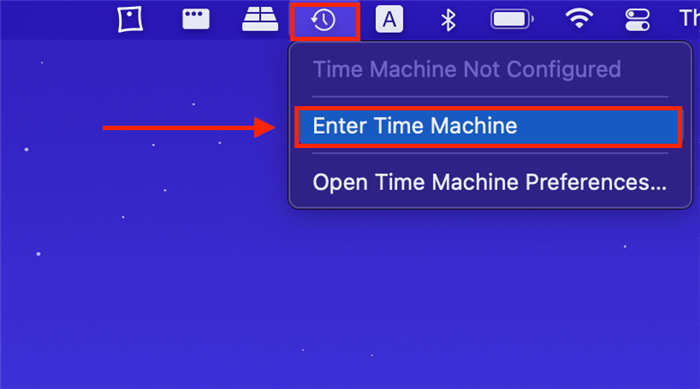
Step 1. Click Enter Time Machine from the top task bard on macOS Monterey.
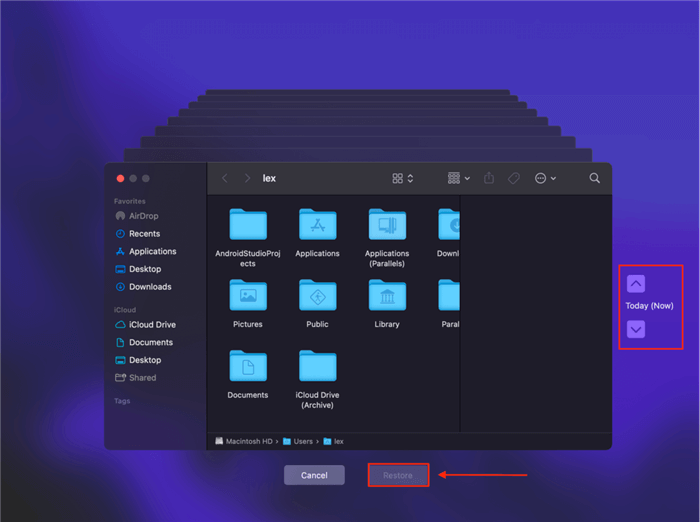
Step 2. Navigate and choose a recent backup which contains the wanted files. Then choose the wanted files or folders, then click the Restore button to restore the files directly.
💻 Restore entire system from Time Machine backup
Step 1. To go to macOS Recovery mode, you may start your Mac. When using an Apple computer with Apple silicon, the results are as follows: Shut down Mac by a hit and hold the power button until you see 'Loading startup options', then select Options, click Continue, and follow the on-screen instructions. When using an Intel-based Mac, choose the Apple menu, restart, press and hold Command+R until you see the starting screen, and follow the on-screen instructions to reboot.
Step 2. On your computer's built-in recovery disk, choose Reinstall macOS Monterey in the Recovery screen, and then press the Continue button to continue.
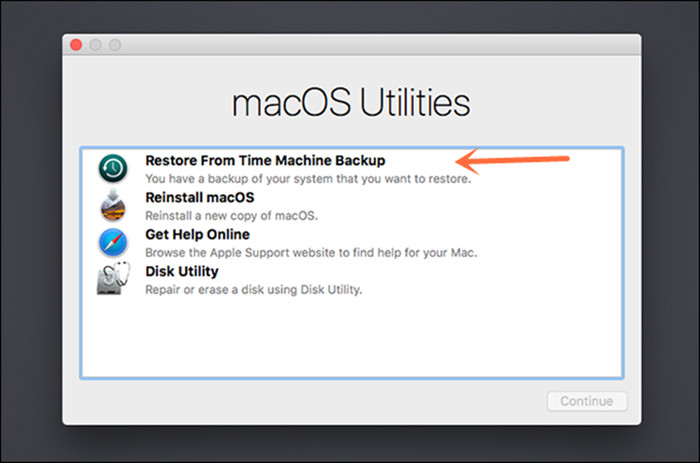
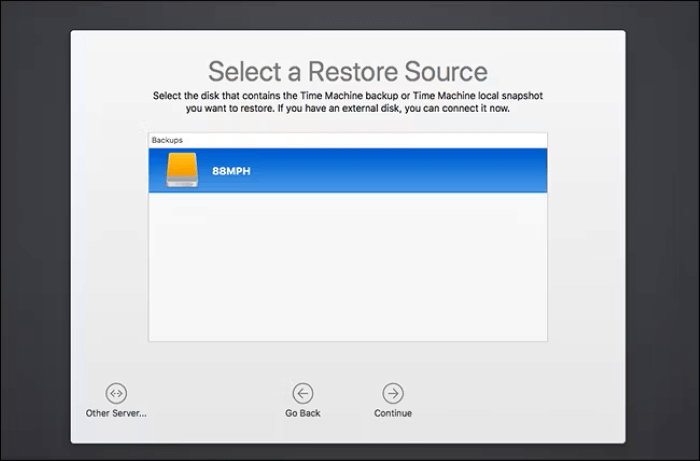
Step 3. A Time Machine backup or another Mac may be used as a data source after installing the new system files. Select Restore From Time Machine Backup, then click on Continue.
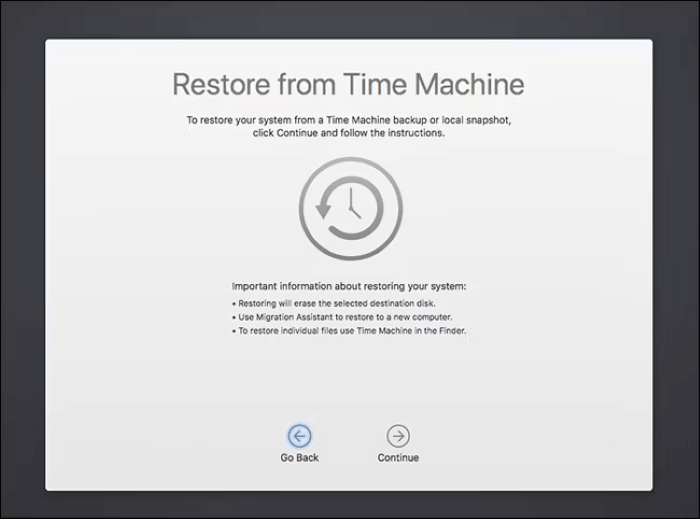
Step 4. On the Restore From Time Machine page, just press the Continue.
Step 5. Then choose the backup drive for Time machine. Access credentials for your backup drive may be needed. Depending on how the backup was encrypted, you may also be prompted for the password.
Step 6. All the available backups on the drive will show up, you can check the date and choose a recent one and click Continue.
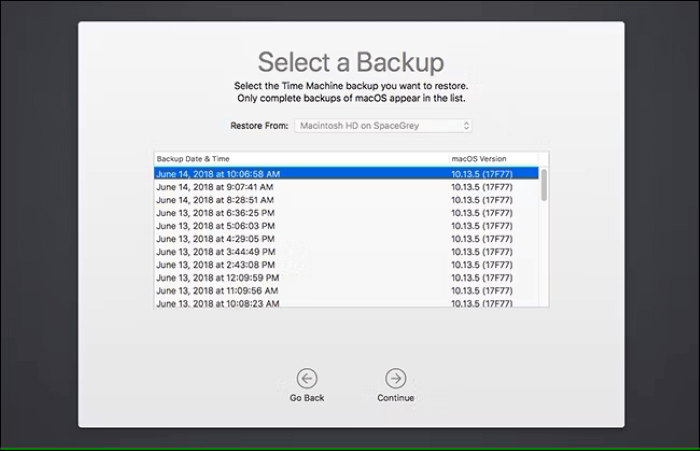
Follow the on-screen steps after selecting the date and time of the backup you wish to restore. Time Machine may perform a complete backup of your system at the next scheduled backup time after executing the restoration. It’s very usual for this to happen. After completing a full backup, Time Machine restarts incremental backups.
Method 2: Recover Deleted Files from macOS Monterey Trash
The Trash is a folder on a Mac where deleted files are kept until they are manually or automatically emptied. Trash files may be recovered with a few easy clicks until they are in the Trash, and the recovery is guaranteed.
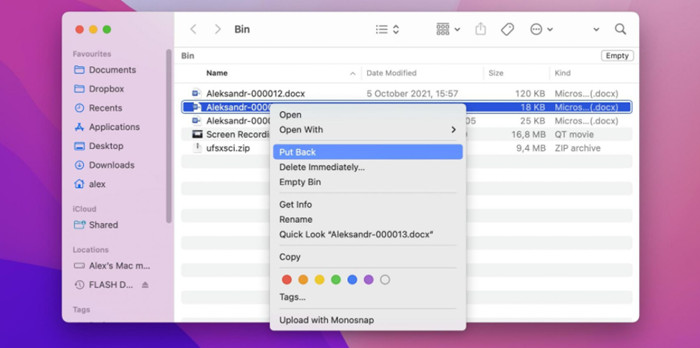
Step 1. In the Dock, click the Trash icon to start the process.
Step 2. Choose your file, and if you know the name of the file you wish to recover, you may use the search box to find it.
Step 3. Right-click any of the chosen files and choose 'Put Back'.
If you don’t want to restore the deleted files to their original directories, you may drag and drop them to a new location of your choosing.
Method 3: Recover Files from iCloud Backup on macOS Monterey
If you have backed up data on iCloud, you can also try to extract the files from iCloud once you suffer data loss. Here is how:
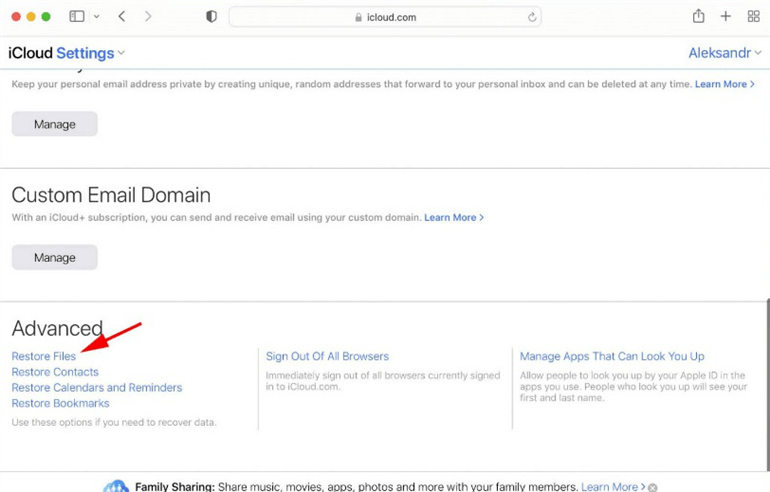
Step 1. Log your iCloud account in browser, and click Account Settings.
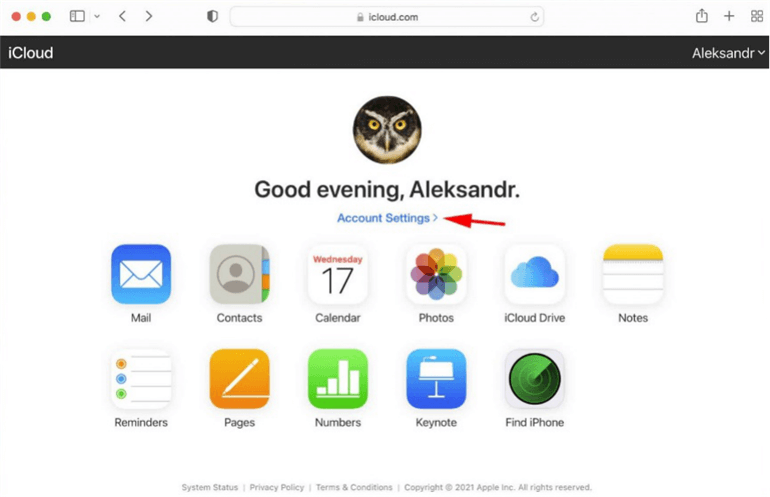
Step 1. Scroll down and then find the Restore Files under Advanced section. Click it to continue.
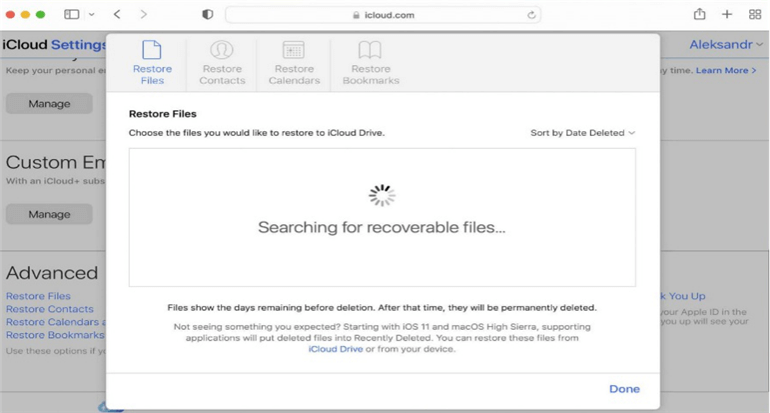
Step 1. It will take some time to show all the files and then you can choose the wanted files to restore.
Method 4: Recover Lost Data with Software on macOS Monterey
If you can not recover lost files with the methods mentioned above, you can try macOS Monterey software. This is the easiest way to recover deleted, formatted or lost files on macOS Monterey. Do Your Data Recovery for Mac is one of the most powerful Mac data recovery software, and it supports for all OS X and macOS systems including macOS Monterey. Download it here:
Do Your Data Recovery for Mac
- Quickly undelete files on macOS Monterey even you have emptied trash bin on macOS Monterey.
- Unformat h ard drive on macOS Monterey, recover erased data on macOS Monterey.
- Recover inaccessible or corrupted data on macOS Monterey.
Do Your Data Recovery supports to recover all types of lost files including photos, documents, videos, audio files, emails, archives, etc. It can recover lost data from macOS Monterey disk, external hard drive, Mac, USB flash drive, memory card, digital camera, etc. Now, follow the steps below to recover lost data on macOS Monterey:
Step 1. Select the hard drive where you lose your files.
Open Do Your Data Recovery on your Mac computer, it lists all hard drives and external devices. Now, just select the hard drive where you delete or lose your files.

Step 2. Scan your hard drive to find lost files.
Click on Scan button. The software will deeply scan the hard drive and search for the possible lost files.
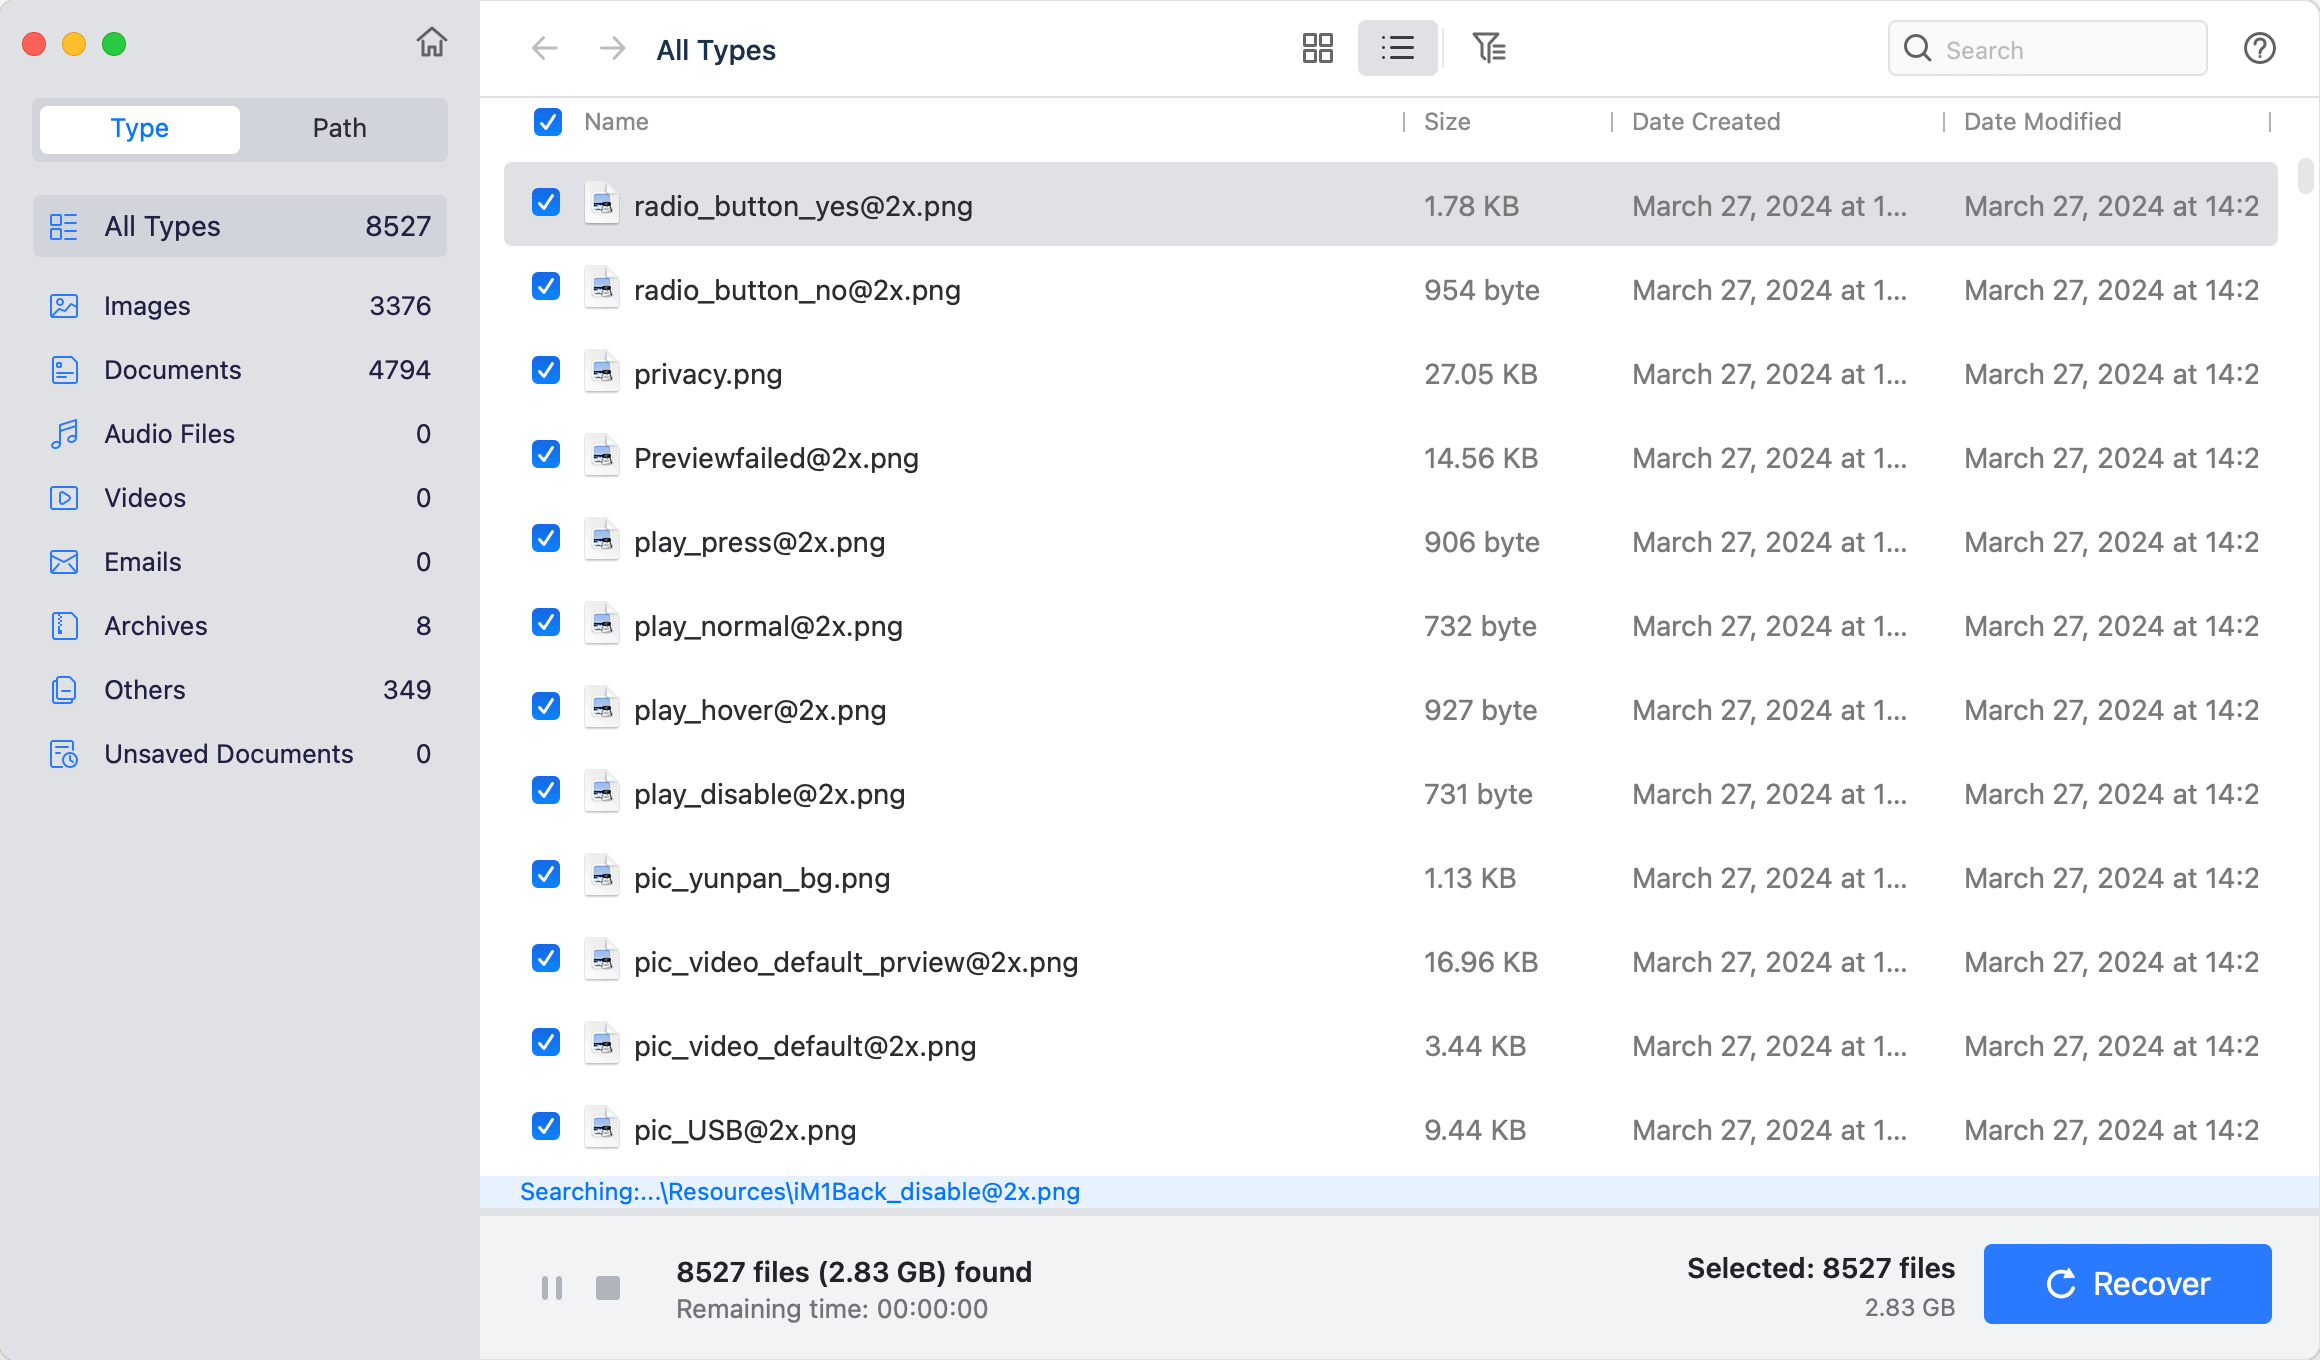
Step 3. Preview and recover lost files.
Once the scan is completed, you can preview all recoverable files. Then select the wanted files and save them.

Bonus Tips: Back Up macOS Monterey to Prevent Data Loss
To keep your data from losing on macOS Monterey, it's highly suggest to back up your files regularly. Here are many tools you can utilize to back up files on macOS Monterey. You can back up the files and system with Time Machine, or sync your important files to iCloud or other cloud services. Here we recommend another third-party software - DoYourClone for Mac.
This software provide flexible methods to help you back up the personal files or the entire system drive. You can check the 3 modes and choose a proper one(s) to back up your files on macOS Monterey.
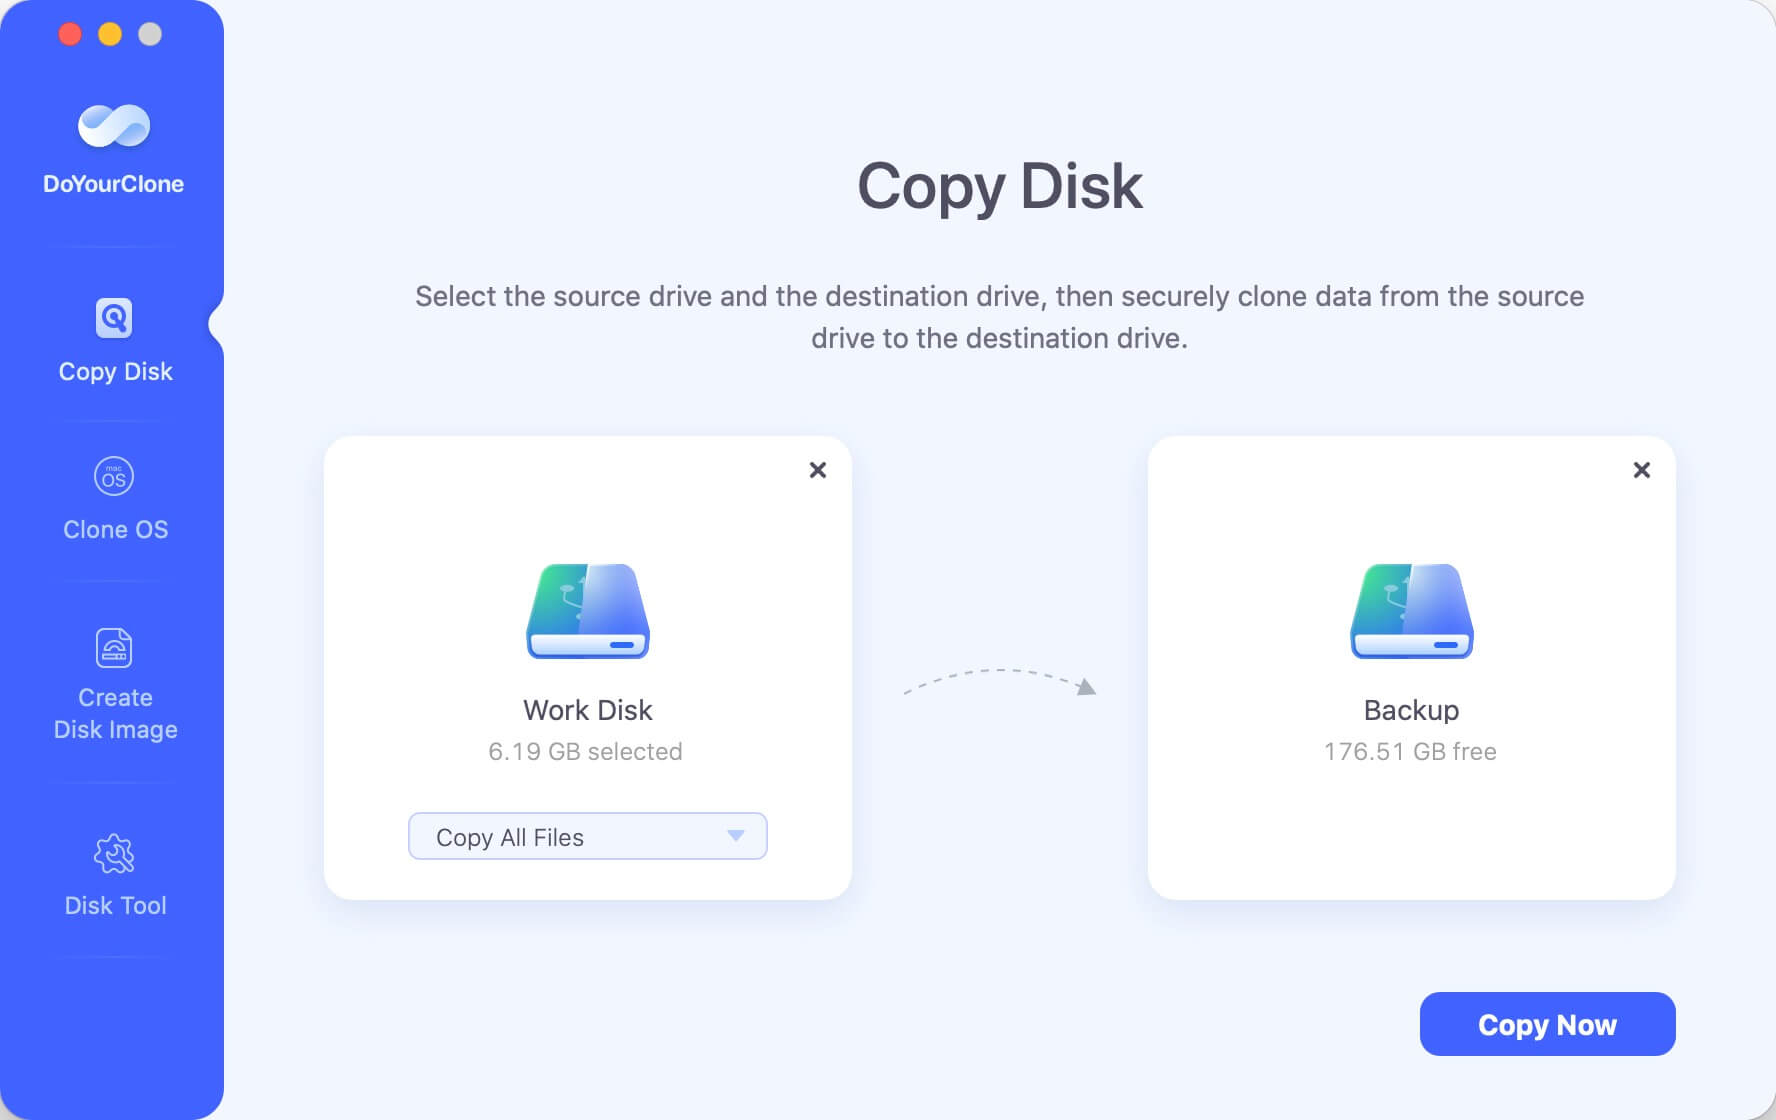
Copy Disk:
With this mode, the software can copy selected files or folders with the original directories to another place. Then you can access and use the copied files on the destination place directly. With this mode, the software will not affect the existing files on the destination disk.
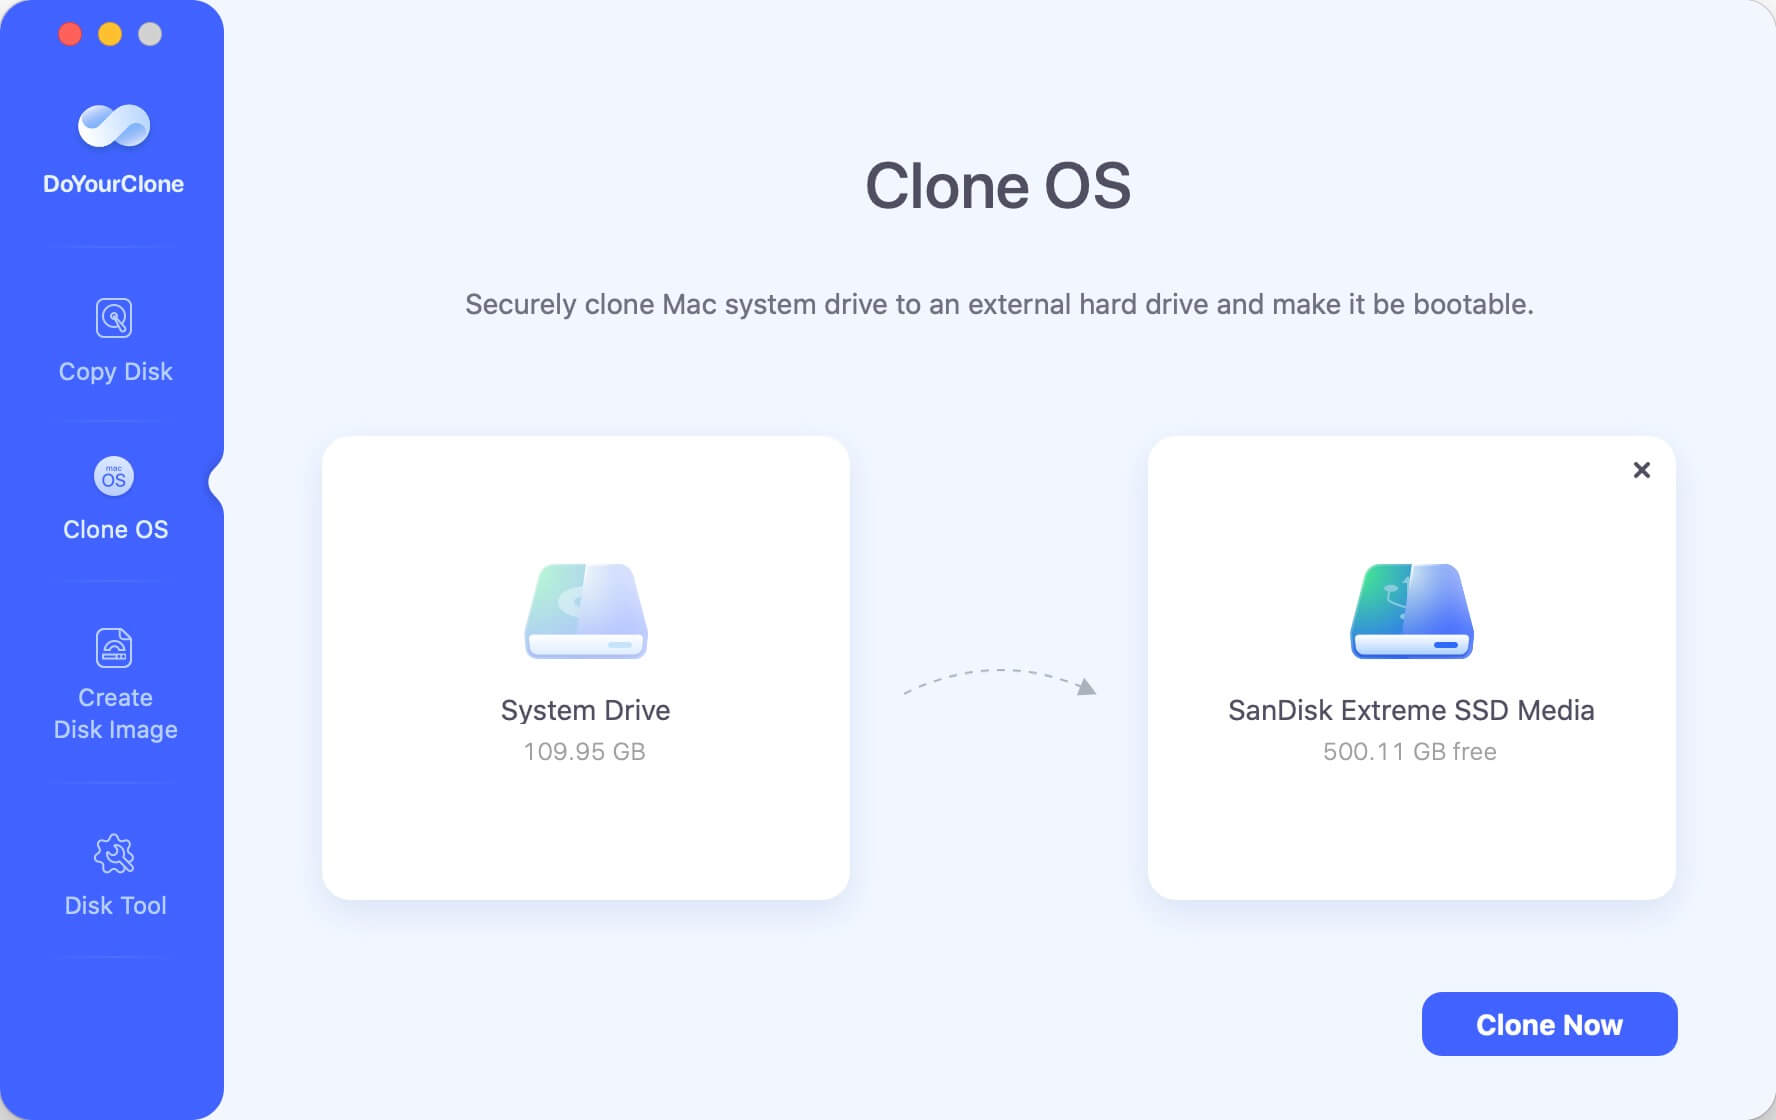
Clone OS:
This feature is very strong and can create a bootable copy of your macOS Monterey. It will copy the entire system drive of macOS Monterey along with all the data and system information. It can ensure the cloned drive can boot into macOS Monterey.
✍Note:
As the clone process will overwrite the destination disk, please ensure to connect an empty disk as destination. Otherwise, the data on the destination drive will be overwritten.
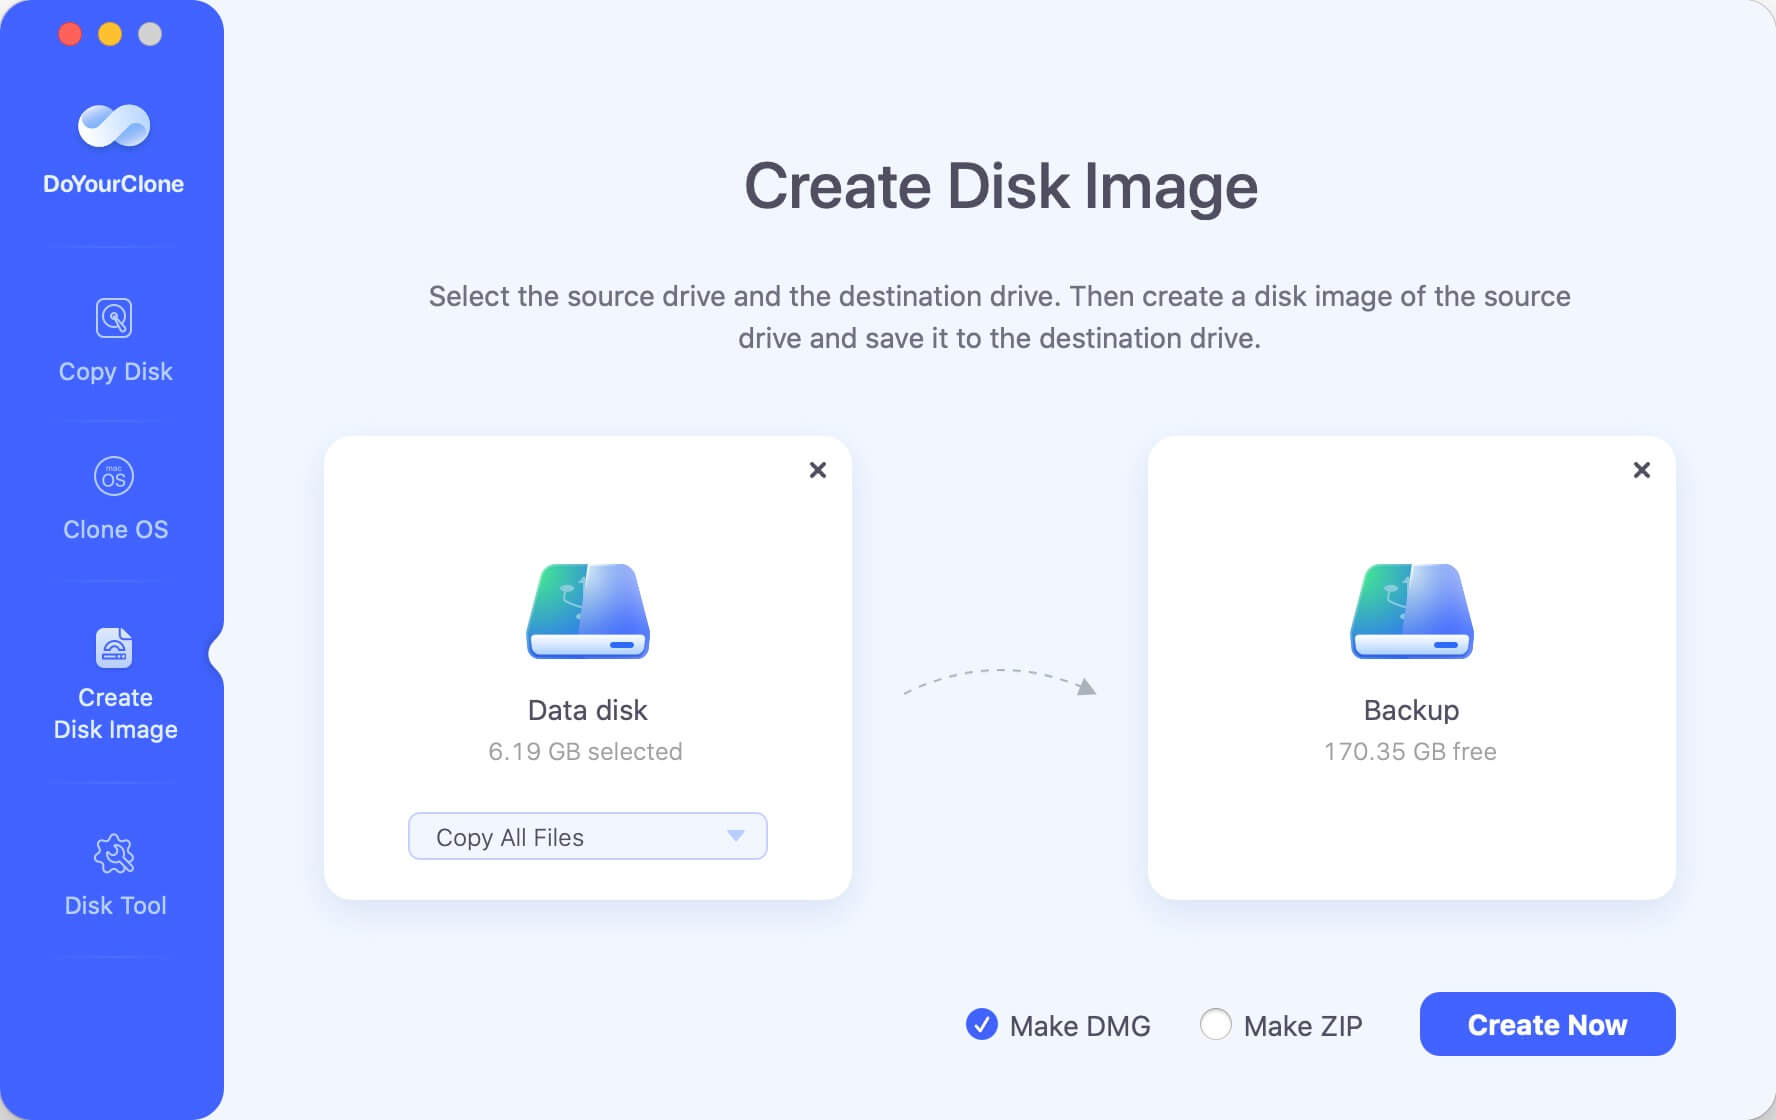
Create Disk Image:
Similar to the Copy Disk feature, this mode allows you to back up selected files or folders. However, it compresses them into a DMG or ZIP file, helping to archive and manage your backup data more efficiently.
Conclusion
We hope that the methods above can help you quickly recover deleted/lost files after upgrading to macOS Monterey. Data loss can result in big problems. When you are going to recover lost files on macOS Monterey, Do Your Data Recovery for Mac is a good choice, it can help you get back lost files, undelete files or unformat hard drive on macOS Monterey. We also recommend you to back up your macOS Monterey or other computers regularly to protect your data from data loss.
FAQs About Data Recovery on macOS Monterey
1. How would you lose files on macOS Monterey?
There are many factors that would lead to data loss on macOS Monterey, for example:
- Deleted files and empty macOS Monterey Trash by mistake.
- Unintended format the wrong drive on macOS Monterey.
- Lost files due to updating macOS Monterey system.
- Delete or lost volume from a disk on macOS Monterey.
- File system of a drive is corrupted and cannot access the drive.
2. How to restore specified files from Time Machine backup on macOS Monterey?
You can do as follows to restore individual files from a Time Machine backup on macOS Monterey:
- First open the location where you lost the files.
- Click the Time Machine icon from the top task bar and click Enter Time Machine.
- Then navigate and choose a version of the Time Machine backup which contain the wanted files.
- Select the files and click Restore button, the selected files will be restored to the original location.
3. How to restore macOS Monterey system from Time Machine backup?
Follow the steps below to restore the system from a Time Machine backup in Recovery mode:
- Go to Recovery mode of the Mac machine.
- Choose Restore From Time Machine Backup to continue.
- Select the backup drive for Time machine.
- Choose a recent version of Time Machine Backups and start the system restore process.
4. How to recover deleted or lost files with Do Your Data Recovery for Mac on macOS Monterey?
Please follow the simple steps to recover lost files on macOS Monterey with the best data recover software for Mac:
- Run the software on macOS Monterey.
- Select the drive where you lost data, click the Scan button to scan the drive.
- After the scan is finished, choose the wanted files and save to another drive.
Do Your Data Recovery for Mac
Do Your Data Recovery for Mac, one of the best Mac data recovery software, can help you easily and completely recover deleted, formatted or lost files from Mac HDD/SSD, external HDD/SDD, USB drive, memory card, digital camera, or other storage devices.
Written & Updated by Justin Kenny
Justin Kenny is a writer & editor of DoYourData. He joined DoYourData in 2016 and focuses on writing articles about Windows data recovery, Mac data recovery, external device data recovery, hard drive clone, data erasure, Mac cleanup, computer issue fixes, etc. He is a super fan of Apple devices and is big on testing new digital device and system utility software.