How to Recover Permanently Deleted Files on macOS 27 Golden Gate
We have all been there. You are cleaning up your desktop, managing your storage, or clearing out old project folders on your Mac. You realize you have just deleted an incredibly important file. To make matters worse, you emptied the Trash. Don't worry, Do Your Data Recovery for Mac can help you get back the deleted essential document, irreplaceable family photo, or critical work presentation.
 Updated by Justin Kenny on July 14, 2026
Quick Navigation:
- What Happens When Deleting a File on macOS 27?
- Popular Methods to Recover Deleted Files on macOS 27
- Pro-Tips to Secure Your Data on macOS 27 Golden Gate
- FAQs about Deleted File Recovery on macOS 27
- Wrapping Up
If you have recently upgraded your Mac to the futuristic macOS 27 Golden Gate, you might be wondering if the traditional file recovery tricks still work on Apple's latest operating system. With new file system optimizations, advanced security updates, and smarter cloud integrations, macOS 27 Golden Gate changes a few things under the hood. However, the short answer is: Yes, you can absolutely recover permanently deleted files on macOS 27 Golden Gate.

In this comprehensive, beginner-friendly guide, we will break down exactly what happens when data is permanently erased and show you the most effective ways to get your data back. Whether you have a recent backup or no backup at all, we have got you covered.
What Happens When Deleting a File on macOS 27?
Before jumping into the step-by-step recovery methods, it helps to understand how macOS 27 Golden Gate handles file deletion. When you select a file and empty the Trash, your Mac does not immediately shred the data from your solid-state drive (SSD).
Instead, macOS 27 simply deletes the 'pointer' or index entry for that file and marks the physical storage space it occupied as 'available' for new data. As long as your Mac has not written new data over that specific sector of the drive, the original file remains fully intact but invisible to the operating system. This is why timing is everything when trying to recover permanently deleted files on macOS 27 Golden Gate. The sooner you stop using your Mac and begin the recovery process, the higher your chances of success.
Popular Methods to Recover Deleted Files on macOS 27
Depending on your current setup and backup habits, there are several different ways to rescue your lost data. Let's look at the most reliable and popular options available today.
Method 1: Restore from a Time Machine Backup
Apple's built-in backup utility, Time Machine, remains one of the most reliable ways to recover permanently deleted files on macOS 27 Golden Gate. If you have this feature configured with an external drive or a network backup target, your files are likely saved in a historical snapshot.
To restore files from Time Machine, follow these steps:
- Connect your Time Machine backup drive to your Mac.
- Open the folder where your deleted file used to live (for example, your Documents folder).
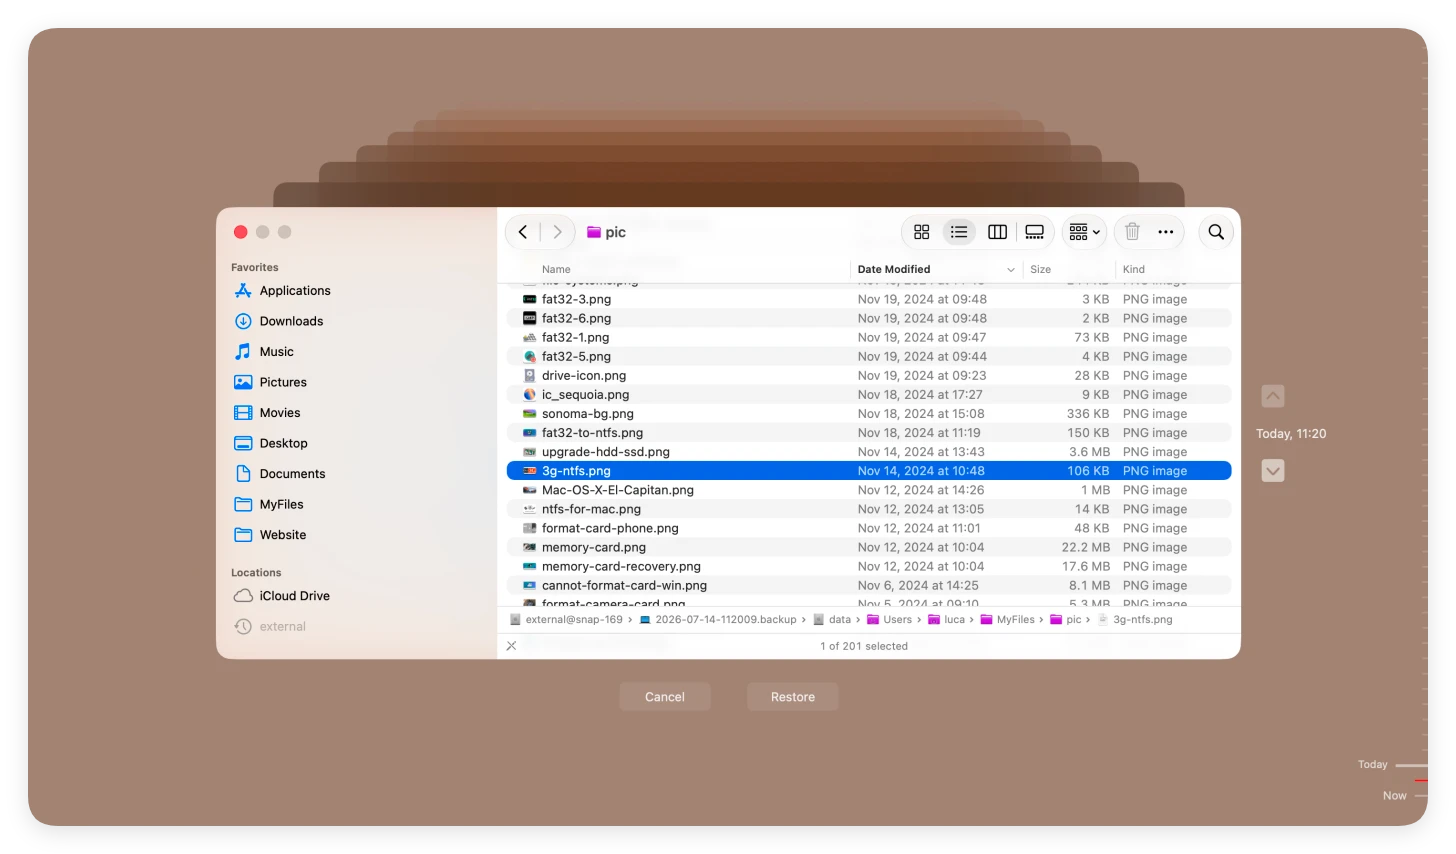
- Click the Time Machine icon in your menu bar and select Browse Time Machine Backups.
- Use the timeline on the right side of the screen to roll back to a point in time before the file was deleted.
- Locate the file, select it, and click the Restore button. The file will be placed back in its original folder.
Method 2: Check for APFS Local Snapshots via Terminal
Even if your external Time Machine drive is not plugged in, macOS 27 Golden Gate automatically creates periodic 'local snapshots' on your internal APFS drive. These snapshots can save your life if you accidentally wiped files a few hours ago.
To look for and mount local snapshots using Terminal, try this method:
- Open the Terminal app (press Command + Space, type Terminal, and press Enter).
- Type the command tmutil listlocalsnapshots / and hit Enter to view a list of available local backups sorted by date.

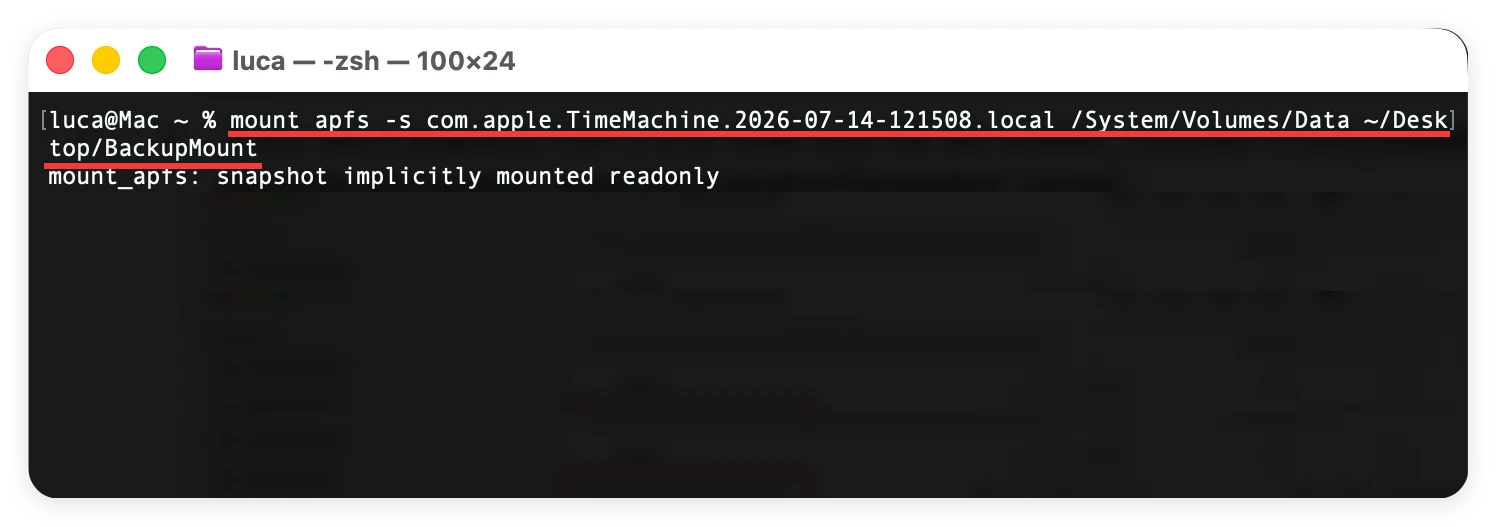
- Create an empty folder to act as a mount point so you can browse the snapshot with the command: mkdir ~/Desktop/BackupMount

- If you see a snapshot from a time when your file still existed, mounted it using mount_apfs -s [TimeMachineSpanshotName] /System/Volumes/Data ~/Desktop/BackupMount.
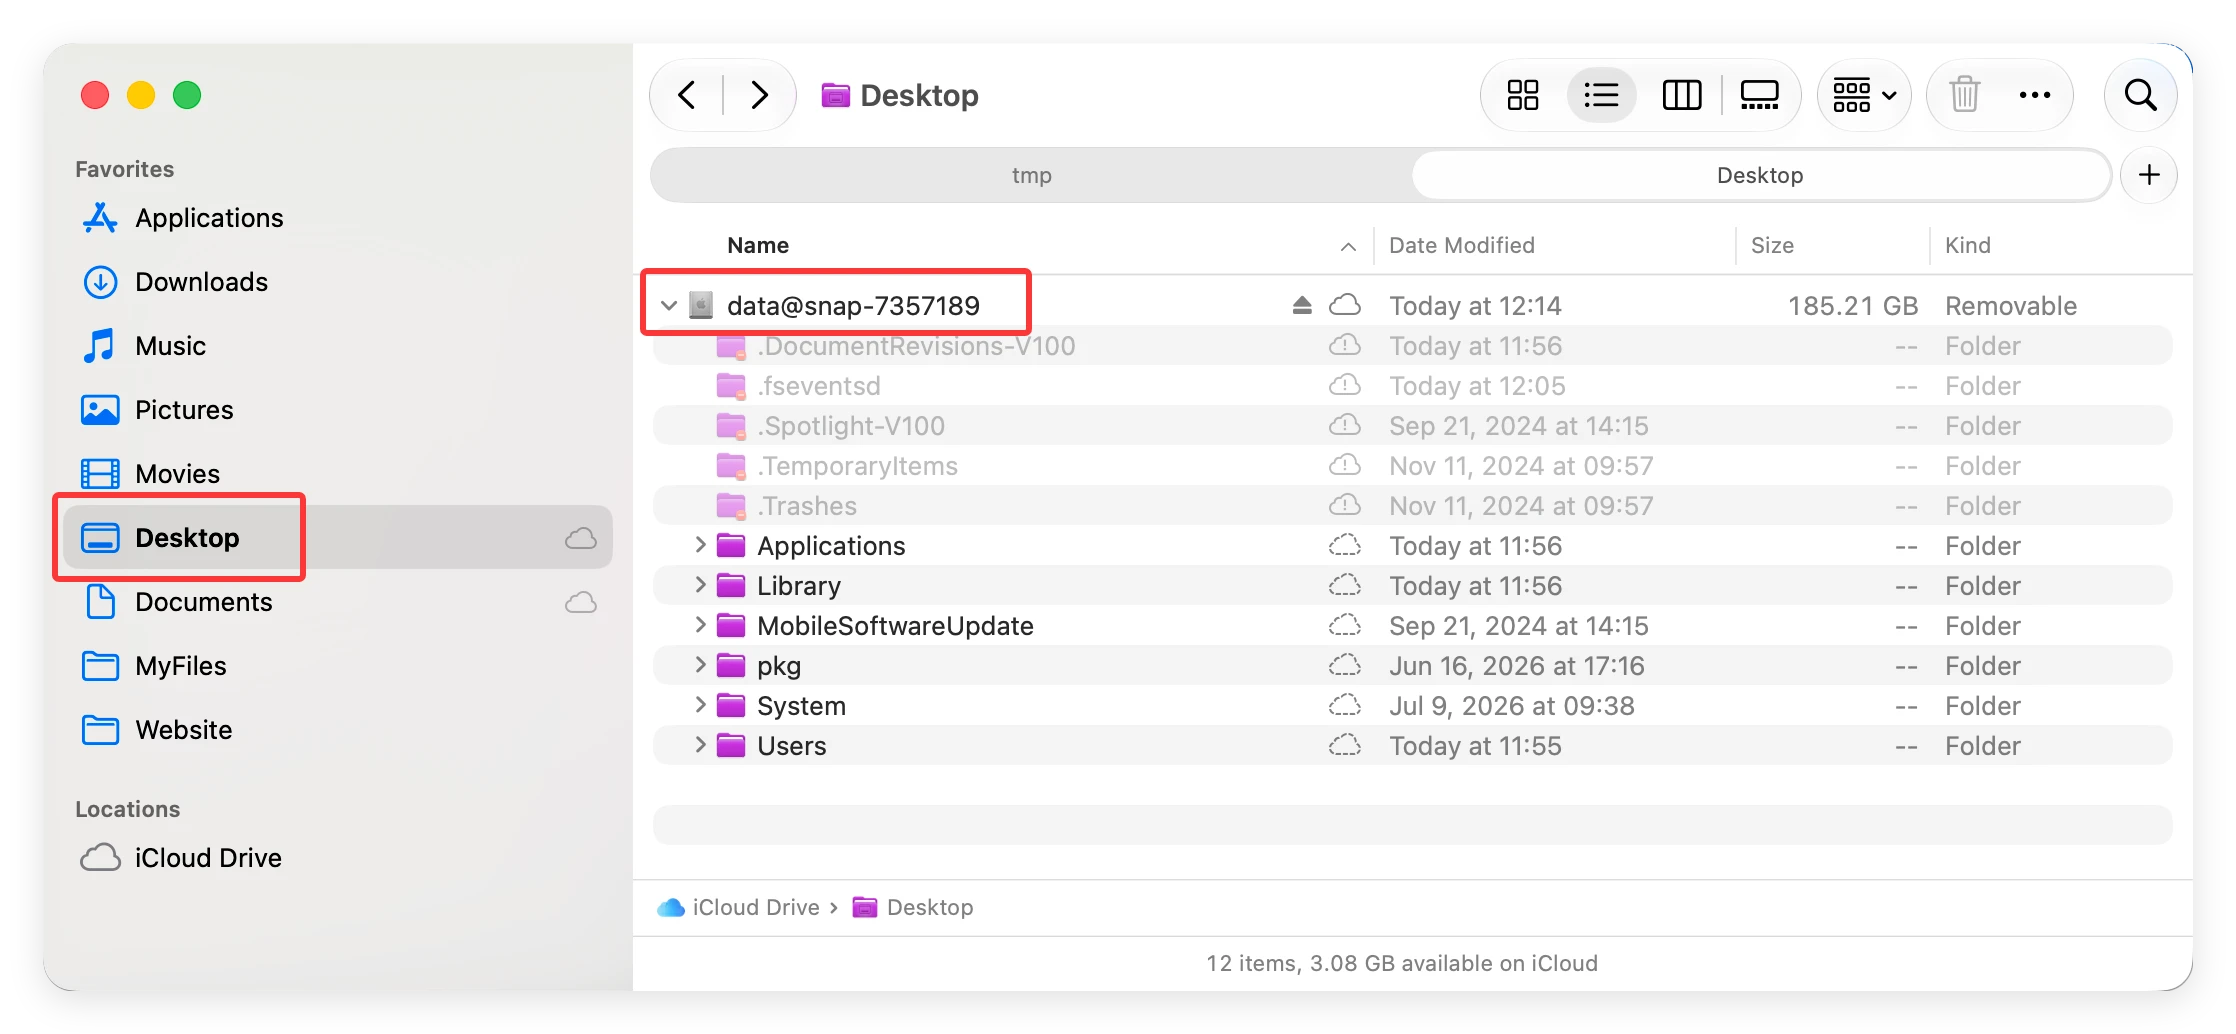
- Accessed the snapshot in Finder, browsed to get my files back.
Method 3: Retrieve Files from iCloud Drive Recently Deleted
Many Mac users sync their Desktop and Documents folders with iCloud. If you delete a file from a synchronized folder, it gets deleted across all your Apple devices. However, iCloud keeps a safety net for permanently deleted files for up to 30 days.
To check your iCloud trash chest:
- Open your web browser and sign in to iCloud.com with your Apple ID.
- Go to iCloud Drive.
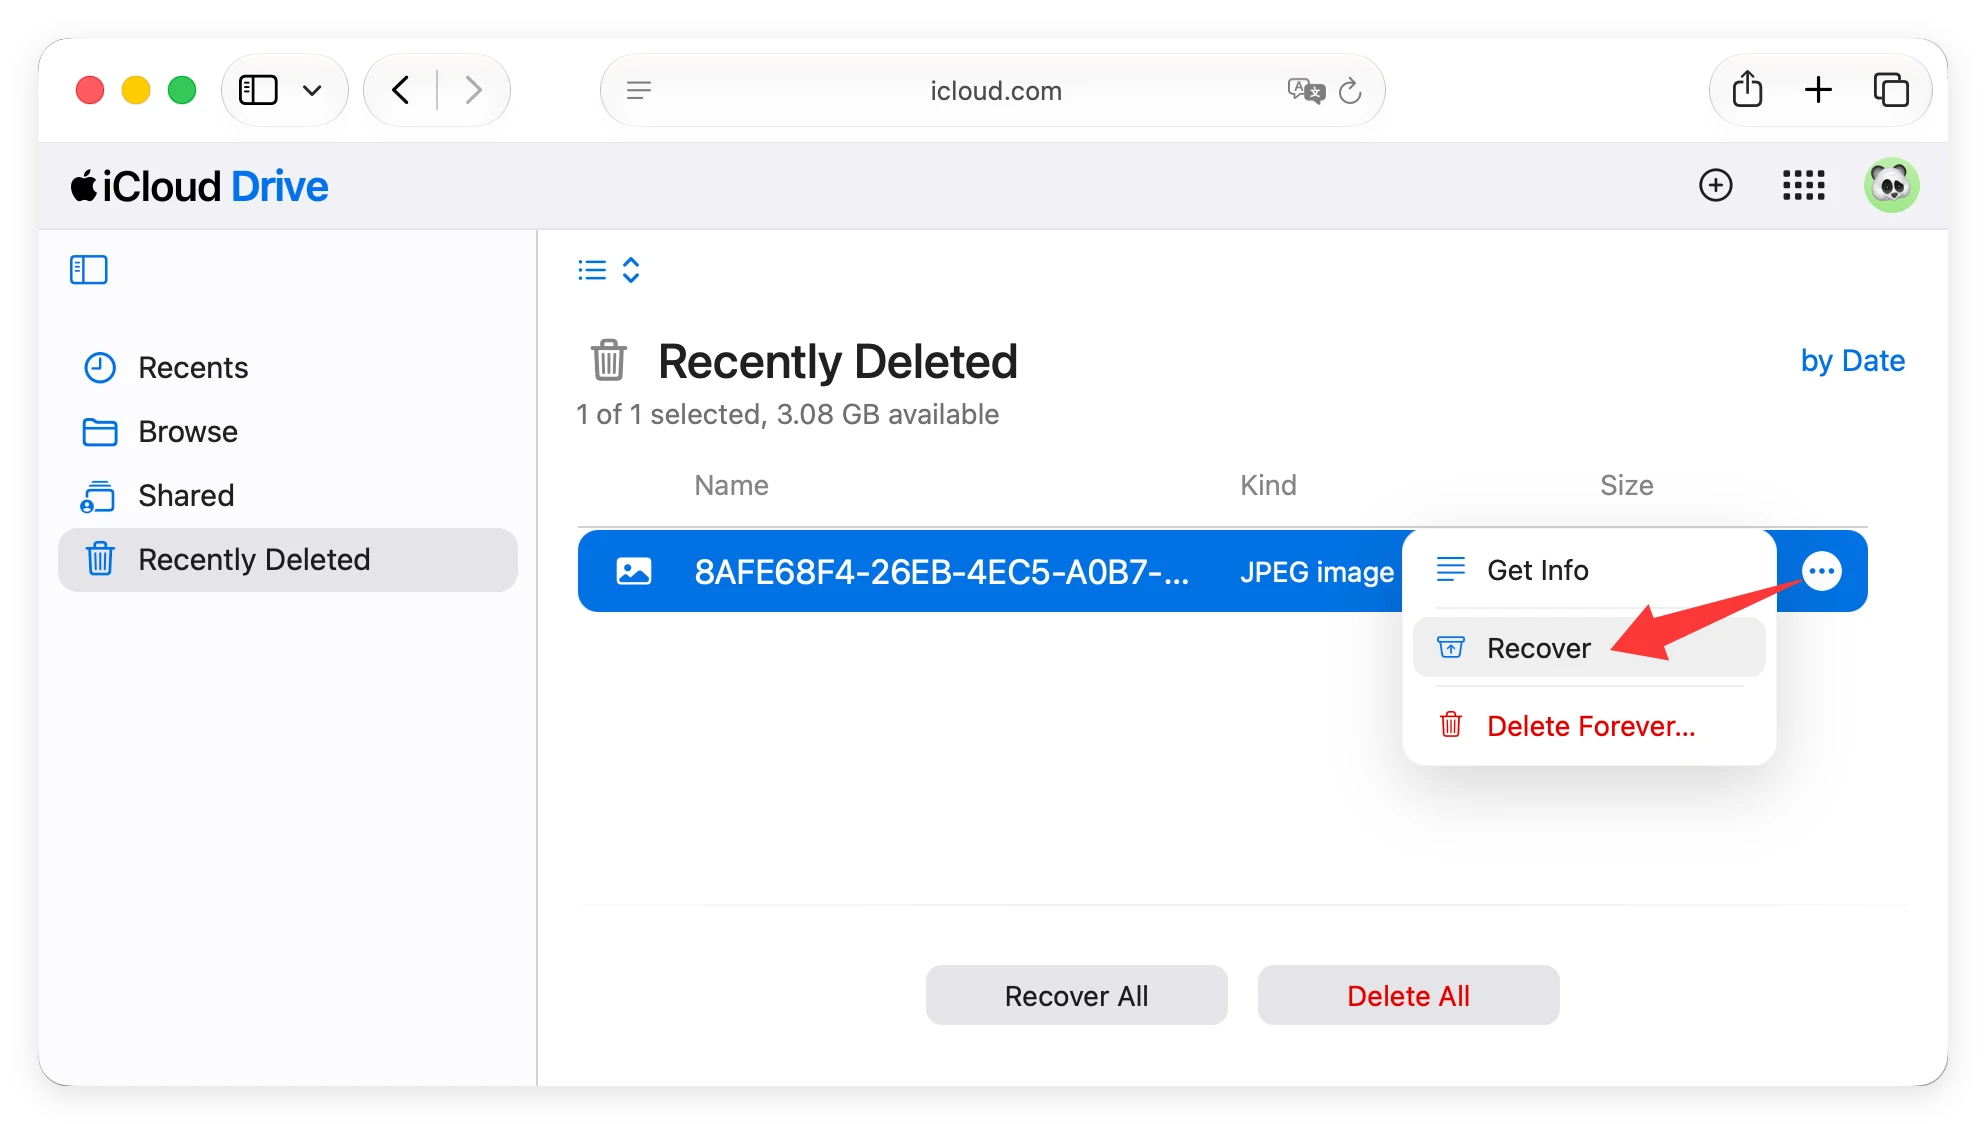
- Look at the sidebar on the left and click on Recently Deleted.
- Find the files you need, select them, and click Recover or Recover All button. They will automatically sync back to your Mac.
Method 4: Use Professional Software – Do Your Data Recovery for Mac
If you do not have a Time Machine backup, or if your files were deleted from an external drive, USB flash drive, or SD card, your best option is to use a dedicated file recovery utility. For macOS 27 Golden Gate users, Do Your Data Recovery for Mac is a powerful, highly recommended solution.
Do Your Data Recovery for Mac
- Effective to recover deleted files on macOS 27 Golden Gate.
- Recover deleted lost photos, videos, documents and more.
- Support data recovery for HDD/SSD, USB drive, SD card, etc.
This software is fully optimized to navigate the complex architecture of modern Apple Silicon chips and advanced APFS storage layouts. It features an intuitive, user-friendly interface that requires zero technical skills to operate.
Why Choose Do Your Data Recovery for Mac?
While built-in tools like Time Machine and iCloud are fantastic, they rely heavily on you having backups enabled before the data loss event occurs. If you didn't set up a backup, or if the file was deleted from an external device not covered by Time Machine, those options won't work.
This is where Do Your Data Recovery for Mac shines. It acts as your ultimate safety net, offering unique benefits:
- Deep Scan Technology: It uses advanced scanning algorithms to rebuild broken file structures, allowing it to find items that other software misses.
- Universal Compatibility: It works flawlessly across HDDs, SSDs, external memory cards, digital cameras, and USB drives.
- Safe File Preview: You don't have to guess if a file is corrupted. The tool lets you view images, read documents, and listen to audio clips before you spend any time recovering them.
- 100% Secure: It works in a read-only mode, meaning it will never overwrite or damage your existing data during the search process.
Steps to Recover Deleted Files on macOS Golden Gate
Here is the simple 3-step process to get your files back using this tool:
Step 1: Download and install Do Your Data Recovery for Mac on your system. To maximize your chances of recovery, try to install the software on a different drive or partition from the one where your files were lost.
Step 2: Launch the program and select the hard drive, external device, or specific folder where your deleted files were originally stored. Click the Scan button to begin.
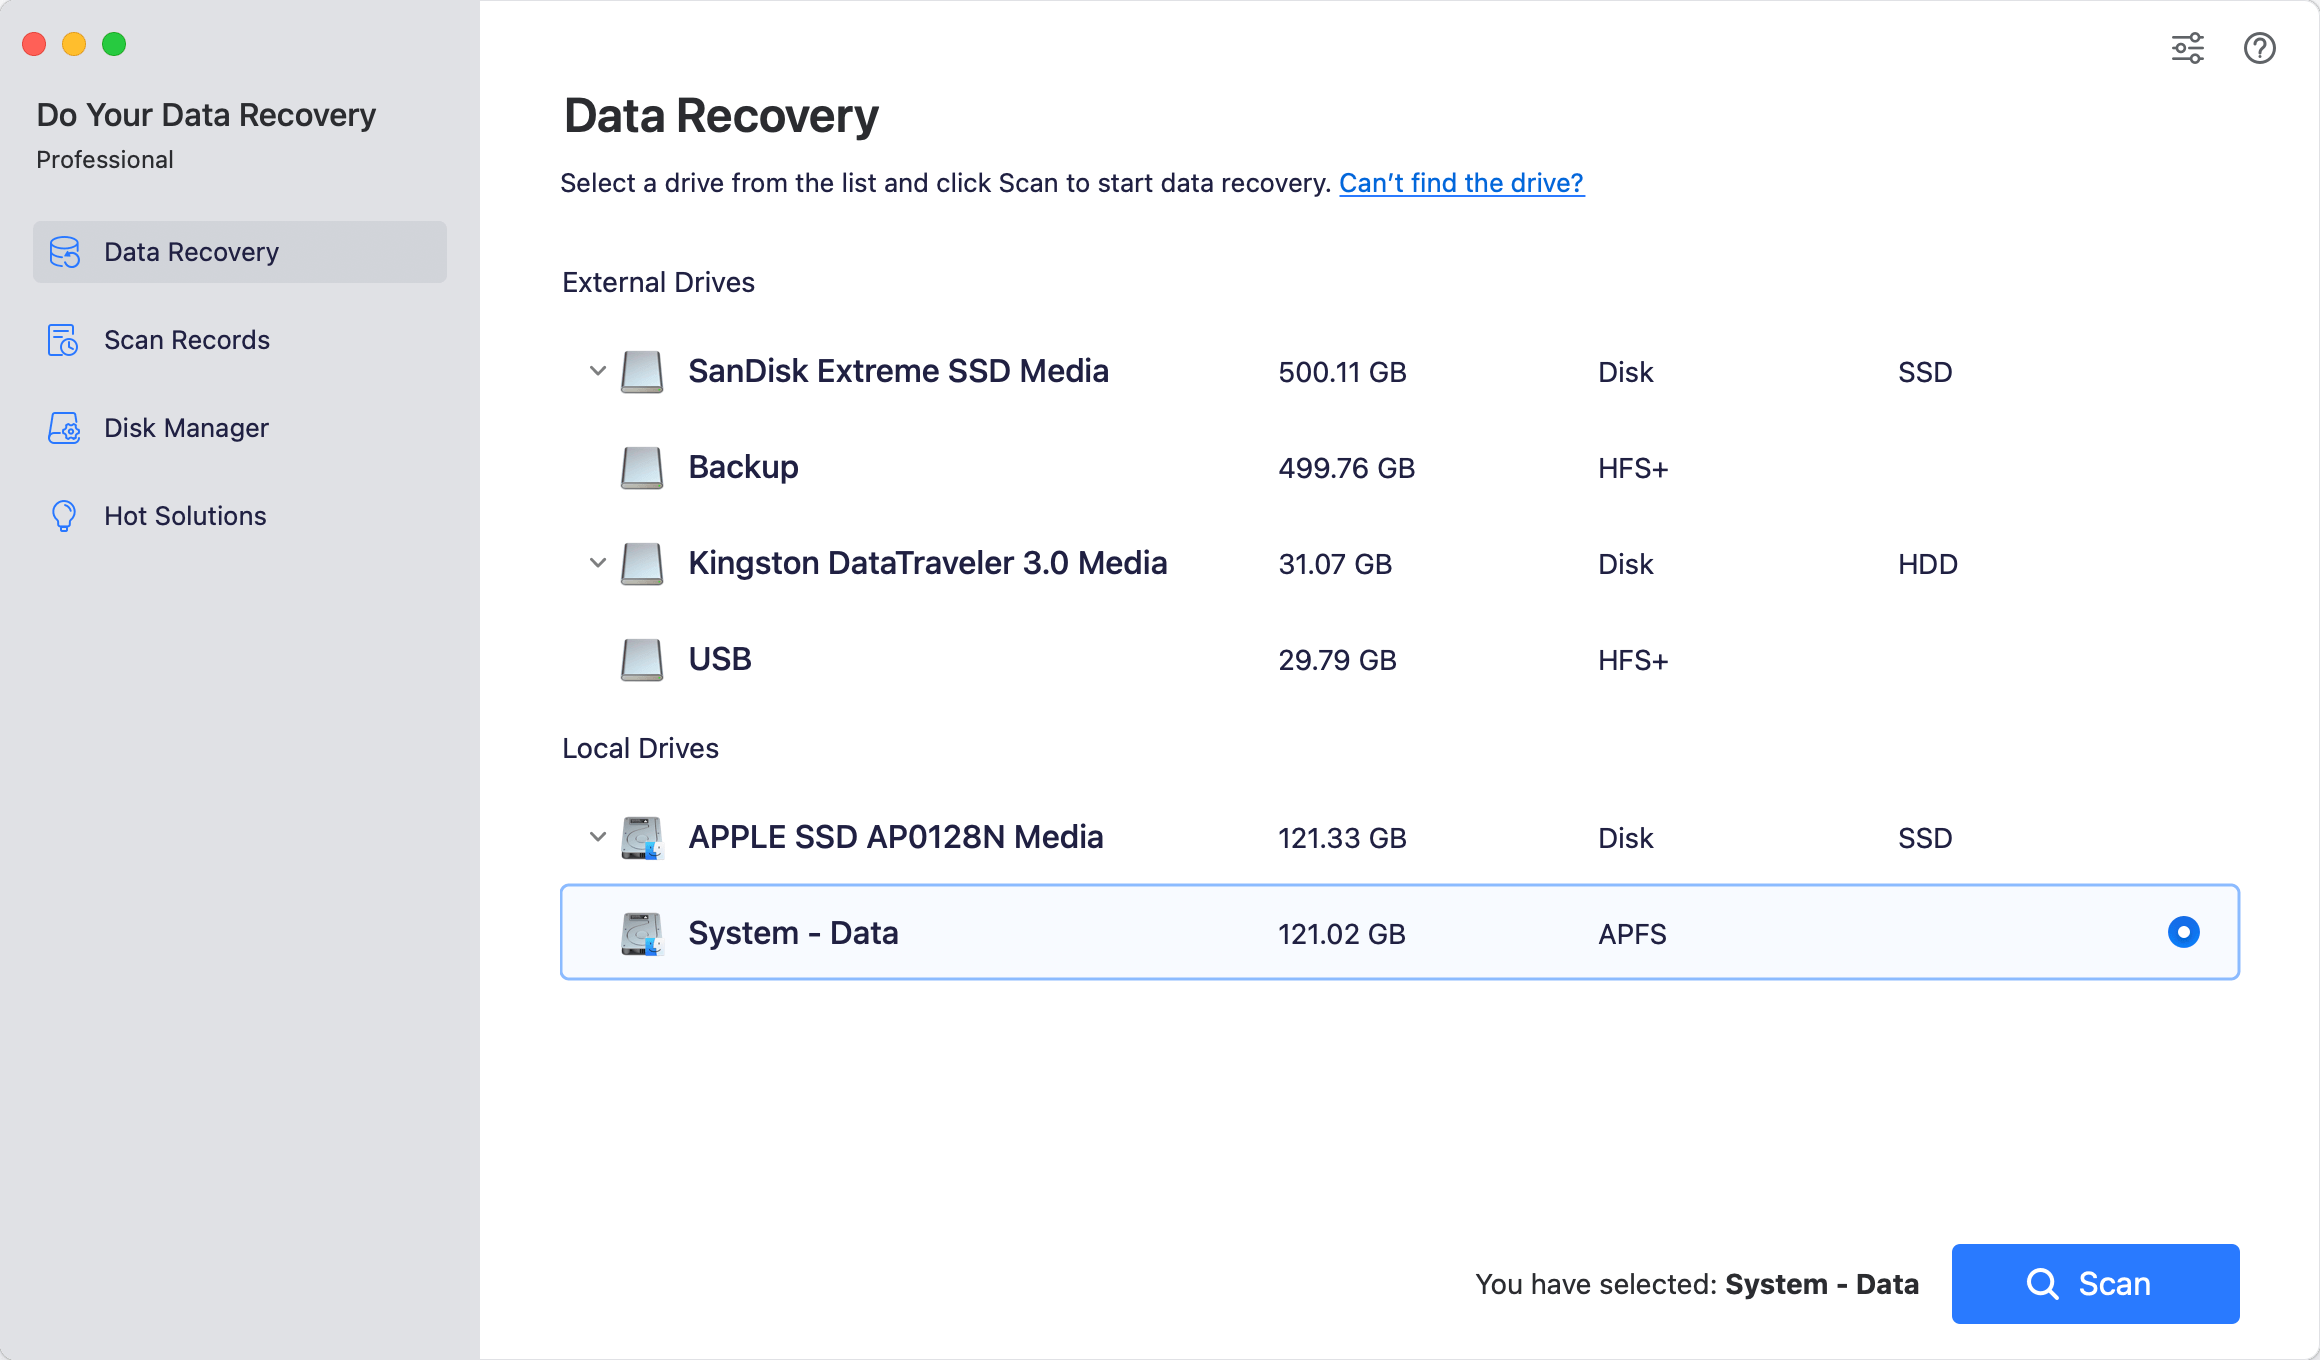
Step 3: Once the scan completes, you can browse through the list of recoverable items. Use the built-in preview feature to look at images, documents, or videos to ensure they are intact. Select the files you want and click Recover to save them safely to a different storage location.

Pro-Tips to Secure Your Data on macOS 27 Golden Gate
Data recovery is incredibly successful when done right, but avoiding data loss in the first place is always the best strategy. Implement these easy habits to safeguard your files:
- Set up Time Machine with an external hard drive so your Mac creates hourly backups automatically.
- Think twice before using the Option + Command + Delete shortcut, which bypasses the Trash entirely.
- As soon as you notice a file is missing, stop downloading new apps, saving new projects, or streaming media. This prevents your Mac from overwriting the invisible file data.
- Keep a trusted tool like Do Your Data Recovery for Mac downloaded on an external drive or a secondary folder ahead of time, ensuring you are prepared for unexpected emergencies.
FAQs about Deleted File Recovery on macOS 27
Wrapping Up
Losing important files is stressful, but it doesn't have to be permanent. With the advanced capabilities of macOS 27 Golden Gate and tools like Do Your Data Recovery for Mac, you have a massive advantage. Act quickly, check your backups, and use professional recovery tools to get your digital life back on track.
Do Your Data Recovery for Mac
Do Your Data Recovery for Mac, one of the best Mac data recovery software, can help you easily and completely recover deleted, formatted or lost files from Mac HDD/SSD, external HDD/SDD, USB drive, memory card, digital camera, or other storage devices.
Written & Updated by Justin Kenny
Justin Kenny is a writer & editor of DoYourData. He joined DoYourData in 2016 and focuses on writing articles about Windows data recovery, Mac data recovery, external device data recovery, hard drive clone, data erasure, Mac cleanup, computer issue fixes, etc. He is a super fan of Apple devices and is big on testing new digital device and system utility software.