How to Use Terminal to Securely Erase Hard Drive on macOS 27 Golden Gate
Are you planning to sell, donate, or recycle your Mac? Or maybe you just want to clean up an external storage drive completely. If so, making sure your private data is gone forever is a top priority. DoYourData Super Eraser for Mac is professional to wipe data permanently from drive and make sure the data is unrecoverable.
 Updated by Shirly Chen on July 6, 2026
Quick Navigation:
- Why Use Terminal to Securely Erase Your Hard Drive?
- Important Checklists Before You Begin Wiping
- Use Terminal to Securely Erase Drive on macOS 27
- The Risk and Limitations of Using Terminal Commands
- Alternative: DoYourData Super Eraser for Mac
- FAQs about Securely Wipe Data on macOS 27
- Conclusion
Simply dragging your files to the Trash and emptying it doesn't actually delete them. The data stays on the disk until it gets overwritten by new files. Anyone using basic data recovery software can easily bring your files back.
To protect your privacy, you need a secure wipe. In this comprehensive guide, we will walk you through exactly how to use Terminal to securely erase a hard drive on macOS 27 Golden Gate. We'll give you step-by-step commands to get it done like a pro.
We also know that typing command lines can feel a bit scary. If you prefer a simpler, safer, and faster solution, we will also show you a powerful tool that does the job in just a few clicks.
Why Use Terminal to Securely Erase Your Hard Drive?
The built-in Disk Utility app on Mac is great for standard formatting. However, in recent macOS versions, Apple removed the easy 'Security Options' slider for many modern drives. This was done mainly because standard wiping can shorten the lifespan of Solid State Drives (SSDs).
But what if you are wiping an old mechanical hard drive (HDD), a thumb drive, or you specifically need a multi-pass military-grade erasure for security compliance? That is where the macOS Terminal comes in.
Terminal gives you direct control over your system. By using the advanced 'diskutil' command, you can force macOS to overwrite your drive multiple times. This ensures that no data recovery tool on earth can ever recover your files.
Important Checklists Before You Begin Wiping
Before you type even a single line of code, please keep these crucial points in mind:
- Backup Your Data: Secure erasure is permanent. Once the process starts, your data is gone forever. Double-check that you have backed up any important files to another device or cloud storage.
- Connect to Power: Secure erasing takes time, especially with multiple passes. Ensure your MacBook is securely plugged into a power source so it doesn't shut down mid-process.
- Identify the Target Drive Correctly: Erasing the wrong drive can cause accidental data loss on your main system. Pay close attention to the drive identifiers.
Use Terminal to Securely Erase Drive on macOS 27
Let's look at the exact steps required to securely wipe a hard drive using command lines on the latest macOS 27 Golden Gate.
Step 1: Open the Terminal App
First, you need to open Terminal. You can do this in a couple of easy ways:
- Press Command + Spacebar to open Spotlight search, type 'Terminal', and press Enter.
- Alternatively, open Finder, go to Applications, open the Utilities folder, and double-click on Terminal.
Step 2: List All Connected Drives
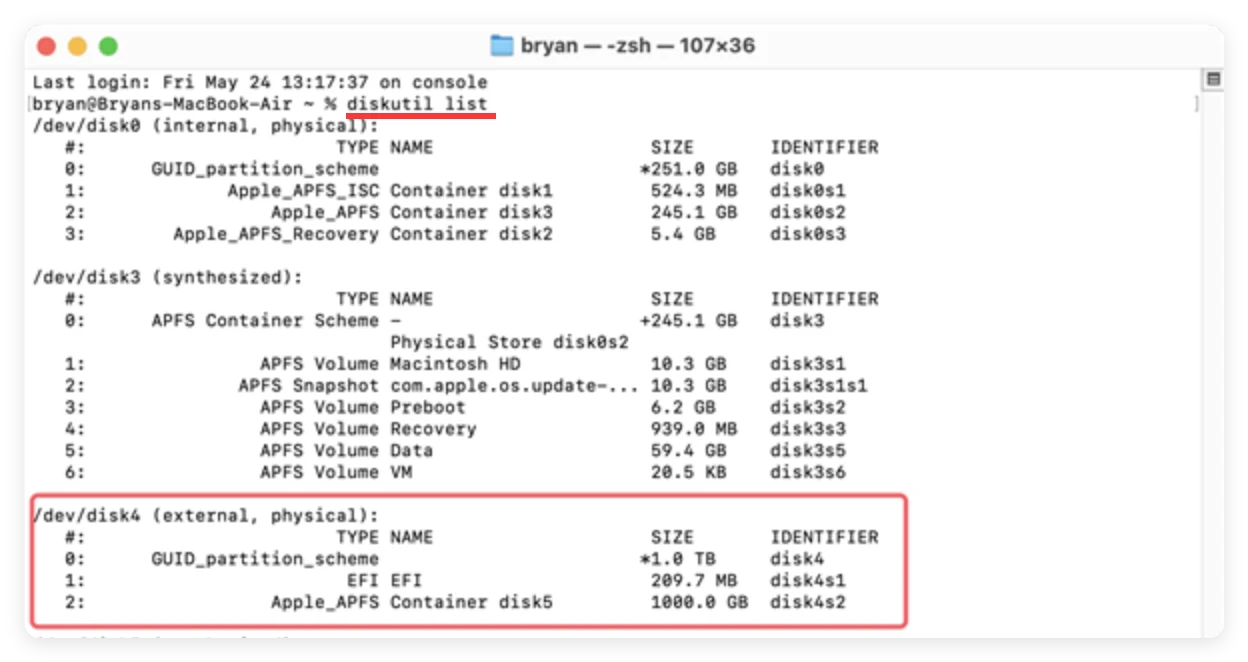
Next, you must find the exact identifier of the hard drive you want to erase. Type the following command in Terminal and press Enter:
diskutil list
Terminal will display a complete list of all internal and external drives connected to your Mac. Look carefully through the sizes and names to find your target disk. It will look something like 'disk2', 'disk3', or 'disk4'.
⚠️ Warning: Be absolutely certain about this identifier. If you choose the wrong disk number, you will wipe out the wrong drive.
Step 3: Run the Secure Erase Command
Now that you have your disk identifier (for example, let's assume it is 'disk2'), you can run the secure erase command. The basic structure of the command is:
diskutil secureErase [Level] [DiskIdentifier]
In this command, you need to replace '[Level]' with a number representing the erasure standard, and '[DiskIdentifier]' with your disk number. Here are the security levels available in macOS 27 Golden Gate:
- 0 – Single-pass zero-fill: Overwrites the entire drive with zeros. It is fast and sufficient for most basic needs.
- 1 – Single-pass random-fill: Overwrites the drive with random data instead of zeros.
- 2 – US DoD 7-pass standard: Overwrites the drive 7 times based on Department of Defense guidelines. Highly secure but takes a long time.
- 3 – Gutmann 35-pass standard: Overwrites the drive 35 times. This is extreme and generally unnecessary for modern drives.
- 4 – US DoE 3-pass standard: A 3-pass secure erasure recommended by the Department of Energy.
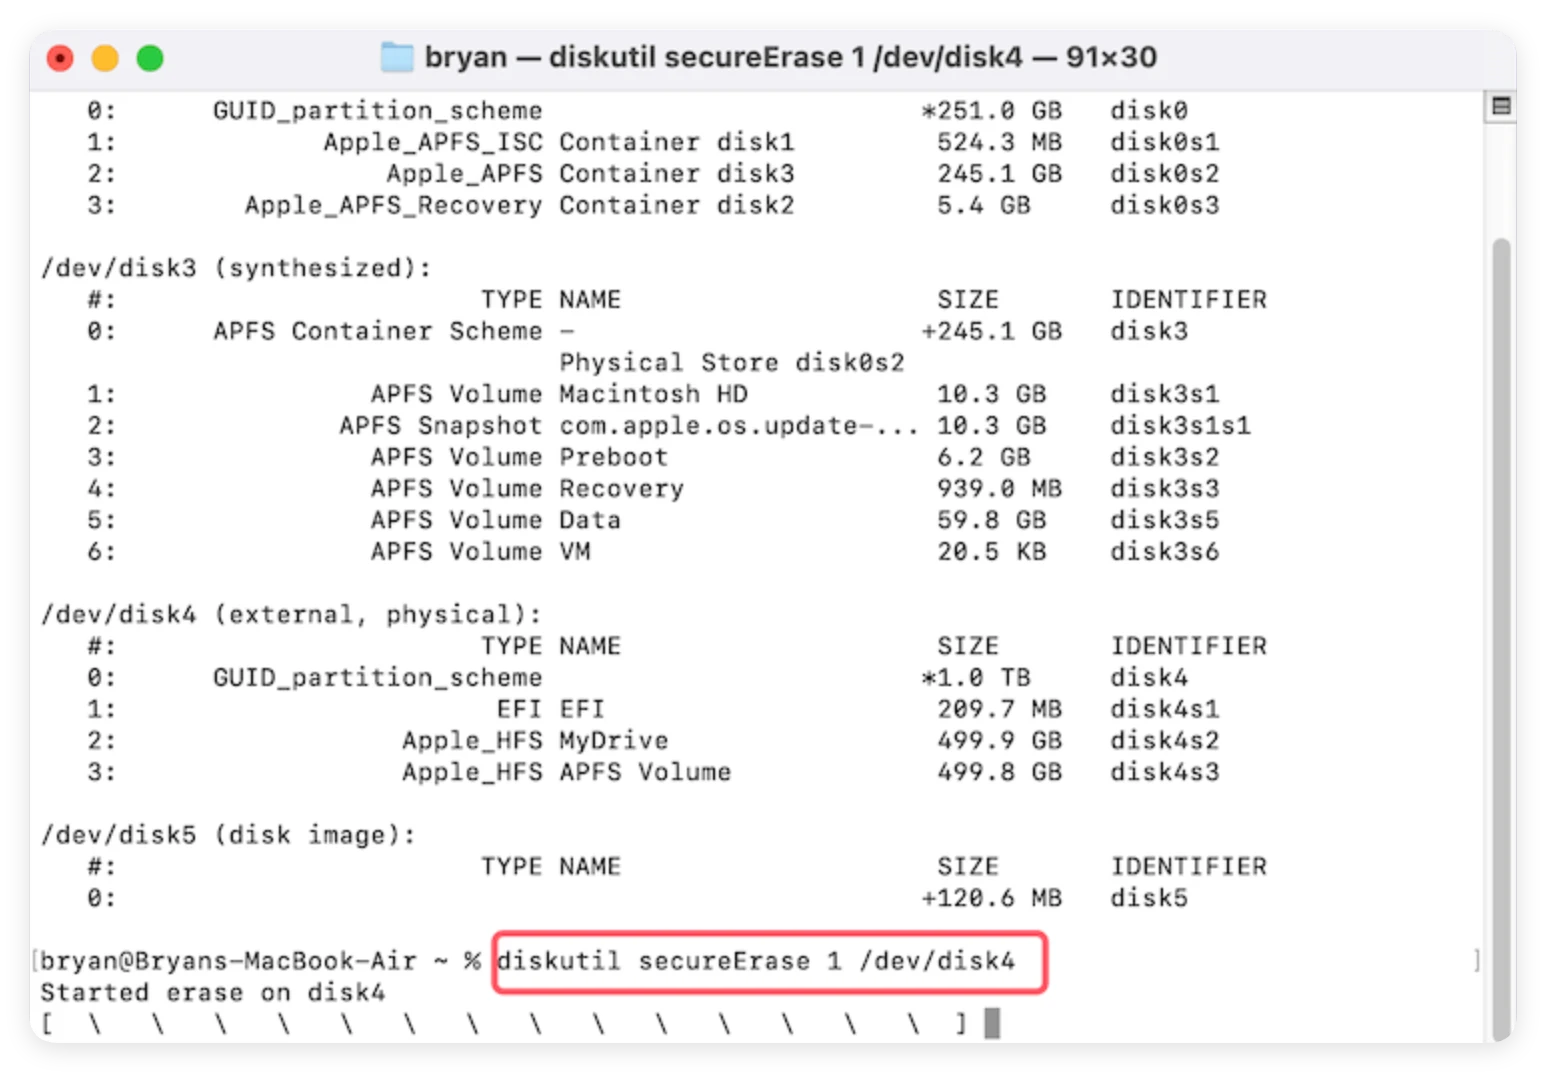
For instance, if you want to perform a safe single-pass random-fill wipe on 'disk4', you would type the following command and hit Enter:
diskutil secureErase 1 /dev/disk4
If prompted, type your Mac's administrator password and press Enter to authorize the process. Terminal will display a progress bar. Sit back and wait until it completes.
The Risk and Limitations of Using Terminal Commands
While Terminal is a built-in tool that costs nothing, it comes with several notable downsides:
- No Room for Mistakes: Typing a wrong disk identifier can destroy your operating system or delete your personal photos and work documents instantly.
- No Un-do Button: Once you execute the command, there is no pausing or stopping it cleanly without risking drive corruption.
- SSD Compatibility Issues: Modern Mac computers use built-in SSDs. The 'secureErase' command is designed primarily for mechanical HDDs. Running multiple passes on an SSD can degrade its health unnecessarily without offering extra security benefits due to how wear-leveling algorithms work.
Alternative: DoYourData Super Eraser for Mac
If you find Terminal too complicated, or if you want to ensure a 100% safe erasure on modern SSDs and HDDs under macOS 27 Golden Gate, there is a much better way.
DoYourData Super Eraser for Mac is a professional, certified data erasure software built specifically for Mac users. It provides a visual, user-friendly interface that completely eliminates the risk of human error.
DoYourData Super Eraser for Mac
- Best data erasure software for macOS 27 Golden Gate.
- Military grade data erasure algorithms supported.
- Permanently wipe data in three different ways.
Why choose DoYourData Super Eraser for Mac?
- 100% Safe and Permanent: It uses military-grade erasure algorithms (like DoD 5220.22-M) to overwrite your data. Once erased, the data can never be recovered by any data recovery software.
- Full macOS 27 Golden Gate Compatibility: It is optimized to run smoothly on the latest macOS version, supporting Intel, M1, M2, M3, M4, M5, and future Apple Silicon chips.
- SSD and HDD Optimization: It securely wipes both traditional hard drives and modern SSDs without causing unnecessary wear or damage to your storage hardware.
- Three Flexible Erasure Modes: You can choose to erase specific selected files, wipe an entire hard drive partition, or clear only the free storage space to permanently erase previously deleted files.
How to Wipe a Hard Drive Using DoYourData Super Eraser in 3 Steps:
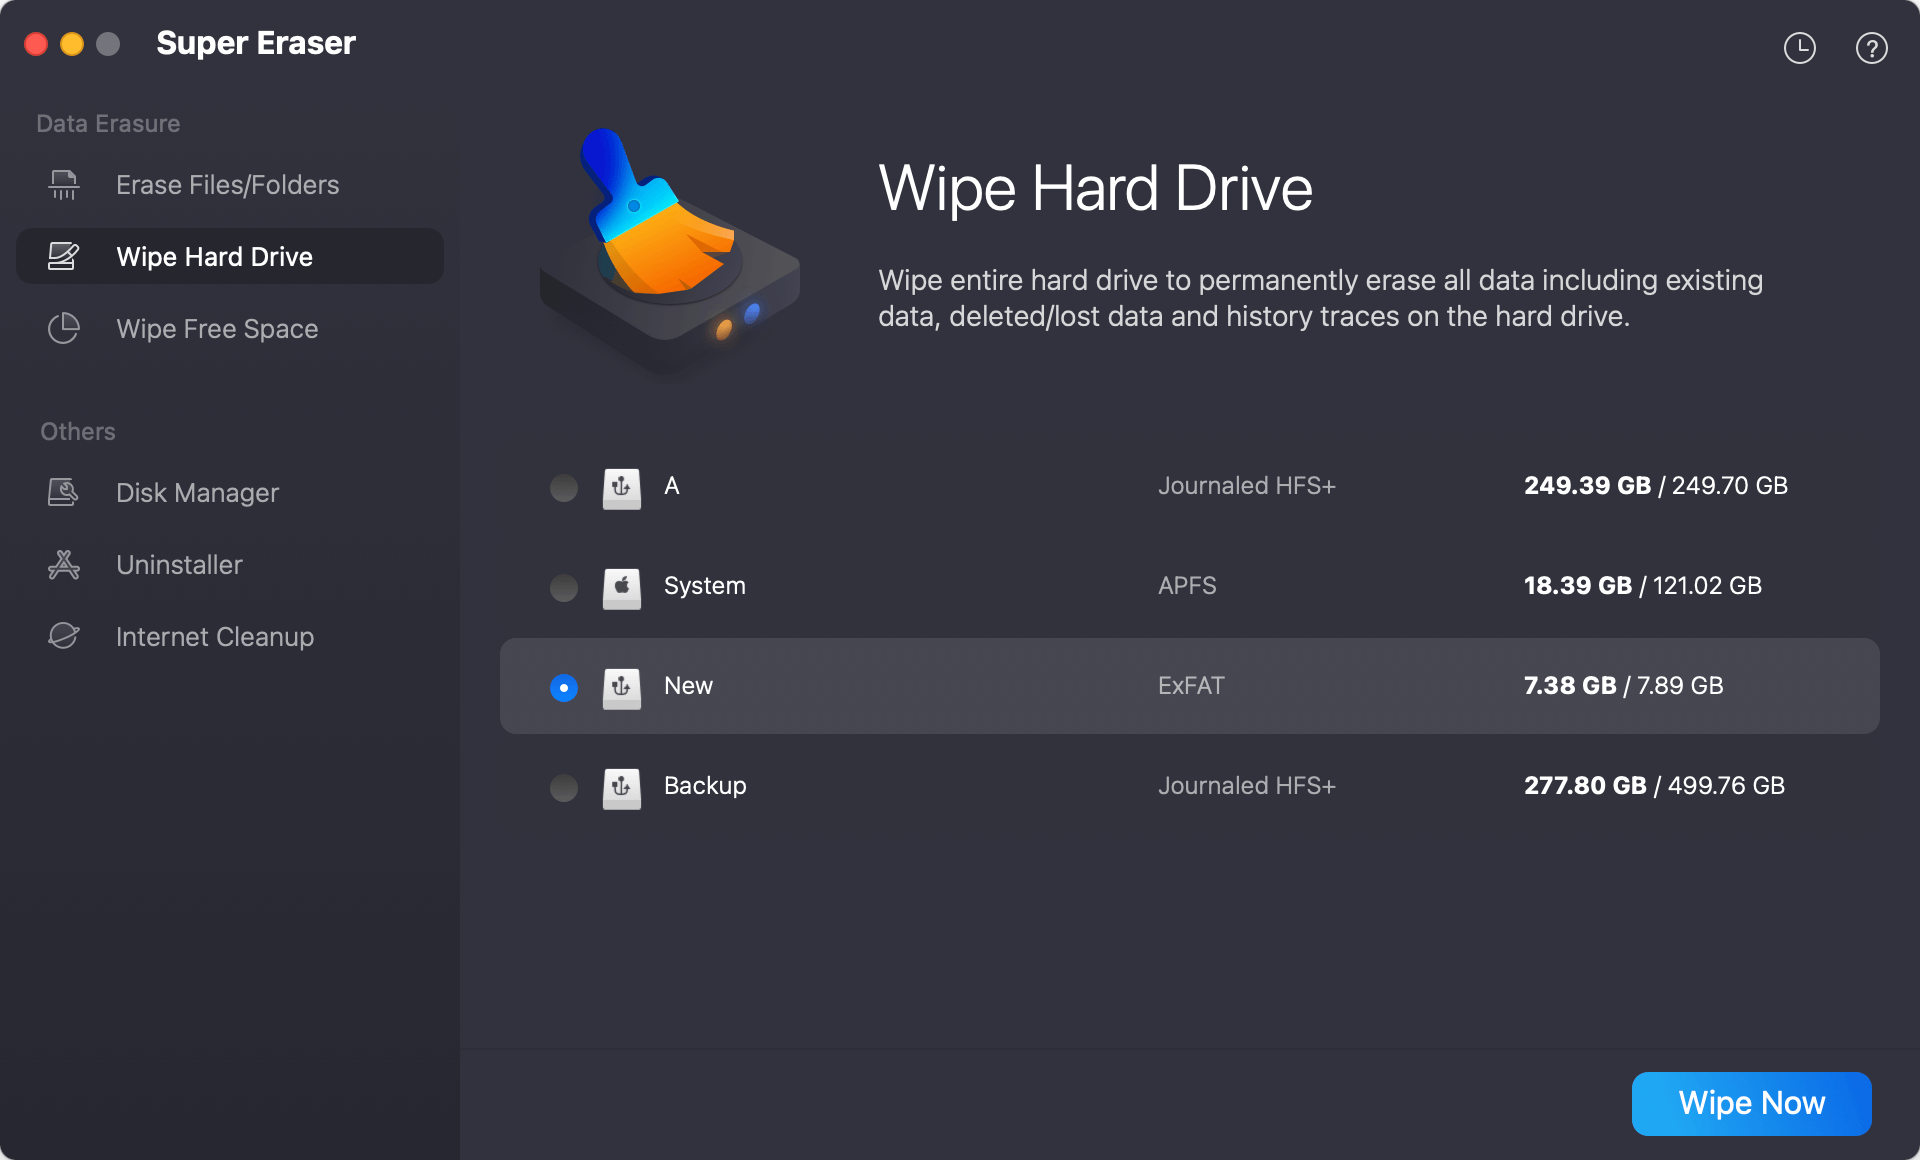
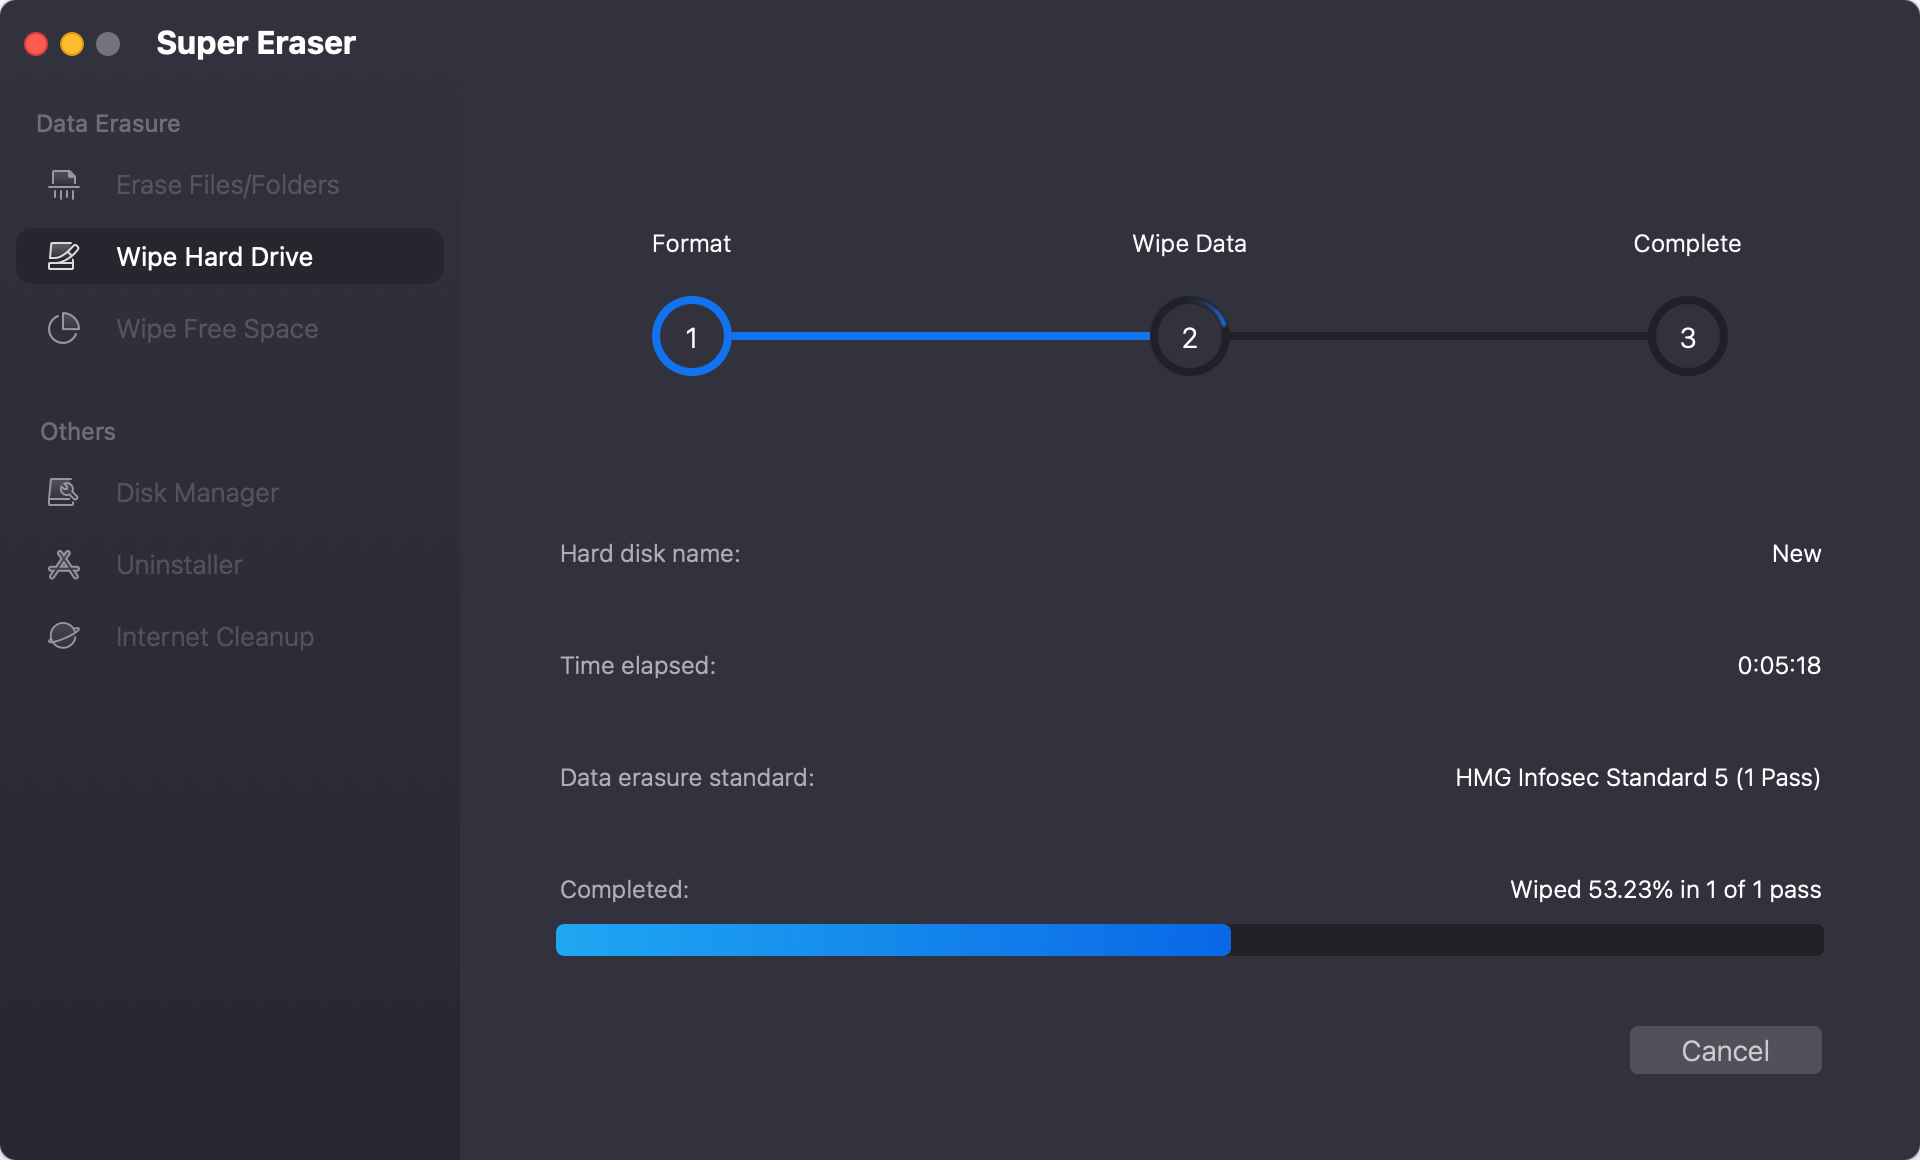
Step 1. Download and open DoYourData Super Eraser for Mac on your computer. Choose the Wipe Hard Drive mode from the main interface and select the target disk you want to clean.
Step 2. Click the Erase Now button. Then you can select a data erasure standard to permanently wipe data from the selected disk.
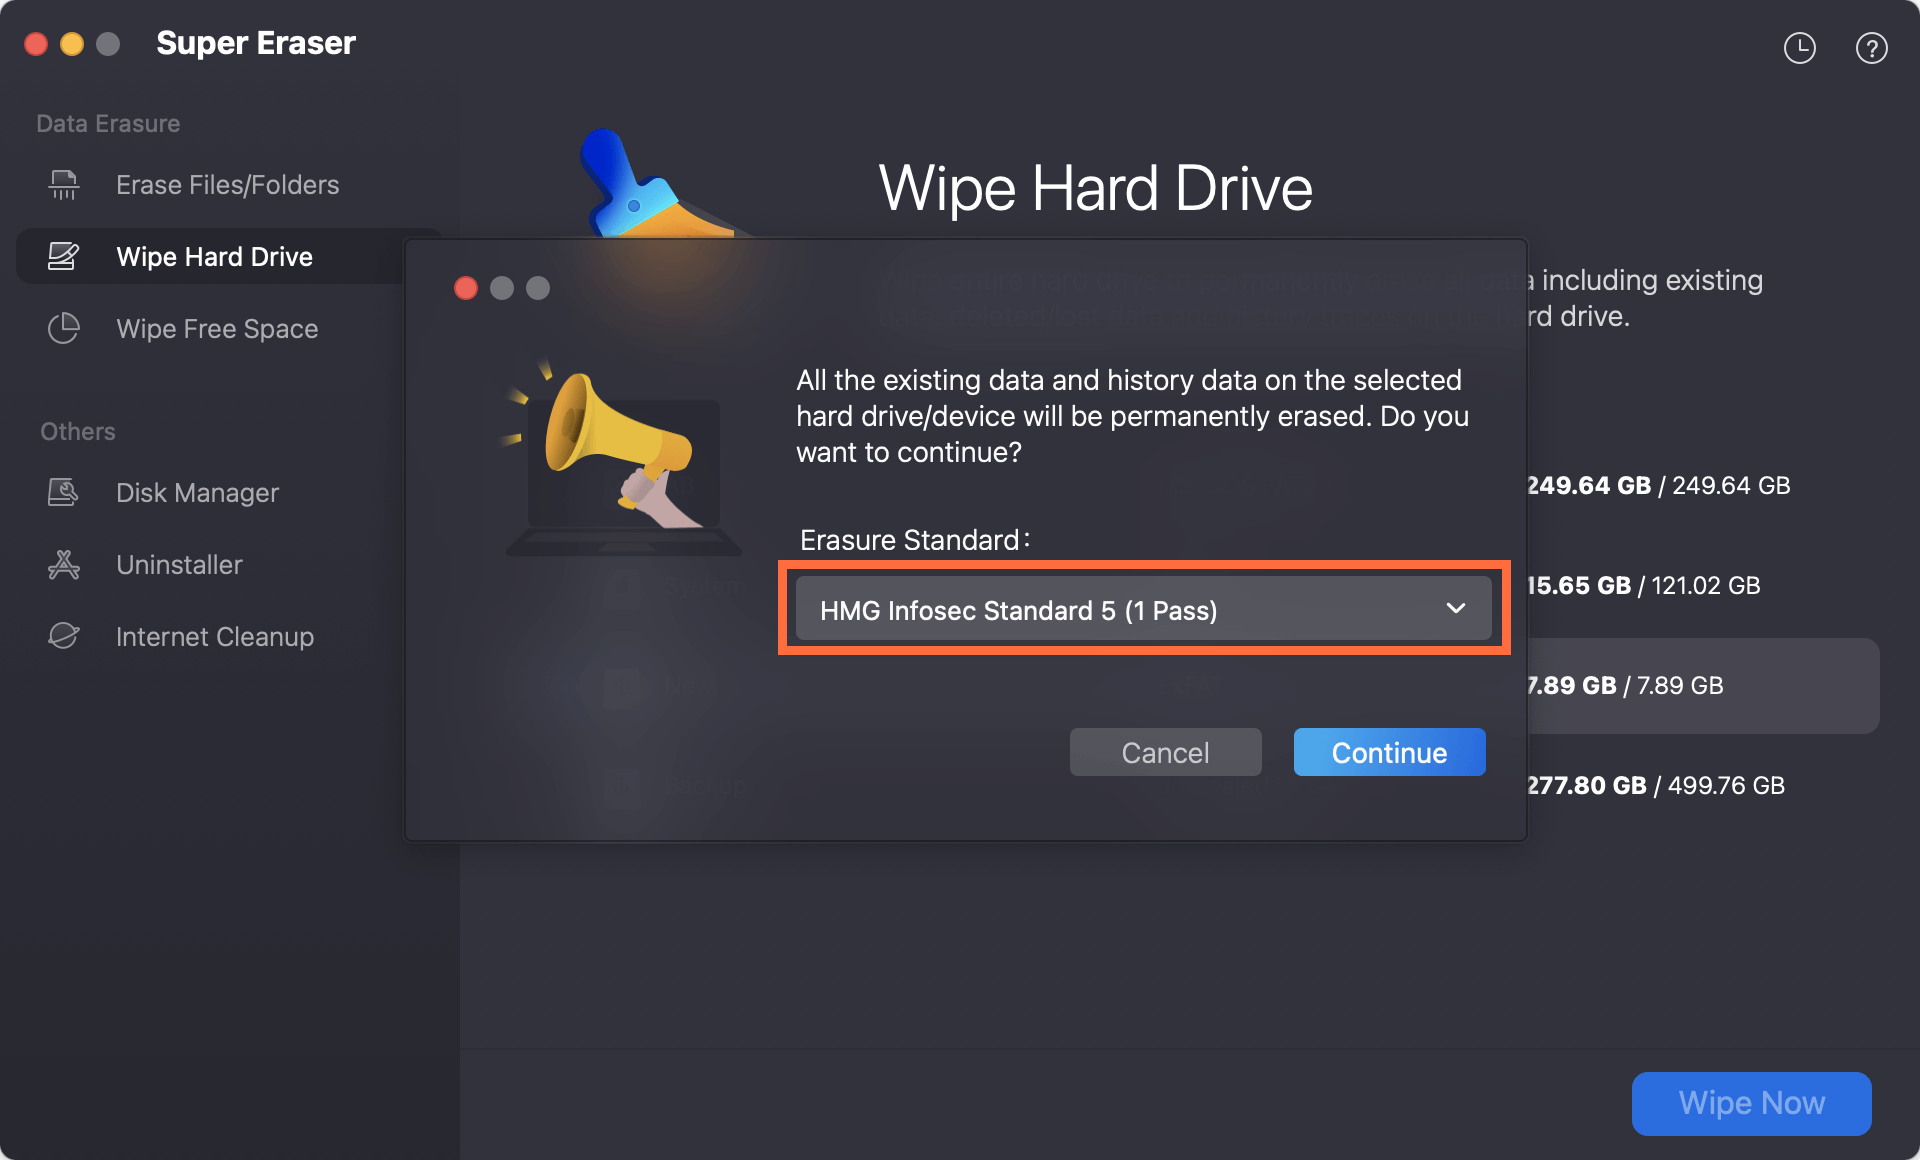
Step 3. At last, click the Continue button to start. The software handles everything safely and quickly, giving you absolute peace of mind.
FAQs about Securely Wipe Data on macOS 27
Conclusion
Knowing how to use Terminal to securely erase a hard drive on macOS 27 Golden Gate is a fantastic skill to have. It provides a robust, built-in way to securely clear out old drives using advanced formatting standards.
However, because Terminal requires absolute precision and lacks full safety guardrails for modern SSD wear-leveling, it isn't always the best choice for everyday users.
If you want a stress-free experience that guarantees your data is permanently gone without any risk of damaging your Mac or erasing the wrong drive, downloading DoYourData Super Eraser for Mac is the smartest alternative. Keep your data safe, protect your privacy, and wipe your drives with absolute confidence!
DoYourData Super Eraser for Mac
DoYourData Super Eraser for Mac is a 100% safe, powerful and easy-to-use data erasure program. It offers certified data erasure standards including Peter Gutmann, U.S. Army AR380-19, DoD 5220.22-M ECE to permanently erase data from Macs and external devices, making data recovery be impossible.
Written & Updated by Shirly Chen
Shirly Chen has been writing data recovery, data erasure articles for DoYourData over 4 years. She has been working as a professional website content writer & editor for quite a long time. She also writes articles about disk clone, Mac optimization, disk backup, etc.