Format Target Partition Using Cryptographic Erasure Protocols on Mac
To guarantee absolute data destruction without causing excessive flash wear, security engineers rely on cryptographic erasure protocols. By destroying the master encryption keys regulating access to an encrypted target container or combining crypto-erase with multi-pass block sanitization via DoYourData Super Eraser for Mac, users can achieve instant, unrecoverable data destruction that complies with NIST SP 800-88 and DoD sanitization standards.
 Updated by Shirly Chen on Novmenber 6, 2026
Quick Navigation:
- Understanding Cryptographic Erasure Protocols on Mac Systems
- Native Methods to Execute Cryptographic Erasure on macOS
- Enhanced Partition Sanitization with DoYourData Super Eraser for Mac
- FAQs about Securely Formatting Partition on Mac
- Conclusion
When you format a partition or erase a volume in macOS Disk Utility using standard settings, the operating system removes the file index tables while leaving the physical raw data blocks intact across the SSD flash storage cells. Even when users run older multi-pass overwrite methods, flash translation layers (FTL) and wear-leveling controllers frequently bypass hidden unallocated blocks, leaving residual private fragments behind.
For financial institutions, IT auditors, enterprise administrators, and privacy-conscious Mac owners, partial partition wiping represents a massive data leakage risk. Forensic data recovery utilities can easily rebuild deleted database files, personal keychains, and tax records from untouched NAND flash memory blocks.
Understanding how to securely format target partition using cryptographic erasure protocols on Mac solves this vulnerability. Cryptographic erasure instantly renders target partition data mathematically unreadable by permanently purging its underlying cryptographic encryption keys, delivering instant, military-grade compliance.
Understanding Cryptographic Erasure Protocols on Mac Systems
Cryptographic erasure (often abbreviated as Crypto-Erase or CE) is a standardized data sanitization protocol explicitly endorsed by NIST SP 800-88 Rev 1. Instead of taking hours to overwrite every individual storage block on a drive, cryptographic erasure focuses on the encryption key lifecycle.
1. How Target Partition Key Erasure Operates
Modern Mac hardware—including Apple Silicon (M1, M2, M3, M4, M5, M6 series) and Intel Macs with T2 Security Chips—enforces hardware-level AES-256 encryption. Every APFS container or encrypted volume relies on a unique Volume Encryption Key (VEK) wrapped by a Master Key stored securely within the Secure Enclave.
When a cryptographic erasure command is executed against a target partition, the system destroys the specific Volume Encryption Key and overwrites its key headers. Without the unique decryption key, the remaining raw binary data stored across the SSD flash cells transforms into unbreakable ciphertext noise ($2^{256}$ entropy balance), rendering recovery impossible even in high-level forensic laboratories.
2. Interplay Between APFS Container Structure and SSD TRIM
APFS organizes storage space using dynamic space-sharing containers rather than rigid physical partitions. When a partition within an APFS container is cryptographically erased and formatted, macOS issues low-level TRIM commands to the SSD controller. TRIM alerts the flash controller that the blocks formerly assigned to that partition are unallocated, prompting hardware background garbage collection to physically purge the NAND cells.
Native Methods to Execute Cryptographic Erasure on macOS
Mac users can utilize native command-line and graphical interfaces to initiate cryptographic partition erasure on internal or external volumes.
Method 1: Cryptographic Erasure via macOS Terminal ('diskutil')
The macOS command-line utility provides direct low-level control over APFS containers and cryptographic key destruction:
Step 1: Identify Target Partition. Launch Terminal from Applications > Utilities, then list all disk identifiers by running: 'diskutil apfs list'.
Step 2: Note Partition Identifier. Locate the exact Volume UUID or device node (e.g., 'disk2s1') for the partition you wish to sanitize.
Step 3: Execute Key Destruction. Execute the APFS key purge and format command: 'diskutil apfs deleteVolume disk2s1' or format an encrypted partition using 'diskutil eraseVolume APFS "NewPartition" disk2s1'.
Step 4: Verify Formatting. The operating system immediately destroys the volume encryption headers, purges access keys from the Secure Enclave, and initializes a fresh, unencrypted APFS layout.
Method 2: Cryptographic Sanitization via macOS Disk Utility
For users preferring a graphical interface, Disk Utility automates key purging when managing encrypted APFS partitions:
Step 1: Enable Full Device Display. Open Disk Utility, click the View menu, and select 'Show All Devices'.
Step 2: Select Encrypted Partition. Highlight the target encrypted APFS partition in the sidebar sidebar and click the Erase button in the top toolbar.
Step 3: Confirm Re-format. Choose APFS (Encrypted) or standard APFS as the target format and click Erase.
Step 4: Key Purge Execution. Disk Utility automatically destroys the original encryption key structures before initializing the new file system structure.
Enhanced Partition Sanitization with DoYourData Super Eraser for Mac
While native cryptographic commands sanitize active file pointers and encryption headers, enterprise compliance frameworks often mandate full-disk sector sanitization alongside key destruction. DoYourData Super Eraser for Mac bridges this gap by combining cryptographic key destruction with multi-pass binary overwriting.
Why Use DoYourData Super Eraser for Mac?
- Multi-Standard Compliance: Supports internationally recognized erasure algorithms including U.S. DoD 5220.22-M (3-pass & 7-pass), NIST SP 800-88 Rev 1, and Peter Gutmann 35-pass wiping.
- APFS & TRIM Optimization: Integrates cleanly with macOS hardware security protocols to issue controller-level TRIM commands across APFS containers.
- Flexible Erasing Modes: Allows targeted destruction of whole partitions, free unallocated storage space, or isolated confidential directories without corrupting system files.
- Verification Reports: Generates detailed, audit-ready data destruction logs verifying key destruction and sector overwriting for HIPAA, GDPR, and PCI-DSS audits.
Step-by-Step Guide: Securely Wiping a Partition with DoYourData
Follow these clear operational steps to permanently sanitize a target Mac partition using DoYourData Super Eraser for Mac:
Step 1: Install DoYourData Super Eraser. Download DoYourData Super Eraser for Mac. Install the app into your Applications folder and launch it.
DoYourData Super Eraser for Mac
- Certified data erasure software for macOS.
- Support international data erasure algorithms.
- Permanently wipe data without recovery chance.
Step 2: Select Target Partition. Select 'Wipe Hard Drive' mode d to format the whole partition and destroy all data. Choose the specific target partition or external drive volume from the device list. Click 'Wipe Now' button.
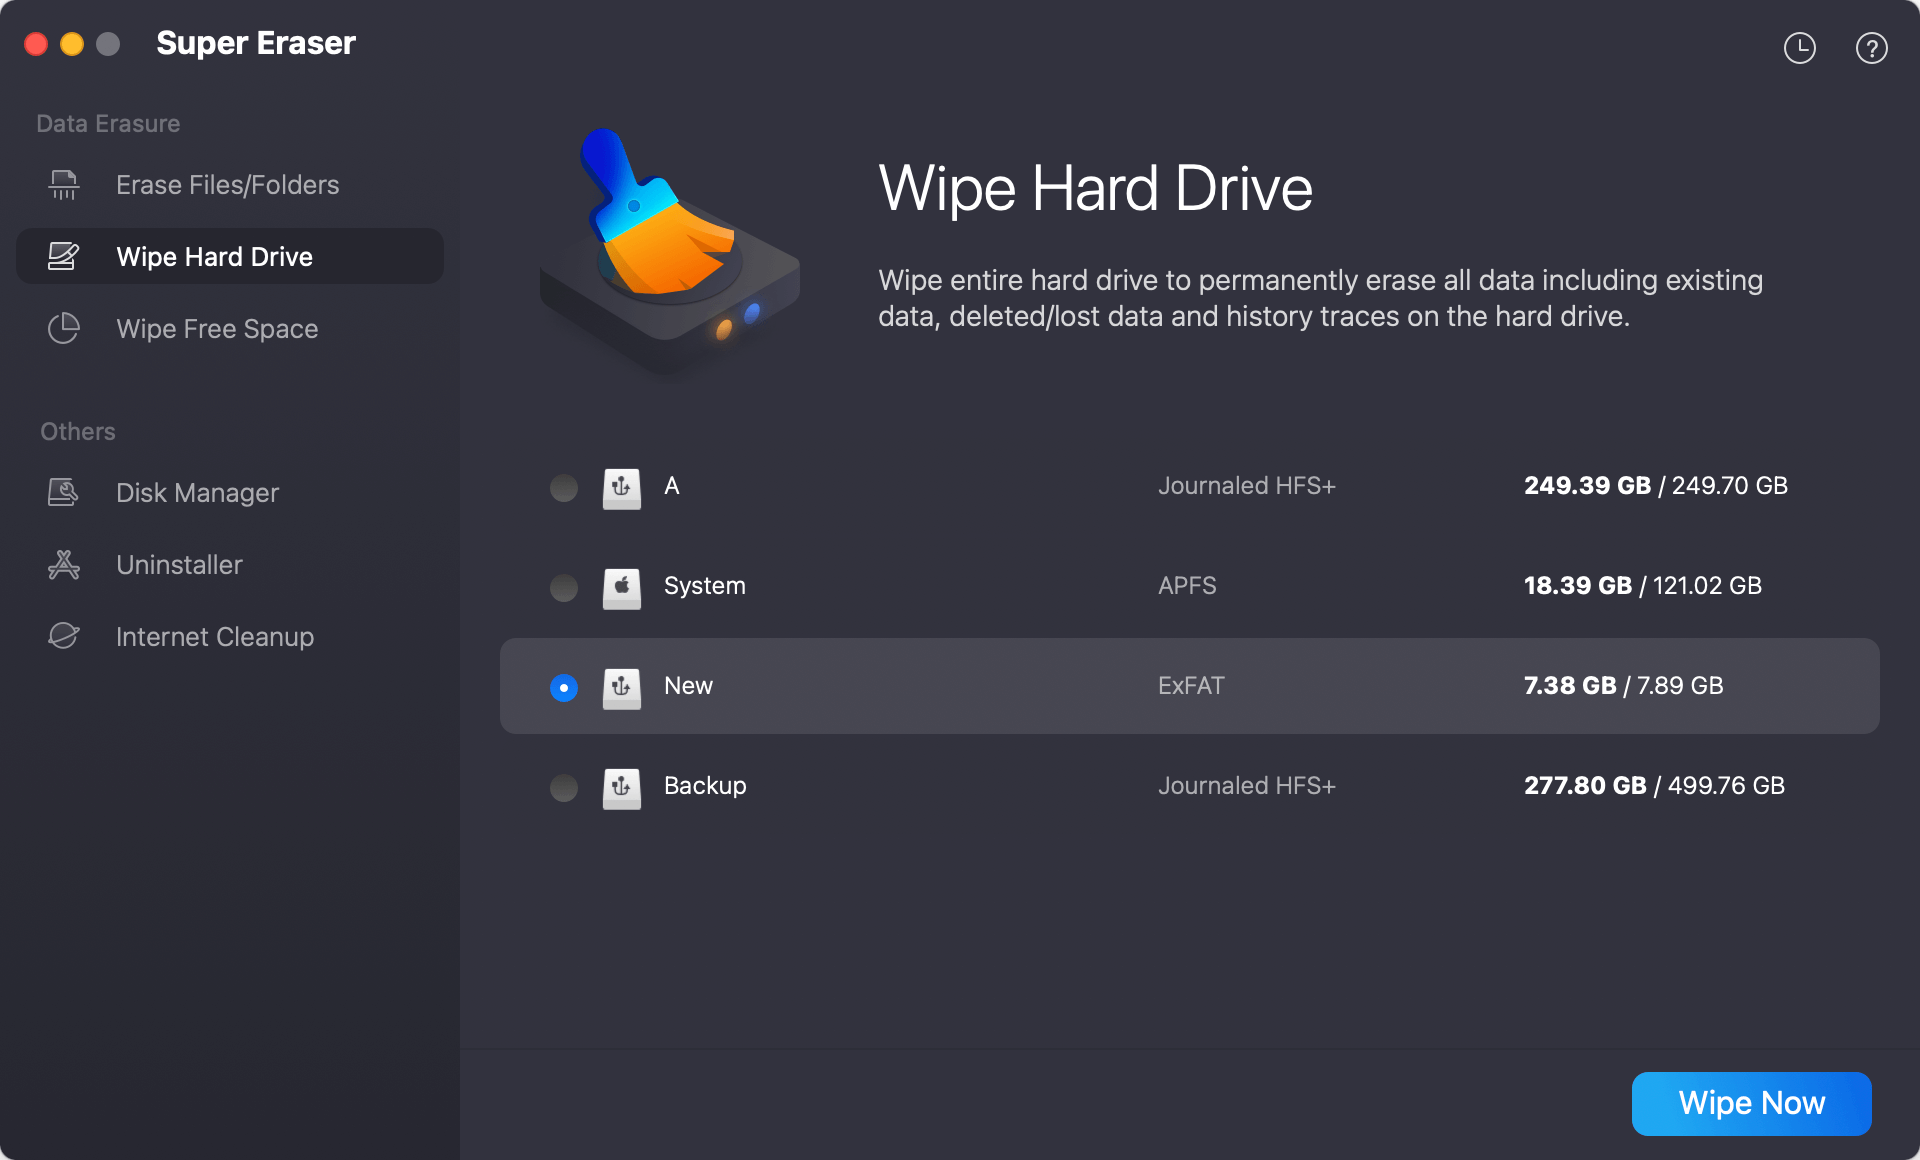
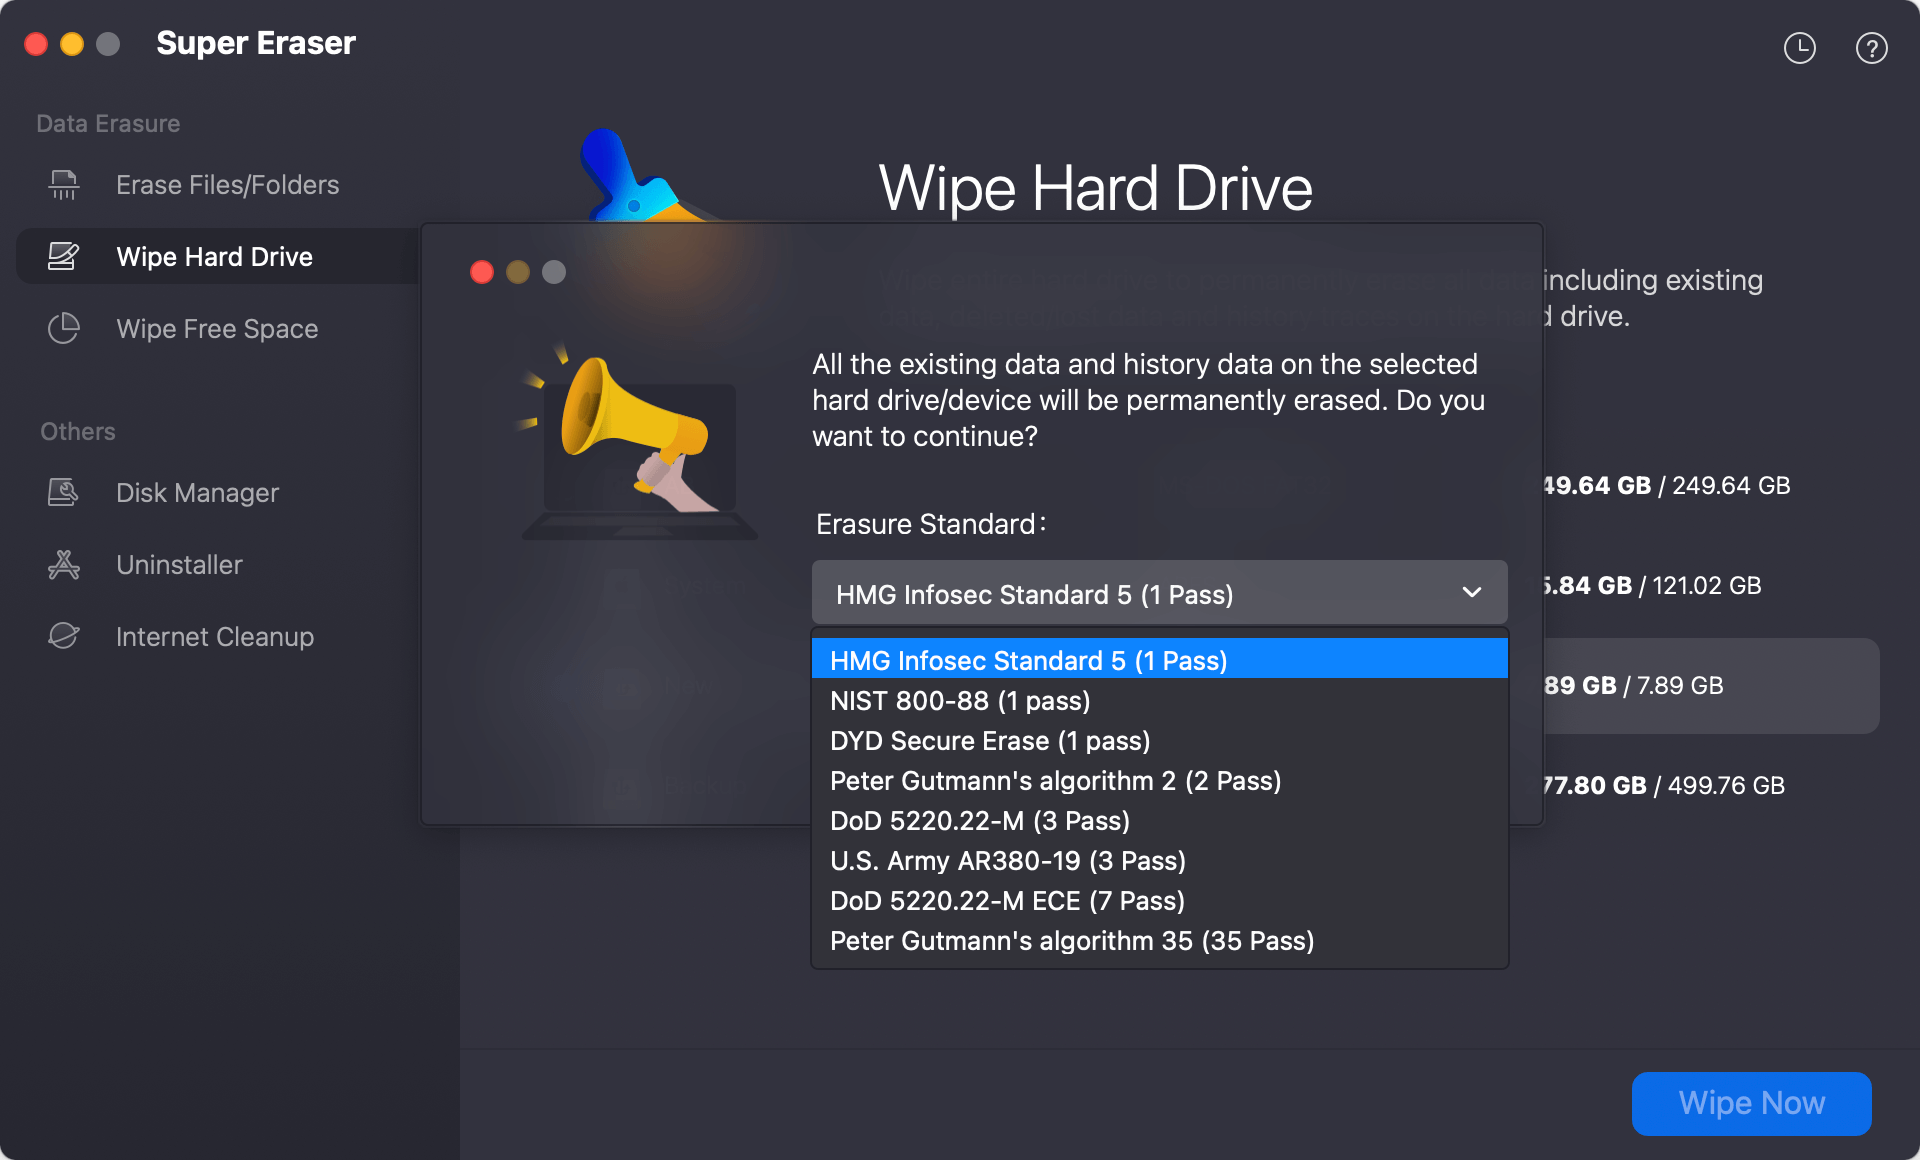
Step 3: Configure Standard and Start Wiping. Select your desired wiping algorithm (e.g., U.S. DoD 5220.22-M 3-Pass or NIST SP 800-88). Click 'Continue'.
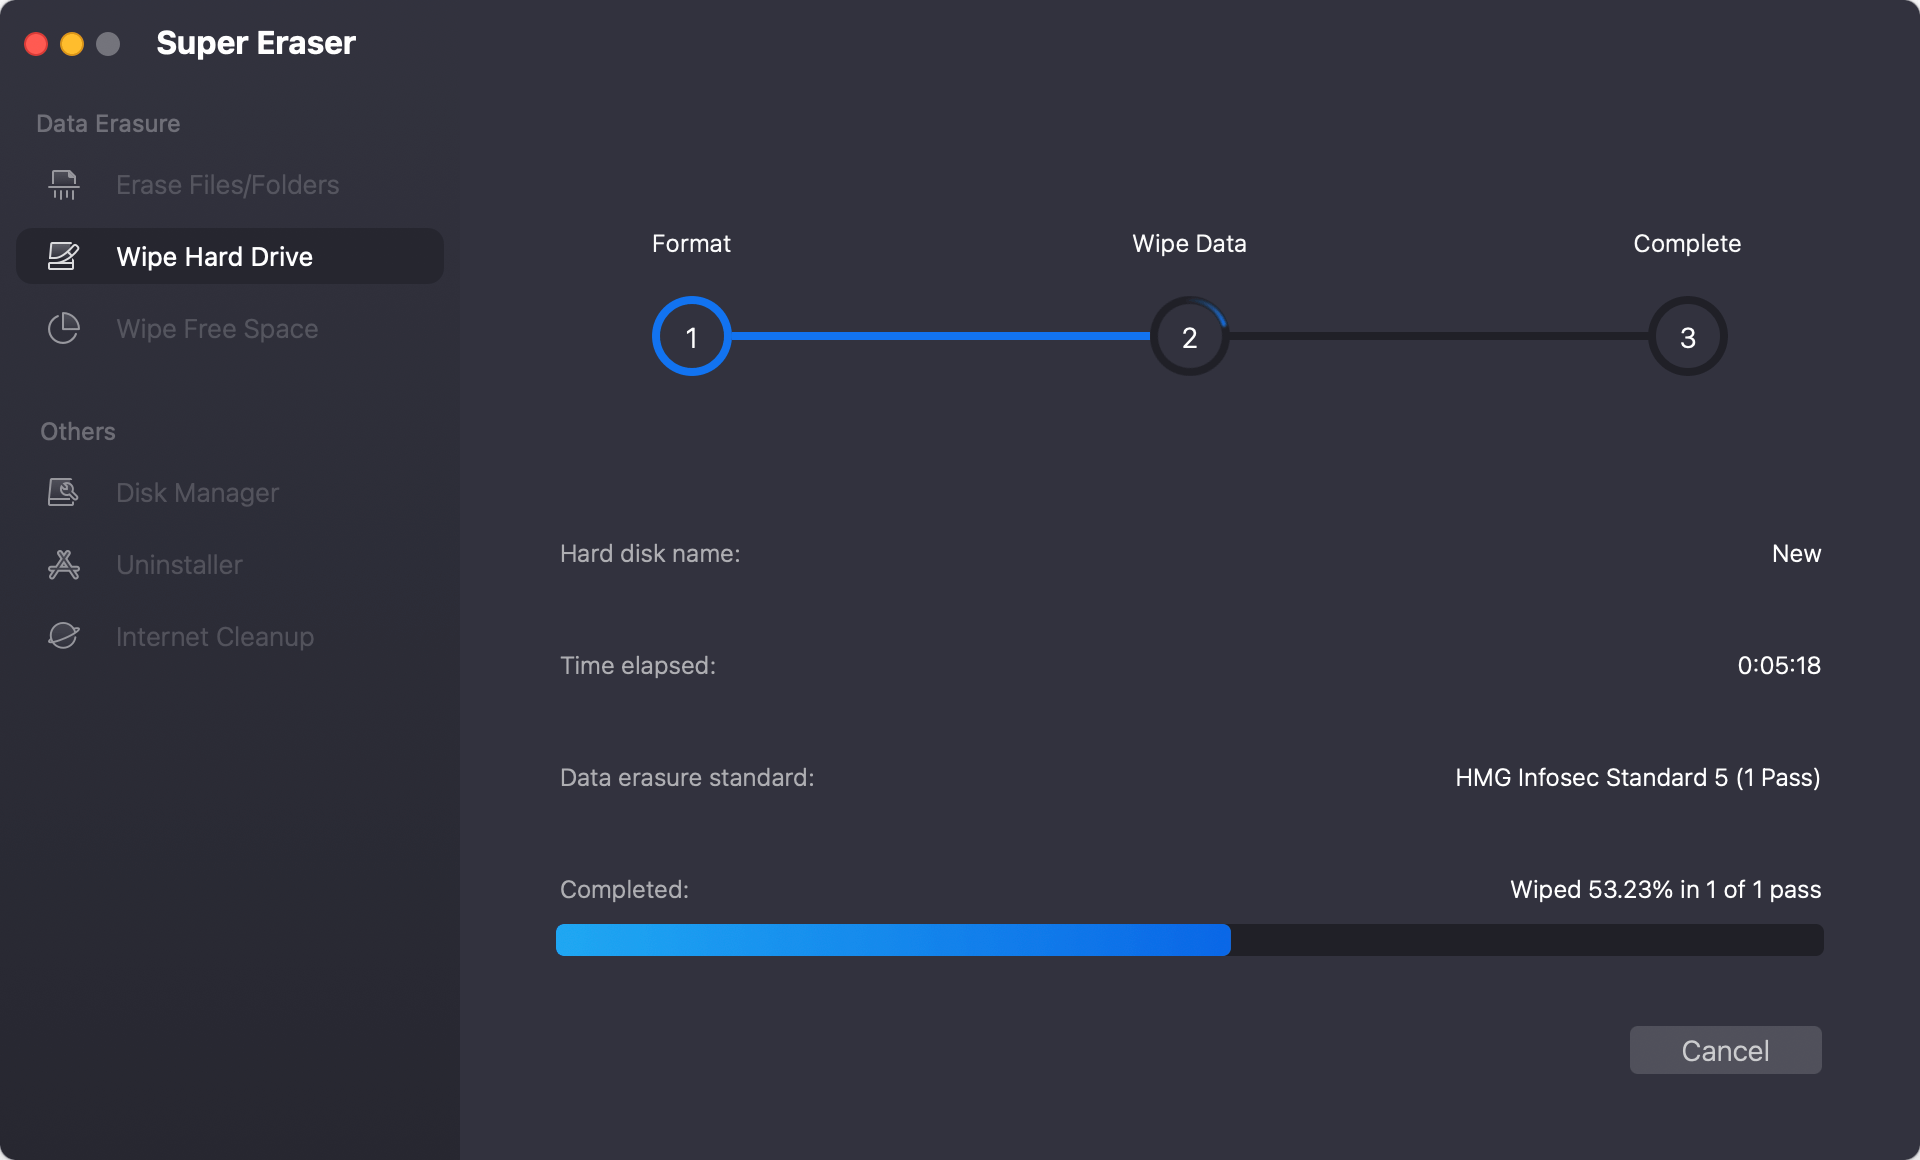
Step 4: Complete Verification. DoYourData Super Eraser executes multi-pass pattern overwriting across the partition sectors and verifies complete data destruction. Once finished, your partition is 100% sanitized and unrecoverable.
💡 Critical Pre-Wipe Notice: Data sanitized using cryptographic protocols combined with DoYourData Super Eraser is permanently destroyed. Original files cannot be restored by any commercial data recovery utility or hardware laboratory. Always back up necessary files prior to wiping.
FAQs about Securely Formatting Partition on Mac
Conclusion
Safeguard sensitive financial records, corporate data, and personal files on your Mac by moving beyond basic file deletion and traditional formatting methods. Understanding how to securely format target partition using cryptographic erasure protocols on Mac ensures your data remains protected against forensic scrutiny.
By pairing native macOS cryptographic key destruction with the verified multi-pass wiping capabilities of DoYourData Super Eraser for Mac, you can wipe target partitions quickly, preserve SSD health, and maintain total compliance. Download DoYourData Super Eraser for Mac today to experience military-grade partition sanitization.
DoYourData Super Eraser for Mac
DoYourData Super Eraser for Mac is a 100% safe, powerful and easy-to-use data erasure program. It offers certified data erasure standards including Peter Gutmann, U.S. Army AR380-19, DoD 5220.22-M ECE to permanently erase data from Macs and external devices, making data recovery be impossible.
Written & Updated by Shirly Chen
Shirly Chen has been writing data recovery, data erasure articles for DoYourData over 4 years. She has been working as a professional website content writer & editor for quite a long time. She also writes articles about disk clone, Mac optimization, disk backup, etc.