The reliable Mac data recovery software to recover deleted or lost files.
Free TrialChoose File System for the External Hard Drive on Mac
![]() Updated by Ricky Lin on 2022-07-22
Updated by Ricky Lin on 2022-07-22
Running out of storage on Mac is common, and many Mac users often face this issue. You can buy an external hard drive to add storage to your Mac.
After acquiring a hard drive, you must have considered looking for a suitable file system. You can effectively format your drive using the Disk Utility app on your Mac.
Do you know about the available file format in Disk Utility?
This post will introduce you to the most anticipated file formats for the external hard drive of your Mac.
Mac File Systems Explained
Disk Utility comes with multiple file system formats for you. Here's the list of those for system formats.
1. Apple File System (APFS)
Apple announced the modern file system in the shape of APFS in 2017 for Apple devices. The users of macOS Sierra were able to use APFS in the first place. SSD boot drives in High Sierra were transformed into APFS upon installation.
Moreover, APFS also replaced HDDS and fusion drives. APFS comes with more versatile services than HFS provides the users. For instance, you can copy folders and files instantaneously using the APFS file system.
You can improve the performance by managing the free space on your drives, reducing the fears of data corruption.
When to use APFS
If cost isn't an issue and you're looking to prioritize convenience and speed, an external SSD might be the more befitting option than the APFS file system, provided you aren't looking to use your drive with pre-Sierra Macs.
APFS comes with more impressive Time Machine backups than HFS+. Besides being faster, it tends to consume less space so that you can create more backups. Moreover, it also enables you to copy sparse and cloned files efficiently.
If you format the Time Machine volumes as APFS, it works only with Macs' Big Sur or Later versions. If you're to connect the disk to Catalina, it won't be recognized by the Time Machine.
2. macOS Extended (HFS+)
Until APFS came in 2017, HFS, Mac OS Extended, was considered the primary file format for system storage. If you purchased a Mac from 1998 to 2016, the macOS tended to be installed on Hierarchical File System Plus Volume.
When to use HFS+
Using the HFS file format depends upon the Mac you're using. If you have a Mac (pre-2016), too old to get updated on the recent macOS version, selecting the HFS+ file format makes complete sense.
If you have macOS Catalina or an earlier version, you must opt for macOS Extended(Journaled) for Time Machine backups.
You'll need to opt for third-party apps to access the HFS+ formatted drives on Windows. For instance, you can use Seagate to write and read data on your Windows without formatting your external drive.
3. exFAT (Extended File Allocation Table)
Microsoft came up with the Extended File Allocation Table to offer compatibility with FAT32 without any limitations.
exFAT is the go-to file format for flash drives you share between Mac and Windows. Surprisingly, exFAT doesn't come up with partition size or realistic file limits. Moreover, it doesn't require file systems like NTFS or complicated ACLs.
When to use exFAT
Windows and Mac offer complete write and read support for exFAT. Opting for exFAT will be ideal if you share the files to your Windows using family members and friends.
It doesn't come with built-in encryption nor support Journaling, meaning you can lose when a crash occurs.
4. MS-DOS FAT
Apples come with MS-DOS format in Disk Utility to extend its support for FAT 32. But, it would help if you opted for FAT32 unless your Mac is old.
When to use Mac-DOS (FAT)
Flash drives are formatted with FAT32 to acquire maximum compatibility with games consoles and old computers.
Files stored on the FAT32 drive shouldn't have 4GB of data. Hence, exFAT is a more appropriate option.
How to format an external hard drive with Disk Utility?
You'll need to follow the step-by-step guide below if you want to use a particular file format on your external hard drive.
Here's how to format your external hard drive through Disk Utility.
Step 1. You'll first link the drive with your Mac through a USB cable.
Step 2. After launching Disk Utility, you'll need to navigate to the Finder, Application, Utilities, and Disk Utility icon.
Alternatively, you can launch Spotlight search by pressing Command + Space to search disk Utility.
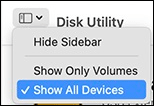
Step 3. Once you've opened the Disk Utility, you'll need to navigate to Disk Utility's left section, where you can see available disks. Next, select Show All Devices after tapping the View icon on your top menu.
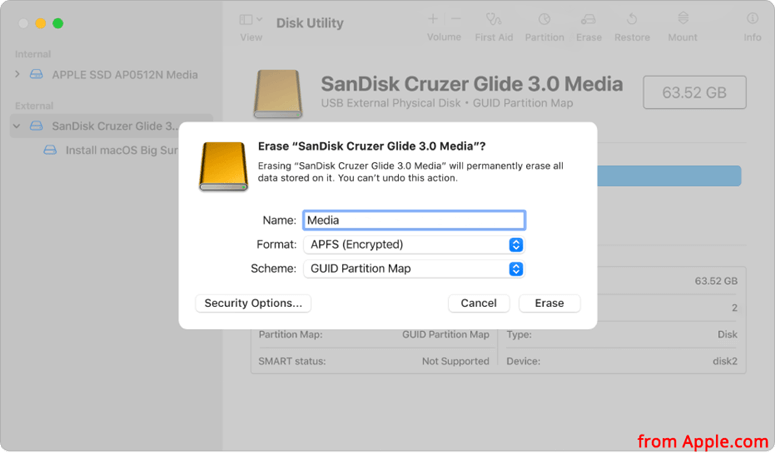
Step 4. After selecting the external hard drive, you'd like to format, you'll need to tap the Erase icon to proceed.
Step 5. Select the GUID Partition Map after navigating to the dialogue and expanding the Scheme.
Step 6. After expanding the format, you'll need to choose the file system you'd like to use. Let's select APFS as an example.
Next, you'll need to enter a name for the volume and then hit the Erase icon. Tap on the Done icon to end the proceedings.
Note: if you want to recover lost data after formatting external hard drive on Mac, just try Do Your Data Recovery for Mac, a powerful data recovery application.
Conclusion
This guide leaves you with an insightful review about the best file system for the external hard drive you buy for your Mac device.
You must take care that you must not decide on the file format based on the popular trend. Instead, you need to assess the situation and decide which file format will be an appropriate option.
After deciding the file format for your external hard drive, you can use Disk Utility to format the drive to your desired file format.
Among all the file systems you'll get to read from here on, most people tend to use the Apple File System, considering the modern features of APFS.
Moreover, you're recommended to backup the data before formatting your external hard drive, as it will completely delete your data.
Luckily, you can back up your data using Time Machine Backup, enabling you to store it on any alternative external hard drive. You also can download a disk cloning software to help you create a bootable clone backup for your Mac.
DoYourData Products
DoYourData Super Eraser for Mac
Permanently shred files or wipe hard drive to prevent data recovery on Mac.
Free TrialClone HDD, SSD, Mac OS, external disk, USB drive, and more under Mac OS.
Free TrialWritten & Updated by Ricky Lin
Ricky Lin is an senior editor of DoYourData who lives in Adelaide, Australia. He is interested in writing technology articles related with data recovery, computer issue fixes, disk clone, iPhone data recovery, video edit, Mac optimization, etc. He Joined DoYourData in 2019 and have written 500+ articles to help both Windows users and Mac users to solve data or computer problems.