
Recover Deleted or Lost Data on macOS Monterey
Follow these steps to recover deleted, formatted or lost data on macOS Monterey.
DoYourData Super Eraser for Mac is a powerful data erasure application for macOS Monterey and other operating systems. It can help you securely and permanently erase data on macOS Monterey with certified data erasure standards such as NIST 800-88, Peter Gutmann's algorithm, DoD 5220.22-M, etc. Once the data is erased by this Mac data eraser, the data is lost for good, cannot be recovered by any method.
![]() Updated by Shirly Chen on July 9, 2024
Updated by Shirly Chen on July 9, 2024
Quick Navigation:
Wiping the hard drive is the only safe way to get rid of all the data on your Mac, whether you want to sell it, fix performance problems, or start over. After upgrading to macOS Monterey, you can use several tools to wipe hard drive data. You can be sure that all your personal and private information is permanently erased when you follow the steps in this guide.
We review everything you need to know, from how to use Disk Utility and factory reset macOS Monterey to how to back up your data and log out of your accounts. Whether you need to erase something quickly or more carefully, this guide has the steps and things to think about to help you do it confidently and easily. Follow these detailed steps to protect your info and get your Mac back to a clean state.

It's not gone when you delete something from your Mac. The operating system only marks the data-containing sectors as free to be written over. However, data recovery software can often retrieve lost data, as long as other data haven't overwritten it.
That is where safe-erase methods come in. These methods write random data patterns over the whole drive, making getting back information saved almost impossible. There are two ways to delete files securely in macOS Monterey:
There are two methods to help you erase startup disk or factory reset on macOS Monterey:
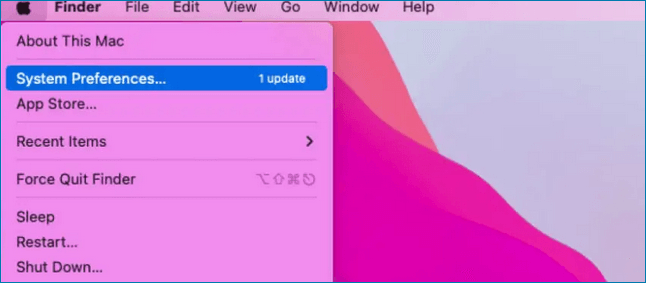
Step 1. Click Apple logo, then choose System Preference.
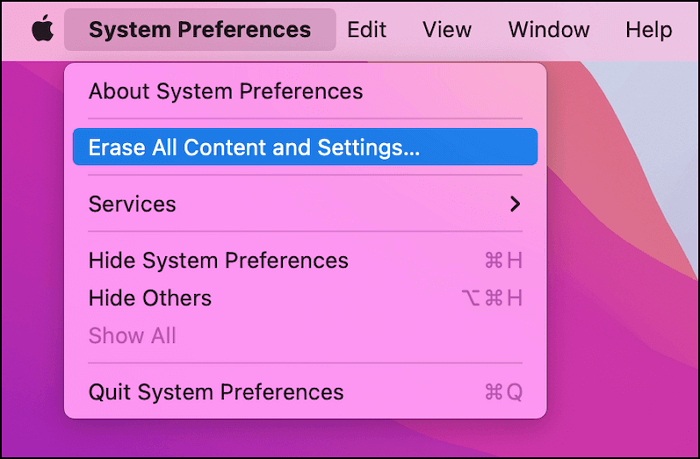
Step 2. From the System Preferences menu in the Apple menu bar, choose Erase All Content and Settings.
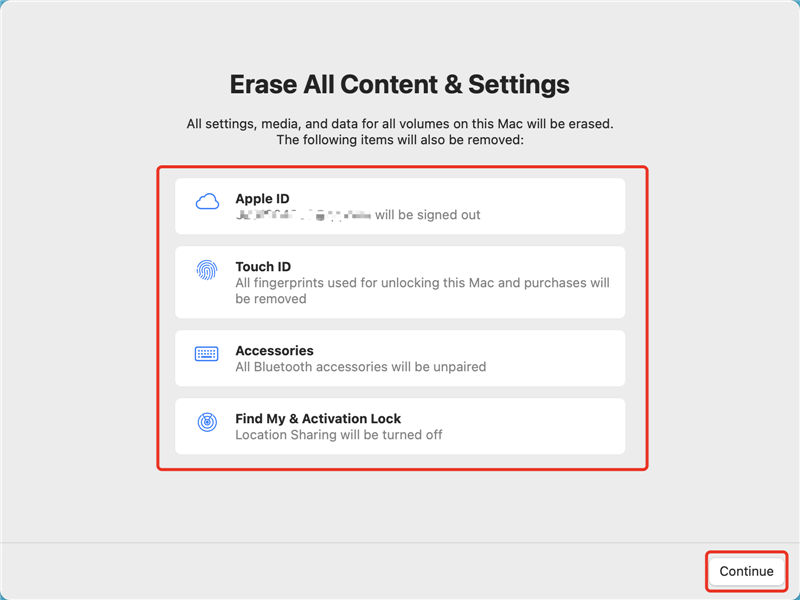
Step 3. Open Erase Assistant, follow the onscreen instructions to erase all data from your Mac.
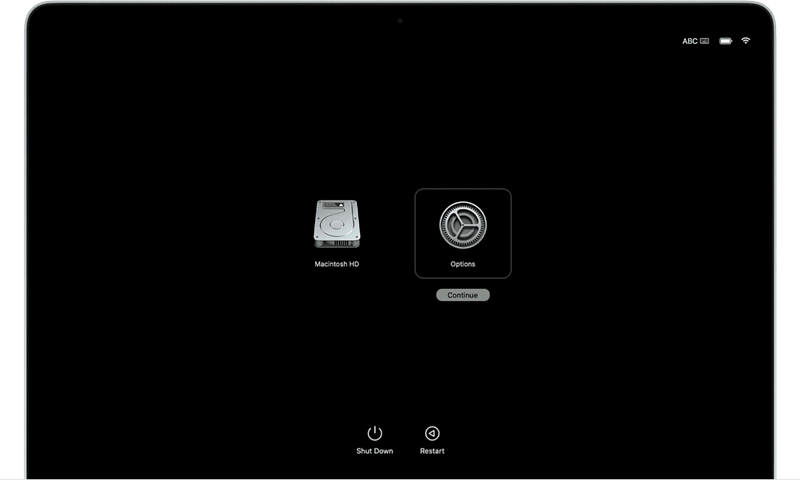
Step 1. Boot into macOS Recovery: Shut down your Mac, then restart it, hold down the Power button until you see the window for setting up the computer.
Step 2. Choose Options and click on Continue button.
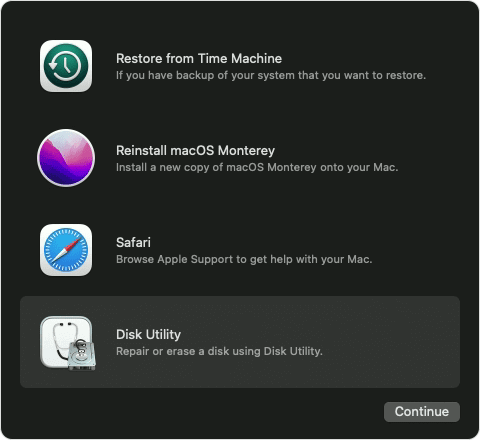
Step 3. Choose Disk Utility, click on Continue button.
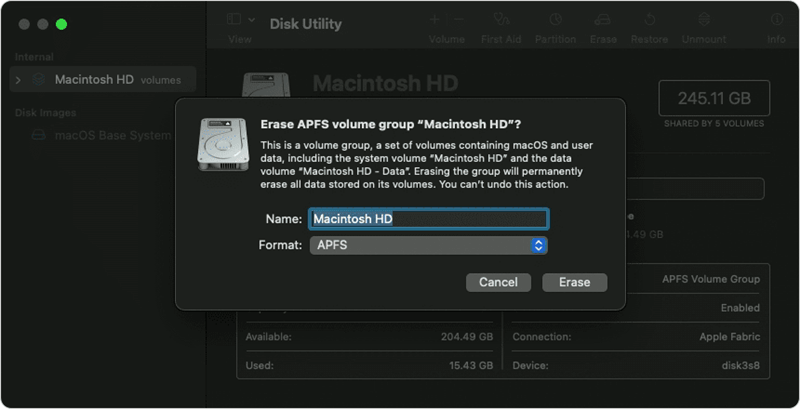
Step 4. Then select the internal drive like Macintosh HD or Apple SSD, then click Erase.
Step 5. Select a file system such as APFS, click Security Options to choose a overwriting method, click Erase again to start erasing the internal drive.
Step 6. Once the process gets finished, go back to the Utilities window, choose Reinstall macOS Monterey.
When the setup is done, your Mac will restart and walk you through the rest of the steps.
Extra steps can be chosen to ensure that all data on a user's hard drive is securely erased if needed. That could be for private data or when selling or donating a Mac.
Use the "Secure Erase" Option:
Note: The data which is erased by Disk Utility is not lost for good and can be recovered by data recovery software.
Recover Deleted or Lost Data on macOS Monterey
Follow these steps to recover deleted, formatted or lost data on macOS Monterey.
Before you sell or donate your Mac which is running macOS Monterey, you should securely and permanently wipe all data from the internal drive. DoYourData Super Eraser for Mac is a powerful Mac data erasure application. It can help you securely and permanently wipe data on macOS Monterey.
After factory resetting your macOS Monterey Mac, then use this erasure app to wipe free disk space of the internal drive to make all deleted/lost data be unrecoverable.
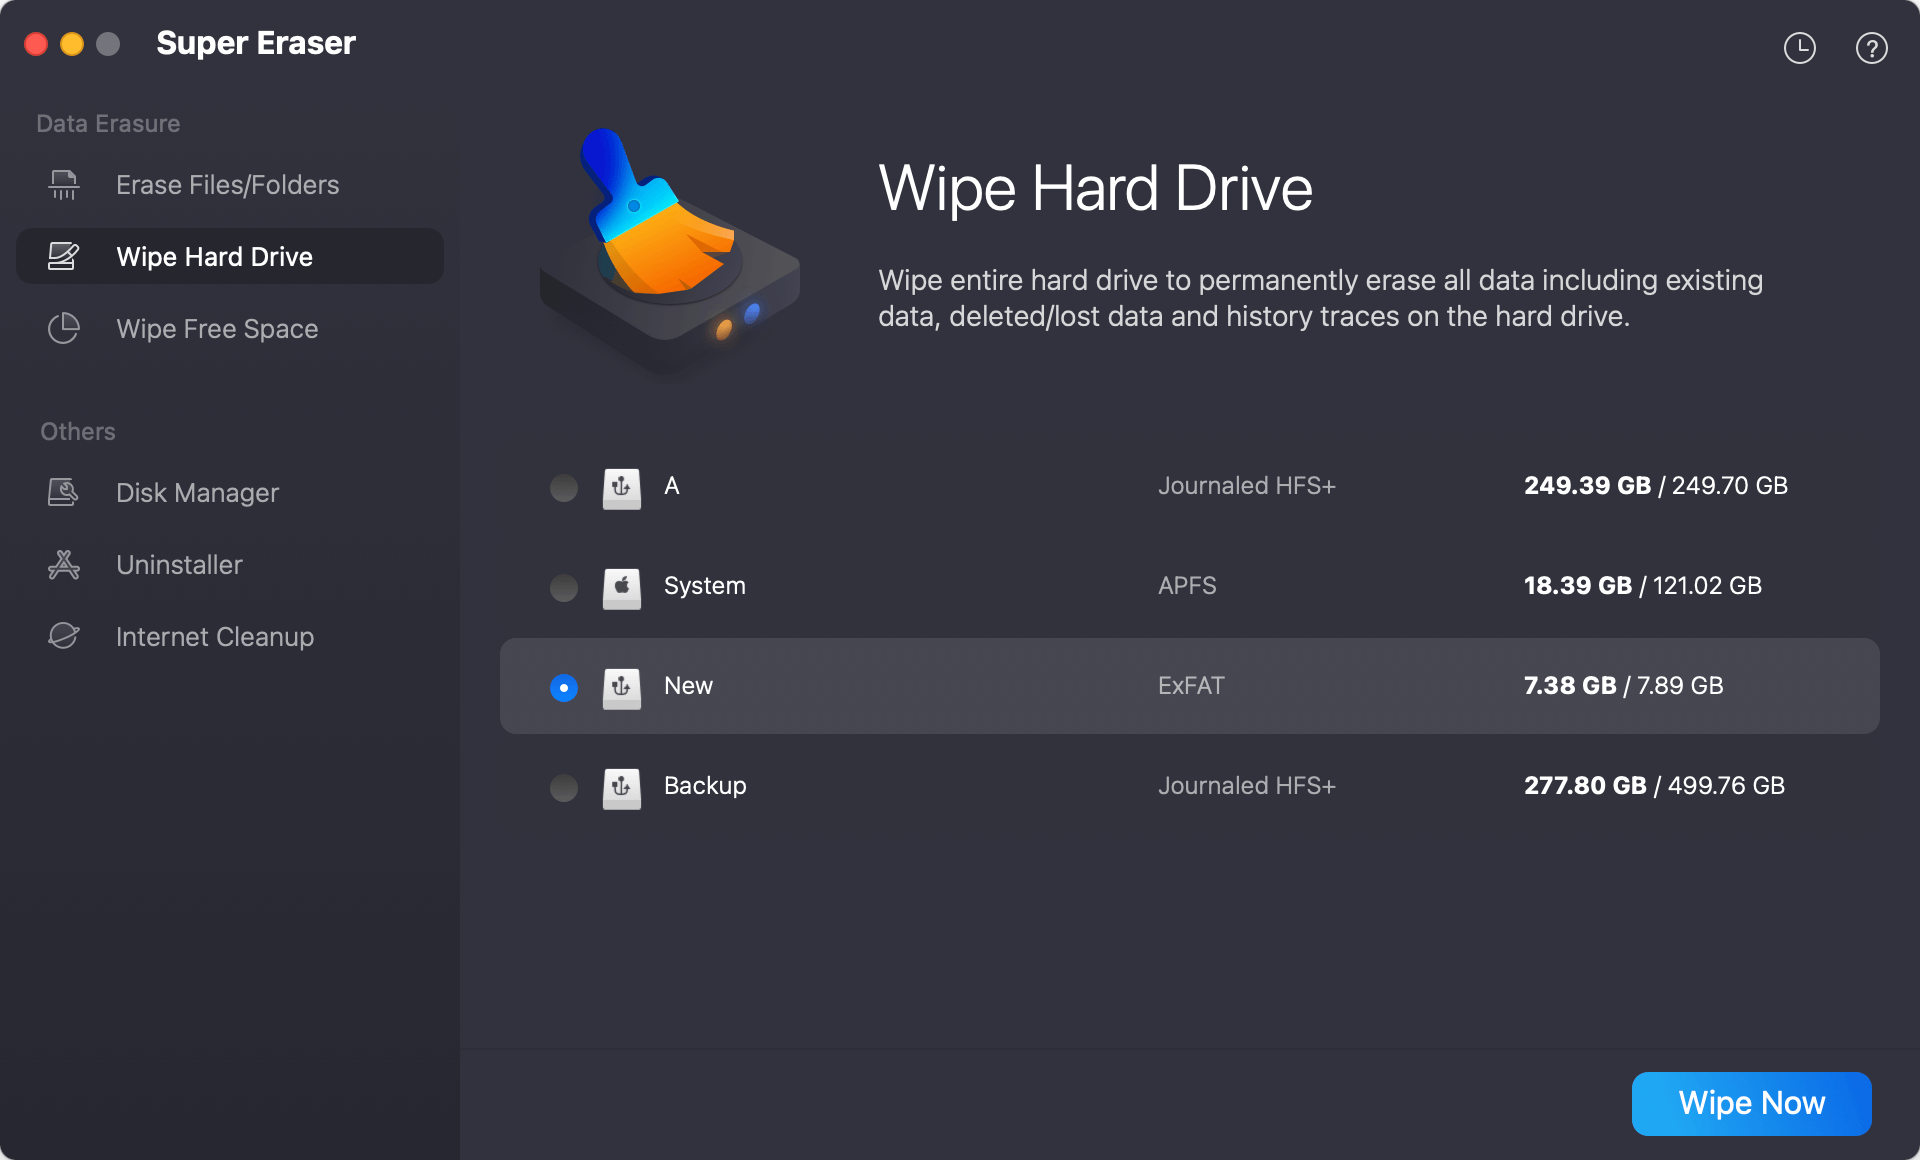
Step 1. Download and install DoYourData Super Eraser for Mac, open it.
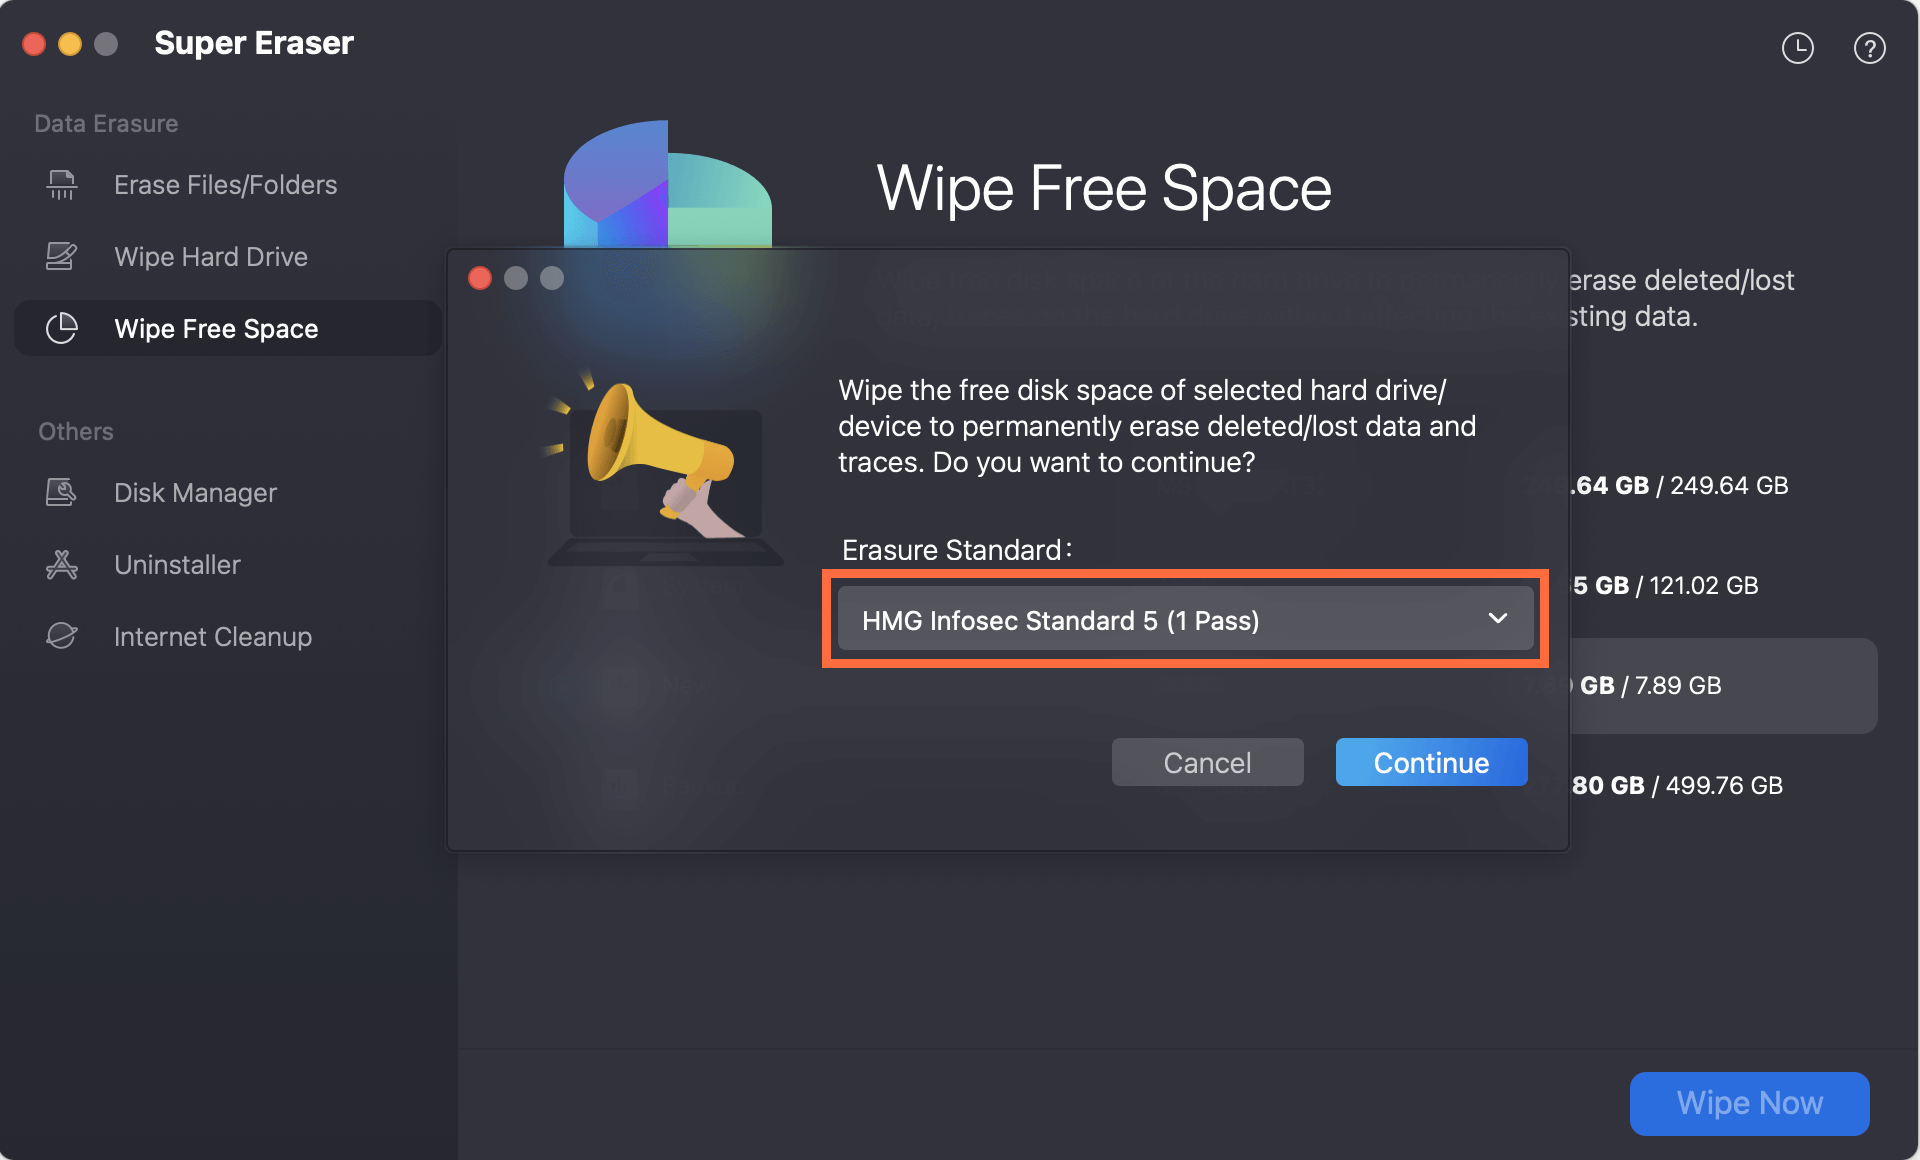
Step 2. Choose Wipe Free Space mode, then select the Mac internal drive such as Macintosh HD, then click on Wipe Now button.

Step 3. Select data erasure standard such as HMG Infosec, NIST 800-88, Peter Gutmann's algorithm, DoD 5220.22-M, U.S. Army AR380-19, then click on Continue button to securely wipe free disk space of the Mac hard drive and permanently erase all deleted/lost data.
It also another modes to help in wiping data on macOS Monterey:
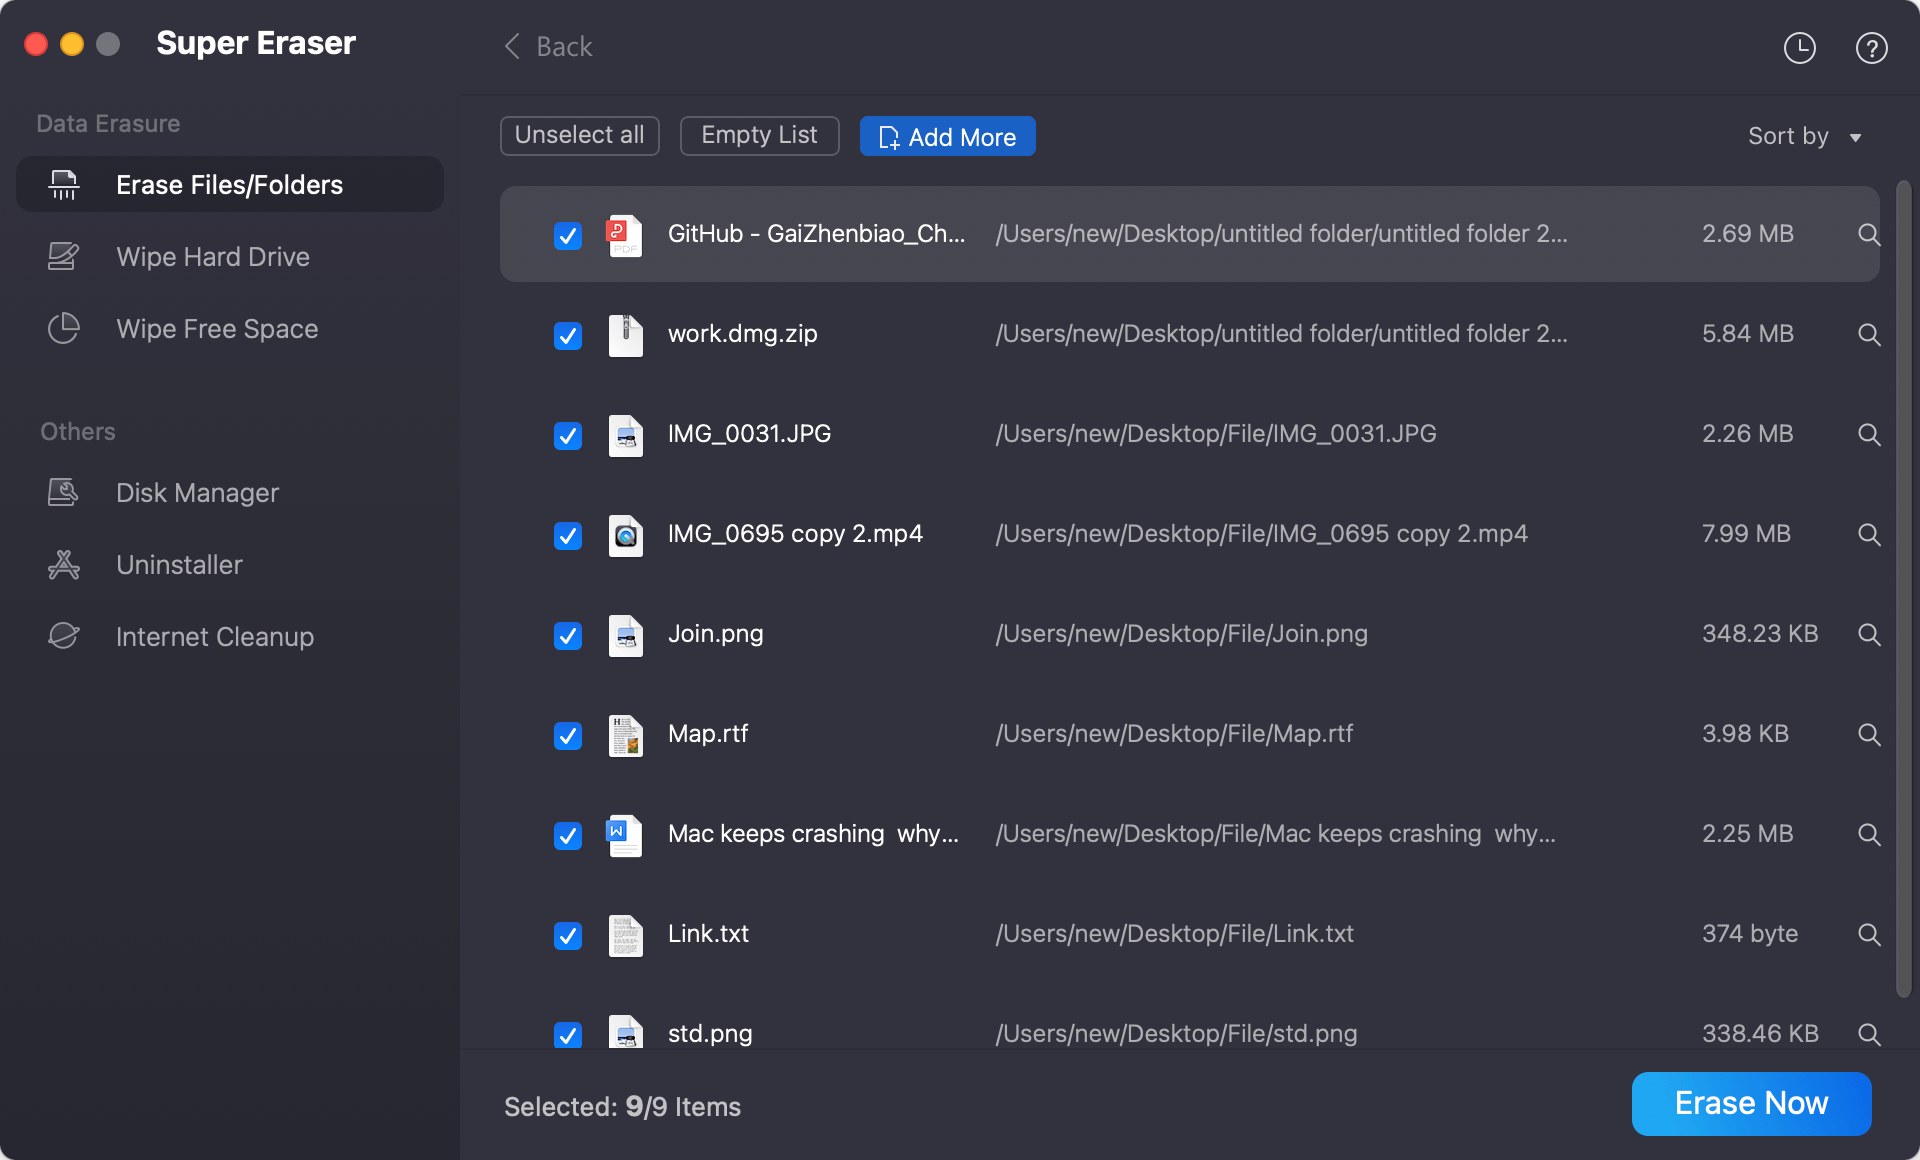
Erase Files/Folders - select files and folders, then click on Erase Now button to securely and permanently erase the selected files and folders.
Wipe Hard Drive - wipe a hard drive to permanently erase all data from the drive.
Erasing a hard drive on macOS Monterey is an easy task that can be done with the tools that come with the operating system. If you follow these steps, your data will be safely erased, whether you are getting your Mac ready for a new user, fixing problems, or starting over.
Don't forget to save a copy of important files, log out of your accounts, and turn off any software before you begin the process. After reading this complete guide, you can be sure that your personal information is safe when you wipe your hard drive and reset macOS Monterey.
1. How to wipe a hard drive on macOS Monterey?
Here are two methods to help you wipe a hard drive on macOS Monterey:
2. Is it possible to permanently delete files on macOS Monterey?
Yes, DoYourData Super Eraser for Mac can help you securely and permanently delete files and folders on macOS Monterey. Just add files/folders to the erasure list, then click on Erase Now button to permanently erase the selected files and folders.
3. Is the erased data lost forever?
Yes, once your data is erased by DoYourData Super Eraser for Mac, the data is lost forever, can't be recovered by any data recovery software.
4. How to permanently erase already deleted data on macOS Monterey?
Just try Wipe Free Space mode. This mode will wipe free disk space of your Mac and permanently erase all deleted/lost data. It will not erase the existing data on your Mac.
5. Is data erasure safe to Mac SSD?
Yes, DoYourData Super Eraser for Mac is a 100% safe data erasure application. It will not cause any damage or shorten the service life of your Mac SSD.
6. How to format a hard drive on macOS Monterey?
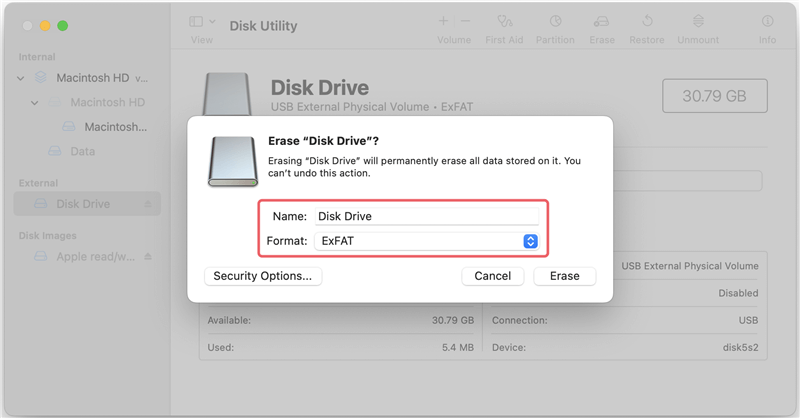
If you want to quickly format a hard drive on macOS Monterey, use Disk Utility. To format your hard drive, follow the steps outlined below.
Step 1. Connect your hard drive to your Mac.
Step 2. Launch Disk Utility and choose the hard drive you want to erase.
Step 3. Click the Erase. Change the drive's name and select a compatible file system.
Step 4. Click the Erase button a second time, and Disk Utility will safely erase and format your hard drive.
If you want to erase data from the startup disk, you should restart your Mac in recovery mode and then use Disk Utility to erase the startup disk and reinstall macOS. However, the Disk Utility tool can not permanently destroy your data. With right data recovery software, you still can recover lost data from the hard drive which is erased by Disk Utility.
7. What is the best disk wipe software for macOS Monterey?
Here are 5 powerful disk wipe applications can help you wipe data on macOS Monterey:
DoYourData Super Eraser for Mac
DoYourData Super Eraser for Mac is a 100% safe, powerful and easy-to-use data erasure program. It offers certified data erasure standards including Peter Gutmann, U.S. Army AR380-19, DoD 5220.22-M ECE to permanently erase data from Macs and external devices, making data recovery be impossible.
Written & Updated by Shirly Chen
Shirly Chen has been writing data recovery, data erasure articles for DoYourData over 4 years. She has been working as a professional website content writer & editor for quite a long time. She also writes articles about disk clone, Mac optimization, disk backup, etc.