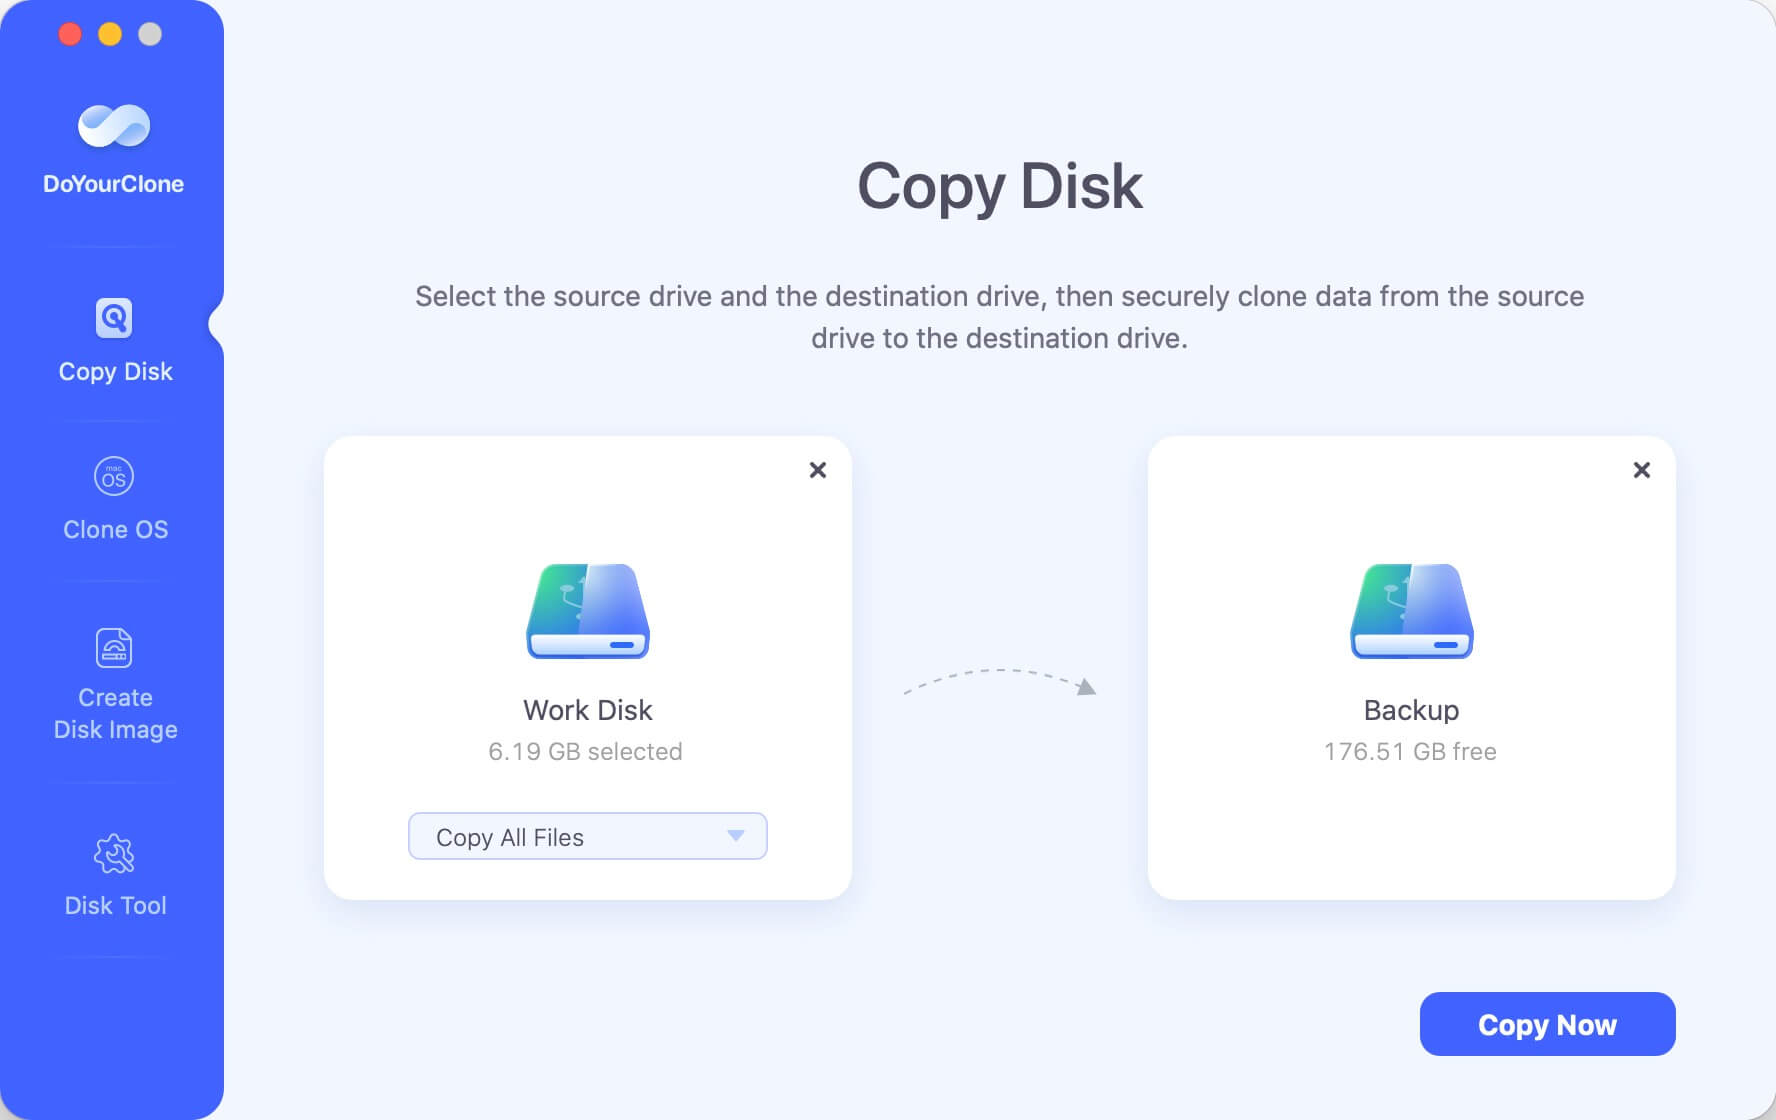
Clone the NTFS drive before formatting it
Back up the files from NTFS drive to another drive before you format the drive on Mac.
📋 Summary: How to convert the file system of a drive from NTFS to FAT32/exFAT on Mac? There are 3 methods provided here: reformatting the drive from NTFS to FAT32 or exFAT with Disk Utility, Terminal, or using the third-party software DoYourData NTFS for Mac.
Quick Navigation:
Formatting a drive is a crucial task that every computer user encounters at some point. Whether you are switching between operating systems, sharing drives with other users, or optimizing your storage for specific tasks, choosing the correct file system format is essential.
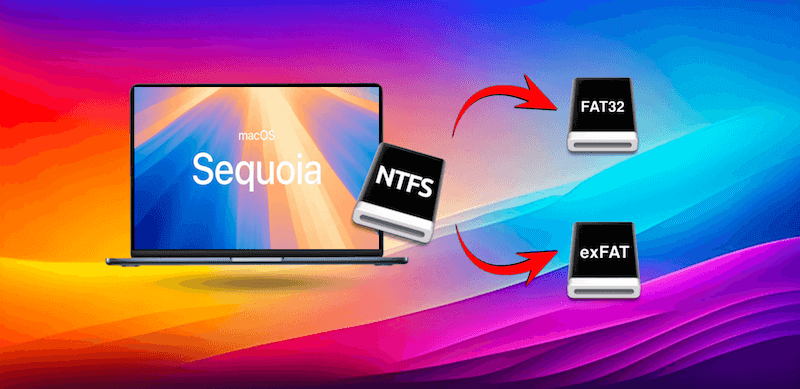
On a Mac, converting a drive from NTFS (New Technology File System) to FAT32 or exFAT can be challenging, especially since macOS has limited native support for NTFS. In this guide, we will have a look on formatting NTFS to FAT32 or exFAT on a Mac, helping you understand the differences between these file systems and why you might choose one over the other.
There are several reasons why you might want to convert an NTFS drive to FAT32 or exFAT on a Mac:
Before starting the conversion process, it is important to back up any data on the NTFS drive that you want to keep. Formatting a drive will erase all data on it, so having a backup ensures that you do not lose any important files.
Clone the NTFS drive before formatting it
Back up the files from NTFS drive to another drive before you format the drive on Mac.
The choice between FAT32 and exFAT depends on your specific needs. Consider the following factors:
There are several methods you can use to format an NTFS drive to FAT32 or exFAT on a Mac. We will explore the most common methods, including using Disk Utility, Terminal, and third-party software.
Disk Utility is the built-in disk management tool in macOS that allows you to format, partition, and manage drives for free. Here are the steps:
Step 1. You can find "Disk Utility" in the Applications folder and then Utilities folder or by searching for it using Spotlight (press Command + Space and type "Disk Utility").
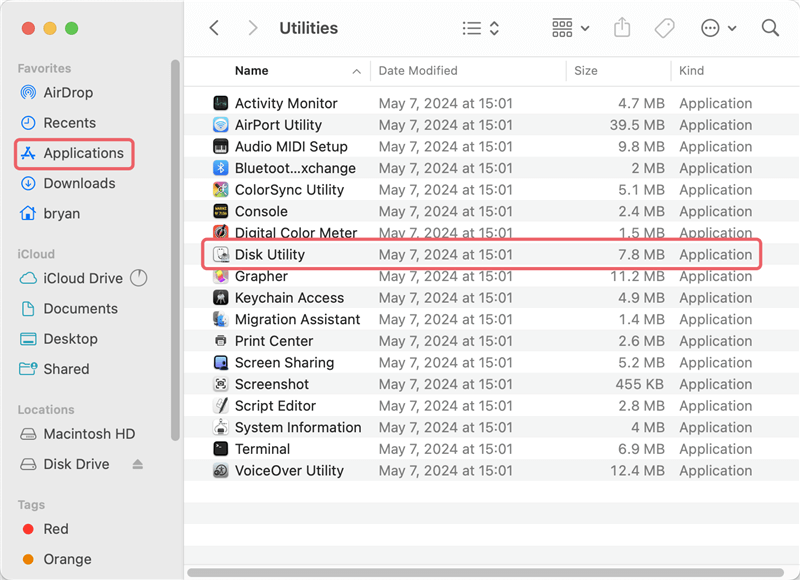
SStep 2. From the Disk Utility sidebar, choose the disk that has the NTFS format you want to format. Because formatting will remove all data from the drive, make sure you choose the right one.
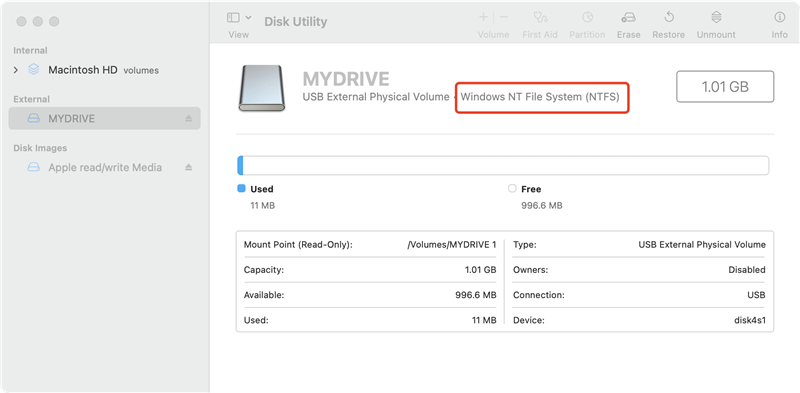
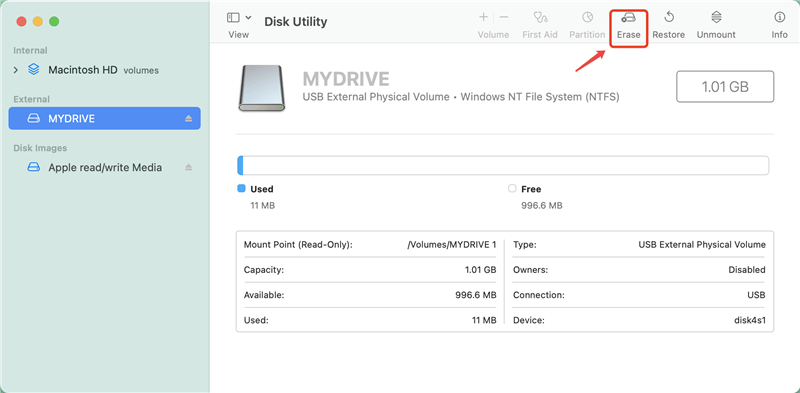
SStep 3. Open the Disk Utility window and select the Erase option. You'll see a new dialog box emerge.
SStep 4. In the "Format" drop down menu, select either "FAT32" (listed as "MS-DOS (FAT)") or "exFAT", depending on your needs. Enter a name for the drive in the "Name" field.
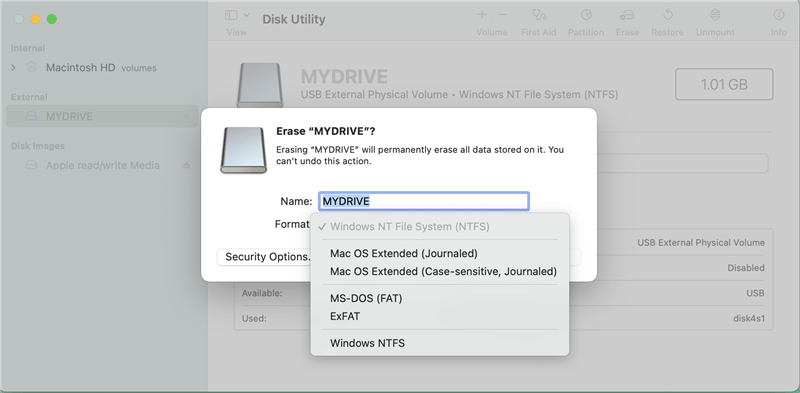
SStep 5. Click Erase to begin the formatting process. Disk Utility will format the drive and convert it to the selected file system.
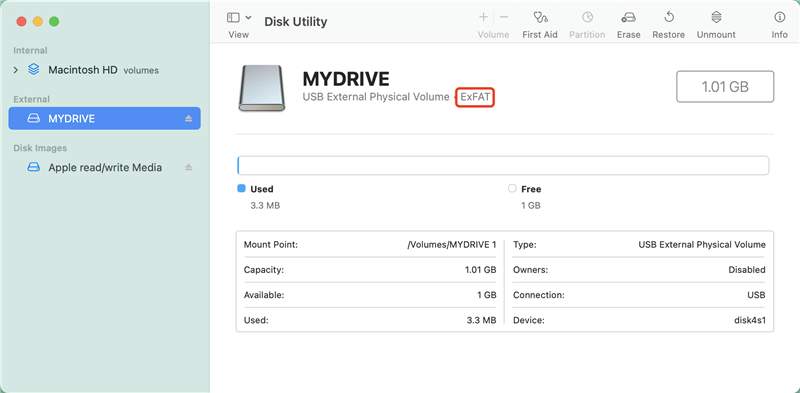
Upon process completion, Disk Utility will display a confirmation message. You can now use the drive with the new file system.
If you prefer using command-line tools as an advanced user, Terminal offers an alternative way to format your NTFS drive to FAT32 or exFAT. Here are the steps:
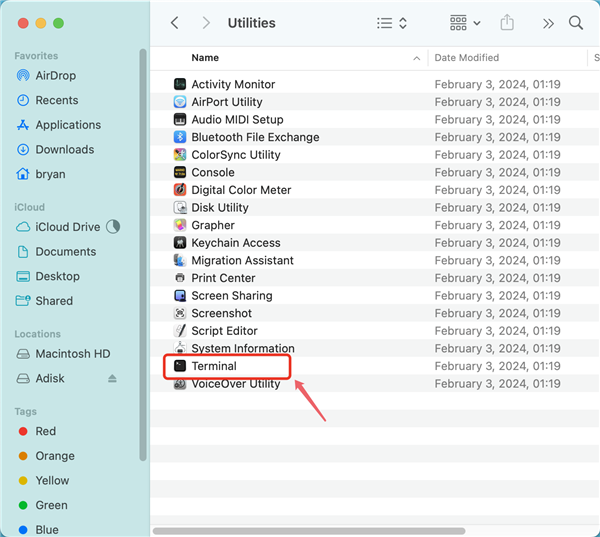
Step 1. You can use Spotlight to search for Terminal or navigate to the Applications folder and then move to the Utilities folder to find it.
Step 2. Type the following command and press Enter:
diskutil list
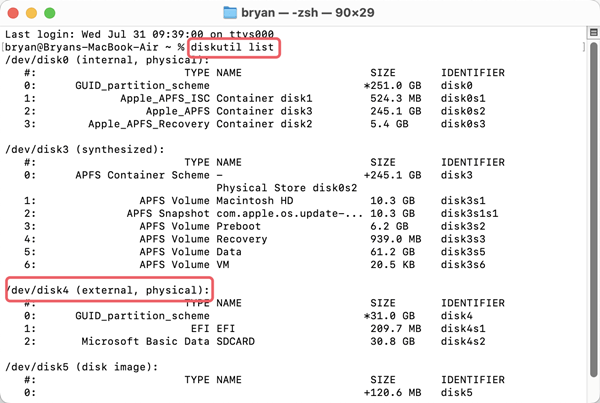
This command will display a list of all connected drives and their identifiers. Locate your NTFS drive in the list and note its identifier (e.g., "disk4").
Step 3. Use the following command to format the drive to FAT32 or exFAT, replacing disk2 with your drive's identifier and DRIVENAME with the desired name for your drive:
For FAT32:
sudo diskutil eraseDisk FAT32 DRIVENAME /dev/disk4
For exFAT:
sudo diskutil eraseDisk exFAT DRIVENAME /dev/disk4
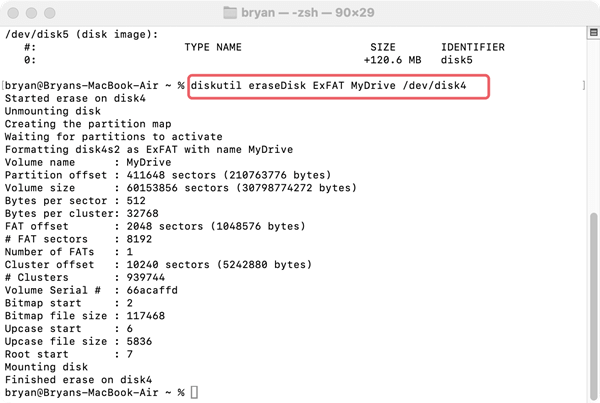
You may be prompted to enter your Mac's admin password. Type it and press Enter. Then just wait for the process to complete. Terminal will format the drive and display a confirmation message when it is finished.
If you encounter issues with Disk Utility or Terminal, or if you need additional features, third-party software can provide more options for formatting NTFS drives on a Mac. Some popular options include DoYourData NTFS for Mac.
DoYourData NTFS for Mac is a powerful tool that allows you to read and write to NTFS-formatted drives on macOS. It also offers a simple way to format drives from NTFS to exFAT or FAT32. Also, it can also format a drive to NTFS on Mac.
You can easily format the drive with the software. Here are the simple tutorials:
Step 1. Download and install the software on your Mac. Open DoYourData NTFS for Mac and connect your NTFS drive to your Mac.
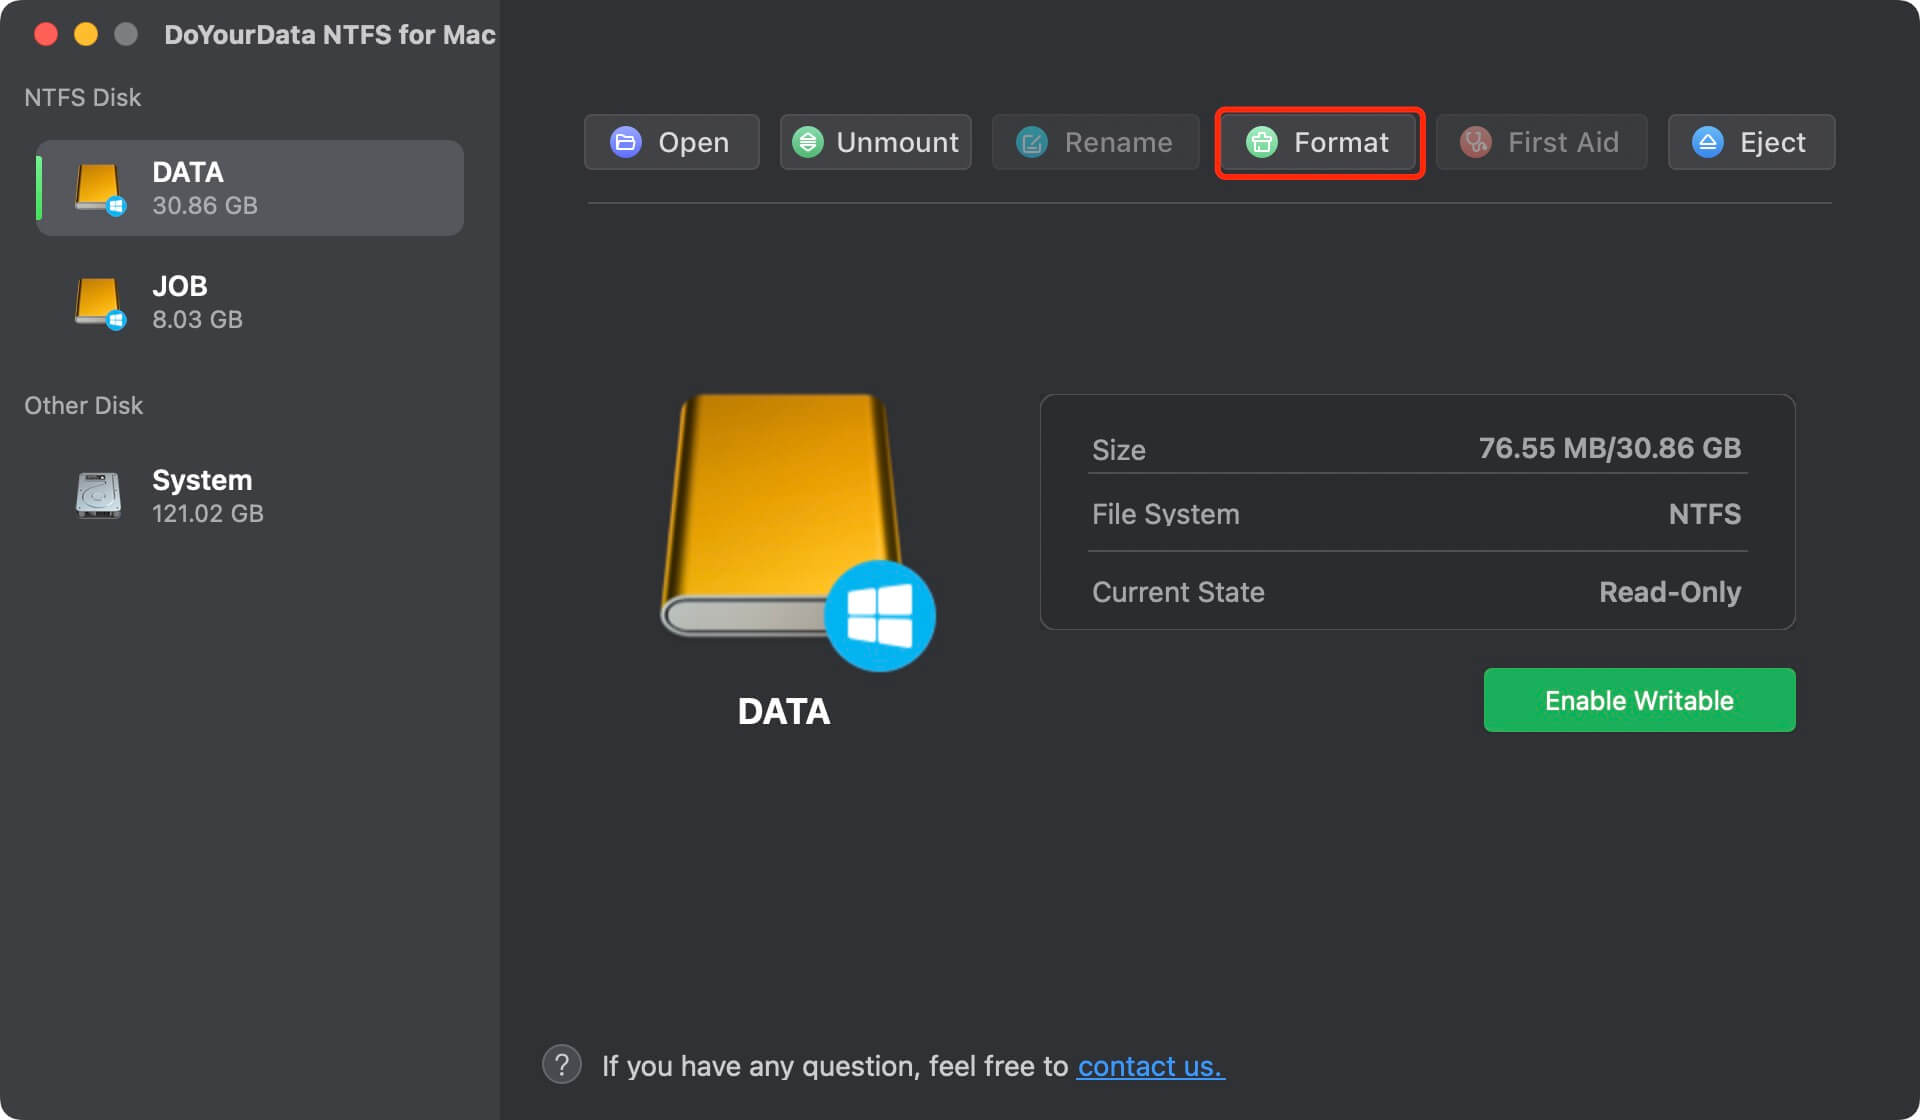
Step 2. In the software interface, select the NTFS drive you want to format. Click Format button and go to next step.
Step 3. Choose either FAT32 or exFAT from the list of file systems.
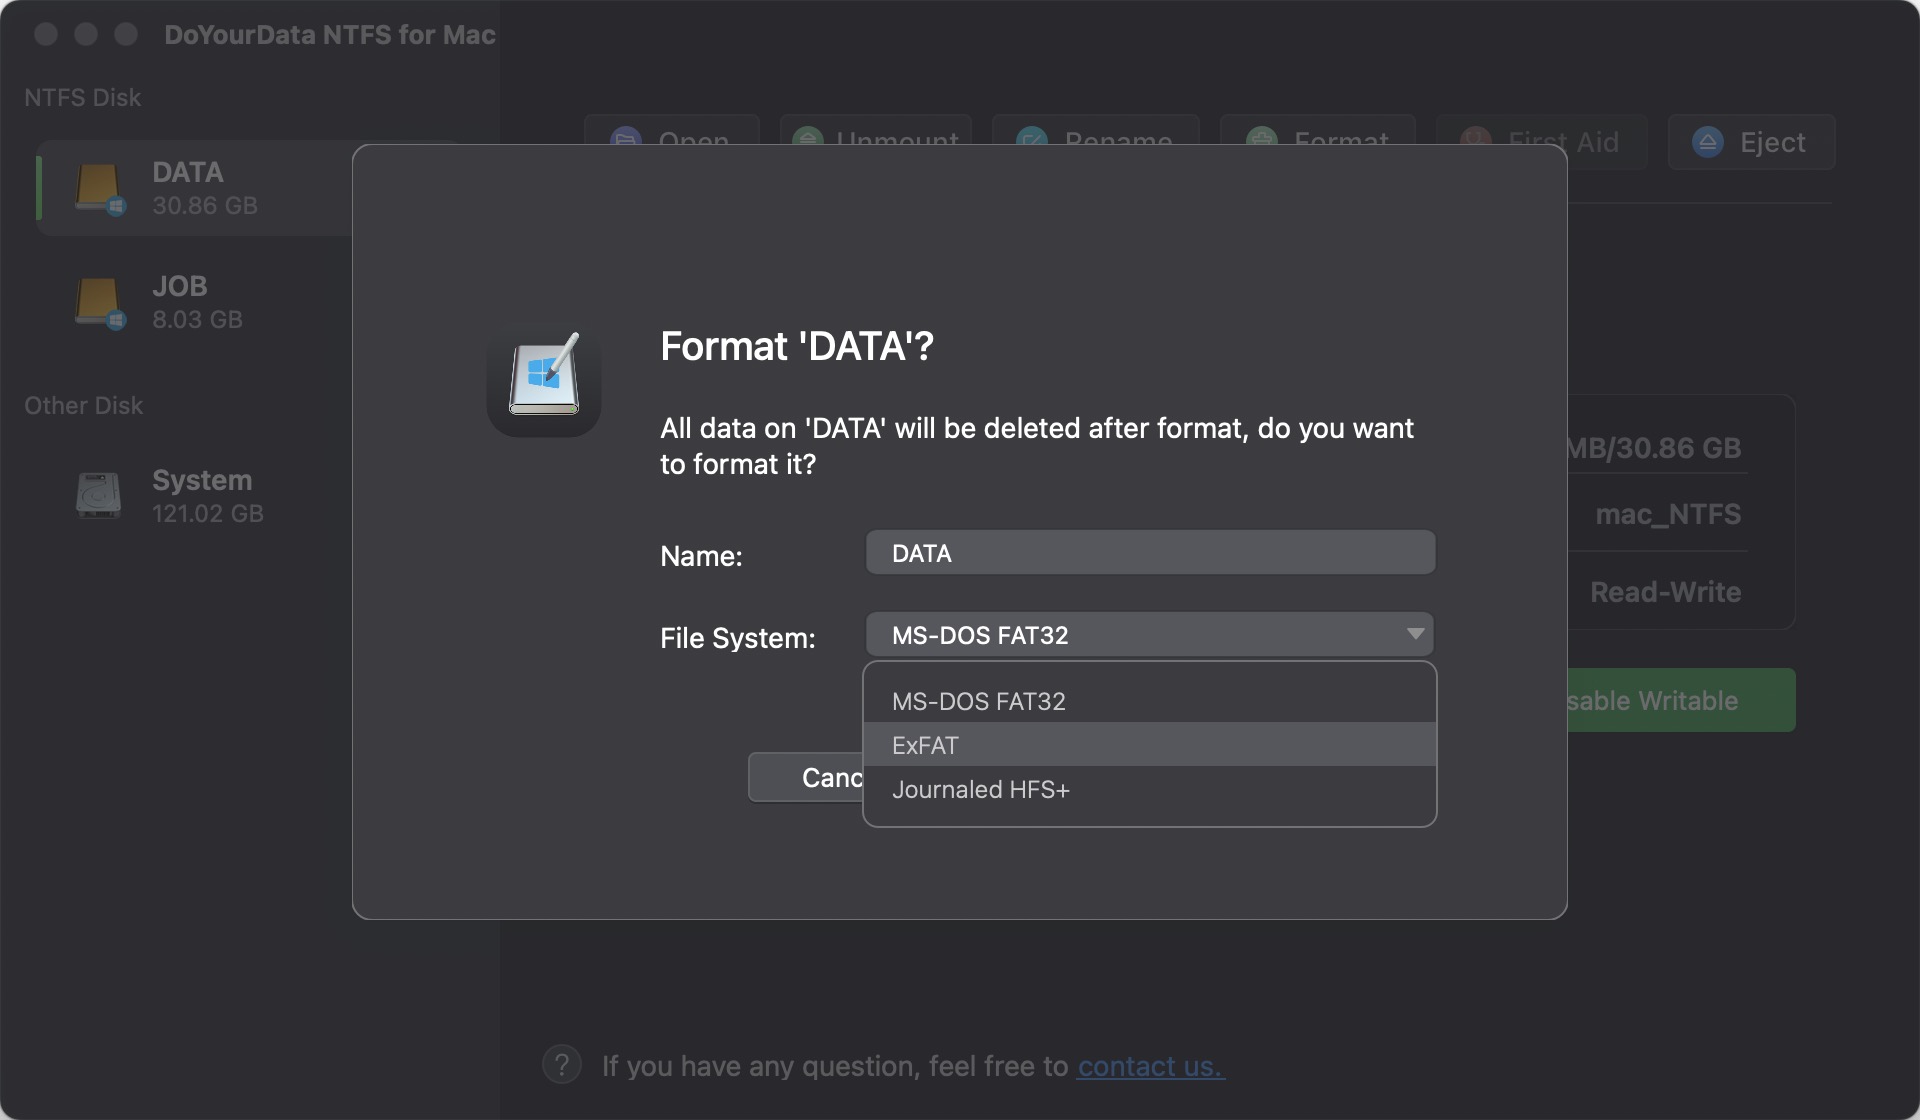
Step 4. Click Continue to begin the process. The software will handle the conversion and formatting for you.
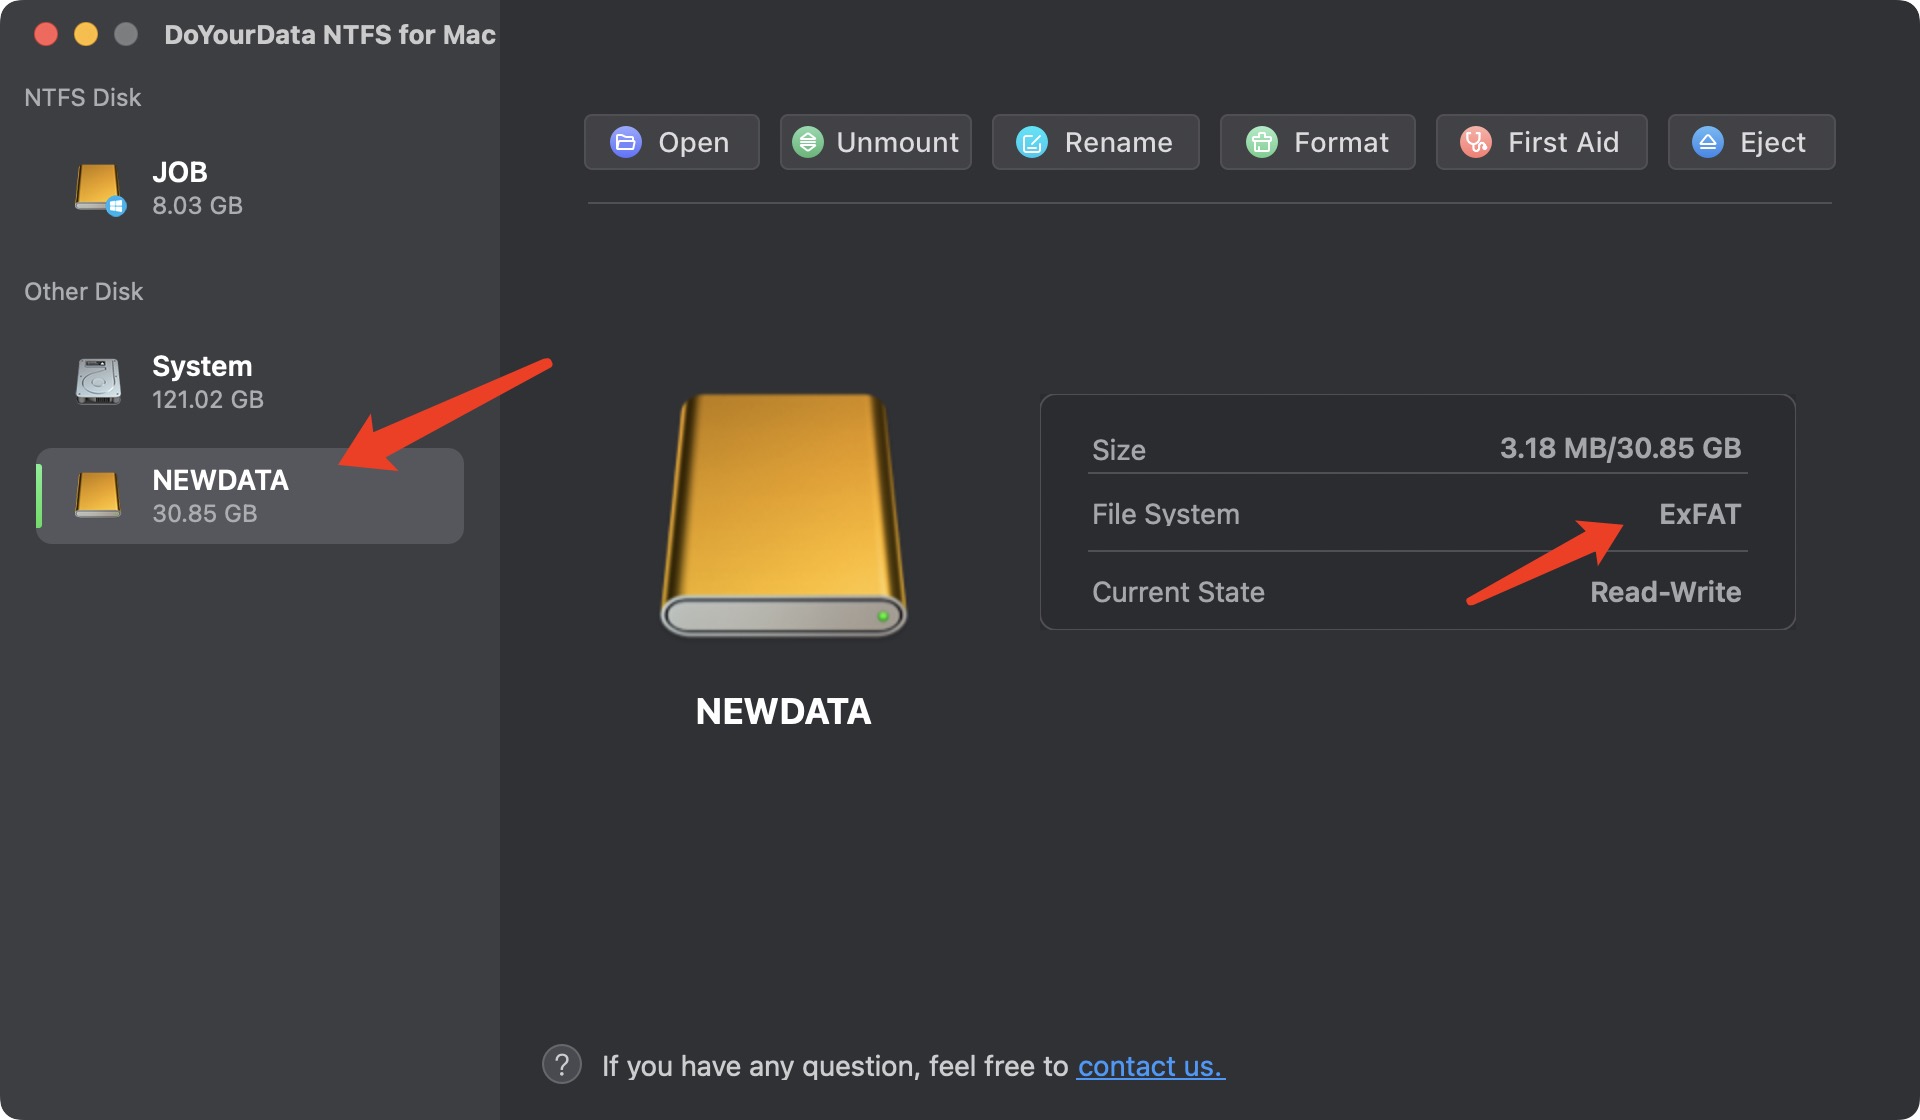
Once the process is complete, your drive will be formatted to the chosen file system and ready for use.
As mentioned, DoYourData NTFS for Mac is a reliable tool that provides full read and write access to NTFS drives on macOS. So if your drive is in NTFS drive, you can also keep the file system and make sure the drive is writable on Mac without converting it to FAT32 or exFAT.
You can select the NTFS drive in the software and then click the Enable Writable button to ensure you have writable access to the drive on Mac.

Prior the formatting process, let us have a look what NTFS, FAT32, and exFAT are and why you might choose one over the others.
![]() NTFS (New Technology File System)
NTFS (New Technology File System)
NTFS is a proprietary file system developed by Microsoft for Windows operating systems. It is known for its robust performance, security features, and ability to handle large files and volumes. However, macOS can only read NTFS drives natively, not write to them, which can be limiting if you want to use an NTFS-formatted drive on a Mac.
 FAT32 (File Allocation Table 32)
One of the earliest file systems still in use today is FAT32. Nearly every operating system, including Windows, macOS, Linux, and even game consoles, is compatible with it. A maximum file size of 4GB and a maximum partition size of 8TB are two of FAT32's drawbacks. Despite these limitations, FAT32 is often chosen for its universal compatibility.
![]() exFAT (Extended File Allocation Table)
exFAT (Extended File Allocation Table)
exFAT is designed to bridge the gap between FAT32 and NTFS. It supports larger file sizes and partitions than FAT32 while maintaining broad compatibility across operating systems, including macOS and Windows. For users that need to deal with huge files, such databases or video editing, and exchange files between systems, exFAT is the recommended option.
Formatting an NTFS drive to FAT32 or exFAT on a Mac is a straightforward process that can be accomplished using built-in tools like Disk Utility and Terminal or with the help of third-party software DoYourData NTFS for Mac. Whether you choose FAT32 for its universal compatibility or exFAT for its ability to handle larger files, the right file system will ensure that your drive meets your needs and works seamlessly across different platforms.
Always remember to back up your data before formatting, choose the file system that best suits your requirements, and follow the steps carefully to avoid any issues. With this guide, you should be well-equipped to handle the conversion process and make the most of your storage devices on macOS.
DoYourData NTFS for Mac
DoYourData NTFS for Mac is a safe, powerful and easy-to-use NTFS for Mac tool. It allows macOS to read & write files on NTFS drives without any limitation. It is also a comprehensive disk management tool for Mac to mount/unmount disk, format disk, repair disk, read-write disk...on Mac.
