How to clear junk data on a drive?
With MacClean360, it's easily to clear junk data to free hard drive space and speed up your Mac.
Quick Navigation:
Managing your computer's storage room is very important in this digital world. Think of your hard drive as a warehouse where all your digital files, like photos, papers, games, and more, are kept.
Putting different things in their own spaces, or "volumes," can help you plan this warehouse better at times. These volumes make it easier to find and organize your things because they work like different rooms in the warehouse. Creating a new volume on your hard drive might sound hard, but don't worry!
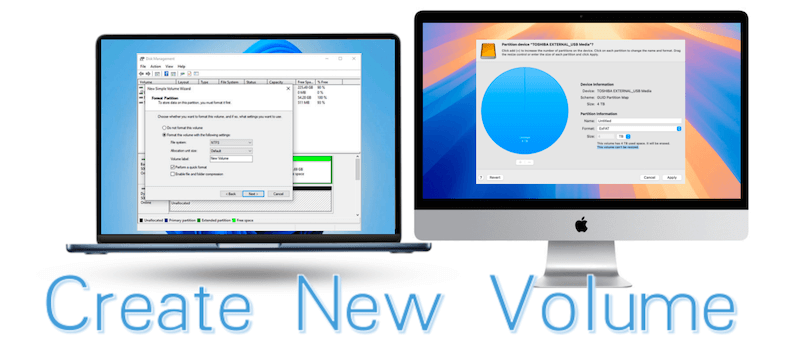
This easy-to-follow guide will show you the steps you need to take to build a new volume on a hard drive in Windows and macOS. It will help you maximize your storage space and simplify your digital life.
Understanding what levels are and why they're essential before making a new one. When talking about hard drives, a volume is a single area of storage that can be accessed and has its file system. Usually, a volume is made with a specific file system like NTFS, FAT32, or exFAT. A different drive letter or mount point in the operating system lets you tell each disk apart.
Volumes help people better organize and handle their data by separating content based on file type, user, or application.
Before you trying to add a new volume on a hard drive, it's necessary to check if there is enough free space on the disk to create a new volume. For Windows machine, you can open File Explorer, it will show the drive space directly. For Mac computer, you can open Disk Utility and see the free space of a hard drive.
If the drive is almost full, there would be impossible to add a new volume. You may need to clear the junk data to free some space or change another drive for new volumes.
How to clear junk data on a drive?
With MacClean360, it's easily to clear junk data to free hard drive space and speed up your Mac.
No matter what operating system you're using, there are several steps to creating a new volume on a hard drive. Below, we'll show you how to do it on both Windows and macOS.
To create a new volume in Windows, you need to use the tool Disk Management. This tool can guide you simply create a volume on a hard drive. Here are the detailed steps:
Open Disk Management:
Windows comes with a Disk Management tool for managing files and disk partitions. To access the tool, right-click on the Start menu and select "Disk Management."
You can also press Win + X and select "Disk Management" from the Power User menu.
Locate the Target Disk:
When you open Disk Management, you'll see a list of all the linked disks and their volumes. Select the disk where you want to add a new volume. Be careful not to pick the wrong disk to prevent your information from getting lost.
Shrink an Existing Volume (Optional):
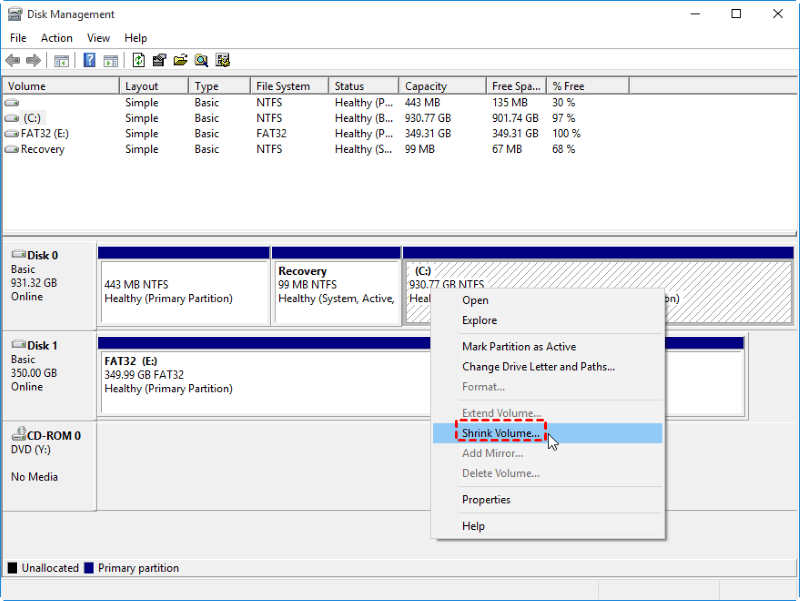
To added a new volume on a hard drive, you need to ensure there is free space (unallocated space) available first. You can skip this step if there is free space on the disk. Otherwise, you need to shrink the exiting volumes to make free space for the new volume first.
If you need to make room for the new volume, right-click on an old volume and choose "Shrink Volume." Follow the on-screen directions to decide how much space to shrink. After shrinking the exiting volumes(s), you will get some unallocated space which can be used to create new volume.
Create a New Volume:
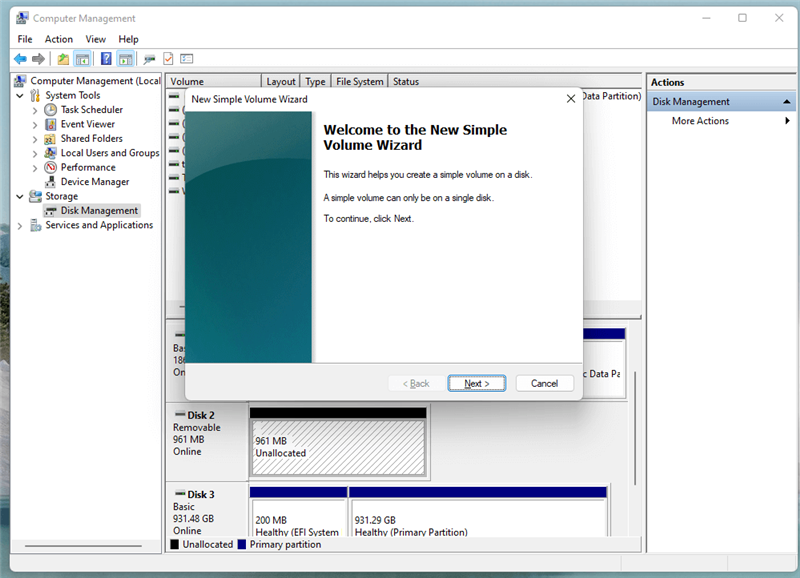
Once you've found or freed up the room, right-click on it. Then, select "New Simple Volume" from the menu that appears.
Specify Volume Size:
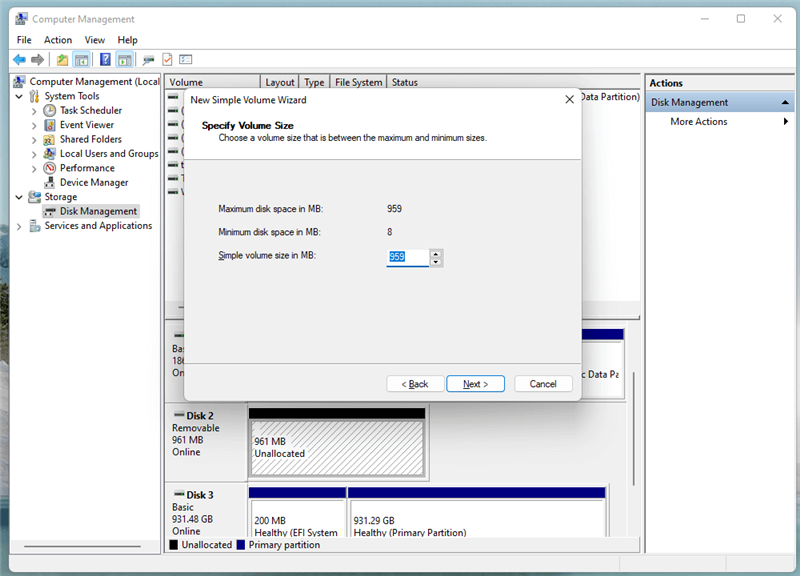
Tell the wizard how big the new volume should be. You can use all the accessible Space or choose a specific size that fits your needs.
Assign a Drive Letter or Mount Point:
Pick a mount point or drive letter for the new disk. You can choose a different letter if needed, but the default choice is generally acceptable.
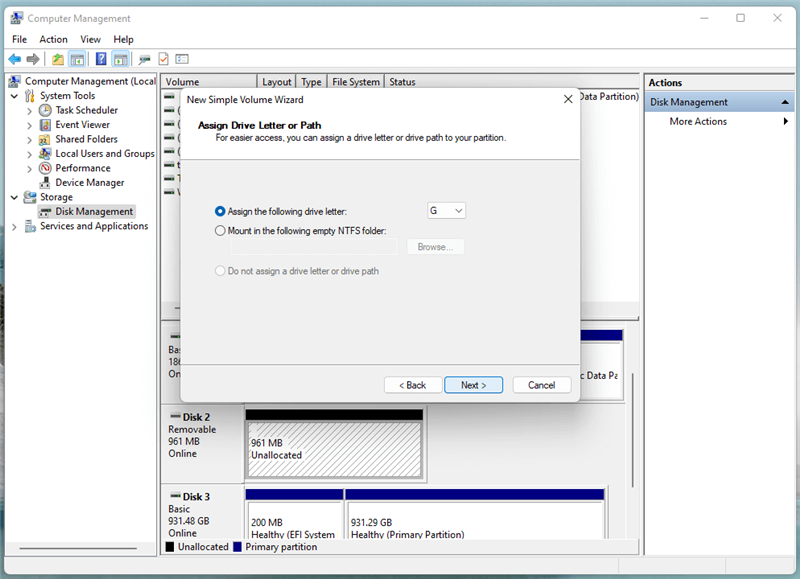
Format the Volume:
First, select the file system. Then, allocate the unit size for the new disk. NTFS is the best file system for Windows, but you can also pick FAT32 or exFAT if you want to ensure it works with other devices.
Complete the Wizard:
After reviewing your choices, click "Finish" to create a new number. Windows will format the volume, making it ready to use.
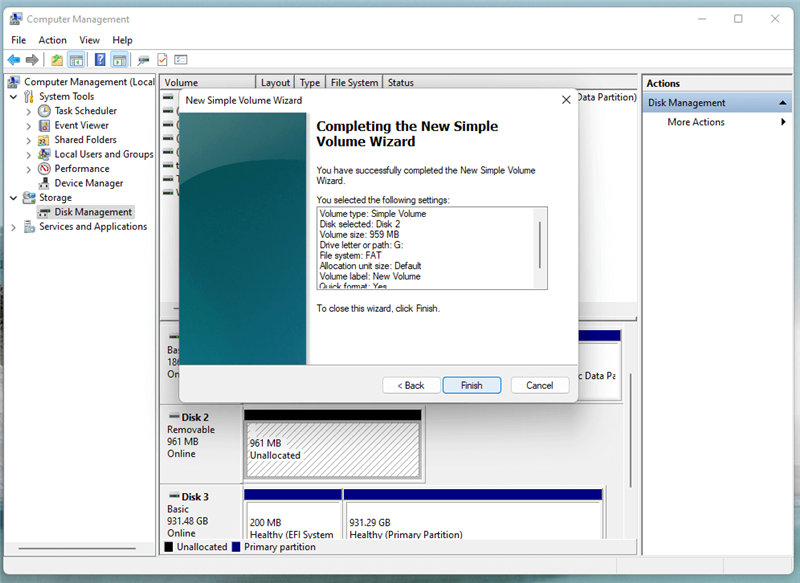
Once a new volume is created successfully on Windows machine, you will see it in File Explorer directly. Then you can access and add data to the volume.
If you are using Mac machine, you can try to add a new volume on a hard drive with the system built-in tool Disk Utility. Here is how:
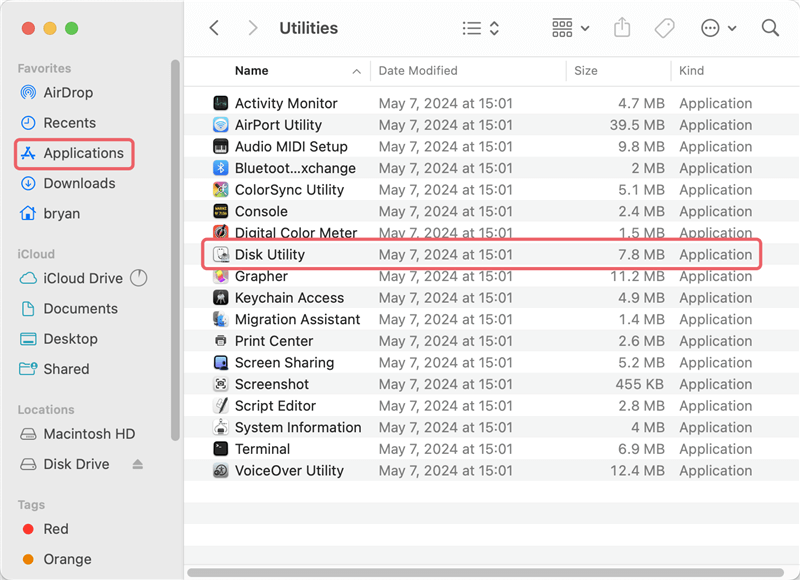
Open Disk Utility:
Disk Utility is the same tool for handling disks and volumes on macOS. You can use Spotlight (Press Command+ Space keys to open) to find it, or you can go to Applications > Utilities > Disk Utility to find it.
Select the Target Disk:
The left side of Disk Utility shows a list of all the linked disks. Select the disk where you want to add a new volume. Click that to get to the "Partition" tab in Disk Utility.
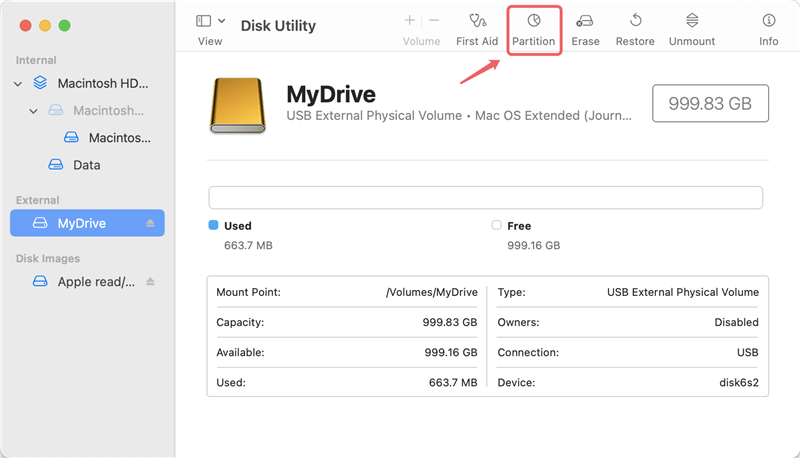
Configure Partition Settings:
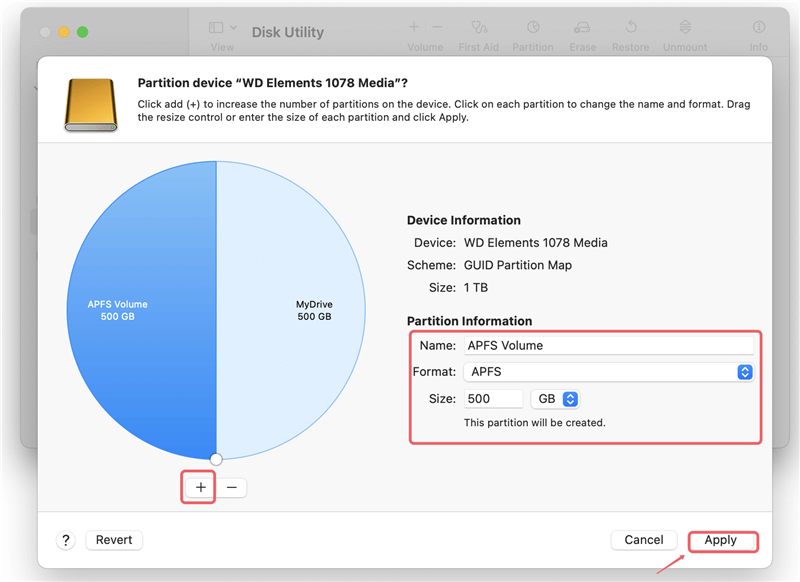
To add a new split, click the "+" button below the layout of the partitions. You can change the size of the new partition by entering a size or dragging the line between the divisions.
You should select the brand-new partition you created, then choose a name, format, and plan. Apple File System (APFS) is usually the default file system for macOS computers, but you can also choose HFS+ or exFAT if you want your system to work with other devices.
Apply Changes:
When you're done setting up the partitions, click Apply to make the new volume. You can tell Disk Utility how to split the disk and format the latest volume, and it will do it.
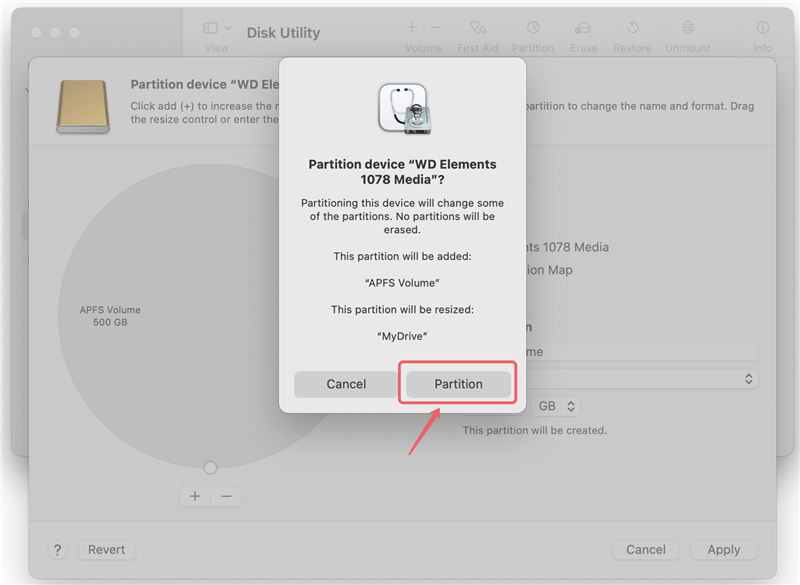
It will pop up a window and ask you to confirm the partition process. You can click Partition button and the tool will start to add the new volume to the hard drive.
Verify and Access the New Volume:
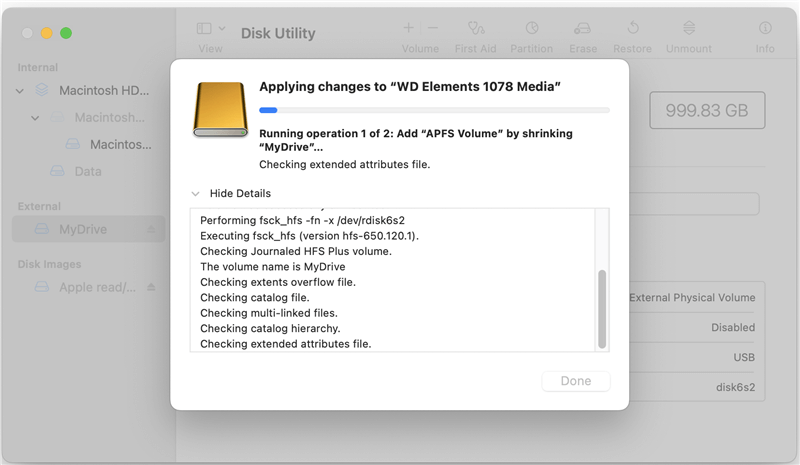
When the process is done, Disk Utility should put the new volume on your desktop or in the sidebar of Finder. It's now ready for you to store files and information.
Making a new volume on a hard drive is a simple process that lets you use your storage space more efficiently. Following the steps in this guide, you can set aside room for specific tasks, organize your files, and improve your computer experience. Be careful when you work with disk sections, and always make a copy of important files before you change how your hard drive is set up. Because you can create new volumes, you can change how your storage is set up to better suit your needs.
1. Why I cannot add new volume on a hard drive in Disk Management?
If you want to add a new volume on a hard disk, make sure there is unallocated space first. Otherwise, you need to shrink the existing volume(s) first and make unallocated space. Then right click the unallocated space to create new volume.
Also, if there are 4 primary volumes on a MBR drive, you also cannot create more volumes. In such a case, you can convert a primary volume next to the unallocated space to logical, then add new volume.
2. Is it possible to add a NTFS volume on a drive on macOS?
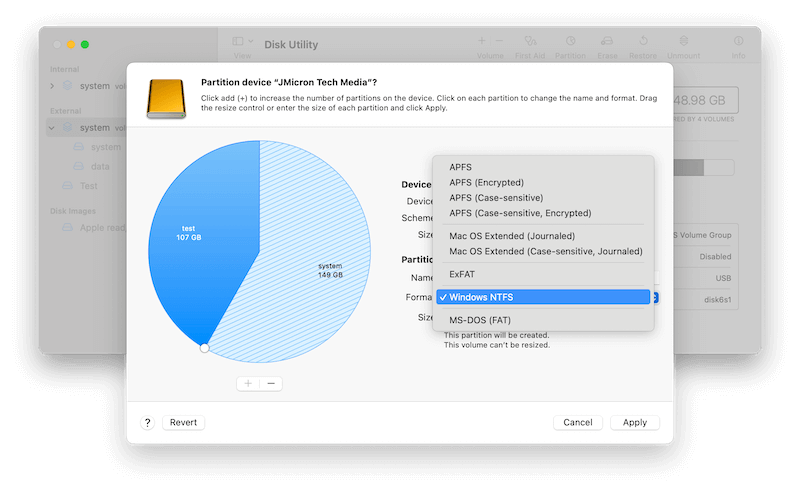
It's not able to create a NTFS volume directly on macOS with the Disk Utility. However, if you install the third-party NTFS driver DoYourData NTFS for Mac, then you can create NTFS volume with Disk Utility on Mac. Here is how:
3. What's the best file system for an external hard drive using on both Mac and Windows?
If you will use an external hard drive on both Windows and Mac machines, you can choose the file system FAT32 or exFAT which are read/writable directly on Windows an macOS without additional tools. To hold large files, the best option is using exFAT.
The reliable data recovery software to recover deleted or lost files.
Free TrialPermanently shred files or wipe hard drive to prevent data recovery.
Free TrialHot Articles
